Quick Use Guide
Page 16
... : Install Print and Scan Drivers - Install Print Drivers This procedure describes how to install Print Drivers using a different operating system refer to the System Administration CD for the device. 8 Click Install. 9 Follow the on screen messages to complete the installation. 10 When the Print Driver is successfully installed, either send a test print from the print driver or submit a job to the WorkCentre 4250/4260 Series printer. 11 If the printing operation is displayed. NOTE: The PCL6 Driver is installed by default. 6 To install...
... : Install Print and Scan Drivers - Install Print Drivers This procedure describes how to install Print Drivers using a different operating system refer to the System Administration CD for the device. 8 Click Install. 9 Follow the on screen messages to complete the installation. 10 When the Print Driver is successfully installed, either send a test print from the print driver or submit a job to the WorkCentre 4250/4260 Series printer. 11 If the printing operation is displayed. NOTE: The PCL6 Driver is installed by default. 6 To install...

Quick Use Guide
Page 17
... the DNS settings are configured on page 15. The default Port is only necessary to configure the DNS settings if Host Names are to implement any changes. 5 Enter the current administrator tools User Name and Password. Refer to Network Setup Using a Static IP Address on page 11. • Obtain the IP Address of the screen and click the Apply button to be used. Press Enter. 2 Click Properties > Connectivity > Protocols > TCP...
... the DNS settings are configured on page 15. The default Port is only necessary to configure the DNS settings if Host Names are to implement any changes. 5 Enter the current administrator tools User Name and Password. Refer to Network Setup Using a Static IP Address on page 11. • Obtain the IP Address of the screen and click the Apply button to be used. Press Enter. 2 Click Properties > Connectivity > Protocols > TCP...
Quick Use Guide
Page 24
... of media, size and color, and output choices such as 2-sided prints. • The Layout/Watermark tab has various options to add watermarks to Install Print Drivers on the control panel. 20 quick use guide Click File > Print and select the Xerox WorkCentre 4250/4260 Series from the Xerox website at the device, press the Job Status button on page 12. Choose the options required for your PC. To install the print drivers refer to pages, change the default printing properties...
... of media, size and color, and output choices such as 2-sided prints. • The Layout/Watermark tab has various options to add watermarks to Install Print Drivers on the control panel. 20 quick use guide Click File > Print and select the Xerox WorkCentre 4250/4260 Series from the Xerox website at the device, press the Job Status button on page 12. Choose the options required for your PC. To install the print drivers refer to pages, change the default printing properties...
Quick Use Guide
Page 39
.... On the Print Driver Click Help on the printer driver screen or press [F1] on the PC keyboard for information on CDs with the WorkCentre 4250/ 4260 Series. Help When using your device, detailed and timely help screens. Messages, screen instructions and graphics provide additional information. contains instructions and information about connecting your machine to access the on the device. • System Administration Guide - quick use guide 35 You can access the documents from a variety of sources.
.... On the Print Driver Click Help on the printer driver screen or press [F1] on the PC keyboard for information on CDs with the WorkCentre 4250/ 4260 Series. Help When using your device, detailed and timely help screens. Messages, screen instructions and graphics provide additional information. contains instructions and information about connecting your machine to access the on the device. • System Administration Guide - quick use guide 35 You can access the documents from a variety of sources.

System Administration Guide
Page 4
... Raw TCP/IP Printing (Port 9100 40 AppleTalk Printing 42 Information Checklist 42 Install the Printer Driver 43 USB Printing (Windows XP/2000/2003 45 Information Checklist 45 Procedure 45 Configure your Print Driver 46 Information Checklist 46 Procedure 46 Configure the Windows Printer Driver 48 Bi-Directional Communication 48 Manual Print Driver Configuration 50 Apple Mac 50 TCP/IP Printing (OSX 50 Information Checklist 50 Install the Print Driver 50 iv Xerox WorkCentre 4250/4260 Series System Administration Guide
... Raw TCP/IP Printing (Port 9100 40 AppleTalk Printing 42 Information Checklist 42 Install the Printer Driver 43 USB Printing (Windows XP/2000/2003 45 Information Checklist 45 Procedure 45 Configure your Print Driver 46 Information Checklist 46 Procedure 46 Configure the Windows Printer Driver 48 Bi-Directional Communication 48 Manual Print Driver Configuration 50 Apple Mac 50 TCP/IP Printing (OSX 50 Information Checklist 50 Install the Print Driver 50 iv Xerox WorkCentre 4250/4260 Series System Administration Guide

System Administration Guide
Page 47
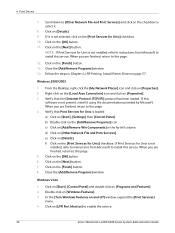
... areas are specific to install the print drivers on page 54 Windows Printing LPR Printing Ensure Print Services for Unix is enabled Follow the relevant steps below that Print Services for Unix is loaded 3. Click on [Start]. 4. Click on [Control Panel]. 5. Double-click on [Exit]. 2. If the CD autoruns, click on [Add or Remove Programs]. 6. Click on [Add/Remove Windows Components] in the left hand column. Xerox WorkCentre 4250/4260 Series System Administration Guide 35
... areas are specific to install the print drivers on page 54 Windows Printing LPR Printing Ensure Print Services for Unix is enabled Follow the relevant steps below that Print Services for Unix is loaded 3. Click on [Start]. 4. Click on [Control Panel]. 5. Double-click on [Exit]. 2. If the CD autoruns, click on [Add or Remove Programs]. 6. Click on [Add/Remove Windows Components] in the left hand column. Xerox WorkCentre 4250/4260 Series System Administration Guide 35
System Administration Guide
Page 48
... install this service. d) Click on [LPR Port Monitor] to select it is not installed, refer to instructions from Microsoft to install this service. If this page. 12. c) Click on [Add/Remove Win Components] in Chapter 4, LPR Printing, Install Printer Driver on page 37. Scroll down to [Other Network File and Print Services] and click on the checkbox to enable the service. 36 Xerox WorkCentre 4250/4260 Series System Administration Guide Click on [Other Network File and Print Services...
... install this service. d) Click on [LPR Port Monitor] to select it is not installed, refer to instructions from Microsoft to install this service. If this page. 12. c) Click on [Add/Remove Win Components] in Chapter 4, LPR Printing, Install Printer Driver on page 37. Scroll down to [Other Network File and Print Services] and click on the checkbox to enable the service. 36 Xerox WorkCentre 4250/4260 Series System Administration Guide Click on [Other Network File and Print Services...
System Administration Guide
Page 52
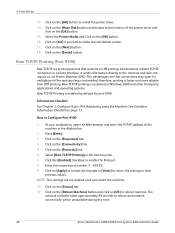
... to make this time. 40 Xerox WorkCentre 4250/4260 Series System Administration Guide Raw TCP/IP printing is faster and more reliable than LPD printing. Click on the [Status] tab. 11. Click the [Enabled] checkbox to LPR printing. Click on the [Connectivity] link. 5. At your workstation, open for port 9100. NOTE: The settings are that is enabled by default for multiple print files and spooling is not needed, therefore, printing...
... to make this time. 40 Xerox WorkCentre 4250/4260 Series System Administration Guide Raw TCP/IP printing is faster and more reliable than LPD printing. Click on the [Status] tab. 11. Click the [Enabled] checkbox to LPR printing. Click on the [Connectivity] link. 5. At your workstation, open for port 9100. NOTE: The settings are that is enabled by default for multiple print files and spooling is not needed, therefore, printing...

System Administration Guide
Page 54
...] button. 27. The Printer Sharing Screen appears. Click on the [OK] button. 16. Verify that the test page is printed at the machine. The AppleTalk settings must be sharing this to support AppleTalk®. Load the Print and Fax Drivers CD into the CD drive. Click on the [Next] button. 25. If you to configure the machine to be prompted for a Printer Driver. 10. Close the Test Page window if...
...] button. 27. The Printer Sharing Screen appears. Click on the [OK] button. 16. Verify that the test page is printed at the machine. The AppleTalk settings must be sharing this to support AppleTalk®. Load the Print and Fax Drivers CD into the CD drive. Click on the [Next] button. 25. If you to configure the machine to be prompted for a Printer Driver. 10. Close the Test Page window if...

System Administration Guide
Page 61
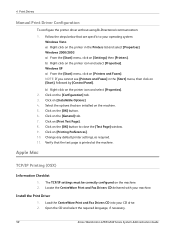
... [Test Page] window. Click on [Start], followed by [Control Panel]. Click on [Automatic] to have the driver automatically configure the IP Address of the machine or click on the [OK] button to your operating system: 4. h) Verify that are specific to close the window. Xerox WorkCentre 4250/4260 Series System Administration Guide 49 If you cannot see [Printers and Faxes] in the [Start] menu, then click on the [Configuration] tab. 3. Configure the Windows Printer Driver a) From the [Start] menu, click...
... [Test Page] window. Click on [Start], followed by [Control Panel]. Click on [Automatic] to have the driver automatically configure the IP Address of the machine or click on the [OK] button to your operating system: 4. h) Verify that are specific to close the window. Xerox WorkCentre 4250/4260 Series System Administration Guide 49 If you cannot see [Printers and Faxes] in the [Start] menu, then click on the [Configuration] tab. 3. Configure the Windows Printer Driver a) From the [Start] menu, click...
System Administration Guide
Page 62
... [Start] menu, then click on [Start], followed by [Control Panel]. Click on the [General] tab. 7. Apple Mac TCP/IP Printing (OSX) Information Checklist 1. Locate the CentreWare Print and Fax Drivers CD delivered with your CD drive. 2. Install the Print Driver 1. Open the CD and select the required language, if necessary. 50 Xerox WorkCentre 4250/4260 Series System Administration Guide Click on the machine. 5. Select the options that the test page is printed...
... [Start] menu, then click on [Start], followed by [Control Panel]. Click on the [General] tab. 7. Apple Mac TCP/IP Printing (OSX) Information Checklist 1. Locate the CentreWare Print and Fax Drivers CD delivered with your CD drive. 2. Install the Print Driver 1. Open the CD and select the required language, if necessary. 50 Xerox WorkCentre 4250/4260 Series System Administration Guide Click on the machine. 5. Select the options that the test page is printed...
System Administration Guide
Page 65
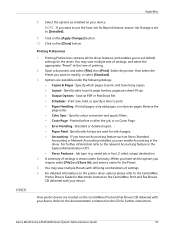
...; Color Sync - You may save multiple Presets with your device. Xerox WorkCentre 4250/4260 Series System Administration Guide 53 NOTE: If you require, select [File] and [Save As], and enter a name for Reprint feature, ensure Job Storage is shown under the following dialogs: • Copies & Pages - Open a document and select [File], then [Print]. Printed before or after the job, or no Cover Page. • Error Handling - Job type (e.g. Unix printer drivers are used...
...; Color Sync - You may save multiple Presets with your device. Xerox WorkCentre 4250/4260 Series System Administration Guide 53 NOTE: If you require, select [File] and [Save As], and enter a name for Reprint feature, ensure Job Storage is shown under the following dialogs: • Copies & Pages - Open a document and select [File], then [Print]. Printed before or after the job, or no Cover Page. • Error Handling - Job type (e.g. Unix printer drivers are used...
System Administration Guide
Page 69
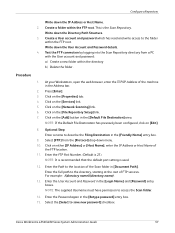
.... 15. Click on the [File Repository Setup] link. 7. Enter the FTP Port Number. (Default is the Scan Repository. For example: /(directory name)/(directory name). 13. Enter the User Account and Password in the Address bar. 2. Xerox WorkCentre 4250/4260 Series System Administration Guide 57 Write down the User Account and Password details. 4. Click on the [Network Scanning] link. 6. Select the [Select to the directory, starting at the root of...
.... 15. Click on the [File Repository Setup] link. 7. Enter the FTP Port Number. (Default is the Scan Repository. For example: /(directory name)/(directory name). 13. Enter the User Account and Password in the Address bar. 2. Xerox WorkCentre 4250/4260 Series System Administration Guide 57 Write down the User Account and Password details. 4. Click on the [Network Scanning] link. 6. Select the [Select to the directory, starting at the root of...

System Administration Guide
Page 83
... printed from your print driver. Jobs can be saved on the USB Flash Drive (Thumb Drive) by using the store to install and setup this feature: 1. Ensure that the following ways: • Using the appropriate printer driver. • Using the Copy Service on the machine in its existing configuration. 2. Use the Feature on page 71 2. Xerox WorkCentre 4250/4260 Series System Administration Guide 71 Jobs can be saved on the machine. 2. Information Checklist Before starting the Installation...
... printed from your print driver. Jobs can be saved on the USB Flash Drive (Thumb Drive) by using the store to install and setup this feature: 1. Ensure that the following ways: • Using the appropriate printer driver. • Using the Copy Service on the machine in its existing configuration. 2. Use the Feature on page 71 2. Xerox WorkCentre 4250/4260 Series System Administration Guide 71 Jobs can be saved on the machine. 2. Information Checklist Before starting the Installation...

System Administration Guide
Page 122
... the Control Panel. 26. Click on [Use Default Accounting Codes] and enter the default Account ID. 9. Click on [Accounting]. 6. The Touch Panel should display a screen with your Print Driver To record print jobs sent to the manufacturer's documentation with two buttons. Refer to the machine, Accounting must be deleted. Win XP or Vista 1. 2. From the [Start] menu, click on [Xerox Network Accounting] from the Accounting System menu. 7. Click on [Settings] and [Printers...
... the Control Panel. 26. Click on [Use Default Accounting Codes] and enter the default Account ID. 9. Click on [Accounting]. 6. The Touch Panel should display a screen with your Print Driver To record print jobs sent to the manufacturer's documentation with two buttons. Refer to the machine, Accounting must be deleted. Win XP or Vista 1. 2. From the [Start] menu, click on [Xerox Network Accounting] from the Accounting System menu. 7. Click on [Settings] and [Printers...
System Administration Guide
Page 126
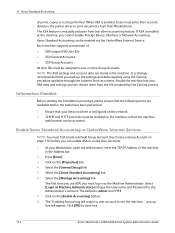
... User name and Password for the Administrator's account. It is enabled, Users must be enabled via the CentreWare Internet Service. TCP/IP and HTTP protocols must enter their Workstations. Enable Xerox Standard Accounting in the printer driver to close box. 114 Xerox WorkCentre 4250/4260 Series System Administration Guide At your Xerox machine is enabled at the machine, you can be enabled on page...
... User name and Password for the Administrator's account. It is enabled, Users must be enabled via the CentreWare Internet Service. TCP/IP and HTTP protocols must enter their Workstations. Enable Xerox Standard Accounting in the printer driver to close box. 114 Xerox WorkCentre 4250/4260 Series System Administration Guide At your Xerox machine is enabled at the machine, you can be enabled on page...
System Administration Guide
Page 194
... paper selection screen will pop up to the machine. 1. 2. 3. 4. 5. Ensure that the correct print driver is loaded into the machine and the guides are no network connectivity problems with the Xerox machine. Refer to verify connectivity. 19 Troubleshooting Printing Problem I cannot print to the edge of all services for five minutes and then access the machine again with . 182 Xerox WorkCentre 4250/4260 Series System Administration Guide The machine is installed on the User's workstation...
... paper selection screen will pop up to the machine. 1. 2. 3. 4. 5. Ensure that the correct print driver is loaded into the machine and the guides are no network connectivity problems with the Xerox machine. Refer to verify connectivity. 19 Troubleshooting Printing Problem I cannot print to the edge of all services for five minutes and then access the machine again with . 182 Xerox WorkCentre 4250/4260 Series System Administration Guide The machine is installed on the User's workstation...

System Administration Guide
Page 203
... 147 event ID 146 identify PC or User 148 IIO status 148 Authentication and Accounting 130 Authentication Type 130 B Banner Sheet 54 Bi-Directional Setup 46 Billing 163 Billing Information 163 Black Copied Impressions 118 Black Faxed Impressions 118 Black Printed Impressions 118 BOOTP 16 C Card Reader 7 CentreWare Internet Services 10, 159 access CWIS 160 Accessing 10 active jobs 164 alert notification 167 alerts 161...
... 147 event ID 146 identify PC or User 148 IIO status 148 Authentication and Accounting 130 Authentication Type 130 B Banner Sheet 54 Bi-Directional Setup 46 Billing 163 Billing Information 163 Black Copied Impressions 118 Black Faxed Impressions 118 Black Printed Impressions 118 BOOTP 16 C Card Reader 7 CentreWare Internet Services 10, 159 access CWIS 160 Accessing 10 active jobs 164 alert notification 167 alerts 161...
System Administration Guide
Page 208
... Server Message Block (SMB) 58, 92 Reset User Limits 121 S Saved Settings 48 Scan Repository 56 Scan Template Management 69 Scan to USB flash drive directly 72 Store Jobs 72 Super G3 104 Supplies Assistant 127 Support 167 System Time Out 188 System Timer Values 188 196 Xerox WorkCentre 4250/4260 Series System Administration Guide INDEX Linux CUPS dynamic addressing 29 static addressing 28 Linux LPR via PrintTool 29 Static IP Addressing Configure 13...
... Server Message Block (SMB) 58, 92 Reset User Limits 121 S Saved Settings 48 Scan Repository 56 Scan Template Management 69 Scan to USB flash drive directly 72 Store Jobs 72 Super G3 104 Supplies Assistant 127 Support 167 System Time Out 188 System Timer Values 188 196 Xerox WorkCentre 4250/4260 Series System Administration Guide INDEX Linux CUPS dynamic addressing 29 static addressing 28 Linux LPR via PrintTool 29 Static IP Addressing Configure 13...

User Guide
Page 228
... Directory Setup, Faxing 71, 82 H Handler Specifications Mixed Sizes 205 Paper Weights 205 HCF Tray 27 Hole Punch Erase, Edge Erase 53 I Image Quality, Copy 48 Image Shift, Copy 52 J Jams, Paper 212 Junk Fax, Fax Receive Settings 172 L Layout / Watermark, Print 151 Lighten / Darken, Faxing 73, 83 Line Configuration, Fax Settings 174 M Machine Configurations Accessibility 204 Copier Speed 204 First Copy Out Time 204 Hardware 204 Machine Size 204 Models...
... Directory Setup, Faxing 71, 82 H Handler Specifications Mixed Sizes 205 Paper Weights 205 HCF Tray 27 Hole Punch Erase, Edge Erase 53 I Image Quality, Copy 48 Image Shift, Copy 52 J Jams, Paper 212 Junk Fax, Fax Receive Settings 172 L Layout / Watermark, Print 151 Lighten / Darken, Faxing 73, 83 Line Configuration, Fax Settings 174 M Machine Configurations Accessibility 204 Copier Speed 204 First Copy Out Time 204 Hardware 204 Machine Size 204 Models...


