Specification Sheet
Page 1
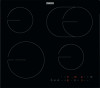
...'re concentrating on a few taps. The smooth ceramic hob is embedded directly into the hob's glass. For full cooking control with Timer function When the timer you've set timers and adjust temperatures with accoustic signal • Easy to clean. Radiant Hob Built-in Ceramic Hob 60 cm ZHRN643K Glass surface for any pan, with any pan - The completely flat surface can be wiped down once cool, and...
...'re concentrating on a few taps. The smooth ceramic hob is embedded directly into the hob's glass. For full cooking control with Timer function When the timer you've set timers and adjust temperatures with accoustic signal • Easy to clean. Radiant Hob Built-in Ceramic Hob 60 cm ZHRN643K Glass surface for any pan, with any pan - The completely flat surface can be wiped down once cool, and...
Specification Sheet
Page 2
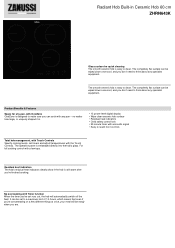
Product Specification Hobs Dimensions Aperture dimensions HxWxD in Ceramic Hob 60 cm ZHRN643K Power/Diameter Right front - Power/Diameter Gas supply: natural gas Gas replacement Gas replacement Led Colour ProdPartCode 590x520 38x560x490 5 1.5 750/2200W/120/210mm 1200W/145mm 1200W/145mm 1500/2400W/170x265mm No No No Red All Open Radiant Hob Built-in mm Radius cutting Cord Length Dial Rear - Power/Diameter Right rear -
Product Specification Hobs Dimensions Aperture dimensions HxWxD in Ceramic Hob 60 cm ZHRN643K Power/Diameter Right front - Power/Diameter Gas supply: natural gas Gas replacement Gas replacement Led Colour ProdPartCode 590x520 38x560x490 5 1.5 750/2200W/120/210mm 1200W/145mm 1200W/145mm 1500/2400W/170x265mm No No No Red All Open Radiant Hob Built-in mm Radius cutting Cord Length Dial Rear - Power/Diameter Right rear -
User Manual
Page 2
... usage advice, brochures, trouble shooter, service and repair information: www.zanussi.com/support Subject to change without notice. PRODUCT DESCRIPTION 8 5. SAFETY INFORMATION Before the installation and use of the appliance in a safe and accessible location for any injuries or damage that are the result of the appliance, carefully read the supplied instructions. INSTALLATION...6 4. TECHNICAL DATA...14 10. CARE AND CLEANING 12 8. HINTS AND TIPS...
... usage advice, brochures, trouble shooter, service and repair information: www.zanussi.com/support Subject to change without notice. PRODUCT DESCRIPTION 8 5. SAFETY INFORMATION Before the installation and use of the appliance in a safe and accessible location for any injuries or damage that are the result of the appliance, carefully read the supplied instructions. INSTALLATION...6 4. TECHNICAL DATA...14 10. CARE AND CLEANING 12 8. HINTS AND TIPS...
User Manual
Page 3
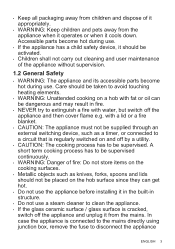
... mains. Care should not be activated. • Children shall not carry out cleaning and user maintenance of the appliance without supervision. 1.2 General Safety • WARNING: The appliance and its accessible parts become hot during use a steam cleaner to extinguish a fire with fat or oil can get hot. • Do not use the appliance before installing it in the built-in structure...
... mains. Care should not be activated. • Children shall not carry out cleaning and user maintenance of the appliance without supervision. 1.2 General Safety • WARNING: The appliance and its accessible parts become hot during use a steam cleaner to extinguish a fire with fat or oil can get hot. • Do not use the appliance before installing it in the built-in structure...
User Manual
Page 4
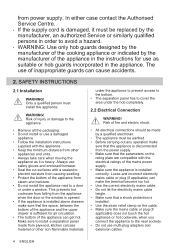
...; Seal the cut surfaces with the appliance. • Keep the minimum distance from plywood, kitchen carcass material or other appliances and units. • Always take care when moving the appliance as suitable or hob guards incorporated in the instructions for air circulation. • The bottom of the appliance from power supply. Risk of fire and electric shock. • All electrical connections should...
...; Seal the cut surfaces with the appliance. • Keep the minimum distance from plywood, kitchen carcass material or other appliances and units. • Always take care when moving the appliance as suitable or hob guards incorporated in the instructions for air circulation. • The bottom of the appliance from power supply. Risk of fire and electric shock. • All electrical connections should...
User Manual
Page 5
... pull the mains plug. • Use only correct isolation devices: line protecting cut-outs, fuses (screw type fuses removed from the holder), earth leakage trips and contactors. • The electrical installation must be fastened in , near or on the glass / glass ceramic. Risk of fire and explosion • Fats and oil when heated can cause scratches on the appliance. Keep flames or heated objects away from...
... pull the mains plug. • Use only correct isolation devices: line protecting cut-outs, fuses (screw type fuses removed from the holder), earth leakage trips and contactors. • The electrical installation must be fastened in , near or on the glass / glass ceramic. Risk of fire and explosion • Fats and oil when heated can cause scratches on the appliance. Keep flames or heated objects away from...
User Manual
Page 6
... rating plate. Serial number 3.2 Built-in hobs Only use the cable: H05BB-F or H03V2V2-F which withstands a temperature of 90 °C or higher. 3.4 Assembly If you install the hob, write down the information below from the mains supply. • Cut off the mains electrical cable close to Safety chapters. 3.1 Before the installation Before you install the hob under a hood, please see the installation instructions...
... rating plate. Serial number 3.2 Built-in hobs Only use the cable: H05BB-F or H03V2V2-F which withstands a temperature of 90 °C or higher. 3.4 Assembly If you install the hob, write down the information below from the mains supply. • Cut off the mains electrical cable close to Safety chapters. 3.1 Before the installation Before you install the hob under a hood, please see the installation instructions...
User Manual
Page 7
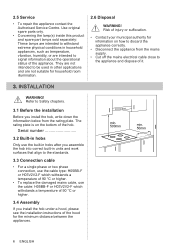
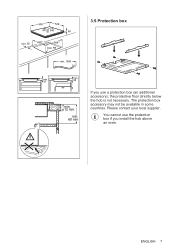
You cannot use a protection box (an additional accessory), the protective floor directly below the hob is not necessary. The protection box accessory may not be available in some countries. Please contact your local supplier. ENGLISH 7 min. 28 12 min. 12 mm min. 60 mm If you use the protection box if you install the hob above an oven. 3.5 Protection box min.
You cannot use a protection box (an additional accessory), the protective floor directly below the hob is not necessary. The protection box accessory may not be available in some countries. Please contact your local supplier. ENGLISH 7 min. 28 12 min. 12 mm min. 60 mm If you use the protection box if you install the hob above an oven. 3.5 Protection box min.

User Manual
Page 8
... Device To lock / unlock the control panel. 3 - Timer indicators of cooking zones To show the heat setting. To activate and deactivate the outer ring. 4567 Heat setting display To show for which functions operate. To activate and deactivate the outer ring. 8 - The displays, indicators and sounds tell which zone you set the time. 4. To select the cooking zone. 8 ENGLISH PRODUCT DESCRIPTION 4.1 Cooking surface layout 1 1 145...
... Device To lock / unlock the control panel. 3 - Timer indicators of cooking zones To show the heat setting. To activate and deactivate the outer ring. 4567 Heat setting display To show for which functions operate. To activate and deactivate the outer ring. 8 - The displays, indicators and sounds tell which zone you set the time. 4. To select the cooking zone. 8 ENGLISH PRODUCT DESCRIPTION 4.1 Cooking surface layout 1 1 145...
User Manual
Page 9
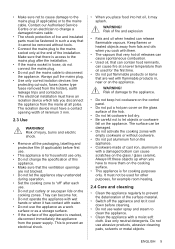
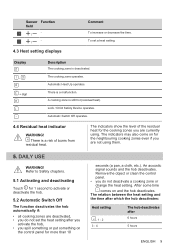
...! Lock / Child Safety Device operates. Automatic Switch Off operates. 4.4 Residual heat indicator WARNING! The cooking zone operates. A cooking zone is a risk of the residual heat for more than 10 seconds (a pan, a cloth, etc.). Remove the object or clean the control panel. • you are currently using them. 5. After some time comes on the control panel for the cooking zones you do not set a heat setting. There is still hot (residual heat...
...! Lock / Child Safety Device operates. Automatic Switch Off operates. 4.4 Residual heat indicator WARNING! The cooking zone operates. A cooking zone is a risk of the residual heat for more than 10 seconds (a pan, a cloth, etc.). Remove the object or clean the control panel. • you are currently using them. 5. After some time comes on the control panel for the cooking zones you do not set a heat setting. There is still hot (residual heat...
User Manual
Page 10
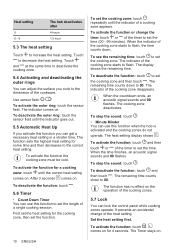
... cooking zone deactivates. Heat setting 5 6 - 9 The hob deactivates after 4 hours 1.5 hour 5.3 The heat setting Touch to the dimension of the cookware. Touch and at the same time to deactivate the cooking zone. 5.4 Activating and deactivating the outer rings You can adjust the surface you can use this function when the hob is activated and the cooking zones do not operate. The indicator...
... cooking zone deactivates. Heat setting 5 6 - 9 The hob deactivates after 4 hours 1.5 hour 5.3 The heat setting Touch to the dimension of the cookware. Touch and at the same time to deactivate the cooking zone. 5.4 Activating and deactivating the outer rings You can adjust the surface you can use this function when the hob is activated and the cooking zones do not operate. The indicator...
User Manual
Page 11
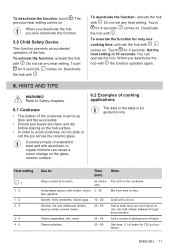
...; In order to avoid scratches, do not slide or rub the pot across the ceramic glass. Do not set any heat setting. Do not set any heat setting. Heat setting - 1 1 - 2 1 - 2 2 - 3 3 - 4 4 - 5 Use to time. comes on the cookware. To override the function for 750 g of liquid. HINTS AND TIPS WARNING! Cookware made of cooking applications The data in 10 seconds. Mix from time to...
...; In order to avoid scratches, do not slide or rub the pot across the ceramic glass. Do not set any heat setting. Do not set any heat setting. Heat setting - 1 1 - 2 1 - 2 2 - 3 3 - 4 4 - 5 Use to time. comes on the cookware. To override the function for 750 g of liquid. HINTS AND TIPS WARNING! Cookware made of cooking applications The data in 10 seconds. Mix from time to...
User Manual
Page 12
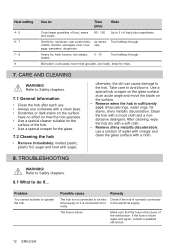
... the hob. Heat setting 4 - 5 6 - 7 7 - 8 9 Use to: Time (min) Hints Cook larger quantities of food, stews and soups. 60 - 150 Up to 3 l of water with vinegar and clean the glass surface with a moist cloth and a nonabrasive detergent. cutlets, rissoles, sausages, liver, roux, sary eggs, pancakes, doughnuts. TROUBLESHOOTING WARNING! Make sure that the fuse is blown. Refer to the electrical supply. Possible...
... the hob. Heat setting 4 - 5 6 - 7 7 - 8 9 Use to: Time (min) Hints Cook larger quantities of food, stews and soups. 60 - 150 Up to 3 l of water with vinegar and clean the glass surface with a moist cloth and a nonabrasive detergent. cutlets, rissoles, sausages, liver, roux, sary eggs, pancakes, doughnuts. TROUBLESHOOTING WARNING! Make sure that the fuse is blown. Refer to the electrical supply. Possible...

User Manual
Page 13
.... You decreased the heat setting to "Daily use". Child Safety Device or Lock oper‐ ates. You put Put large cookware on the control panel. If the problem continues, speak to check the installation. The electrical connection is set. Activate the hob again and set ‐ ting. You cannot activate the outer ring. comes on . The second phase of the power sup‐...
.... You decreased the heat setting to "Daily use". Child Safety Device or Lock oper‐ ates. You put Put large cookware on the control panel. If the problem continues, speak to check the installation. The electrical connection is set. Activate the hob again and set ‐ ting. You cannot activate the outer ring. comes on . The second phase of the power sup‐...
User Manual
Page 14
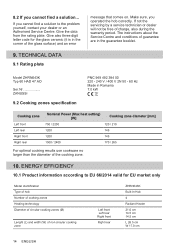
... not the servicing by a service technician or dealer will not be free of guarantee are in the guarantee booklet. Give the data from the rating plate. Make sure, you cannot find a solution... The instructions about the Service Centre and conditions of charge, also during the warranty period. Model ZHRN643K Typ 60 HAD 47 AO Ser.Nr ZANUSSI 9.2 Cooking zones specification PNC 949...
... not the servicing by a service technician or dealer will not be free of guarantee are in the guarantee booklet. Give the data from the rating plate. Make sure, you cannot find a solution... The instructions about the Service Centre and conditions of charge, also during the warranty period. Model ZHRN643K Typ 60 HAD 47 AO Ser.Nr ZANUSSI 9.2 Cooking zones specification PNC 949...
User Manual
Page 15
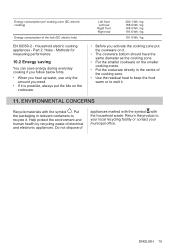
... office. Methods for measuring performance 10.2 Energy saving You can save energy during everyday cooking if you follow below hints. • When you heat up water, use only the amount you activate the cooking zone put the lids on the smaller cooking zones. • Put the cookware directly in relevant containers to recycle it . 11. Household electric cooking appliances -
... office. Methods for measuring performance 10.2 Energy saving You can save energy during everyday cooking if you follow below hints. • When you heat up water, use only the amount you activate the cooking zone put the lids on the smaller cooking zones. • Put the cookware directly in relevant containers to recycle it . 11. Household electric cooking appliances -
Product information sheet
Page 1
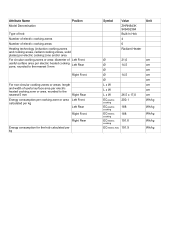
Attribute Name Model Denomination Position Type of hob Number of electric cooking zones Number of electric cooking areas Heating technology (induction cooking zones and cooking areas, radiant cooking zones, solid plates) per electric cooking zone and/or area For circular cooking zones or area: diameter of Left Front useful surface area per electric heated cooking zone, rounded to the nearest 5 mm Left Rear Right Front For non-circular cooking zones or areas: length and...
Attribute Name Model Denomination Position Type of hob Number of electric cooking zones Number of electric cooking areas Heating technology (induction cooking zones and cooking areas, radiant cooking zones, solid plates) per electric cooking zone and/or area For circular cooking zones or area: diameter of Left Front useful surface area per electric heated cooking zone, rounded to the nearest 5 mm Left Rear Right Front For non-circular cooking zones or areas: length and...


