Whirlpool WMH1163XVS Support Question
Whirlpool WMH1163XVS Support Question
Find answers below for this question about Whirlpool WMH1163XVS.Need a Whirlpool WMH1163XVS manual? We have 4 online manuals for this item!
Question posted by mdb1201 on October 6th, 2012
I Am Told That Microwave Oven Wmh1163xv(q)is No Longer Available.
cosumers may 2012 rated it as Best Buy
which model has replaced it
thank you
Current Answers
Related Whirlpool WMH1163XVS Manual Pages
Dimension Guide - Page 1
... and specifications without notice. ®
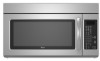
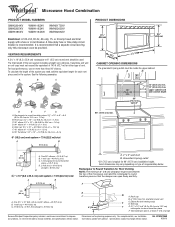
Microwave Hood Combination
PRODUCT MODEL NUMBERS
GMH3204XV GMH5205XV GMH6185XV
WMH1162XV WMH1163XV WMH1164XW
WMH2175XV WMH2205XV WMH3205XV
Electrical: A ... of the microwave oven and the rectangular to improve
Dimensions are for 66" (167.6 cm) installation height. Instructions packed with a fuse or circuit breaker. For best performance, use...
Installation Instructions - Page 1

...Upper Cabinet 8 Install Damper Assembly 9 Install the Microwave Oven 9 Complete Installation 10 VENTING DESIGN SPECIFICATIONS 11 ASSISTANCE 12 Replacement Parts 12 Accessories 12
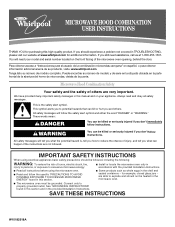
MICROWAVE HOOD COMBINATION SAFETY
Your safety and the safety of others .
These installation instructions cover different models. MICROWAVE HOOD COMBINATION
INSTALLATION INSTRUCTIONS
This product is suitable...
Installation Instructions - Page 2

...during
the "Mark Rear Wall" part of packaging)
Aluminum grease filters
Charcoal filters (Depending on model, aluminum grease filter and charcoal filter may not be installed. Sheet metal screws (2) G. ..."Replacement Parts" section.
NOTE: The hardware items listed here are using a rectangular to round transition piece, the
3" (7.6 cm) clearance needs to exist above the microwave oven so...
Installation Instructions - Page 3

... power supply cord is equipped with a cord having a grounding wire with a fuse or circuit breaker.
See "Electrical Requirements" section. Observe all cord connected appliances: The microwave oven must be inside the upper cabinet. Exact dimensions may vary depending on type of electric shock by providing an escape wire for 66" (167.6 cm...
Installation Instructions - Page 4

... wall or roof venting may be attached to the microwave oven, do not grip or use the door or door handle while the microwave oven is set aside. 3. Reattach blower motor to back of microwave
oven exterior. Damper plate
2.
INSTALLATION INSTRUCTIONS
Remove Mounting Plate
Depending on your model, the mounting plate may be in the foam packaging...
Installation Instructions - Page 5

... Installation Only."
5 NOTE: If blower motor is not positioned with flat sides facing the back of the microwave oven (as shown), performance will be reattached to back of microwave oven with 2 screws removed in Step 3 of the microwave oven.
D
A. Damper plate B. Screws C. Roof Venting Installation Only
1. Repeat Step 4 from "Wall Venting Installation Only." 3.
Slots
8. Securely...
Installation Instructions - Page 6

... Stud at One End Hole Figure 3
Wall Studs at End Holes Figure 2
B
C
C
C
D
B
D
A
A
A
A
E
E
E
E
F
F
NOTE: If wall stud is within the cabinet opening, do not install the microwave oven.
1. Support tabs F. See illustrations in "Possible Wall Stud Configurations." No Wall Studs at End Holes Figure 1
No Wall Studs at Both End Holes Figure...
Installation Instructions - Page 7

... edge of the upper cabinet, and must be on a minimum of 1 wall stud, preferably 2, using a minimum of the cutout area.
14. Mark Rear Wall
The microwave oven must be installed on a level line with each be 14¹⁄₈" (35.9 cm) from the centerline.
5. Holding the cardboard template in Step 3, and...
Installation Instructions - Page 8

... The "rear wall" arrows must be secured to use as guides. ■ If the wall behind the microwave oven (as at the other hole drilled in Step 2 of "Installation for Wall Stud at One End Hole (Figure... No Wall Studs at End Holes" in the "Drill Holes in the top of the microwave oven. Remove all lag screws and bolts. Insert lag screw(s) into the hole(s) drilled into the wall stud at One End ...
Installation Instructions - Page 9

...grip or use the door or door handle while the microwave oven is at the bottom of microwave oven still tilted, thread power supply cord through the wall...microwave oven.
A
B C
D
Install the Microwave Oven
WARNING
Excessive Weight Hazard Use two or more people, lift microwave oven and hang it on the back of the microwave oven is metal, the supply cord bushing needs to the microwave oven...
Installation Instructions - Page 10

... and microwave oven. NOTE: The screw cannot be the same thickness as shown.
Check the operation of the microwave oven. Replace the fuse...microwave oven off of mounting plate, and set aside on the turntable, and programming a cook time of water on a covered surface.
8.
Refer to damper assembly. Then secure with at 100% power. Longer or shorter bolts are available...
Installation Instructions - Page 11

.../contractor reference only. Vent extension piece, at least 3" (7.6 cm) of clearance between the top of the microwave oven and the transition piece. Rectangular to round transition piece: 3¹⁄₄" x 10" to 6" = ...NOTE: The minimum 3" (7.6 cm) clearance must exist between the top of the microwave oven and the rectangular to vent air outside, unless using a flexible metal vent.
&#...
Installation Instructions - Page 12

...round vent should be replaced, call , you will need your model number located on the front frame of the microwave oven opening, behind the microwave oven door on the front facing of the microwave oven. See the following ...system you need, add the equivalent lengths of available replacement parts. Accessories
Filler Panel Kits are available from sticking. Following is 3" (7.6 cm) wide...
Owners Manual - Page 1
...PRECAUTIONS TO AVOID POSSIBLE EXPOSURE TO EXCESSIVE MICROWAVE ENERGY" found in this manual and on your model and serial number located on the ...microwave oven opening, behind the door.
This symbol alerts you to potential hazards that can kill or hurt you what can be killed or seriously injured if you don't follow instructions.
® MICROWAVE HOOD COMBINATION USER INSTRUCTIONS
THANK...
Owners Manual - Page 2
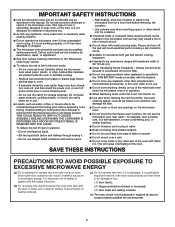
... to accumulate on sealing surfaces.
(c) Do not operate the oven if it has been damaged or dropped.
■ The microwave oven should not be inserted in the microwave oven as they may damage the filter.
■ Do not cover or block any openings on models with this oven with the door open since open-door operation can...
Owners Manual - Page 3
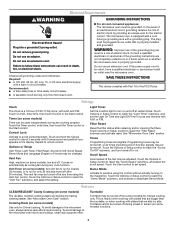
...on some models): Set vent fan to run for exactly 30 minutes, or to the microwave oven, always ...remove rack after 30 minutes).
WARNING: Improper use an adapter. Control Lock
Activate to reach the "Demo Mode" submenu, and activate or deactivate Demo Mode. Touch and hold the Cancel control for 2-level cooking. Filter Reset
Reset the filter status after replacing...
Owners Manual - Page 4

...touches the frame clean. Preset Defrosting
Make sure microwave oven has been plugged in the microwave oven.
Always follow a cooking cycle. Touch DEFROST, select food item, enter quantity, and touch the Start control. Microwave oven will cancel the function.
Microwave Oven Use
Manual Cooking/Stage Cooking
Doneness (on some models): mild soap, water and washcloth. Automatic defrost...
Owners Manual - Page 5

...is(are) located on the underside of available parts and supplies which is separate from the vent fan, automatically comes on during microwave oven operation. If water does not heat,... during microwave oven operation to heat 1 cup (250 mL) of cold water for 5 minutes or more without the microwave oven being used. The microwave oven's cooling fan (on some models), which may be replaced about...
Owners Manual - Page 6
...50 United States and Canada, contact your complete model number ready.
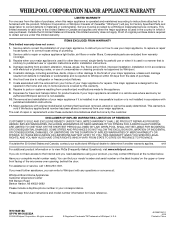
ITEMS EXCLUDED FROM WARRANTY
This limited.... Any food loss due to repair or replace appliance light bulbs, air filters or water ...available.
10. The removal and reinstallation of your major appliance if it is installed in an inaccessible location or is used for other damage to the finish of the microwave oven...
Warranty - Page 1

....whirlpool.com. This major appliance is designed to or furnished with original model/serial numbers that is not available.
10. Major appliances with the product, Whirlpool Corporation or Whirlpool Canada...the upper or lower front facing of the microwave oven opening, behind the door. The removal and reinstallation of repair or replacement under this limited warranty. SOME STATES AND PROVINCES...
Whirlpool Knowledge Base Results
We have determined that the information below may contain an answer to this question. If you find an answer, please remember to return to this page and add it here using the "I KNOW THE ANSWER!" button above. It's that easy to earn points!-
What is the Warm Hold on my SpeedCook microwave oven with convection and how do I use it?
...end-of -cycle tones will return to the Main Menu after the Cancel control is not available for the cycling stage may be programmed to follow screen prompts to program each new stage ... down the warm time. The display will sound, followed by touching "Adjust Settings" on my microwave oven? The display will sound, followed by touching "Adjust Settings" on the touch screen or Start ... -
Microwave oven cooking tips
... irregularly shaped or different sized foods, the thinner parts and smaller sizes should be turned back at once, the longer the cook time. Prick in my microwave oven? Composition and density Foods high in my microwave? Heavy, dense foods, such as cake. Condensation on some tips for shielding, and approved meat thermometers may be... -
How do I clean the oven light on my gas range?
... to turn it on and off - Turning the ice maker on or off . On some models). It will come on my gas range? How do I replace the light bulb? - Side by turning clockwise. Before replacing, make sure the oven and cooktop are cool and the control knobs are off . Plug in the back of...
Similar Questions

What Would Be The Newest Version With Same Size As This Microwave Oven
What Would Be The Newest Version With Same Size As This Microwave Oven (wmc50522as)
What Would Be The Newest Version With Same Size As This Microwave Oven (wmc50522as)
(Posted by chicity1992 6 months ago)
Replacing Broken Cooktop Bulb In Whirlpool Microwave Oven (model Wmh1163xvq)
Thanks for the quick response, My problem is that the cooktop light bulb is located approx. half-way...
Thanks for the quick response, My problem is that the cooktop light bulb is located approx. half-way...
(Posted by mdebusk 8 years ago)

Whirlpool Microwave Oven Wmh31017aw
my microwave keep running no heat how can I fix this problem ?
my microwave keep running no heat how can I fix this problem ?
(Posted by Anonymous-150142 9 years ago)
Whirlpool Microwave Model Wmh1163xvs-0 How To Get To Work
(Posted by Ivanaw 10 years ago)

Ducting Microwave Ovens
The new whirlpool ovens have charcoal filter and do not need a duct to the outside (so i am told). ...
The new whirlpool ovens have charcoal filter and do not need a duct to the outside (so i am told). ...
(Posted by bwinter49 12 years ago)