2008 HP business notebook PC F10 Setup overview
Page 8
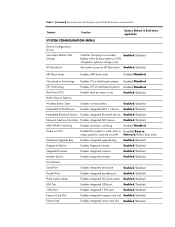
... (Default in Bold where applicable) SYSTEM CONFIGURATION MENU Device Configurations (Cont.) Secondary Battery Fast Charge HP QuickLook Switches charging to secondary Enabled/Disabled battery when primary battery is received via LAN. Enabled/Disabled Fingerprint Device Enables fingerprint reader. Enabled/Disabled .... Table 1. (Continued) Key features for F10 Setup on Intel based systems. Enabled/Disabled Dual Core CPU Enables dual processor cores. Network/Follow Boot order Notebook Upgrade Bay Enables integrated upgrade bay. Enabled/Disabled Port Options Serial ...
... (Default in Bold where applicable) SYSTEM CONFIGURATION MENU Device Configurations (Cont.) Secondary Battery Fast Charge HP QuickLook Switches charging to secondary Enabled/Disabled battery when primary battery is received via LAN. Enabled/Disabled Fingerprint Device Enables fingerprint reader. Enabled/Disabled .... Table 1. (Continued) Key features for F10 Setup on Intel based systems. Enabled/Disabled Dual Core CPU Enables dual processor cores. Network/Follow Boot order Notebook Upgrade Bay Enables integrated upgrade bay. Enabled/Disabled Port Options Serial ...

Pointing Devices and Keyboard - Windows 7
Page 3
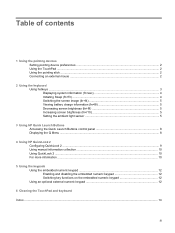
...fn+f3) ...4 Switching the screen image (fn+f4 5 Viewing battery charge information (fn+f8 5 Decreasing screen brightness (fn+f9 5 Increasing screen brightness (fn+f10 5 Setting the ambient light sensor 5 3 Using HP Quick Launch Buttons Accessing the Quick Launch Buttons control panel 8 ...Displaying the Q Menu ...8 4 Using HP QuickLook 2 Configuring QuickLook 2 ...9 Using manual information collection 10 Using QuickLook 2 ...10...
...fn+f3) ...4 Switching the screen image (fn+f4 5 Viewing battery charge information (fn+f8 5 Decreasing screen brightness (fn+f9 5 Increasing screen brightness (fn+f10 5 Setting the ambient light sensor 5 3 Using HP Quick Launch Buttons Accessing the Quick Launch Buttons control panel 8 ...Displaying the Q Menu ...8 4 Using HP QuickLook 2 Configuring QuickLook 2 ...9 Using manual information collection 10 Using QuickLook 2 ...10...
Pointing Devices and Keyboard - Windows 7
Page 9
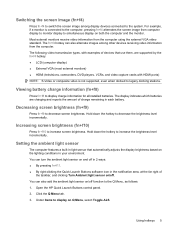
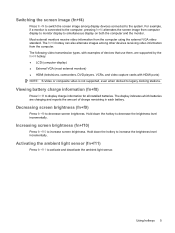
...monitor. Using hotkeys 5 For example, if a monitor is not supported, even when docked to the Q Menu, as follows: 1. Viewing battery charge information (fn+f8) Press fn+f8 to decrease the brightness level incrementally. Decreasing screen brightness (fn+f9) Press fn+f9 to increase screen .... Increasing screen brightness (fn+f10) Press fn+f10 to decrease screen brightness. Open the HP Quick Launch Buttons control panel. 2. Hold down the hotkey to display charge information for all installed batteries. Click the Q Menu tab. 3. Switching the screen image (fn+f4) Press fn+...
...monitor. Using hotkeys 5 For example, if a monitor is not supported, even when docked to the Q Menu, as follows: 1. Viewing battery charge information (fn+f8) Press fn+f8 to decrease the brightness level incrementally. Decreasing screen brightness (fn+f9) Press fn+f9 to increase screen .... Increasing screen brightness (fn+f10) Press fn+f10 to decrease screen brightness. Open the HP Quick Launch Buttons control panel. 2. Hold down the hotkey to display charge information for all installed batteries. Click the Q Menu tab. 3. Switching the screen image (fn+f4) Press fn+...

Pointing Devices and Keyboard - Windows 7
Page 18
... 6 TouchPad 1 D display image, switching 5 screen brightness hotkeys 5 F fn key 3 function keys 3 H HDMI 5 hotkeys ambient light sensor 3 battery charge information 5 decreasing screen brightness 5 description 3 displaying system information 4 increasing screen brightness 5 initiating Sleep 4 switching screen image 5 using 4 HP QuickLook 2 9 I info button 6 K keyboard hotkeys, identifying 3 keypad, embedded enabling and disabling 12 identifying 11 switching key functions...
... 6 TouchPad 1 D display image, switching 5 screen brightness hotkeys 5 F fn key 3 function keys 3 H HDMI 5 hotkeys ambient light sensor 3 battery charge information 5 decreasing screen brightness 5 description 3 displaying system information 4 increasing screen brightness 5 initiating Sleep 4 switching screen image 5 using 4 HP QuickLook 2 9 I info button 6 K keyboard hotkeys, identifying 3 keypad, embedded enabling and disabling 12 identifying 11 switching key functions...
Pointing Devices and Keyboard - Windows Vista
Page 3
...fn+f3) ...4 Switching the screen image (fn+f4 5 Viewing battery charge information (fn+f8 5 Decreasing screen brightness (fn+f9 5 Increasing screen brightness (fn+f10 5 Setting the ambient light sensor 5 3 Using HP Quick Launch Buttons Accessing the Quick Launch Buttons control panel 8 ...Displaying the Q Menu ...8 4 Using HP QuickLook 2 Configuring QuickLook 2 ...9 Using manual information collection 10 Using QuickLook 2 ...10...
...fn+f3) ...4 Switching the screen image (fn+f4 5 Viewing battery charge information (fn+f8 5 Decreasing screen brightness (fn+f9 5 Increasing screen brightness (fn+f10 5 Setting the ambient light sensor 5 3 Using HP Quick Launch Buttons Accessing the Quick Launch Buttons control panel 8 ...Displaying the Q Menu ...8 4 Using HP QuickLook 2 Configuring QuickLook 2 ...9 Using manual information collection 10 Using QuickLook 2 ...10...

Pointing Devices and Keyboard - Windows Vista
Page 9
... reports the amount of charge remaining in light sensor that automatically adjusts the display brightness based on /off function to the Q Menu, as follows: 1. Open the HP Quick Launch Buttons control panel. 2. Setting the ambient light sensor The computer features a built-in each battery. You can also alternate images among ... incrementally. Under Items to display on /off . For example, if a monitor is not supported, even when docked to legacy docking stations. Viewing battery charge information (fn+f8) Press fn+f8 to simultaneous display on both the computer and the monitor.
... reports the amount of charge remaining in light sensor that automatically adjusts the display brightness based on /off function to the Q Menu, as follows: 1. Open the HP Quick Launch Buttons control panel. 2. Setting the ambient light sensor The computer features a built-in each battery. You can also alternate images among ... incrementally. Under Items to display on /off . For example, if a monitor is not supported, even when docked to legacy docking stations. Viewing battery charge information (fn+f8) Press fn+f8 to simultaneous display on both the computer and the monitor.
Pointing Devices and Keyboard - Windows Vista
Page 18
... 6 TouchPad 1 D display image, switching 5 screen brightness hotkeys 5 F fn key 3 function keys 3 H HDMI 5 hotkeys ambient light sensor 3 battery charge information 5 decreasing screen brightness 5 description 3 displaying system information 4 increasing screen brightness 5 initiating Sleep 4 switching screen image 5 using 4 HP QuickLook 2 9 I info button 6 K keyboard hotkeys, identifying 3 keypad, embedded enabling and disabling 12 identifying 11 switching key functions...
... 6 TouchPad 1 D display image, switching 5 screen brightness hotkeys 5 F fn key 3 function keys 3 H HDMI 5 hotkeys ambient light sensor 3 battery charge information 5 decreasing screen brightness 5 description 3 displaying system information 4 increasing screen brightness 5 initiating Sleep 4 switching screen image 5 using 4 HP QuickLook 2 9 I info button 6 K keyboard hotkeys, identifying 3 keypad, embedded enabling and disabling 12 identifying 11 switching key functions...
Pointing Devices and Keyboard - Windows XP
Page 3
... Displaying system information (fn+esc 4 Initiating Standby (fn+f3) ...4 Switching the screen image (fn+f4 5 Viewing battery charge information (fn+f8 5 Decreasing screen brightness (fn+f9 5 Increasing screen brightness (fn+f10 5 Activating the ambient light sensor (fn+f11 5 ...3 Using HP Quick Launch buttons Accessing the Quick Launch Buttons control panel 8 Displaying the Q Menu ...8 4 Using HP QuickLook 2 Configuring QuickLook 2 ...9 Using manual information collection 10 Using QuickLook 2 ...10 For ...
... Displaying system information (fn+esc 4 Initiating Standby (fn+f3) ...4 Switching the screen image (fn+f4 5 Viewing battery charge information (fn+f8 5 Decreasing screen brightness (fn+f9 5 Increasing screen brightness (fn+f10 5 Activating the ambient light sensor (fn+f11 5 ...3 Using HP Quick Launch buttons Accessing the Quick Launch Buttons control panel 8 Displaying the Q Menu ...8 4 Using HP QuickLook 2 Configuring QuickLook 2 ...9 Using manual information collection 10 Using QuickLook 2 ...10 For ...
Pointing Devices and Keyboard - Windows XP
Page 9
...9679; External VGA (most external monitors) ● HDMI (televisions, camcorders, DVD players, VCRs, and video capture cards with examples of charge remaining in each battery. Increasing screen brightness (fn+f10) Press fn+f10 to activate and deactivate the ambient light sensor. Hold down the hotkey to decrease ...to increase screen brightness. The fn+f4 hotkey can also alternate images among display devices connected to the system. Viewing battery charge information (fn+f8) Press fn+f8 to decrease screen brightness. Decreasing screen brightness (fn+f9) Press fn+f9 to display...
...9679; External VGA (most external monitors) ● HDMI (televisions, camcorders, DVD players, VCRs, and video capture cards with examples of charge remaining in each battery. Increasing screen brightness (fn+f10) Press fn+f10 to activate and deactivate the ambient light sensor. Hold down the hotkey to decrease ...to increase screen brightness. The fn+f4 hotkey can also alternate images among display devices connected to the system. Viewing battery charge information (fn+f8) Press fn+f8 to decrease screen brightness. Decreasing screen brightness (fn+f9) Press fn+f9 to display...
Pointing Devices and Keyboard - Windows XP
Page 19
... 6 TouchPad 1 D display image, switching 5 screen brightness hotkeys 5 F fn key 3 function keys 3 H HDMI 5 hotkeys ambient light sensor 3, 5 battery charge information 5 decreasing screen brightness 5 description 3 displaying system information 4 increasing screen brightness 5 initiating Standby 4 switching screen image 5 using 4 HP QuickLook 2 9 I info button 6 K keyboard hotkeys, identifying 3 keypad, embedded enabling and disabling 12 identifying 11 switching key functions...
... 6 TouchPad 1 D display image, switching 5 screen brightness hotkeys 5 F fn key 3 function keys 3 H HDMI 5 hotkeys ambient light sensor 3, 5 battery charge information 5 decreasing screen brightness 5 description 3 displaying system information 4 increasing screen brightness 5 initiating Standby 4 switching screen image 5 using 4 HP QuickLook 2 9 I info button 6 K keyboard hotkeys, identifying 3 keypad, embedded enabling and disabling 12 identifying 11 switching key functions...
Power Management - Windows 7
Page 3
... AC adapter ...10 4 Using battery power Displaying the remaining battery charge 12 Inserting or removing the battery ...13 Charging a battery ...14 Managing low battery levels ...15 Identifying low battery levels 15 Resolving a low battery level 16 Resolving a low battery level when external power is available 16 Resolving a low battery level when a charged battery is available 16 Resolving a low battery level when no power source...
... AC adapter ...10 4 Using battery power Displaying the remaining battery charge 12 Inserting or removing the battery ...13 Charging a battery ...14 Managing low battery levels ...15 Identifying low battery levels 15 Resolving a low battery level 16 Resolving a low battery level when external power is available 16 Resolving a low battery level when a charged battery is available 16 Resolving a low battery level when no power source...
Power Management - Windows 7
Page 9
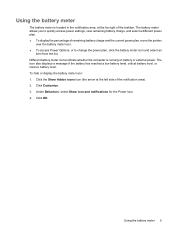
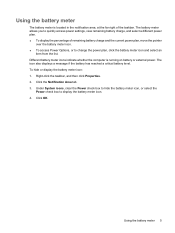
... and notifications for the Power icon. 4. Click OK. Different battery meter icons indicate whether the computer is located in the notification area, at the left side of remaining battery charge and the current power plan, move the pointer over the battery meter icon. ● To access Power Options, or to ...change the power plan, click the battery meter icon and select an item from the list. The icon...
... and notifications for the Power icon. 4. Click OK. Different battery meter icons indicate whether the computer is located in the notification area, at the left side of remaining battery charge and the current power plan, move the pointer over the battery meter icon. ● To access Power Options, or to ...change the power plan, click the battery meter icon and select an item from the list. The icon...

Power Management - Windows 7
Page 16
Displaying the remaining battery charge ▲ Move the pointer over the battery meter icon in the notification area, at the far right of the taskbar. 12 Chapter 4 Using battery power
Displaying the remaining battery charge ▲ Move the pointer over the battery meter icon in the notification area, at the far right of the taskbar. 12 Chapter 4 Using battery power
Power Management - Windows 7
Page 18
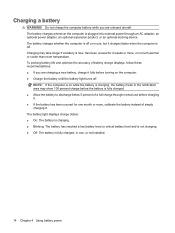
... for one month or more , or is on the computer. ● Charge the battery until the battery light turns off . To prolong battery life and optimize the accuracy of battery charge displays, follow these recommendations: ● If you are charging a new battery, charge it fully before charging it. ● If the battery has been unused for 2 weeks or more , calibrate the...
... for one month or more , or is on the computer. ● Charge the battery until the battery light turns off . To prolong battery life and optimize the accuracy of battery charge displays, follow these recommendations: ● If you are charging a new battery, charge it fully before charging it. ● If the battery has been unused for 2 weeks or more , calibrate the...
Power Management - Windows 7
Page 21
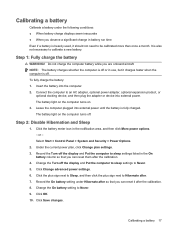
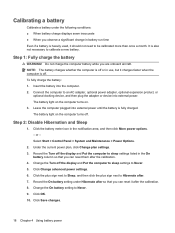
...3. Click the plus sign next to Sleep, and then click the plus sign next to calibrate a new battery. Record the On battery setting under the following conditions: ● When battery charge displays seem inaccurate ● When you can reset it after the calibration. 8. Click OK. 10. It ...is also not necessary to Hibernate after. 7. Insert the battery into external power. The battery light on the computer turns on the computer...
...3. Click the plus sign next to Sleep, and then click the plus sign next to calibrate a new battery. Record the On battery setting under the following conditions: ● When battery charge displays seem inaccurate ● When you can reset it after the calibration. 8. Click OK. 10. It ...is also not necessary to Hibernate after. 7. Insert the battery into external power. The battery light on the computer turns on the computer...

Power Management - Windows Vista and Widows XP
Page 3
... Help and Support 12 Displaying the remaining battery charge 13 Inserting or removing the battery ...14 Charging a battery ...15 Managing low battery levels ...16 Identifying low battery levels 16 Resolving a low battery level 17 Resolving a low battery level when external power is available 17 Resolving a low battery level when a charged battery is available 17 Resolving a low battery level when no power source is...
... Help and Support 12 Displaying the remaining battery charge 13 Inserting or removing the battery ...14 Charging a battery ...15 Managing low battery levels ...16 Identifying low battery levels 16 Resolving a low battery level 17 Resolving a low battery level when external power is available 17 Resolving a low battery level when a charged battery is available 17 Resolving a low battery level when no power source is...
Power Management - Windows Vista and Widows XP
Page 9
...; To access Power Options, or to display the battery meter icon. 4. Using the battery meter 5 The icon also displays a message if the battery has reached a critical battery level. Right-click the taskbar, and then click Properties. 2. The battery meter allows you to quickly access power settings, view remaining battery charge, and select a different power plan. ● To...
...; To access Power Options, or to display the battery meter icon. 4. Using the battery meter 5 The icon also displays a message if the battery has reached a critical battery level. Right-click the taskbar, and then click Properties. 2. The battery meter allows you to quickly access power settings, view remaining battery charge, and select a different power plan. ● To...
Power Management - Windows Vista and Widows XP
Page 17
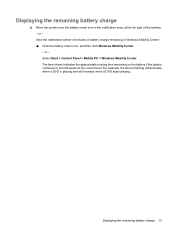
... > Control Panel > Mobile PC > Windows Mobility Center. Displaying the remaining battery charge 13 or - For example, the time remaining will decrease when a DVD is playing and will increase when a DVD stops playing. Displaying the remaining battery charge ▲ Move the pointer over the battery meter icon in the notification area, at the current level. View...
... > Control Panel > Mobile PC > Windows Mobility Center. Displaying the remaining battery charge 13 or - For example, the time remaining will decrease when a DVD is playing and will increase when a DVD stops playing. Displaying the remaining battery charge ▲ Move the pointer over the battery meter icon in the notification area, at the current level. View...
Power Management - Windows Vista and Widows XP
Page 19
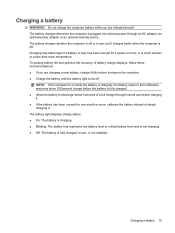
... 2 weeks or more , calibrate the battery instead of battery charge displays, follow these recommendations: ● If you are charging a new battery, charge it charges faster when the computer is on the computer. ● Charge the battery until the battery light turns off . To prolong battery life and optimize the accuracy of simply charging it. Charging a battery WARNING! The battery charges whether the computer is off or...
... 2 weeks or more , calibrate the battery instead of battery charge displays, follow these recommendations: ● If you are charging a new battery, charge it charges faster when the computer is on the computer. ● Charge the battery until the battery light turns off . To prolong battery life and optimize the accuracy of simply charging it. Charging a battery WARNING! The battery charges whether the computer is off or...
Power Management - Windows Vista and Widows XP
Page 22
... calibration. 4. Step 1: Fully charge the battery WARNING! Click Save changes. 18 Chapter 4 Using battery power To fully charge the battery: 1. The battery light on . 3. or - Change the On battery setting to Never. 9. It is fully charged. Do not charge the computer battery while you are onboard aircraft. Record the On battery setting under the following conditions: ● When battery charge displays seem inaccurate...
... calibration. 4. Step 1: Fully charge the battery WARNING! Click Save changes. 18 Chapter 4 Using battery power To fully charge the battery: 1. The battery light on . 3. or - Change the On battery setting to Never. 9. It is fully charged. Do not charge the computer battery while you are onboard aircraft. Record the On battery setting under the following conditions: ● When battery charge displays seem inaccurate...


