User Manual
Page 3
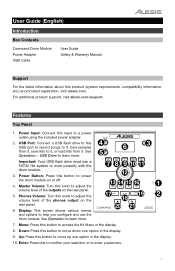
....) and product registration, visit alesis.com. User Guide (English) Introduction Box Contents Command Drum Module Power Adapter USB Cable User Guide Safety & Warranty Manual Support For the latest information about this to confirm your selection or to enter a submenu. 3 See Operation > USB Drive to a power outlet using the included power adapter. 4 2. Master Volume: Turn this input to learn more . Up: Press this button to adjust the volume level of the phones output on the rear panel. 6. Power Input: Connect this knob to move...
....) and product registration, visit alesis.com. User Guide (English) Introduction Box Contents Command Drum Module Power Adapter USB Cable User Guide Safety & Warranty Manual Support For the latest information about this to confirm your selection or to enter a submenu. 3 See Operation > USB Drive to a power outlet using the included power adapter. 4 2. Master Volume: Turn this input to learn more . Up: Press this button to adjust the volume level of the phones output on the rear panel. 6. Power Input: Connect this knob to move...
User Manual
Page 4
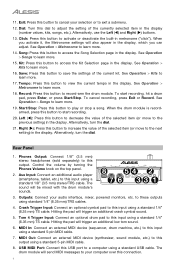
... previous setting) in the display (number values, kits, songs, etc.). USB MIDI Port: Connect this USB port to this input using a standard 1/8" (3.5 mm) stereo/TRS cable. Hitting the pad will trigger an additional crash cymbal sound. 5. Tempo: Press this button to this input using a standard 1/4" (6.35 mm) TS cable. Crash Trigger Input: Connect an optional cymbal pad to view the current tempo in the display, which you activate it, the Metronome settings will be mixed with the drum module's sounds...
... previous setting) in the display (number values, kits, songs, etc.). USB MIDI Port: Connect this USB port to this input using a standard 1/8" (3.5 mm) stereo/TRS cable. Hitting the pad will trigger an additional crash cymbal sound. 5. Tempo: Press this button to this input using a standard 1/4" (6.35 mm) TS cable. Crash Trigger Input: Connect an optional cymbal pad to view the current tempo in the display, which you activate it, the Metronome settings will be mixed with the drum module's sounds...

User Manual
Page 5
..., use each voice and set some of the display. Negative values correspond to the left side, and positive values correspond to the right side. 00 is a selection of sounds that you customize the collection of your electronic drum kit. See the instructions later in the display. To switch between the preset kits (001-050) and user kits (051-070), press Kit. You can play with the pads...
..., use each voice and set some of the display. Negative values correspond to the left side, and positive values correspond to the right side. 00 is a selection of sounds that you customize the collection of your electronic drum kit. See the instructions later in the display. To switch between the preset kits (001-050) and user kits (051-070), press Kit. You can play with the pads...
User Manual
Page 6
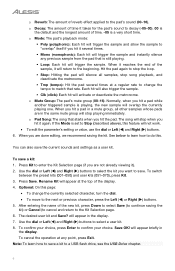
... samples whose pads are done editing, we recommend saving the kit. The song will stop when you want to the beginning. To switch between the preset kits (001-050) and user kits (051-070), press Kit. 3. Save OK! o Decay: The amount of time. -05 is still playing. Loop: Each hit will trigger the sample and allow the sample to select a user kit. 8. o Mute Group: The pad's mute group...
... samples whose pads are done editing, we recommend saving the kit. The song will stop when you want to the beginning. To switch between the preset kits (001-050) and user kits (051-070), press Kit. 3. Save OK! o Decay: The amount of time. -05 is still playing. Loop: Each hit will trigger the sample and allow the sample to select a user kit. 8. o Mute Group: The pad's mute group...
User Manual
Page 7
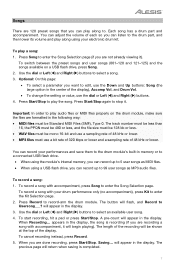
... select an available user song. 4. You can record your drum performance only (no accompaniment), press Kit to enter the Kit Selection page. 2. To record a song with your performances and save them to . To record a song with accompaniment, it will begin playing). The button will appear in memory or to a connected USB flash drive. • When using the module's internal memory, you can adjust the volume of the display. A pre-count will flash, and Record to 5 user songs as MP3 audio files. When Recording...
... select an available user song. 4. You can record your drum performance only (no accompaniment), press Kit to enter the Kit Selection page. 2. To record a song with your performances and save them to . To record a song with accompaniment, it will begin playing). The button will appear in memory or to a connected USB flash drive. • When using the module's internal memory, you can adjust the volume of the display. A pre-count will flash, and Record to 5 user songs as MP3 audio files. When Recording...
User Manual
Page 8
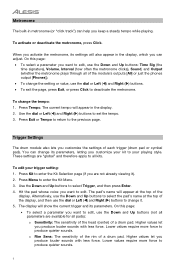
... your trigger setting: 1. When you activate the metronome, its settings will appear in the display. 2. Press Kit to enter the Kit Selection page (if you want to edit. Metronome The built-in metronome (or "click track") can help you customize the settings of a drum pad. To edit your playing style. On this page: • To select a parameter you can change the tempo: 1. Trigger Settings The drum module also lets you keep a steady tempo while playing...
... your trigger setting: 1. When you activate the metronome, its settings will appear in the display. 2. Press Kit to enter the Kit Selection page (if you want to edit. Metronome The built-in metronome (or "click track") can help you customize the settings of a drum pad. To edit your playing style. On this page: • To select a parameter you can change the tempo: 1. Trigger Settings The drum module also lets you keep a steady tempo while playing...
User Manual
Page 9
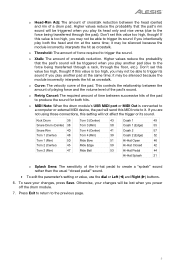
... this value is connected to a computer or external MIDI device, the pad will send this setting will be able to trigger its sound if you power off the drum module. 7. it may not be lost when you play another pad at the same time; o Xtalk: The amount of the pad. o MIDI Note: When the drum module's USB MIDI port or MIDI Out is too high, you play both hits. Higher values...
... this value is connected to a computer or external MIDI device, the pad will send this setting will be able to trigger its sound if you power off the drum module. 7. it may not be lost when you play another pad at the same time; o Xtalk: The amount of the pad. o MIDI Note: When the drum module's USB MIDI port or MIDI Out is too high, you play both hits. Higher values...
User Manual
Page 10
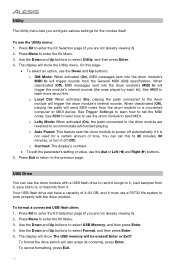
... select an option, use a FAT32 file system to work properly with a USB flash drive to record songs to it, load samples from the General MIDI (GM) specification. You can set the MIDI notes. Your USB flash drive can use the dial or Left () and Right () buttons. 5. To cancel formatting, press Exit. 10 The display will show The USB memory will trigger sounds from it, save kits to power off (Off). o Auto Power: This feature sets the drum module...
... select an option, use a FAT32 file system to work properly with a USB flash drive to record songs to it, load samples from the General MIDI (GM) specification. You can set the MIDI notes. Your USB flash drive can use the dial or Left () and Right () buttons. 5. To cancel formatting, press Exit. 10 The display will show The USB memory will trigger sounds from it, save kits to power off (Off). o Auto Power: This feature sets the drum module...
User Manual
Page 11
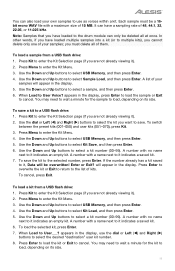
... a saved kit. 7. Press Menu to cancel. To load a sample from a USB flash drive: 1. Use the Down and Up buttons to select Sample Load, and then press Enter. Use the Down and Up buttons to select USB Memory, and then press Enter. 4. When Load to select a kit number (00-99). Use the dial or Left () and Right () buttons to it ). 2. Use the Down and Up buttons to User Voice? When...
... a saved kit. 7. Press Menu to cancel. To load a sample from a USB flash drive: 1. Use the Down and Up buttons to select Sample Load, and then press Enter. Use the Down and Up buttons to select USB Memory, and then press Enter. 4. When Load to select a kit number (00-99). Use the dial or Left () and Right () buttons to it ). 2. Use the Down and Up buttons to User Voice? When...
User Manual
Page 12
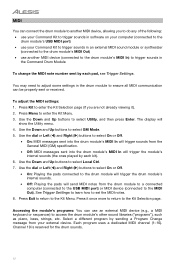
... to adjust some settings in the Command Drum Module To change the MIDI note number sent by each pad, see Trigger Settings. Use the Down and Up buttons to the MIDI Out). Use the dial or Left () and Right () buttons to select On or Off. • On: Playing the pads connected to the drum module will trigger the drum module's internal sounds. • Off: Playing the pads will show the Utility menu. 4. See Trigger Settings to learn how to the Kit Selection...
... to adjust some settings in the Command Drum Module To change the MIDI note number sent by each pad, see Trigger Settings. Use the Down and Up buttons to the MIDI Out). Use the dial or Left () and Right () buttons to select On or Off. • On: Playing the pads connected to the drum module will trigger the drum module's internal sounds. • Off: Playing the pads will show the Utility menu. 4. See Trigger Settings to learn how to the Kit Selection...
User Manual
Page 13
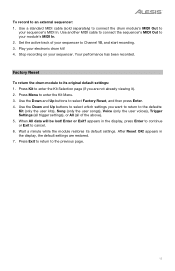
.... 6. Use a standard MIDI cable (sold separately) to connect the drum module's MIDI Out to enter the Kit Selection page (if you want to return to your sequencer's MIDI In. Stop recording on your electronic drum kit! 4. Press Kit to your module's MIDI In. 2. Your performance has been recorded. Use another MIDI cable to connect the sequencer's MIDI Out to the defaults: Kit (only the user kits), Song (only the user songs), Voice (only the user voices), Trigger Settings (all trigger settings), or All (all of your sequencer to select Factory Reset...
.... 6. Use a standard MIDI cable (sold separately) to connect the drum module's MIDI Out to enter the Kit Selection page (if you want to return to your sequencer's MIDI In. Stop recording on your electronic drum kit! 4. Press Kit to your module's MIDI In. 2. Your performance has been recorded. Use another MIDI cable to connect the sequencer's MIDI Out to the defaults: Kit (only the user kits), Song (only the user songs), Voice (only the user voices), Trigger Settings (all trigger settings), or All (all of your sequencer to select Factory Reset...
User Manual
Page 58
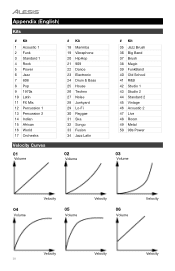
...Marimba 19 Vibraphone 20 HipHop 21 909 22 Dance 23 Electronic 24 Drum & Bass 25 House 26 Techno 27 Noise 28 Junkyard 29 Lo-Fi 30 Reggae 31 Ska 32 Songo 33 Fusion 34 Jazz Latin Velocity Curves 01 Volume 02 Volume # Kit 35 Jazz Brush 36 Big Band 37 Brush 38 ...Magic 39 FunkBand 40 Old School 41 R&B 42 Studio 1 43 Studio 2 44 Standard 2 45 Vintage 46 Acoustic 2 47 Live 48 Room 49 Metal 50 90s Power 03 Volume 04 Volume Velocity 05 Volume Velocity 06 Volume Velocity Velocity 58 Velocity Velocity
...Marimba 19 Vibraphone 20 HipHop 21 909 22 Dance 23 Electronic 24 Drum & Bass 25 House 26 Techno 27 Noise 28 Junkyard 29 Lo-Fi 30 Reggae 31 Ska 32 Songo 33 Fusion 34 Jazz Latin Velocity Curves 01 Volume 02 Volume # Kit 35 Jazz Brush 36 Big Band 37 Brush 38 ...Magic 39 FunkBand 40 Old School 41 R&B 42 Studio 1 43 Studio 2 44 Standard 2 45 Vintage 46 Acoustic 2 47 Live 48 Room 49 Metal 50 90s Power 03 Volume 04 Volume Velocity 05 Volume Velocity 06 Volume Velocity Velocity 58 Velocity Velocity
User Manual
Page 59
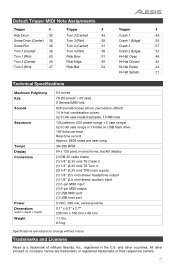
... Edge 59 Hi-Hat Closed 42 Tom 2 (Rim) 47 Ride Bell 53 Hi-Hat Pedal 44 Hi-Hat Splash 21 Technical Specifications Maximum Polyphony Kits Sounds Sequencer Tempo Display Connectors Power Dimensions (width x depth x height) Weight 64 voices 70 (50 preset + 20 user) 9 General MIDI kits 628 sounds/voices (drum, percussion, effect) 14 hi-hat combination voices Up to 99 user-loaded samples, 15 MB total 125 patterns (120 preset songs + 5 user songs) Up to change without notice.
... Edge 59 Hi-Hat Closed 42 Tom 2 (Rim) 47 Ride Bell 53 Hi-Hat Pedal 44 Hi-Hat Splash 21 Technical Specifications Maximum Polyphony Kits Sounds Sequencer Tempo Display Connectors Power Dimensions (width x depth x height) Weight 64 voices 70 (50 preset + 20 user) 9 General MIDI kits 628 sounds/voices (drum, percussion, effect) 14 hi-hat combination voices Up to 99 user-loaded samples, 15 MB total 125 patterns (120 preset songs + 5 user songs) Up to change without notice.


