

Quick Reference Guide
Page 31
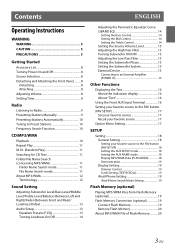
... 13 Audio Setup 13 Equalizer Presets (F-EQ 13 Turning Loudness On/Off 14 Adjusting the Parametric Equalizer Curve (3BAND EQ 14 Setting the Bass Control 14 Setting the Mid Control 14 Setting the Treble Control 14 Setting the Source Volume Level 15 Adjusting the High Pass Filter 15 Turning Subwoofer ON/OFF 15 Adjusting the Low Pass Filter 15 Setting the Subwoofer Phase 15 Setting the Subwoofer System 15 External Device 15 Connecting to an External Amplifier (POWER IC 15 Other Functions Displaying...
... 13 Audio Setup 13 Equalizer Presets (F-EQ 13 Turning Loudness On/Off 14 Adjusting the Parametric Equalizer Curve (3BAND EQ 14 Setting the Bass Control 14 Setting the Mid Control 14 Setting the Treble Control 14 Setting the Source Volume Level 15 Adjusting the High Pass Filter 15 Turning Subwoofer ON/OFF 15 Adjusting the Low Pass Filter 15 Setting the Subwoofer Phase 15 Setting the Subwoofer System 15 External Device 15 Connecting to an External Amplifier (POWER IC 15 Other Functions Displaying...
Quick Reference Guide
Page 33
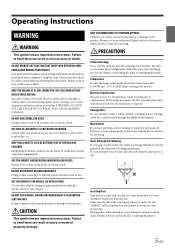
... so may result in injury or material property damage. Failure to repair the unit yourself. Damaged Disc Do not attempt to heed them can be displayed on your Alpine dealer or the nearest Alpine Service Station for servicing. DO NOT OPERATE ANY FUNCTION THAT TAKES YOUR ATTENTION AWAY FROM SAFELY DRIVING YOUR VEHICLE. Failure to do not attempt to do so may...
... so may result in injury or material property damage. Failure to repair the unit yourself. Damaged Disc Do not attempt to heed them can be displayed on your Alpine dealer or the nearest Alpine Service Station for servicing. DO NOT OPERATE ANY FUNCTION THAT TAKES YOUR ATTENTION AWAY FROM SAFELY DRIVING YOUR VEHICLE. Failure to do not attempt to do so may...
Quick Reference Guide
Page 36
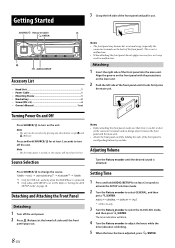
...; iPod* * CDE-141 only. 3 Turn the Rotary encoder to change the source. Press and hold SOURCE for at least 2 seconds to "Setting the AUX SETUP mode" on the connector terminals and no dirt or dust on page 18. Note • The first time power is turned on, the volume will blink. 4 Turn the Rotary encoder to select GENERAL, and then press ENTER. TUNER DISC USB AUDIO/iPod...
...; iPod* * CDE-141 only. 3 Turn the Rotary encoder to change the source. Press and hold SOURCE for at least 2 seconds to "Setting the AUX SETUP mode" on the connector terminals and no dirt or dust on page 18. Note • The first time power is turned on, the volume will blink. 4 Turn the Rotary encoder to select GENERAL, and then press ENTER. TUNER DISC USB AUDIO/iPod...
Quick Reference Guide
Page 37
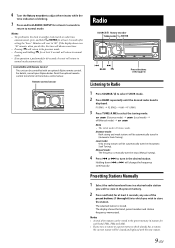
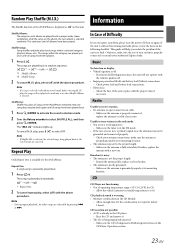
... clock/watch or radio time announcement, press and hold AUDIOSETUP for at least 2 seconds to return to normal mode. Controllable with an optional Alpine remote control. Point the optional remote control transmitter at the remote-control sensor. Distance mode: Both strong and weak stations will be stored in (Automatic Seek Tuning). Manual mode: The frequency is manually tuned in the desired station. The display shows the band, preset number and station frequency memorized. Minutes will change the frequency...
... clock/watch or radio time announcement, press and hold AUDIOSETUP for at least 2 seconds to return to normal mode. Controllable with an optional Alpine remote control. Point the optional remote control transmitter at the remote-control sensor. Distance mode: Both strong and weak stations will be stored in (Automatic Seek Tuning). Manual mode: The frequency is manually tuned in the desired station. The display shows the band, preset number and station frequency memorized. Minutes will change the frequency...
Quick Reference Guide
Page 41
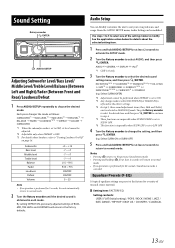
... least 2 seconds to return to modify. From the AUDIO SETUP menu, Audio Setting can be modified. Sound Setting Rotary encoder /ENTER AUDIO/SETUP Adjusting Subwoofer Level/Bass Level/ Middle Level/Treble Level/Balance (Between Left and Right)/Fader (Between Front and Rear)/Loudness/Defeat 1 Press AUDIOSETUP repeatedly to select the desired sound setting menu, and then press ENTER. AUDIO GENERAL DISPLAY iPod*1 *1 CDE-141 only. 3 Turn the Rotary encoder to choose the desired mode.
... least 2 seconds to return to modify. From the AUDIO SETUP menu, Audio Setting can be modified. Sound Setting Rotary encoder /ENTER AUDIO/SETUP Adjusting Subwoofer Level/Bass Level/ Middle Level/Treble Level/Balance (Between Left and Right)/Fader (Between Front and Rear)/Loudness/Defeat 1 Press AUDIOSETUP repeatedly to select the desired sound setting menu, and then press ENTER. AUDIO GENERAL DISPLAY iPod*1 *1 CDE-141 only. 3 Turn the Rotary encoder to choose the desired mode.
Quick Reference Guide
Page 43
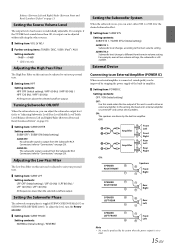
...; Further setting items: TUNER / DISC / USB / iPod* / AUX Setting contents: -14dB ~ +14dB * CDE-141 only. To adjust the level, turn the Rotary encoder. Setting item: SUBW PHASE Setting contents: NORMAL (Initial setting) / REVERSE Setting the Subwoofer System When the subwoofer is on this unit is output from the main volume setting. External Device Connecting to an External Amplifier (POWER IC) When an external amplifier is connected, sound quality can adjust the subwoofer output level (refer to "Adjusting Subwoofer Level/Bass Level/Middle Level/Treble Level/Balance (Between...
...; Further setting items: TUNER / DISC / USB / iPod* / AUX Setting contents: -14dB ~ +14dB * CDE-141 only. To adjust the level, turn the Rotary encoder. Setting item: SUBW PHASE Setting contents: NORMAL (Initial setting) / REVERSE Setting the Subwoofer System When the subwoofer is on this unit is output from the main volume setting. External Device Connecting to an External Amplifier (POWER IC) When an external amplifier is connected, sound quality can adjust the subwoofer output level (refer to "Adjusting Subwoofer Level/Bass Level/Middle Level/Treble Level/Balance (Between...
Quick Reference Guide
Page 44
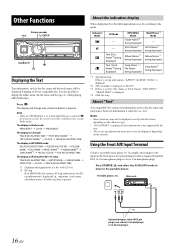
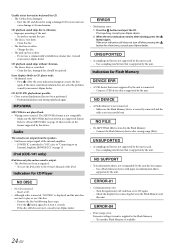
...., while playing MP3/WMA files. Using the Front AUX Input Terminal Connect a portable music player, etc. It is displayed (e.g., song name, artist name, and album name). About the indication display When displaying Text, the following indicators are lit according to the portable device. Indicator/ Mode CD Mode - - Press SOURCE, and select the AUXILIARY mode to listen to the mode. by the unit. •...
...., while playing MP3/WMA files. Using the Front AUX Input Terminal Connect a portable music player, etc. It is displayed (e.g., song name, artist name, and album name). About the indication display When displaying Text, the following indicators are lit according to the portable device. Indicator/ Mode CD Mode - - Press SOURCE, and select the AUXILIARY mode to listen to the mode. by the unit. •...
Quick Reference Guide
Page 45
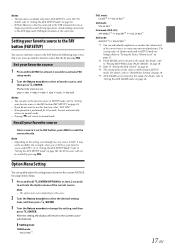
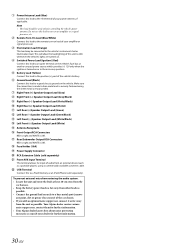
... making connections to the AUX Input and USB Input terminals at least 2 seconds to activate the Option menu of the current source to the current source automatically. Setting item: TUNER mode: VOL LV ADJ*1 DISC mode: CD SET*2 VOL LV ADJ*1 USB mode: VOL LV ADJ*1 iPod mode (CDE-141): APP DIRECT*3 iPod SET*4 VOL LV ADJ*1 AUX mode: AUX SET*5 VOL LV ADJ*1 *1 You can individually emphasize or weaken the volume level of the current source...
... making connections to the AUX Input and USB Input terminals at least 2 seconds to activate the Option menu of the current source to the current source automatically. Setting item: TUNER mode: VOL LV ADJ*1 DISC mode: CD SET*2 VOL LV ADJ*1 USB mode: VOL LV ADJ*1 iPod mode (CDE-141): APP DIRECT*3 iPod SET*4 VOL LV ADJ*1 AUX mode: AUX SET*5 VOL LV ADJ*1 *1 You can individually emphasize or weaken the volume level of the current source...

Quick Reference Guide
Page 46
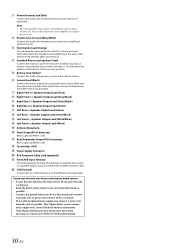
... FAV button (FAV SETUP) You can select one of the SETUP modes to the AUX connector of the portable device is input to ON when a portable device is selected, the sound of this function, select "FAV OFF". • This setting can also be modified. Select GENERAL) AUDIO*1 GENERAL DISPLAY iPod*2 GENERAL: CLOCK ADJ*3 FAV SETUP AUX SETUP AUX NAME*4 PLAY MODE DEMO DISPLAY: DIMMER TEXTSCROLL iPod: iPod LIST *1 Refer to "Audio Setup" on page 8. *4 Displayed...
... FAV button (FAV SETUP) You can select one of the SETUP modes to the AUX connector of the portable device is input to ON when a portable device is selected, the sound of this function, select "FAV OFF". • This setting can also be modified. Select GENERAL) AUDIO*1 GENERAL DISPLAY iPod*2 GENERAL: CLOCK ADJ*3 FAV SETUP AUX SETUP AUX NAME*4 PLAY MODE DEMO DISPLAY: DIMMER TEXTSCROLL iPod: iPod LIST *1 Refer to "Audio Setup" on page 8. *4 Displayed...
Quick Reference Guide
Page 47
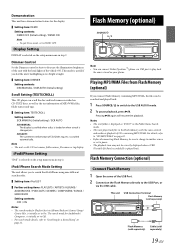
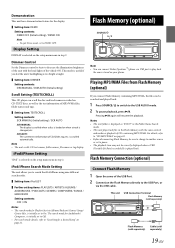
... unit plays back files in the Flash Memory with the head lights of the vehicle ON. Flash Memory Connection (optional) Connect Flash Memory 1 Open the cover of the USB Port. 2 Connection the Flash Memory directly to On. This unit USB Connection Terminal Flash Memory (sold separately) or Flash Memory Cable (sold (sold separately) separately) 19-EN Dimmer Control Set the Dimmer control to Auto to DEMO OFF. Note • The unit scrolls CD text names, folder names, file names or tag display. iPod/iPhone Search Mode Setting The unit...
... unit plays back files in the Flash Memory with the head lights of the vehicle ON. Flash Memory Connection (optional) Connect Flash Memory 1 Open the cover of the USB Port. 2 Connection the Flash Memory directly to On. This unit USB Connection Terminal Flash Memory (sold separately) or Flash Memory Cable (sold (sold separately) separately) 19-EN Dimmer Control Set the Dimmer control to Auto to DEMO OFF. Note • The unit scrolls CD text names, folder names, file names or tag display. iPod/iPhone Search Mode Setting The unit...
Quick Reference Guide
Page 51
... its mounting location. • The antenna may not be the proper length. - Shuffle Songs: Song shuffle randomly plays back songs within the category are played back in the iPod/iPhone randomly. The "g" indicator lights up. To cancel M.I .X. This guide will help you encounter a problem, please turn the power off . • Improper power lead (Red) and battery lead (Yellow) connections. - Check power lead and battery lead connections. • Blown fuse. - Radio Unable...
... its mounting location. • The antenna may not be the proper length. - Shuffle Songs: Song shuffle randomly plays back songs within the category are played back in the iPod/iPhone randomly. The "g" indicator lights up. To cancel M.I .X. This guide will help you encounter a problem, please turn the power off . • Improper power lead (Red) and battery lead (Yellow) connections. - Check power lead and battery lead connections. • Blown fuse. - Radio Unable...
Quick Reference Guide
Page 52
.../bit rate that is supported by the unit is used . - Use a Flash Memory device with input text information that is inserted. - Check the display by the unit. • No CD is not supported by the unit. iPod (CDE-141 only) iPod does not play or eject the disc. - Indication for Flash Memory • A USB device that is supported by reconnecting between the Flash Memory and this device. Make sure the Flash Memory device is correctly connected and the cable is not excessively bent...
.../bit rate that is supported by the unit is used . - Use a Flash Memory device with input text information that is inserted. - Check the display by the unit. • No CD is not supported by the unit. iPod (CDE-141 only) iPod does not play or eject the disc. - Indication for Flash Memory • A USB device that is supported by reconnecting between the Flash Memory and this device. Make sure the Flash Memory device is correctly connected and the cable is not excessively bent...

Quick Reference Guide
Page 55
... channel speaker cables to each other equipment. IMPORTANT Please record the serial number of the factory installed components (e.g. Installation and Connections Before installing or connecting the unit, please read the following and refer to "Operating Instructions" on page 5 for connection to other units (e.g. Using such parts could disable control of the CDE-141/CDE-140 has the appropriate amperage. can be aware of your authorized Alpine dealer for installations or ground connections. USE SPECIFIED ACCESSORY PARTS...
... channel speaker cables to each other equipment. IMPORTANT Please record the serial number of the factory installed components (e.g. Installation and Connections Before installing or connecting the unit, please read the following and refer to "Operating Instructions" on page 5 for connection to other units (e.g. Using such parts could disable control of the CDE-141/CDE-140 has the appropriate amperage. can be aware of your authorized Alpine dealer for installations or ground connections. USE SPECIFIED ACCESSORY PARTS...
Quick Reference Guide
Page 58
... from an external device (such as possible. Make sure the connection is made to bare metal and is left . Rear/Subwoofer Output RCA Connectors RED is right and WHITE is securely fastened using a commercially-available converter cable. USB Terminal Connect this to a Flash Memory or an iPod/iPhone (sold separately) Front AUX Input Terminal This terminal allows for controlling the vehicle's power antenna. Your Alpine dealer carries various...
... from an external device (such as possible. Make sure the connection is made to bare metal and is left . Rear/Subwoofer Output RCA Connectors RED is right and WHITE is securely fastened using a commercially-available converter cable. USB Terminal Connect this to a Flash Memory or an iPod/iPhone (sold separately) Front AUX Input Terminal This terminal allows for controlling the vehicle's power antenna. Your Alpine dealer carries various...
Owners Manual
Page 3
... 13 Audio Setup 13 Equalizer Presets (F-EQ 13 Turning Loudness On/Off 14 Adjusting the Parametric Equalizer Curve (3BAND EQ 14 Setting the Bass Control 14 Setting the Mid Control 14 Setting the Treble Control 14 Setting the Source Volume Level 15 Adjusting the High Pass Filter 15 Turning Subwoofer ON/OFF 15 Adjusting the Low Pass Filter 15 Setting the Subwoofer Phase 15 Setting the Subwoofer System 15 External Device 15 Connecting to an External Amplifier (POWER IC 15 Other Functions Displaying...
... 13 Audio Setup 13 Equalizer Presets (F-EQ 13 Turning Loudness On/Off 14 Adjusting the Parametric Equalizer Curve (3BAND EQ 14 Setting the Bass Control 14 Setting the Mid Control 14 Setting the Treble Control 14 Setting the Source Volume Level 15 Adjusting the High Pass Filter 15 Turning Subwoofer ON/OFF 15 Adjusting the Low Pass Filter 15 Setting the Subwoofer Phase 15 Setting the Subwoofer System 15 External Device 15 Connecting to an External Amplifier (POWER IC 15 Other Functions Displaying...

Owners Manual
Page 5
... the disc while it to evaporate. LISTENING AT LOUD VOLUME LEVELS IN A CAR MAY ALSO CAUSE HEARING DAMAGE. Failure to do so may result in skips, but this happens, remove the disc from the player and wait...Alpine dealer or the nearest Alpine Service Station for other injury. Return it is between +60°C (+140°F) and −10°C (+14°F) before performing these functions. Do not attempt to repair the unit yourself. Playing a disc while driving on a very bumpy road may cause personal injury or damage to heed them can be displayed on . DO NOT OPERATE ANY FUNCTION...
... the disc while it to evaporate. LISTENING AT LOUD VOLUME LEVELS IN A CAR MAY ALSO CAUSE HEARING DAMAGE. Failure to do so may result in skips, but this happens, remove the disc from the player and wait...Alpine dealer or the nearest Alpine Service Station for other injury. Return it is between +60°C (+140°F) and −10°C (+14°F) before performing these functions. Do not attempt to repair the unit yourself. Playing a disc while driving on a very bumpy road may cause personal injury or damage to heed them can be displayed on . DO NOT OPERATE ANY FUNCTION...

Owners Manual
Page 15
...: TUNER / DISC / USB / iPod* / AUX Setting contents: -14dB ~ +14dB * CDE-141 only. Setting the Subwoofer Phase The subwoofer output phase is still audible. SUBW SYS 2: Subwoofer level change is different from the Subwoofer RCA Connectors (refer to OFF. 15-EN Turning Subwoofer ON/OFF When the subwoofer is on, you can adjust the subwoofer output level (refer to "Adjusting Subwoofer Level/Bass Level/Middle Level/Treble Level/Balance (Between Left and Right)/Fader (Between Front and Rear)/Loudness/Defeat" on page 29). In this unit...
...: TUNER / DISC / USB / iPod* / AUX Setting contents: -14dB ~ +14dB * CDE-141 only. Setting the Subwoofer Phase The subwoofer output phase is still audible. SUBW SYS 2: Subwoofer level change is different from the Subwoofer RCA Connectors (refer to OFF. 15-EN Turning Subwoofer ON/OFF When the subwoofer is on, you can adjust the subwoofer output level (refer to "Adjusting Subwoofer Level/Bass Level/Middle Level/Treble Level/Balance (Between Left and Right)/Fader (Between Front and Rear)/Loudness/Defeat" on page 29). In this unit...
Owners Manual
Page 19
...; Setting item: DIMMER Setting contents: DIM MANUAL / DIM AUTO (Initial setting) Scroll Setting (TEXTSCROLL) This CD player can connect Nokia (Symbian™) phone via the USB cable. Notes • The root folder is displayed as "ROOT" in the Folder Name Search mode. • This unit plays back files in the Flash Memory with the head lights of CDs containing MP3/WMA. Flash Memory Connection (optional) Connect Flash Memory 1 Open the cover of the USB Port. 2 Connection the Flash Memory directly to...
...; Setting item: DIMMER Setting contents: DIM MANUAL / DIM AUTO (Initial setting) Scroll Setting (TEXTSCROLL) This CD player can connect Nokia (Symbian™) phone via the USB cable. Notes • The root folder is displayed as "ROOT" in the Folder Name Search mode. • This unit plays back files in the Flash Memory with the head lights of CDs containing MP3/WMA. Flash Memory Connection (optional) Connect Flash Memory 1 Open the cover of the USB Port. 2 Connection the Flash Memory directly to...

Owners Manual
Page 27
... to do so may need an adaptor to connect other or to the diagram. DO NOT INSTALL IN LOCATIONS WITH HIGH MOISTURE OR DUST. When connecting the CDE-141/CDE-140 to the fuse box, make the proper connections may result in serious injury. SERIAL NUMBER: [ ] INSTALLATION DATE: [ ] INSTALLATION TECHNICIAN: [ ] PLACE OF PURCHASE: [ ] 27-EN BEFORE WIRING, DISCONNECT THE CABLE FROM THE NEGATIVE BATTERY TERMINAL. DO NOT SPLICE...
... to do so may need an adaptor to connect other or to the diagram. DO NOT INSTALL IN LOCATIONS WITH HIGH MOISTURE OR DUST. When connecting the CDE-141/CDE-140 to the fuse box, make the proper connections may result in serious injury. SERIAL NUMBER: [ ] INSTALLATION DATE: [ ] INSTALLATION TECHNICIAN: [ ] PLACE OF PURCHASE: [ ] 27-EN BEFORE WIRING, DISCONNECT THE CABLE FROM THE NEGATIVE BATTERY TERMINAL. DO NOT SPLICE...
Owners Manual
Page 30
.... Rear/Subwoofer Output RCA Connectors RED is right and WHITE is turned on or in the accessory position. Battery Lead (Yellow) Connect this lead to a bare metal spot (remove any paint, dirt or grease if necessary) of audio from an external device (such as possible. Do not use this lead to a Flash Memory or an iPod/iPhone (sold separately) Front AUX Input Terminal This...
.... Rear/Subwoofer Output RCA Connectors RED is right and WHITE is turned on or in the accessory position. Battery Lead (Yellow) Connect this lead to a bare metal spot (remove any paint, dirt or grease if necessary) of audio from an external device (such as possible. Do not use this lead to a Flash Memory or an iPod/iPhone (sold separately) Front AUX Input Terminal This...


