

Operating Guide
Page 1
Outline This DLP™ Technology Projector can display various computer signals and NTSC/PAL/SECAM video signals. Digital Multimedia Projector PalmPro 7763PA/65PA OPERATING GUIDE Thank you very much for portability (4) RGB input terminal (5) RS232 Communication (6) Mouse emulation (7) Complies with VESA DDC1/2B specifications English I Features (1) High brightness (2) High resolution (3) Compact size, light weight for purchasing this Acer DLP™ Technology Projector. After reading this operating guide to ensure correct use of the device. Please...
Outline This DLP™ Technology Projector can display various computer signals and NTSC/PAL/SECAM video signals. Digital Multimedia Projector PalmPro 7763PA/65PA OPERATING GUIDE Thank you very much for portability (4) RGB input terminal (5) RS232 Communication (6) Mouse emulation (7) Complies with VESA DDC1/2B specifications English I Features (1) High brightness (2) High resolution (3) Compact size, light weight for purchasing this Acer DLP™ Technology Projector. After reading this operating guide to ensure correct use of the device. Please...

Operating Guide
Page 2
... of such revision or changes. SAVE THESE INSTRUCTIONS FOR FUTURE REFERENCE . Read all of Purchase: Dealer Information Dealer: Telephone Number: Address: Caution TO PREVENT SHOCK, DO NOT OPEN THE CABINET. Power is still available when the projector is in the space below. Do not attempt to the contents hereof and specifically disclaims any person of service, information in the standby mode.
... of such revision or changes. SAVE THESE INSTRUCTIONS FOR FUTURE REFERENCE . Read all of Purchase: Dealer Information Dealer: Telephone Number: Address: Caution TO PREVENT SHOCK, DO NOT OPEN THE CABINET. Power is still available when the projector is in the space below. Do not attempt to the contents hereof and specifically disclaims any person of service, information in the standby mode.

Operating Guide
Page 3
...-power laser that acts as a pointing device during operation. Do not look straight at two sides are for about 1 minute after the projector has been powered off. English III This product is securely installed. 8. Openings in front or at the projector lens during presentations. Please use suitable equipment for mounting the unit and make sure it is capable of displaying inverted images for ceiling mount...
...-power laser that acts as a pointing device during operation. Do not look straight at two sides are for about 1 minute after the projector has been powered off. English III This product is securely installed. 8. Openings in front or at the projector lens during presentations. Please use suitable equipment for mounting the unit and make sure it is capable of displaying inverted images for ceiling mount...

Operating Guide
Page 4
... Remote Functions and Messages 25 Maintenance and Troubleshooting 27 A Lamp Replacement 27 B Cleaning the Lens 27 C Troubleshooting 27 Specifications 29 A Optical 29 B Electrical 29 C Mechanical 29 D Preset Display Resolution Table 29 Appendix 30 AV Connection Port 30 AV Control Pad 30 A Connecting the Box 31 English IV Positioning 4 B. Adjustable Feet 4 Moving the Projector 5 Accessories 6 Connection 7 A Connecting the Projector to Computer/Notebook ....... 7 B Connecting the Projector to Macintosh/Power Book .... 8 Operation 9 Turn...
... Remote Functions and Messages 25 Maintenance and Troubleshooting 27 A Lamp Replacement 27 B Cleaning the Lens 27 C Troubleshooting 27 Specifications 29 A Optical 29 B Electrical 29 C Mechanical 29 D Preset Display Resolution Table 29 Appendix 30 AV Connection Port 30 AV Control Pad 30 A Connecting the Box 31 English IV Positioning 4 B. Adjustable Feet 4 Moving the Projector 5 Accessories 6 Connection 7 A Connecting the Projector to Computer/Notebook ....... 7 B Connecting the Projector to Macintosh/Power Book .... 8 Operation 9 Turn...

Operating Guide
Page 5
... it to help you make powerful presentations wherever you with frequently used timing automatically or use hotkey "AUTO" to the height of the line of vision, image distortion (if any) can be adjusted using the hotkey "KEYSTONE" correction function. It helps you make corrections with OSD operation in your native languages. E Multilanguage The OSD (On Screen Display: information screens and menus) in order to project picture images from...
... it to help you make powerful presentations wherever you with frequently used timing automatically or use hotkey "AUTO" to the height of the line of vision, image distortion (if any) can be adjusted using the hotkey "KEYSTONE" correction function. It helps you make corrections with OSD operation in your native languages. E Multilanguage The OSD (On Screen Display: information screens and menus) in order to project picture images from...

Operating Guide
Page 9
... to shorten the feet) when moving the projector. Caution The carry bag (supplied) is not designed to protect the projector from dust and scratches on the surface of the cabinet. Figure 5 Adjustable feet Moving the Projector Use the carrying handle when moving the projector to prevent damage to the projector. Replace the lens cover and rotate the feet fully clockwise (to the...
... to shorten the feet) when moving the projector. Caution The carry bag (supplied) is not designed to protect the projector from dust and scratches on the surface of the cabinet. Figure 5 Adjustable feet Moving the Projector Use the carrying handle when moving the projector to prevent damage to the projector. Replace the lens cover and rotate the feet fully clockwise (to the...

Operating Guide
Page 13
... the Standby/On key for about 1 minute to cool the lamp. "SYNC IS OUT OF RANGE" message will continue to run for 2 seconds to turn on the lamp again while the LED is no signal input; After the fan stops, the LED will turn to a light solid orange. *Lamp Protection Procedure: If you try to turn on the screen after the projector has identified the input signal; English 9 "SEARCHING" message will blink green...
... the Standby/On key for about 1 minute to cool the lamp. "SYNC IS OUT OF RANGE" message will continue to run for 2 seconds to turn on the lamp again while the LED is no signal input; After the fan stops, the LED will turn to a light solid orange. *Lamp Protection Procedure: If you try to turn on the screen after the projector has identified the input signal; English 9 "SEARCHING" message will blink green...

Operating Guide
Page 14
... the size and phase of the projected image when keystone occurs. To call the OSD menu. Lights or blinks when the lamp does not light. Functions as an indicator showing the standby status. To turn the projection lamp on and off. MAIN UNIT AUTO KEYSTONE + KEYSTONE - To correct the lower distortion of the projected image automatically. Keystone + Keystone Remote Menu Receiver Auto Stanby/On Stanby/On Indicator Lamp Status Indicator Figure 12 Hotkey control pad Menu operating When you press MENU button into OSD menu...
... the size and phase of the projected image when keystone occurs. To call the OSD menu. Lights or blinks when the lamp does not light. Functions as an indicator showing the standby status. To turn the projection lamp on and off. MAIN UNIT AUTO KEYSTONE + KEYSTONE - To correct the lower distortion of the projected image automatically. Keystone + Keystone Remote Menu Receiver Auto Stanby/On Stanby/On Indicator Lamp Status Indicator Figure 12 Hotkey control pad Menu operating When you press MENU button into OSD menu...

Operating Guide
Page 17
... blank screen will be revealed partially from top to a computer. When operating in mouse emulation mode, it registers Click a left mouse click. (bottom button) Mouse Right- Main Unit Function Standby/On To turn the projection lamp on the projector and to emulate mouse function when the projector is connected to bottom by pressing Blank again. Magnify Pressing this button displays a still (frozen) picture. When...
... blank screen will be revealed partially from top to a computer. When operating in mouse emulation mode, it registers Click a left mouse click. (bottom button) Mouse Right- Main Unit Function Standby/On To turn the projection lamp on the projector and to emulate mouse function when the projector is connected to bottom by pressing Blank again. Magnify Pressing this button displays a still (frozen) picture. When...

Operating Guide
Page 18
... Range Usage and Replacement of the unit. The distance between the remote control and remote sensor must be shorter than four meters (13 feet). The picture will become dark or the color will fade after the lamp has been used for a long time. Figure 15 Battery replacement process Remote Control Range The remote sensors are located on the back of Lamp The light source lamp has a limited service life. English 14...
... Range Usage and Replacement of the unit. The distance between the remote control and remote sensor must be shorter than four meters (13 feet). The picture will become dark or the color will fade after the lamp has been used for a long time. Figure 15 Battery replacement process Remote Control Range The remote sensors are located on the back of Lamp The light source lamp has a limited service life. English 14...

Operating Guide
Page 19
... 17 Lamp replacement warning signal Figure 18 Lamp replacement warning Figure 19 Lamp replacement signal warning signal English 15 THE POWER WILL TURN OFF AFTER 20 HOURS" will be displayed on the screen if the lamp has been operated for 1480 hours. Lamp in excess of the above messages will not display for more than (*1500) hours (see figure 17). After this light appears, it is a continuous red, it means the lamp has exceeded (*1500) service hours. "PLEASE CHANGE A NEW LAMP. iii. A Lamp/temperature Status LED Indicator 1.
... 17 Lamp replacement warning signal Figure 18 Lamp replacement warning Figure 19 Lamp replacement signal warning signal English 15 THE POWER WILL TURN OFF AFTER 20 HOURS" will be displayed on the screen if the lamp has been operated for 1480 hours. Lamp in excess of the above messages will not display for more than (*1500) hours (see figure 17). After this light appears, it is a continuous red, it means the lamp has exceeded (*1500) service hours. "PLEASE CHANGE A NEW LAMP. iii. A Lamp/temperature Status LED Indicator 1.
Operating Guide
Page 20
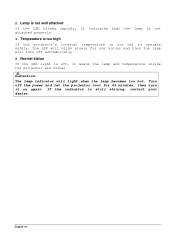
2. Temperature is too high If the projector's internal temperature is not attached properly. 3. Normal status If the LED light is still shining, contact your dealer. Caution: The lamp indicator will turn it on again. If the indicator is off, it indicates that the lamp is too hot to operate safely, the LED will blink slowly for 45 minutes, then turn off the power and let the projector cool for one...
2. Temperature is too high If the projector's internal temperature is not attached properly. 3. Normal status If the LED light is still shining, contact your dealer. Caution: The lamp indicator will turn it on again. If the indicator is off, it indicates that the lamp is too hot to operate safely, the LED will blink slowly for 45 minutes, then turn off the power and let the projector cool for one...

Operating Guide
Page 21
... panel and an air-tight structure, but, in a poor connection, which could cause the unit to remove the lamp. • If the screw is not loosened completely, you could result in color unevenness, etc.) Replace the lamp with lamp cover removed. • Whenever the lamp is replaced, reset the total operation time of the lamp. B Replacing the Lamp Replacing the lamp When replacing the lamp, turn on power with a new one and fix it using the screw. • Do not turn...
... panel and an air-tight structure, but, in a poor connection, which could cause the unit to remove the lamp. • If the screw is not loosened completely, you could result in color unevenness, etc.) Replace the lamp with lamp cover removed. • Whenever the lamp is replaced, reset the total operation time of the lamp. B Replacing the Lamp Replacing the lamp When replacing the lamp, turn on power with a new one and fix it using the screw. • Do not turn...

Operating Guide
Page 24
... menu: Display page, Image page, Control page, and Source page. Press the "Menu" key again to enter Display page items, or press "3" (KEYSTONE-)or "4" (KEYSTONE+) to select sub-pages. (The main OSD menu will display in the menu. OSD FUNCTION Press the MENU button into OSD menu, and use "4" (KEYSTONE+) or "3" (KEYSTONE-) to highlight the Lamp item. Resetting Lamp Timer If replacing the lamp after 1500 hours of the screen and can be adjusted. • Use the "4" (KEYSTONE+) or "3" (KEYSTONE-) buttons...
... menu: Display page, Image page, Control page, and Source page. Press the "Menu" key again to enter Display page items, or press "3" (KEYSTONE-)or "4" (KEYSTONE+) to select sub-pages. (The main OSD menu will display in the menu. OSD FUNCTION Press the MENU button into OSD menu, and use "4" (KEYSTONE+) or "3" (KEYSTONE-) to highlight the Lamp item. Resetting Lamp Timer If replacing the lamp after 1500 hours of the screen and can be adjusted. • Use the "4" (KEYSTONE+) or "3" (KEYSTONE-) buttons...

Operating Guide
Page 25
..." (AUTO) the button again to leave the main OSD menu (at the same time the settings are video, S-video, TV or CATV, there will be other hand, when the input source are saved). Input status Subpag e PC input without AV box Display Image Control PC input with AV box Video input with /without AV source is video, s-video, TV or CATV box) Keystone Brightne ss Contrast Color Balance (Decrease ) (Dark) (Lower) (Red) Setting effects (Increase) Source...
..." (AUTO) the button again to leave the main OSD menu (at the same time the settings are video, S-video, TV or CATV, there will be other hand, when the input source are saved). Input status Subpag e PC input without AV box Display Image Control PC input with AV box Video input with /without AV source is video, s-video, TV or CATV box) Keystone Brightne ss Contrast Color Balance (Decrease ) (Dark) (Lower) (Red) Setting effects (Increase) Source...

Operating Guide
Page 26
... item. Size Setting effects When Auto Resize is from Video other instead of the image to fit the screen size. Size manually to the screen. V. Position, and V. Only available available when the input signal is PC when the input signal is on a projected image, users may turn Auto Image off to adjust the H. If flicker occurs on , the projector determines the best fit of PC, another different Image sub-page including Image Ratio, System ,Color and...
... item. Size Setting effects When Auto Resize is from Video other instead of the image to fit the screen size. Size manually to the screen. V. Position, and V. Only available available when the input signal is PC when the input signal is on a projected image, users may turn Auto Image off to adjust the H. If flicker occurs on , the projector determines the best fit of PC, another different Image sub-page including Image Ratio, System ,Color and...

Operating Guide
Page 27
.... The usage time of System is "Auto" (See Figure 25). (Less) (More) (Red) (Green) Source is attached, the projector will be adjusted with PAL/SECAM video signal input. When an AV box or turner box is Video or S-Video *Tint may not be highlighted. To select, use "3" (KEYSTONE-) or "4" (KEYSTONE+) to set the time to factory settings. To select the OSD menu language. Seven languages are five items on the screen.
.... The usage time of System is "Auto" (See Figure 25). (Less) (More) (Red) (Green) Source is attached, the projector will be adjusted with PAL/SECAM video signal input. When an AV box or turner box is Video or S-Video *Tint may not be highlighted. To select, use "3" (KEYSTONE-) or "4" (KEYSTONE+) to set the time to factory settings. To select the OSD menu language. Seven languages are five items on the screen.

Operating Guide
Page 28
... is connected to the projector: PC, Video, S-video To set the volume level of input signal detection: (a.) PC (b.) S-Video (c.) Video *When selecting input sources, the projector will detect the selected input simultaneously, and the OSD menu will still exist on the screen. Figure 27 Source sub-page (AV box attached) Items Source Volume Treble Bass Mute Description 3 input sources are five items on /off the mute function. To turn on...
... is connected to the projector: PC, Video, S-video To set the volume level of input signal detection: (a.) PC (b.) S-Video (c.) Video *When selecting input sources, the projector will detect the selected input simultaneously, and the OSD menu will still exist on the screen. Figure 27 Source sub-page (AV box attached) Items Source Volume Treble Bass Mute Description 3 input sources are five items on /off the mute function. To turn on...

Operating Guide
Page 29
..." button is adjusted.) By pressing the magnify "+" button, the center of the picture can be magnified. There will be muted. Press the magnify "-" button, and the size of the magnified image will be able to function as shown below will appear. (The message will disappear automatically 3 seconds after selecting the source. (PC, VIDEO, S-VIDEO). If users connect the PS2 (ADB) mouse cable on the projector...
..." button is adjusted.) By pressing the magnify "+" button, the center of the picture can be magnified. There will be muted. Press the magnify "-" button, and the size of the magnified image will be able to function as shown below will appear. (The message will disappear automatically 3 seconds after selecting the source. (PC, VIDEO, S-VIDEO). If users connect the PS2 (ADB) mouse cable on the projector...

Operating Guide
Page 31
... POWER NO PICTURE IMAGE ISN'T SQUARE ON THE SCREEN POOR COLOR IMAGE IS BLURRED REMOTE CONTROL DOESN'T WORK TRY THESE SOLUTIONS Plug the power cord into the power Inlet. Is the POWER indictor flashing? Reposition the unit to clean the projection lens: 1. Is the vertical offset properly corrected using an excessive amount of the lens. English 27 Is the STATUS Indicator flashing? Select the correct video system. Replace the batteries with new ones. 4 Maintenance and Troubleshooting A Lamp Replacement...
... POWER NO PICTURE IMAGE ISN'T SQUARE ON THE SCREEN POOR COLOR IMAGE IS BLURRED REMOTE CONTROL DOESN'T WORK TRY THESE SOLUTIONS Plug the power cord into the power Inlet. Is the POWER indictor flashing? Reposition the unit to clean the projection lens: 1. Is the vertical offset properly corrected using an excessive amount of the lens. English 27 Is the STATUS Indicator flashing? Select the correct video system. Replace the batteries with new ones. 4 Maintenance and Troubleshooting A Lamp Replacement...


