Getting Started Guide
Page 1
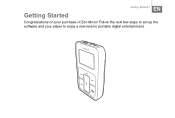
Follow the next few steps to enjoy a new level in portable digital entertainment. Getting Started EN Getting Started 1 Congratulations on your player to set up the software and your purchase of Zen Micro!
Follow the next few steps to enjoy a new level in portable digital entertainment. Getting Started EN Getting Started 1 Congratulations on your player to set up the software and your purchase of Zen Micro!
Getting Started Guide
Page 5
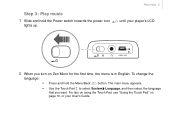
Play music 5 until your User's Guide. To change the language: • Press and hold the Power switch towards the power icon lights up. For tips on using the Touch Pad, see "Using the Touch Pad" on Zen Micro for the first time, the menu is in English. Step 3: Play music 1 Slide and hold the Menu/Back button. The main menu appears. • Use the Touch Pad to select System Language, and then select the language that you turn on page 10, or your player's LCD USB 2 When you want.
Play music 5 until your User's Guide. To change the language: • Press and hold the Power switch towards the power icon lights up. For tips on using the Touch Pad, see "Using the Touch Pad" on Zen Micro for the first time, the menu is in English. Step 3: Play music 1 Slide and hold the Menu/Back button. The main menu appears. • Use the Touch Pad to select System Language, and then select the language that you turn on page 10, or your player's LCD USB 2 When you want.
Getting Started Guide
Page 6
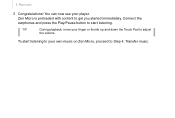
TIP During playback, move your finger or thumb up and down the Touch Pad to get you started immediately. To start listening. Zen Micro is preloaded with content to adjust the volume. 6 Play music 3 Congratulations! You can now use your own music on Zen Micro, proceed to Step 4: Transfer music. Connect the earphones and press the Play/Pause button to start listening to your player.
TIP During playback, move your finger or thumb up and down the Touch Pad to get you started immediately. To start listening. Zen Micro is preloaded with content to adjust the volume. 6 Play music 3 Congratulations! You can now use your own music on Zen Micro, proceed to Step 4: Transfer music. Connect the earphones and press the Play/Pause button to start listening to your player.
Getting Started Guide
Page 8
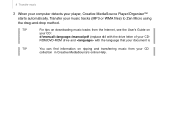
ROM/DVD-ROM drive and with the language that your document is TIP You can find information on your CD: d:\manual\\manual.pdf (replace d:\ with the drive letter of your CD collection in Creative MediaSource's online Help. Transfer your player, Creative MediaSource Player/Organizer™ starts automatically. TIP For tips on downloading music tracks from the Internet, see the User's Guide on ripping and transferring music from your CD- 8 Transfer music 3 When your computer detects your music tracks (MP3 or WMA files) to Zen Micro using the drag-and-drop method.
ROM/DVD-ROM drive and with the language that your document is TIP You can find information on your CD: d:\manual\\manual.pdf (replace d:\ with the drive letter of your CD collection in Creative MediaSource's online Help. Transfer your player, Creative MediaSource Player/Organizer™ starts automatically. TIP For tips on downloading music tracks from the Internet, see the User's Guide on ripping and transferring music from your CD- 8 Transfer music 3 When your computer detects your music tracks (MP3 or WMA files) to Zen Micro using the drag-and-drop method.
Getting Started Guide
Page 9
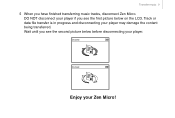
Docked Docked Enjoy your player. Wait until you see the first picture below before disconnecting your Zen Micro! Track or data file transfer is in progress and disconnecting your player if you have finished transferring music tracks, disconnect Zen Micro. DO NOT disconnect your player may damage the content being transferred. Transfer music 9 4 When you see the second picture below on the LCD.
Docked Docked Enjoy your player. Wait until you see the first picture below before disconnecting your Zen Micro! Track or data file transfer is in progress and disconnecting your player if you have finished transferring music tracks, disconnect Zen Micro. DO NOT disconnect your player may damage the content being transferred. Transfer music 9 4 When you see the second picture below on the LCD.


