
Quick Installation Guide
Page 1
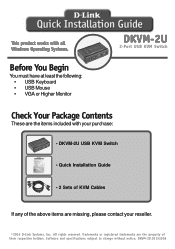
... your reseller. ©2006 D-Link Systems, Inc. All rights reserved. Software and specifications subject to change without notice. This product works with all Windows Operating Systems. Before You Begin You must have at least the following: • USB Keyboard • USB Mouse • VGA or Higher Monitor DKVM-2U 2-Port USB KVM Switch Check Your Package...
... your reseller. ©2006 D-Link Systems, Inc. All rights reserved. Software and specifications subject to change without notice. This product works with all Windows Operating Systems. Before You Begin You must have at least the following: • USB Keyboard • USB Mouse • VGA or Higher Monitor DKVM-2U 2-Port USB KVM Switch Check Your Package...
Quick Installation Guide
Page 3
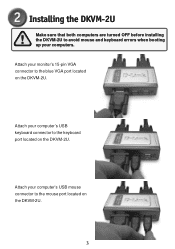
Installing the DKVM-2U Make sure that both computers are turned OFF before installing the DKVM-2U to avoid mouse and keyboard errors when booting up your monitor's 15-pin VGA connector to the blue VGA port located on the DKVM-2U. Attach your computers. Attach your computer's USB keyboard connector to the mouse port located on the DKVM-2U. Attach your computer's USB mouse connector to the keyboard port located on the DKVM-2U. 3
Installing the DKVM-2U Make sure that both computers are turned OFF before installing the DKVM-2U to avoid mouse and keyboard errors when booting up your monitor's 15-pin VGA connector to the blue VGA port located on the DKVM-2U. Attach your computers. Attach your computer's USB keyboard connector to the mouse port located on the DKVM-2U. Attach your computer's USB mouse connector to the keyboard port located on the DKVM-2U. 3
Quick Installation Guide
Page 4
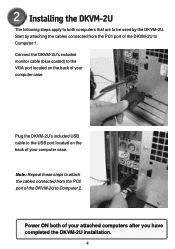
... the PC1 port of the DKVM-2U to Computer 1. Plug the DKVM-2U's included USB cable to the USB port located on the back of your attached computers after you have completed the DKVM-2U installation. 4 Installing the DKVM-2U The following steps apply to both of your computer case. Start by the DKVM-2U. Connect the DKVM-2U's included monitor cable (blue coated...
... the PC1 port of the DKVM-2U to Computer 1. Plug the DKVM-2U's included USB cable to the USB port located on the back of your attached computers after you have completed the DKVM-2U installation. 4 Installing the DKVM-2U The following steps apply to both of your computer case. Start by the DKVM-2U. Connect the DKVM-2U's included monitor cable (blue coated...
Quick Installation Guide
Page 7
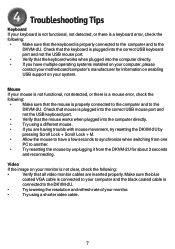
... that the keyboard is properly connected to the computer and to the DKVM-2U. • Try lowering the resolution and refresh rate of your monitor is plugged into the correct USB keyboard port and not the USB mouse port. • Verify that all video monitor cables are having... seconds to synchronize when switching from one PC to another. • Try resetting the mouse by unplugging it from the DKVM-2U for information on enabling USB support on your motherboard/computer's manufacturer for about 3 seconds and reconnecting. Mouse If your keyboard is not functional, not detected...
... that the keyboard is properly connected to the computer and to the DKVM-2U. • Try lowering the resolution and refresh rate of your monitor is plugged into the correct USB keyboard port and not the USB mouse port. • Verify that all video monitor cables are having... seconds to synchronize when switching from one PC to another. • Try resetting the mouse by unplugging it from the DKVM-2U for information on enabling USB support on your motherboard/computer's manufacturer for about 3 seconds and reconnecting. Mouse If your keyboard is not functional, not detected...

