
Owner's Manual (PDF)
Page 5
20 Removing the Hard Drive 51 Prerequisites 51 Procedure 51 21 Replacing the Hard Drive 53 Procedure 53 Postrequisites 53 22 Removing the Hard-Drive Cage 55 Prerequisites 55 Procedure 55 23 Replacing the Hard-Drive Cage 57 Procedure 57 Postrequisites 57 24 Removing the Power-Supply Fan 59 Prerequisites 59 Procedure 59 25 Replacing the Power-Supply Fan 61 Procedure 61...
20 Removing the Hard Drive 51 Prerequisites 51 Procedure 51 21 Replacing the Hard Drive 53 Procedure 53 Postrequisites 53 22 Removing the Hard-Drive Cage 55 Prerequisites 55 Procedure 55 23 Replacing the Hard-Drive Cage 57 Procedure 57 Postrequisites 57 24 Removing the Power-Supply Fan 59 Prerequisites 59 Procedure 59 25 Replacing the Power-Supply Fan 61 Procedure 61...
Owner's Manual (PDF)
Page 49
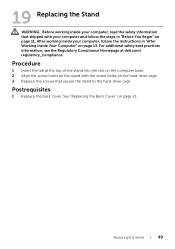
... inside your computer, follow the steps in "After Working Inside Your Computer" on page 13. 19 Replacing the Stand WARNING: Before working inside your computer, read the safety information that secure the stand to the hard-drive cage. For additional safety best practices information, see the Regulatory Compliance Homepage at the top of... the screw holes on the stand with your computer and follow the instructions in "Before You Begin" on page 11. Procedure 1 Insert the tab at dell.com/ regulatory_compliance.
... inside your computer, follow the steps in "After Working Inside Your Computer" on page 13. 19 Replacing the Stand WARNING: Before working inside your computer, read the safety information that secure the stand to the hard-drive cage. For additional safety best practices information, see the Regulatory Compliance Homepage at the top of... the screw holes on the stand with your computer and follow the instructions in "Before You Begin" on page 11. Procedure 1 Insert the tab at dell.com/ regulatory_compliance.
Owner's Manual (PDF)
Page 53
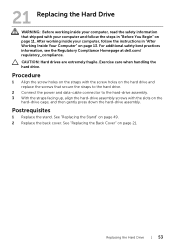
... dell.com/ regulatory_compliance. Procedure 1 Align the screw holes on the straps with the screw holes on the hard drive and replace the screws that shipped with the slots on the hard-drive cage, and then gently press down the hard-drive assembly. See "Replacing the Back Cover" on page 49. 2 Replace the back cover. Exercise care when handling the hard drive. CAUTION: Hard drives...
... dell.com/ regulatory_compliance. Procedure 1 Align the screw holes on the straps with the screw holes on the hard drive and replace the screws that shipped with the slots on the hard-drive cage, and then gently press down the hard-drive assembly. See "Replacing the Back Cover" on page 49. 2 Replace the back cover. Exercise care when handling the hard drive. CAUTION: Hard drives...

Owner's Manual (PDF)
Page 54
54 | Replacing the Hard Drive
54 | Replacing the Hard Drive
Owner's Manual (PDF)
Page 57
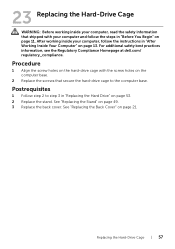
... with your computer, read the safety information that secure the hard-drive cage to the computer base. Replacing the Hard-Drive Cage | 57 See "Replacing the Back Cover" on page 49. 3 Replace the back cover. For additional safety best practices information, see the Regulatory Compliance Homepage at dell.com/ regulatory_compliance. Postrequisites 1 Follow step 2 to step 3 in "After Working...
... with your computer, read the safety information that secure the hard-drive cage to the computer base. Replacing the Hard-Drive Cage | 57 See "Replacing the Back Cover" on page 49. 3 Replace the back cover. For additional safety best practices information, see the Regulatory Compliance Homepage at dell.com/ regulatory_compliance. Postrequisites 1 Follow step 2 to step 3 in "After Working...

Owner's Manual (PDF)
Page 58
58 | Replacing the Hard-Drive Cage
58 | Replacing the Hard-Drive Cage
Owner's Manual (PDF)
Page 113
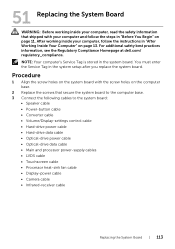
... Service Tag is stored in the system setup after you replace the system board. For additional safety best practices information, see the Regulatory Compliance Homepage at dell.com/ regulatory_compliance. After working inside your computer and follow...Hard-drive power cable • Hard-drive data cable • Optical-drive power cable • Optical-drive data cable • Main and processor power-supply cables • LVDS cable • Touchscreen cable • Processor heat-sink fan cable • Display-power cable • Camera cable • Infrared-receiver cable Replacing...
... Service Tag is stored in the system setup after you replace the system board. For additional safety best practices information, see the Regulatory Compliance Homepage at dell.com/ regulatory_compliance. After working inside your computer and follow...Hard-drive power cable • Hard-drive data cable • Optical-drive power cable • Optical-drive data cable • Main and processor power-supply cables • LVDS cable • Touchscreen cable • Processor heat-sink fan cable • Display-power cable • Camera cable • Infrared-receiver cable Replacing...
Owner's Manual (PDF)
Page 131
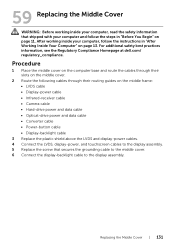
...practices information, see the Regulatory Compliance Homepage at dell.com/ regulatory_compliance. Replacing the Middle Cover | 131 After working inside your computer and follow the instructions in "Before You Begin" on page 13. 59 Replacing the Middle Cover WARNING: Before working inside ... • Infrared-receiver cable • Camera cable • Hard-drive power and data cable • Optical-drive power and data cable • Converter cable • Power-button cable • Display-backlight cable 3 Replace the plastic shield above the LVDS and display-power cables. 4...
...practices information, see the Regulatory Compliance Homepage at dell.com/ regulatory_compliance. Replacing the Middle Cover | 131 After working inside your computer and follow the instructions in "Before You Begin" on page 13. 59 Replacing the Middle Cover WARNING: Before working inside ... • Infrared-receiver cable • Camera cable • Hard-drive power and data cable • Optical-drive power and data cable • Converter cable • Power-button cable • Display-backlight cable 3 Replace the plastic shield above the LVDS and display-power cables. 4...
Owner's Manual (PDF)
Page 132
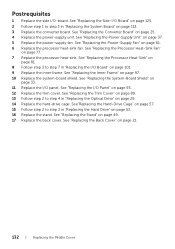
... Board" on page 29. 14 Replace the hard-drive cage. See "Replacing the Power-Supply Fan" on page 97. 10 Replace the system-board shield. See"Replacing the Hard-Drive Cage" on page 57. 15 Follow step 2 to step 3 in "Replacing the Optical Drive" on page 113. 3 Replace the converter board. See "Replacing the Side-I /O-board. See "Replacing the Inner Frame" on page...
... Board" on page 29. 14 Replace the hard-drive cage. See "Replacing the Power-Supply Fan" on page 97. 10 Replace the system-board shield. See"Replacing the Hard-Drive Cage" on page 57. 15 Follow step 2 to step 3 in "Replacing the Optical Drive" on page 113. 3 Replace the converter board. See "Replacing the Side-I /O-board. See "Replacing the Inner Frame" on page...

Owner's Manual (PDF)
Page 136
It is heavy when the components are attached to it . 12 Using the hard-drive cage, gently lift the middle-cover assembly along with the components and ease the cables out of the slots. 2 1 1 hard-drive cage 13 Remove the side-I/O board. 2 middle-cover assembly 1 1 display assembly 2 2 side I/O board 136 | Removing the Display Panel WARNING: The middle cover is recommended that two people remove and replace the middle cover while the components are attached to it .
It is heavy when the components are attached to it . 12 Using the hard-drive cage, gently lift the middle-cover assembly along with the components and ease the cables out of the slots. 2 1 1 hard-drive cage 13 Remove the side-I/O board. 2 middle-cover assembly 1 1 display assembly 2 2 side I/O board 136 | Removing the Display Panel WARNING: The middle cover is recommended that two people remove and replace the middle cover while the components are attached to it .


