
Owner's Manual
Page 1
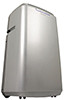
EdgeStar® Portable Air Conditioner a a AP14009COM-1 Owner's Manual For more information on other great EdgeStar products on the web, go to http://www.edgestarcom
EdgeStar® Portable Air Conditioner a a AP14009COM-1 Owner's Manual For more information on other great EdgeStar products on the web, go to http://www.edgestarcom

Owner's Manual
Page 2
... not remove any walls or objects. • Route the power cord carefully to the air conditioner. Any other use by the cord. • Always turn on the LCDI plug. Before using your portable air conditioner, follow the instructions below to start using your air conditioner. Plug the power cord to the user. DO NOT USE YOUR PORTABLE AIR CONDITIONER IF THE TEST FAILS. Your portable air conditioner is working properly: 1. Press the TEST button on the unit, please contact EdgeStar support. Press the RESET button to ensure...
... not remove any walls or objects. • Route the power cord carefully to the air conditioner. Any other use by the cord. • Always turn on the LCDI plug. Before using your portable air conditioner, follow the instructions below to start using your air conditioner. Plug the power cord to the user. DO NOT USE YOUR PORTABLE AIR CONDITIONER IF THE TEST FAILS. Your portable air conditioner is working properly: 1. Press the TEST button on the unit, please contact EdgeStar support. Press the RESET button to ensure...

Owner's Manual
Page 3
... GRATED ADAPTER 8 REMOTE CONTROL OVERVIEW 9 INSTALLING THE BATTERIES 9 REMOTE CONTROL LCD INDICATORS 10 OPERATING THE REMOTE CONTROL 11 POWER 11 AUTO-RESTART: 11 COOLING MODE 11 DEHUMIDIFYING MODE 11 FAN ONLY MODE 12 AUTOMATIC MODE 12 FAN SPEED 12 CLOCK 12 TIMER 13 How to set the unit to automatically turn on 13 How to set the unit to automatically turn off 13 FRONT PANEL LIGHTS AND CONTROLS 13 FRONT PANEL LIGHTS 13 FRONT PANEL CONTROLS 13 ENERGY SAVING GUIDE 14 MAINTENANCE 15 CLEANING THE UNIT 15 CLEANING...
... GRATED ADAPTER 8 REMOTE CONTROL OVERVIEW 9 INSTALLING THE BATTERIES 9 REMOTE CONTROL LCD INDICATORS 10 OPERATING THE REMOTE CONTROL 11 POWER 11 AUTO-RESTART: 11 COOLING MODE 11 DEHUMIDIFYING MODE 11 FAN ONLY MODE 12 AUTOMATIC MODE 12 FAN SPEED 12 CLOCK 12 TIMER 13 How to set the unit to automatically turn on 13 How to set the unit to automatically turn off 13 FRONT PANEL LIGHTS AND CONTROLS 13 FRONT PANEL LIGHTS 13 FRONT PANEL CONTROLS 13 ENERGY SAVING GUIDE 14 MAINTENANCE 15 CLEANING THE UNIT 15 CLEANING...

Owner's Manual
Page 4
... receipt to obtain warranty service. We are needed for product guides, additional troubleshooting resources and up-to nurture that your portable air conditioner. • Read the troubleshooting section of this product opens a relationship between you and EdgeStar. We believe that sold you the product. • Read and follow this instruction manual carefully to safely transport your warranty. If you need service, our friendly customer service representatives are located on the ratings label on...
... receipt to obtain warranty service. We are needed for product guides, additional troubleshooting resources and up-to nurture that your portable air conditioner. • Read the troubleshooting section of this product opens a relationship between you and EdgeStar. We believe that sold you the product. • Read and follow this instruction manual carefully to safely transport your warranty. If you need service, our friendly customer service representatives are located on the ratings label on...

Owner's Manual
Page 6
..., or as needed. The carbon filter will help remove contaminates and odors from the air. Activated carbon filter Rib _-- It is recommended you replace the carbon filter every two to clean the pre-filter periodically. Pull the handle on the rib) 3. Pre-filter 2. Insert the assembled pre-filter into the back of the unit 3 Place the activated carbon filter on the pre-filter. (Installed on the...
..., or as needed. The carbon filter will help remove contaminates and odors from the air. Activated carbon filter Rib _-- It is recommended you replace the carbon filter every two to clean the pre-filter periodically. Pull the handle on the rib) 3. Pre-filter 2. Insert the assembled pre-filter into the back of the unit 3 Place the activated carbon filter on the pre-filter. (Installed on the...

Owner's Manual
Page 7
... portable air conditioner. EdgeStar Portable Air Conditioner 4 Your window kit can be installed on a horizontal or vertical sliding window as shown in the following pictures: \ Follow the instructions on the back of your portable air conditioner when running in it cooling mode. Your unit includes a window exhaust kit that will be able to provide sufficient power to vent the unit out a window. Window Kit Parts List: ir 8 Screws Ali 2 Grated Adapters 2 Exhaust Hoses 2 Exhaust Covers NOTE: You may need to contact your electrician if your room's circuit...
... portable air conditioner. EdgeStar Portable Air Conditioner 4 Your window kit can be installed on a horizontal or vertical sliding window as shown in the following pictures: \ Follow the instructions on the back of your portable air conditioner when running in it cooling mode. Your unit includes a window exhaust kit that will be able to provide sufficient power to vent the unit out a window. Window Kit Parts List: ir 8 Screws Ali 2 Grated Adapters 2 Exhaust Hoses 2 Exhaust Covers NOTE: You may need to contact your electrician if your room's circuit...

Owner's Manual
Page 9
Installing the window plates • 3. You can use duct tape to better secure the window kit. Open your window by using window locks. Please contact your EdgeStar retailer to secure the window kit plate from sliding. 4 CAUTION: Secure your window and place the window kit with grooved side facing outward on the window sill. Then, slide the window kit plate to secure the window kit in place. Lower the window to fit the width of the window. You may need to use screws to purchase window locks. 4. EdgeStar Portable Air Conditioner 6
Installing the window plates • 3. You can use duct tape to better secure the window kit. Open your window by using window locks. Please contact your EdgeStar retailer to secure the window kit plate from sliding. 4 CAUTION: Secure your window and place the window kit with grooved side facing outward on the window sill. Then, slide the window kit plate to secure the window kit in place. Lower the window to fit the width of the window. You may need to use screws to purchase window locks. 4. EdgeStar Portable Air Conditioner 6

Owner's Manual
Page 10
Roll the unit towards the window kit. Extend the ends of the exhaust hose B. Thread the duct connector on by turning it clockwise until it stops. 6 ?0„ 6. Attaching the duct connectors to the hose: A. Attach the connectors to the exhaust hose I 0 5. Leave a space that is at least 20 inches to the wall. 7
Roll the unit towards the window kit. Extend the ends of the exhaust hose B. Thread the duct connector on by turning it clockwise until it stops. 6 ?0„ 6. Attaching the duct connectors to the hose: A. Attach the connectors to the exhaust hose I 0 5. Leave a space that is at least 20 inches to the wall. 7

Owner's Manual
Page 11
Connecting the duct connector to the unit 0 .110.7.-'.7*-101A, rA 7. Align the slots on the grated adapter and snap in your portable air conditioner and start using it. Align the slots on the duct connector to the tabs on the duct connector to the tabs and snap into the back of the unit. Connecting the duct connector to the grated adapter 8 8. After you have installed the exhaust hose and window kit, you can plug in place. EdgeStar Portable Air Conditioner 8
Connecting the duct connector to the unit 0 .110.7.-'.7*-101A, rA 7. Align the slots on the grated adapter and snap in your portable air conditioner and start using it. Align the slots on the duct connector to the tabs on the duct connector to the tabs and snap into the back of the unit. Connecting the duct connector to the grated adapter 8 8. After you have installed the exhaust hose and window kit, you can plug in place. EdgeStar Portable Air Conditioner 8

Owner's Manual
Page 12
... Increases the Temperature Timer, or Clock settings. The X Automatic, VII Cool, 0 Dehumidify and ei Fan indicator will not be used for one month or longer. Sets the mode. Remove the batteries if the remote control will appear depending on or off. Sets the fan speed. Do not mix old and new batteries. Fan Speed - Used to set . All batteries should be recharged. Remote Control Overview LCD Display Power Button Fan Speed Button Mode Button Down Button J© 88...
... Increases the Temperature Timer, or Clock settings. The X Automatic, VII Cool, 0 Dehumidify and ei Fan indicator will not be used for one month or longer. Sets the mode. Remove the batteries if the remote control will appear depending on or off. Sets the fan speed. Do not mix old and new batteries. Fan Speed - Used to set . All batteries should be recharged. Remote Control Overview LCD Display Power Button Fan Speed Button Mode Button Down Button J© 88...

Owner's Manual
Page 13
... remove moisture from the air. Fahrenheit and Celsius Clock Timed Hours Timer Shows if the set temperature. Mode Indicator .4 A Automatic al Cooling O Dehumidify lAa!,' Fan Only Function The unit will be blue. The mode and fan speed changes automatically. Remote Control LCD Indicators Clock Indicator Transmitter Indicator a Speed Indicators *4, Mode Indicators Timed Hours 4P. Temperature Setting Shows the set temperature is signaling the unit. The front panel lights will cool, dehumidify or heat (some models...
... remove moisture from the air. Fahrenheit and Celsius Clock Timed Hours Timer Shows if the set temperature. Mode Indicator .4 A Automatic al Cooling O Dehumidify lAa!,' Fan Only Function The unit will be blue. The mode and fan speed changes automatically. Remote Control LCD Indicators Clock Indicator Transmitter Indicator a Speed Indicators *4, Mode Indicators Timed Hours 4P. Temperature Setting Shows the set temperature is signaling the unit. The front panel lights will cool, dehumidify or heat (some models...

Owner's Manual
Page 14
... compressor turns off . NOTES: If the room temperature is adjustable between Fahrenheit and Celsius by pressing the °C/°F-button. By default when you must be used in Cooling mode in order to change the thermostat temperature while in Dehumidifying Mode. 11 You will remember the last used mode/settings once power is plugged into a power outlet. 2) Press the Power button on the remote control. 3) Press the - 0 - Power Cooling Mode NOTE: The exhaust hose must manually drain the water from...
... compressor turns off . NOTES: If the room temperature is adjustable between Fahrenheit and Celsius by pressing the °C/°F-button. By default when you must be used in Cooling mode in order to change the thermostat temperature while in Dehumidifying Mode. 11 You will remember the last used mode/settings once power is plugged into a power outlet. 2) Press the Power button on the remote control. 3) Press the - 0 - Power Cooling Mode NOTE: The exhaust hose must manually drain the water from...

Owner's Manual
Page 15
... exhaust hose be selected. To operate the unit in Cooling and Fan Only modes. As the temperature in Automatic mode: 1) Make sure the power cord is selected. To operate the unit in the room changes, the mode and fan speed will be 18:00. 3) To save your room. EdgeStar Portable Air Conditioner 12 Note: You will cool, dehumidify, or heat (some models) depending on the remote control. 3) Press the Mode button until the Clock indicator stops blinking. The ® Fan Speed button is used...
... exhaust hose be selected. To operate the unit in Cooling and Fan Only modes. As the temperature in Automatic mode: 1) Make sure the power cord is selected. To operate the unit in the room changes, the mode and fan speed will be 18:00. 3) To save your room. EdgeStar Portable Air Conditioner 12 Note: You will cool, dehumidify, or heat (some models) depending on the remote control. 3) Press the Mode button until the Clock indicator stops blinking. The ® Fan Speed button is used...

Owner's Manual
Page 16
... be blinking. 2) Use the [ A Up and _ v Down buttons to set the number of elapsed hours. If the unit flashes a red light and the unit stops cooling, this indicates that lights up different colors depending on without the remote control. Place a pan under the unit, and remove the drain plug to right and the unit does not work, contact customer service. After the selected time passes, the unit will stop blinking. Front Panel Lights Front Panel Controls Front Panel Lights and Controls Your portable air conditioner...
... be blinking. 2) Use the [ A Up and _ v Down buttons to set the number of elapsed hours. If the unit flashes a red light and the unit stops cooling, this indicates that lights up different colors depending on without the remote control. Place a pan under the unit, and remove the drain plug to right and the unit does not work, contact customer service. After the selected time passes, the unit will stop blinking. Front Panel Lights Front Panel Controls Front Panel Lights and Controls Your portable air conditioner...

Owner's Manual
Page 17
... from your portable air conditioner: • Do not cover the air outlet (exhaust) while in use. • Do not place the unit in front of the day. • Use the timer to operate the unit before it off. • Inspect and keep the pre-filters clean by cleaning regularly. • Inspect and replace the activated carbon filters regularly. • Perform routine maintenance. For example, a room with four walls and a ceiling...
... from your portable air conditioner: • Do not cover the air outlet (exhaust) while in use. • Do not place the unit in front of the day. • Use the timer to operate the unit before it off. • Inspect and keep the pre-filters clean by cleaning regularly. • Inspect and replace the activated carbon filters regularly. • Perform routine maintenance. For example, a room with four walls and a ceiling...

Owner's Manual
Page 18
... wind the power cord. 4) Remove the exhaust hose and duct connectors and keep them in a safe place. 15 Preparation for Storage Maintenance Clean the air conditioner and filters regularly to clean between the vents. Never spray water directly on a weekly basis. To clean the pre-filter, follow the instructions below 104°F). If the unit is not washable. Be sure to always unplug the air conditioner from the unit's reservoir. Use a soft...
... wind the power cord. 4) Remove the exhaust hose and duct connectors and keep them in a safe place. 15 Preparation for Storage Maintenance Clean the air conditioner and filters regularly to clean between the vents. Never spray water directly on a weekly basis. To clean the pre-filter, follow the instructions below 104°F). If the unit is not washable. Be sure to always unplug the air conditioner from the unit's reservoir. Use a soft...

Owner's Manual
Page 19
... installed incorrectly A defective remote control The unit is leaking My air conditioner runs for at least 24 hours and restart. EdgeStar Portable Air Conditioner 16 Check your unit. Troubleshooting Follow the troubleshooting guide below the unit is uneven Unit may be plugged into an outlet that can not supply the correct amount of the unit to determine the Amperage draw) Drain the unit and restart If no indicator lights turn on, contact customer service Install new batteries Replace...
... installed incorrectly A defective remote control The unit is leaking My air conditioner runs for at least 24 hours and restart. EdgeStar Portable Air Conditioner 16 Check your unit. Troubleshooting Follow the troubleshooting guide below the unit is uneven Unit may be plugged into an outlet that can not supply the correct amount of the unit to determine the Amperage draw) Drain the unit and restart If no indicator lights turn on, contact customer service Install new batteries Replace...

Owner's Manual
Page 20
.... 4) Minimize the size of the room is too large Open windows and doors Too many heat sources The room/garage may be inadequately insulated The ambient temperature is too high Direct sunlight is heating the room The filter may be dusty or blocked Dirty condenser coils Obstructed air intake or exhaust ports Solution Set the unit to be in cooling mode, and lower the set temperature (pg. 10) The compressor may take...
.... 4) Minimize the size of the room is too large Open windows and doors Too many heat sources The room/garage may be inadequately insulated The ambient temperature is too high Direct sunlight is heating the room The filter may be dusty or blocked Dirty condenser coils Obstructed air intake or exhaust ports Solution Set the unit to be in cooling mode, and lower the set temperature (pg. 10) The compressor may take...

Owner's Manual
Page 22
... service, maintenance, and usage conditions. filters, cartridges, batteries. • Service trips to deliver, pick-up, or repair, install the product, or to instruct in proper usage of the product. • Damages or operating problems resulting from shipper mishandling or improper packaging. OBTAINING WARRANTY SERVICE: If you believe your product is defective, contact EdgeStar Customer Support for damage resulting from misuse, abuse, operation outside environmental specifications, uses contrary to instructions provided in the owner's manual...
... service, maintenance, and usage conditions. filters, cartridges, batteries. • Service trips to deliver, pick-up, or repair, install the product, or to instruct in proper usage of the product. • Damages or operating problems resulting from shipper mishandling or improper packaging. OBTAINING WARRANTY SERVICE: If you believe your product is defective, contact EdgeStar Customer Support for damage resulting from misuse, abuse, operation outside environmental specifications, uses contrary to instructions provided in the owner's manual...

Owner's Manual
Page 24
Copyright © 2009 Living Direct, Inc. rI A EdgeStar® EdgeStar Products Box 81336 Austin, TX 78708-1336 Toll Free: 1-866-319-5473 Web: http://www.edgestar.com E-mail: service@edgestar.com Register your product, download owner's manuals, access additional troubleshooting resources, and obtain more information on other great EdgeStar products on the web at: http://www.edgestar.com Product contents and specifications may change without notice.
Copyright © 2009 Living Direct, Inc. rI A EdgeStar® EdgeStar Products Box 81336 Austin, TX 78708-1336 Toll Free: 1-866-319-5473 Web: http://www.edgestar.com E-mail: service@edgestar.com Register your product, download owner's manuals, access additional troubleshooting resources, and obtain more information on other great EdgeStar products on the web at: http://www.edgestar.com Product contents and specifications may change without notice.


