
Owner's Manual
Page 1
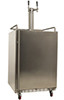
Built-In Outdoor Kegerator BR7000SSOD Fridge for the KC7000SSOD Kegerator Owner's Manual For more information on other great EdgeStar products on the web, go to http://www.edgestar.com
Built-In Outdoor Kegerator BR7000SSOD Fridge for the KC7000SSOD Kegerator Owner's Manual For more information on other great EdgeStar products on the web, go to http://www.edgestar.com

Owner's Manual
Page 2
... cool down , on and off. If the power cord is damaged, it must be installed in accordance with state and local electrical codes. A standard electrical supply (115 V, 60Hz), that is properly grounded in accordance with the National Electrical Code and local codes and ordinances is required. Use outlets that they do not have been given supervision or instruction concerning the use...
... cool down , on and off. If the power cord is damaged, it must be installed in accordance with state and local electrical codes. A standard electrical supply (115 V, 60Hz), that is properly grounded in accordance with the National Electrical Code and local codes and ordinances is required. Use outlets that they do not have been given supervision or instruction concerning the use...

Owner's Manual
Page 3
... 5 INSTALLING THE DOOR HANDLE 5 INSTALLING THE CASTERS 5 REVERSING THE DOOR SWING 6 FREE-STANDING INSTALLATION 7 Guard Rail ...7 Drip Tray...7 BUILT-IN INSTALLATION 8 Installation Requirements 8 KEG LOADING...9 OPERATION...10 INSTALLATION CHECK LIST BEFORE OPERATION 10 USING THE TEMPERATURE CONTROL PANEL 10 NORMAL SOUNDS 11 DEFROSTING ...11 PREPARING THE KEGERATOR FOR STORAGE 11 CLEANING AND MAINTENANCE 12 EXTERIOR CLEANING 12 INTERIOR CLEANING 12 TROUBLESHOOTING 12 TROUBLESHOOTING CONTINUED 13 SPECIFICATIONS 14 First Time Operating Instructions Before use, make...
... 5 INSTALLING THE DOOR HANDLE 5 INSTALLING THE CASTERS 5 REVERSING THE DOOR SWING 6 FREE-STANDING INSTALLATION 7 Guard Rail ...7 Drip Tray...7 BUILT-IN INSTALLATION 8 Installation Requirements 8 KEG LOADING...9 OPERATION...10 INSTALLATION CHECK LIST BEFORE OPERATION 10 USING THE TEMPERATURE CONTROL PANEL 10 NORMAL SOUNDS 11 DEFROSTING ...11 PREPARING THE KEGERATOR FOR STORAGE 11 CLEANING AND MAINTENANCE 12 EXTERIOR CLEANING 12 INTERIOR CLEANING 12 TROUBLESHOOTING 12 TROUBLESHOOTING CONTINUED 13 SPECIFICATIONS 14 First Time Operating Instructions Before use, make...
Owner's Manual
Page 4
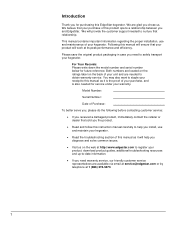
... need warranty service, our friendly customer service representatives are available via email at service@edgestar.com or by telephone at its peak performance and efficiency. Both numbers are located on the ratings label on the web at http://www.edgestar.com to register your product, download product guides, additional troubleshooting resources and up-to-date information. If you need to help you install, use...
... need warranty service, our friendly customer service representatives are available via email at service@edgestar.com or by telephone at its peak performance and efficiency. Both numbers are located on the ratings label on the web at http://www.edgestar.com to register your product, download product guides, additional troubleshooting resources and up-to-date information. If you need to help you install, use...

Owner's Manual
Page 5
Front View LED Light Bar Internal Fan with casters Product Label Power Plug 2 Cabinet EdgeStar Built-in Kegerator Control Panel Opening for Dispense Tower Compressor Step Lock Leveling Foot Can be replaced with Fan Pipe For Cooling of Dispense Tower Parts Identification Front Vent Back View Tip: Gather the model and serial number from the product label and write them down before installing the kegerator.
Front View LED Light Bar Internal Fan with casters Product Label Power Plug 2 Cabinet EdgeStar Built-in Kegerator Control Panel Opening for Dispense Tower Compressor Step Lock Leveling Foot Can be replaced with Fan Pipe For Cooling of Dispense Tower Parts Identification Front Vent Back View Tip: Gather the model and serial number from the product label and write them down before installing the kegerator.

Owner's Manual
Page 6
... NOTE: The type of kegerator you purchase will determine the type of standard accessories. Casters Includes 16 screws for installation 4 - Standard Accessories: Accessories Your kegerator will receive for the dispense kit. Drip Tray 1 - Dispense Tower Screws For attaching dispense tower to cabinet 4 - The most common options include single, dual, and triple taps. 1 - The other accessories...
... NOTE: The type of kegerator you purchase will determine the type of standard accessories. Casters Includes 16 screws for installation 4 - Standard Accessories: Accessories Your kegerator will receive for the dispense kit. Drip Tray 1 - Dispense Tower Screws For attaching dispense tower to cabinet 4 - The most common options include single, dual, and triple taps. 1 - The other accessories...

Owner's Manual
Page 7
... these instructions can result in back or other injury. The fuse (or circuit breaker) size should be installed in accordance with the National Electrical Code and local codes and ordinances. EdgeStar Built-in Kegerator Installing the Kegerator The kegerator should be 3 Amps. Do not use an extension cord. Failure to have the proper electrical connection: A standard electrical supply (115 V, 60Hz), properly grounded in accordance with a power supply cord...
... these instructions can result in back or other injury. The fuse (or circuit breaker) size should be installed in accordance with the National Electrical Code and local codes and ordinances. EdgeStar Built-in Kegerator Installing the Kegerator The kegerator should be 3 Amps. Do not use an extension cord. Failure to have the proper electrical connection: A standard electrical supply (115 V, 60Hz), properly grounded in accordance with a power supply cord...

Owner's Manual
Page 8
...directly on the bottom of the unit. 2. Installing the Door Handle To install the door handle: 1. Place and align the openings of the handle hinges over the area of the caster over the screw holes. 3. To install the casters: 1. Insert the screws to attach the caster to side. 2. We recommend using a carpenter's level to raise that side of the refrigerator.... IMPORTANT: Once you are ready to install it . CAUTION: Do not over-tighten the screws as follows: Turn the leveling feet to the right to lower ...
...directly on the bottom of the unit. 2. Installing the Door Handle To install the door handle: 1. Place and align the openings of the handle hinges over the area of the caster over the screw holes. 3. To install the casters: 1. Insert the screws to attach the caster to side. 2. We recommend using a carpenter's level to raise that side of the refrigerator.... IMPORTANT: Once you are ready to install it . CAUTION: Do not over-tighten the screws as follows: Turn the leveling feet to the right to lower ...

Owner's Manual
Page 9
... door on top of the door 6. Install the upper left hinge corner. Remove the plastic caps from the upper left hinge by installing the lower screws. Remove the bottom right support bracket. Insert the plastic caps to the bottom right corner. Install the bottom left swing: 1. Open the door and using a Phillips screwdriver, remove the bottom screws from the plastic bag that was included with the instruction manual...
... door on top of the door 6. Install the upper left hinge corner. Remove the plastic caps from the upper left hinge by installing the lower screws. Remove the bottom right support bracket. Insert the plastic caps to the bottom right corner. Install the bottom left swing: 1. Open the door and using a Phillips screwdriver, remove the bottom screws from the plastic bag that was included with the instruction manual...

Owner's Manual
Page 10
...to avoid spills or broken glass. There are two pieces included for this manual. Please follow the safety information referenced on top of the cabinet in place. 1. Drip Tray The drip tray is a reservoir to collect any place you to install the kegerator in this... four installation pegs to hold glasses on the guard rail to ensure the rail has clicked into the guard rail. Place the guard rail onto the four installation pegs. Free-Standing Installation A free-standing installation will allow you desire. Important Note: • Please refer to the dispense kit installation guide to ...
...to avoid spills or broken glass. There are two pieces included for this manual. Please follow the safety information referenced on top of the cabinet in place. 1. Drip Tray The drip tray is a reservoir to collect any place you to install the kegerator in this... four installation pegs to hold glasses on the guard rail to ensure the rail has clicked into the guard rail. Place the guard rail onto the four installation pegs. Free-Standing Installation A free-standing installation will allow you desire. Important Note: • Please refer to the dispense kit installation guide to ...

Owner's Manual
Page 11
...order to work or cool as the opening will be able to support the entire weight of a fully loaded unit. Once the location of the kegerator installation is determined the first step is not sealed the cabinet will lose its cold air and will...Operation outside these temperatures may result in the counter. • The kegerator should not be placed under the counter. EdgeStar Built-in Kegerator A built-in installation allows the kegerator to be located next to create an opening in lowered efficiency or cause other high heat sources. • Do not kink or pinch the power supply cord...
...order to work or cool as the opening will be able to support the entire weight of a fully loaded unit. Once the location of the kegerator installation is determined the first step is not sealed the cabinet will lose its cold air and will...Operation outside these temperatures may result in the counter. • The kegerator should not be placed under the counter. EdgeStar Built-in Kegerator A built-in installation allows the kegerator to be located next to create an opening in lowered efficiency or cause other high heat sources. • Do not kink or pinch the power supply cord...

Owner's Manual
Page 13
... to turn the inner light on or off the unit, please wait at the same time for the kegerator? 3. Press and hold the and buttons at least 5 minutes before Operation 1. EdgeStar Built-in Fahrenheit or Celsius. And has proper grounding been installed for approximately 5 seconds until the temperature scale changes. Using the Temperature Control Panel Power Button Run Light Temperature Display Temp. Light Button Temp. The temperature displayed can reach the actual set temperature and current temperature displays being displayed. This...
... to turn the inner light on or off the unit, please wait at the same time for the kegerator? 3. Press and hold the and buttons at least 5 minutes before Operation 1. EdgeStar Built-in Fahrenheit or Celsius. And has proper grounding been installed for approximately 5 seconds until the temperature scale changes. Using the Temperature Control Panel Power Button Run Light Temperature Display Temp. Light Button Temp. The temperature displayed can reach the actual set temperature and current temperature displays being displayed. This...

Owner's Manual
Page 14
... the floor or walls can also make noises. The high efficiency compressor may make sounds that under most refrigerating settings, the unit will be used for air circulation and to the water bin may make the sounds seem louder than they actually are wet. • Never unplug the unit by removing the power plug from the wall socket. 2. Items...
... the floor or walls can also make noises. The high efficiency compressor may make sounds that under most refrigerating settings, the unit will be used for air circulation and to the water bin may make the sounds seem louder than they actually are wet. • Never unplug the unit by removing the power plug from the wall socket. 2. Items...

Owner's Manual
Page 15
.... EdgeStar Built-in Kegerator 12 Disconnect power to the unit. If the problem persists, check the Troubleshooting Guide below and on and off frequently. The door is stainless steel, it can easily be malfunctioning, read through the OPERATION section of baking soda to chlorine gas and moisture. Never use solvent based or abrasive cleaners. Run the unit at the appropriate ambient temperature. The door gasket...
.... EdgeStar Built-in Kegerator 12 Disconnect power to the unit. If the problem persists, check the Troubleshooting Guide below and on and off frequently. The door is stainless steel, it can easily be malfunctioning, read through the OPERATION section of baking soda to chlorine gas and moisture. Never use solvent based or abrasive cleaners. Run the unit at the appropriate ambient temperature. The door gasket...

Owner's Manual
Page 16
... temperature is humid. Your unit is not installed correctly. The door gasket is not level. A house fuse has blown or Replace the broken fuse in to a power outlet that has sufficient amperage. The door is not in the kegerator. Close the door tightly and do not open the door, or unplugging the unit to allow the frost to test your fuse box or reset the the circuit...
... temperature is humid. Your unit is not installed correctly. The door gasket is not level. A house fuse has blown or Replace the broken fuse in to a power outlet that has sufficient amperage. The door is not in the kegerator. Close the door tightly and do not open the door, or unplugging the unit to allow the frost to test your fuse box or reset the the circuit...

Owner's Manual
Page 17
Specifications Description of product Built-in Kegerator 14 Temperature Range 32 - 60ºF Dimensions (Height x Width x Depth ) Weight 34 3/8" x 23 13/16" x 25 3/8" 90 pounds Note: Technical data and performance information is provided for the KC7000SSOD Kegerator AC 115V~60Hz Amperage 1.03A Input Power 120W Color Storage Capacity Options Refrigerant Stainless Steel Cabinet; Check the rating label on the kegerator...
Specifications Description of product Built-in Kegerator 14 Temperature Range 32 - 60ºF Dimensions (Height x Width x Depth ) Weight 34 3/8" x 23 13/16" x 25 3/8" 90 pounds Note: Technical data and performance information is provided for the KC7000SSOD Kegerator AC 115V~60Hz Amperage 1.03A Input Power 120W Color Storage Capacity Options Refrigerant Stainless Steel Cabinet; Check the rating label on the kegerator...

Owner's Manual
Page 18
... in the owner's manual, accidents, acts of God, vermin, fire, flood, improper installation, unauthorized service, maintenance negligence, unauthorized installation or modification, or commercial use. -Labor, service transportation, and shipping charges for troubleshooting assistance and warranty service at an authorized EdgeStar repair facility and EdgeStar will be repaired or replaced on parts or replacement of parts designed to be returned in proper usage of the product. -Damages or operating problems resulting from...
... in the owner's manual, accidents, acts of God, vermin, fire, flood, improper installation, unauthorized service, maintenance negligence, unauthorized installation or modification, or commercial use. -Labor, service transportation, and shipping charges for troubleshooting assistance and warranty service at an authorized EdgeStar repair facility and EdgeStar will be repaired or replaced on parts or replacement of parts designed to be returned in proper usage of the product. -Damages or operating problems resulting from...

Owner's Manual
Page 19
Copyright © 2013 Living Direct, Inc. All rights reserved. Capital of TX Hwy, Bldg 5 Austin, TX 78746 Toll Free: 1-866-319-5473 Web: http://www.edgestar.com E-mail: service@edgestar.com Register your product, download owner's manuals, access additional troubleshooting resources, and obtain more information on other great EdgeStar products on the web at: http://www.edgestar.com Product contents and specifications may change without notice. EdgeStar Products 500 N.
Copyright © 2013 Living Direct, Inc. All rights reserved. Capital of TX Hwy, Bldg 5 Austin, TX 78746 Toll Free: 1-866-319-5473 Web: http://www.edgestar.com E-mail: service@edgestar.com Register your product, download owner's manuals, access additional troubleshooting resources, and obtain more information on other great EdgeStar products on the web at: http://www.edgestar.com Product contents and specifications may change without notice. EdgeStar Products 500 N.


