
Owners Manual
Page 4
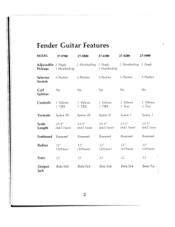
Fender Guitar Features MODEL 27-5700 27-5800 27-4100 27-4200 27-5400 Adjustable 2 Single, 2 Ho mbucking 2 Single, 2 I-lumina-king 3 Single Pickups 1 Hu m bucking 7 H um bucking Selector Switch 5-Position Coil Yes Splitter Controls I Volume, 1 TBX Tremolo System III 3 -Position Yes 1 Volume, 1 TBX System Ill 5-Position Yes 1 Volume, 1 TBX System II 3 -Position No 1 Volume, 1 Tone System I 5-Position No 1 Volume, 2 Tone System I Scale Length 25.5" (647...
Fender Guitar Features MODEL 27-5700 27-5800 27-4100 27-4200 27-5400 Adjustable 2 Single, 2 Ho mbucking 2 Single, 2 I-lumina-king 3 Single Pickups 1 Hu m bucking 7 H um bucking Selector Switch 5-Position Coil Yes Splitter Controls I Volume, 1 TBX Tremolo System III 3 -Position Yes 1 Volume, 1 TBX System Ill 5-Position Yes 1 Volume, 1 TBX System II 3 -Position No 1 Volume, 1 Tone System I 5-Position No 1 Volume, 2 Tone System I Scale Length 25.5" (647...
Owners Manual
Page 6
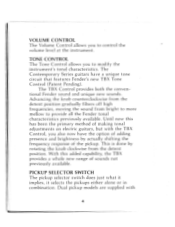
... making tonal adjustments on electric guitars, but with With this has been the primary method of the pickup. The Contemporary Series guitars have the option of sounds not previously available. PICKUP SELECTOR SWITCH The pickup selector switch does just what it implies, it selects the pickups either alone or in combination. The TBX Control provides both the conventional Fender sound and unique new sounds. VOLUME CONTROL...
... making tonal adjustments on electric guitars, but with With this has been the primary method of the pickup. The Contemporary Series guitars have the option of sounds not previously available. PICKUP SELECTOR SWITCH The pickup selector switch does just what it implies, it selects the pickups either alone or in combination. The TBX Control provides both the conventional Fender sound and unique new sounds. VOLUME CONTROL...
Owners Manual
Page 7
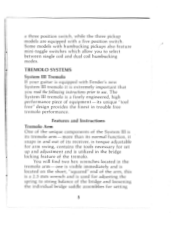
... to string balance of the bridge and loosening the individual bridge saddle assemblies for set up and adjustment and is extremely important that you to use. TREMOLO SYSTEMS System III Tremolo If your guitar is equipped with Fender's new System III tremolo it snaps in and out of its unique "tool free" design provides the finest in trouble free tremolo performance...
... to string balance of the bridge and loosening the individual bridge saddle assemblies for set up and adjustment and is extremely important that you to use. TREMOLO SYSTEMS System III Tremolo If your guitar is equipped with Fender's new System III tremolo it snaps in and out of its unique "tool free" design provides the finest in trouble free tremolo performance...
Owners Manual
Page 8
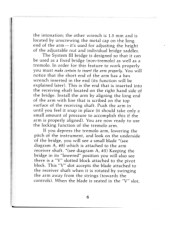
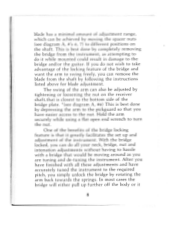
...the pitch of the instrument, and look on the long end of the arm has a hex wrench inserted in the "V" slot, 6 the other wrench is 1.5 mm and is seated in the end (its "lowered" position you must make certain to the pivot block. In order for adjusting the ... by swinging the arm away from the strings (towards the controls). This "V" slot accepts the blade attached to use the locking function of pressure to accomplish this feature to work properly you will also see diagram A, #5) Keeping the bridge in until you will notice that it 's used as a fixed bridge (non-tremolo) ...
...the pitch of the instrument, and look on the long end of the arm has a hex wrench inserted in the "V" slot, 6 the other wrench is 1.5 mm and is seated in the end (its "lowered" position you must make certain to the pivot block. In order for adjusting the ... by swinging the arm away from the strings (towards the controls). This "V" slot accepts the blade attached to use the locking function of pressure to accomplish this feature to work properly you will also see diagram A, #5) Keeping the bridge in until you will notice that it 's used as a fixed bridge (non-tremolo) ...

Owners Manual
Page 9
... Adjust 13. Spring, Fine Tune Adjusting 17. SIDE V TOP SECTION 1. Bracket, Spring Retainer 5. Insert, Threaded Arm Retaining 6. Ring "E" 15. The position of the blade on the shaft determines where the bridge will be locked in position and functions as a fixed bridge. Nut, Split .265L 7. Nut, Square 14. It is preset at the factory so that when the instrument...
... Adjust 13. Spring, Fine Tune Adjusting 17. SIDE V TOP SECTION 1. Bracket, Spring Retainer 5. Insert, Threaded Arm Retaining 6. Ring "E" 15. The position of the blade on the shaft determines where the bridge will be locked in position and functions as a fixed bridge. Nut, Split .265L 7. Nut, Square 14. It is preset at the factory so that when the instrument...
Owners Manual
Page 10
... the benefits of the bridge locking feature is that would be moving the spacer nuts (see diagram A, #6) This is best done by completely removing the bridge from the shaft by following the instructions listed above for blade adjustment. that you are tuning and de-tuning the instrument. blade has a minimal amount of adjustment range, which can be achieved by...
... the benefits of the bridge locking feature is that would be moving the spacer nuts (see diagram A, #6) This is best done by completely removing the bridge from the shaft by following the instructions listed above for blade adjustment. that you are tuning and de-tuning the instrument. blade has a minimal amount of adjustment range, which can be achieved by...
Owners Manual
Page 11
...re real lucky, it will find the hex nut adjuster located slightly under the strap button on the bottom edge of the player's way. There will be locked and still in tune. By checking the tuning of the string receiver. *(see diagram A, #'s 2, 3) If you push the arm ...bolt *(see diagram A, #10) are trapped -they are hollow cap nuts that are threaded internally. This is not a problem, as the bridge can be repositioned quite easily to deliver micro-fine tuning while maintaining a low profile, out of the guitar). Fine Tuning The System III bridge features a special fine tuning system -...
...re real lucky, it will find the hex nut adjuster located slightly under the strap button on the bottom edge of the player's way. There will be locked and still in tune. By checking the tuning of the string receiver. *(see diagram A, #'s 2, 3) If you push the arm ...bolt *(see diagram A, #10) are trapped -they are hollow cap nuts that are threaded internally. This is not a problem, as the bridge can be repositioned quite easily to deliver micro-fine tuning while maintaining a low profile, out of the guitar). Fine Tuning The System III bridge features a special fine tuning system -...
Owners Manual
Page 12
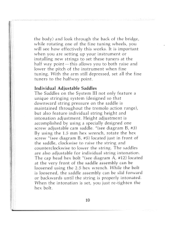
... adjustable cam saddle. *(see diagram B, #3) By using the 1.5 mm hex wrench, rotate the hex screw *(see diagram B, #5) located just in front of the saddle, clockwise to raise the string and counterclockwise to lower the string. The saddles are setting up your instrument or installing new strings to set all the fine tuners to both raise and lower the pitch of the instrument when fine tuning...
... adjustable cam saddle. *(see diagram B, #3) By using the 1.5 mm hex wrench, rotate the hex screw *(see diagram B, #5) located just in front of the saddle, clockwise to raise the string and counterclockwise to lower the string. The saddles are setting up your instrument or installing new strings to set all the fine tuners to both raise and lower the pitch of the instrument when fine tuning...
Owners Manual
Page 16
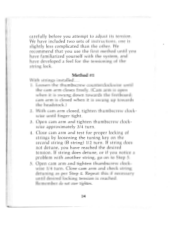
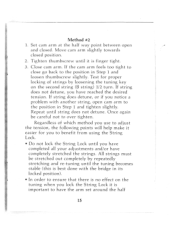
... reached. Open cam arm and tighten thumbscrew clockwise approximately 314 turn . If string does detune, or if you attempt to Step 5. 5. carefully before you notice a problem with the system, and have developed a feel for proper locking of strings by loosening the tuning key on to adjust its tension.... Close cam arm and test for the tensioning of instructions, one is swung up towards the fretboard; We recommend that you use the first...
... reached. Open cam arm and tighten thumbscrew clockwise approximately 314 turn . If string does detune, or if you attempt to Step 5. 5. carefully before you notice a problem with the system, and have developed a feel for proper locking of strings by loosening the tuning key on to adjust its tension.... Close cam arm and test for the tensioning of instructions, one is swung up towards the fretboard; We recommend that you use the first...
Owners Manual
Page 17
... the strings. Once again be stretched out completely by loosening the tuning key on the tuning when you have completed all your adjustments and/or have reached the desired tension. All strings must be careful not to have the arm set around the...use to adjust the tension, the following points will help make it is finger tight. 3. Test for you notice a problem with the bridge in its locked position). • In order to ensure that there is no effect on the second string (B string) 112 turn. Repeat until the tuning becomes stable (this is best done with another string, open...
... the strings. Once again be stretched out completely by loosening the tuning key on the tuning when you have completed all your adjustments and/or have reached the desired tension. All strings must be careful not to have the arm set around the...use to adjust the tension, the following points will help make it is finger tight. 3. Test for you notice a problem with the bridge in its locked position). • In order to ensure that there is no effect on the second string (B string) 112 turn. Repeat until the tuning becomes stable (this is best done with another string, open...
Owners Manual
Page 20
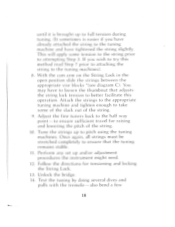
... 7 prior to attaching the string to the tuning machines). 8. With the cam arm on the String Lock in the open position slide the strings between the appropriate vise blocks *(see diagram C). Tune the strings up andlor adjustment procedures the instrument might need. 12. Test the tuning by doing several dives and ...have tightened the string slightly. until it is brought up to full tension during tuning. (It sometimes is easier if you wish to try this operation. This will apply some of the slack out of the string. 10. Perform any set up to pitch using the tuning machines. Follow the...
... 7 prior to attaching the string to the tuning machines). 8. With the cam arm on the String Lock in the open position slide the strings between the appropriate vise blocks *(see diagram C). Tune the strings up andlor adjustment procedures the instrument might need. 12. Test the tuning by doing several dives and ...have tightened the string slightly. until it is brought up to full tension during tuning. (It sometimes is easier if you wish to try this operation. This will apply some of the slack out of the string. 10. Perform any set up to pitch using the tuning machines. Follow the...
Owners Manual
Page 21
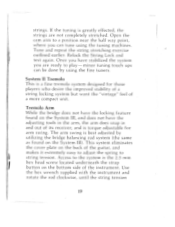
...the "vintage" feel of the guitar, and makes it extremely easy to adjust the spring to a position near the half way point, where you are not completely stretched. Access to play minor tuning touch ups can tune using the fine tuners. Tune and repeat the string stretching exercise outlined earlier. The arm... unit. strings. System II Tremolo This is best adjusted by using the tuning machines. This system eliminates the cover plate on the System III, and does not have the locking feature found on the bottom side of its receiver, and is greatly effected, the strings are ready...
...the "vintage" feel of the guitar, and makes it extremely easy to adjust the spring to a position near the half way point, where you are not completely stretched. Access to play minor tuning touch ups can tune using the fine tuners. Tune and repeat the string stretching exercise outlined earlier. The arm... unit. strings. System II Tremolo This is best adjusted by using the tuning machines. This system eliminates the cover plate on the System III, and does not have the locking feature found on the bottom side of its receiver, and is greatly effected, the strings are ready...
Owners Manual
Page 23
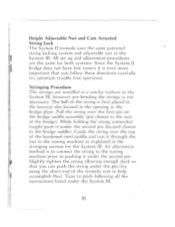
... installed in the bridge plate. Height Adjustable Nut and Cam Actuated String Lock The System II tremolo uses the same patented string locking system and adjustable nut as explained in the stringing section for optimum trouble free operation. Slightly tighten the string allowing enough slack so that you can push the string under the System III. 21 Tune to pitch following all the instructions listed...
... installed in the bridge plate. Height Adjustable Nut and Cam Actuated String Lock The System II tremolo uses the same patented string locking system and adjustable nut as explained in the stringing section for optimum trouble free operation. Slightly tighten the string allowing enough slack so that you can push the string under the System III. 21 Tune to pitch following all the instructions listed...
Owners Manual
Page 24
... sections, each string into its own roller slot and into the holes in the fine tuning tongues before emerging from the top of the nut lock. System I Nut Lock The System I features a fine tuning floating bridge with two knife edge pivots, height adjustable pivot posts, roller saddles, and snap-in pitch. It also comes supplied with the...
... sections, each string into its own roller slot and into the holes in the fine tuning tongues before emerging from the top of the nut lock. System I Nut Lock The System I features a fine tuning floating bridge with two knife edge pivots, height adjustable pivot posts, roller saddles, and snap-in pitch. It also comes supplied with the...
Owners Manual
Page 25
... stretched the strings. If the tuning is greatly affected, the strings are ready to play. Remember. . . For best results, set the vise locks so that the strings are almost locked, leaving only enough space to adjust your Fender 23 Tune the guitar to pitch, being sure to completely stretch all your adjustments and/or have need to tune using the fine tuners on the tuning machines...
... stretched the strings. If the tuning is greatly affected, the strings are ready to play. Remember. . . For best results, set the vise locks so that the strings are almost locked, leaving only enough space to adjust your Fender 23 Tune the guitar to pitch, being sure to completely stretch all your adjustments and/or have need to tune using the fine tuners on the tuning machines...
Owners Manual
Page 26
... factory. Tuning Tune the instrument to playing pitch. If it by regulating the neck's resistance to string tension. The truss rod and string height are set at the factory. Adjust Neck Curvature (Truss Rod) Each Fender guitar is adjustable so the correct curvature can be achieved by the strings. The tension on it becomes necessary, the following : 1 2.5mm Allen Wrench (supplied) 1-1/8" Allen Wrench (supplied) 1 1.5mm Allen Wrench (supplied...
... factory. Tuning Tune the instrument to playing pitch. If it by regulating the neck's resistance to string tension. The truss rod and string height are set at the factory. Adjust Neck Curvature (Truss Rod) Each Fender guitar is adjustable so the correct curvature can be achieved by the strings. The tension on it becomes necessary, the following : 1 2.5mm Allen Wrench (supplied) 1-1/8" Allen Wrench (supplied) 1 1.5mm Allen Wrench (supplied...
Owners Manual
Page 27
... the instrument to 25 Periodically re-check tuning for inspection. 3. Set Bridge Height The recommended string clearance at least a quarter turn.), DO NOT continue adjusting. The recommended string clearance shoi,ild be left loose, but should not be approximately .010". If the neck is : Strings 1-4: 5/64" (2mm) +1- 1/64" (.4mm) Strings 5-6: 3/32" (2.4mm) +1- 1164" (.4mm) The above dimensions are the factory recommended settings...
... the instrument to 25 Periodically re-check tuning for inspection. 3. Set Bridge Height The recommended string clearance at least a quarter turn.), DO NOT continue adjusting. The recommended string clearance shoi,ild be left loose, but should not be approximately .010". If the neck is : Strings 1-4: 5/64" (2mm) +1- 1/64" (.4mm) Strings 5-6: 3/32" (2.4mm) +1- 1164" (.4mm) The above dimensions are the factory recommended settings...
Owners Manual
Page 29
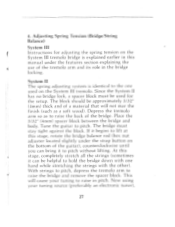
... slightly under the features section explaining the use of the guitar), counterclockwise until you can be helpful to lift at this manual under the strap button on the bottom of the tremolo arm and its role in pitch. Depress the tremolo arm so as a soft wood). Adjusting Spring Tension (Bridge/String Balance) System III Instructions for the setup. Place the...
... slightly under the features section explaining the use of the guitar), counterclockwise until you can be helpful to lift at this manual under the strap button on the bottom of the tremolo arm and its role in pitch. Depress the tremolo arm so as a soft wood). Adjusting Spring Tension (Bridge/String Balance) System III Instructions for the setup. Place the...
Owners Manual
Page 30
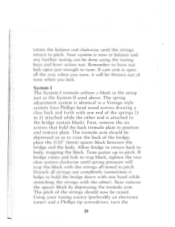
Remember to have nut lock open all the way when you lock. Using your tuning source (preferably an electronic tuner) and a Phillips tip screwdriver, turn the 28 System I The System I tremolo utilizes a block in the setup just as to raise the back of the bridge, place the 5/32" (4mm) spacer...clockwise until the strings return to pitch. The spring adjustment system is identical to a Vintage style system (two Phillips head wood screws drawing a claw back and forth with one hand while stretching the strings with the other end is attached to the bridge sustain block). If ...
Remember to have nut lock open all the way when you lock. Using your tuning source (preferably an electronic tuner) and a Phillips tip screwdriver, turn the 28 System I The System I tremolo utilizes a block in the setup just as to raise the back of the bridge, place the 5/32" (4mm) spacer...clockwise until the strings return to pitch. The spring adjustment system is identical to a Vintage style system (two Phillips head wood screws drawing a claw back and forth with one hand while stretching the strings with the other end is attached to the bridge sustain block). If ...

Owners Manual
Page 32
... With the instrument plugged into your amplifier and the pickup selector switch set to the plane of playing. If you may rattle when another player plays the instrument. Check the intonation of each fret position, holding the pick parallel to the neck pickup position and the tone and volume controls at the 12th fret. Play each string with an electronic tuner by playing the open string harmonic at...
... With the instrument plugged into your amplifier and the pickup selector switch set to the plane of playing. If you may rattle when another player plays the instrument. Check the intonation of each fret position, holding the pick parallel to the neck pickup position and the tone and volume controls at the 12th fret. Play each string with an electronic tuner by playing the open string harmonic at...


