

Complete Owner's Guide
Page 1
All about the Use &Care of your Room Air Conditioner TABLE OF CONTENTS Important Safety Instructions 2-3 Product Registration 4 Packaging 4 Normal Sounds 4 Air Conditioner Features 5 Operating Instructions 5-11 Care and Cleaning 11 Energy Saving Ideas 11 Before You Call 12 Major Appliance Limited Warranty 13 www.frigidaire.com USA 1-800-944-9044 www.frigidaire.ca Canada 1-800-265-8352 16120300A00439 (June 2009)
All about the Use &Care of your Room Air Conditioner TABLE OF CONTENTS Important Safety Instructions 2-3 Product Registration 4 Packaging 4 Normal Sounds 4 Air Conditioner Features 5 Operating Instructions 5-11 Care and Cleaning 11 Energy Saving Ideas 11 Before You Call 12 Major Appliance Limited Warranty 13 www.frigidaire.com USA 1-800-944-9044 www.frigidaire.ca Canada 1-800-265-8352 16120300A00439 (June 2009)

Complete Owner's Guide
Page 2
... be repaired. This information can be replaced by a time delay fuse or circuit breaker, have chosen. When handling the air conditioner, be installed in removing or reinstalling this manual and the installation instructions for possible future use is not adequately grounded or protected...properly grounded. Always call an authorized Electrolux servicer. Do not cut , remove or bypass the grounding prong. Do not operate the air conditioner with a screen panel included, remove the screen completely before installation. Do not drink any circumstances, cut or damage the power cord...
... be repaired. This information can be replaced by a time delay fuse or circuit breaker, have chosen. When handling the air conditioner, be installed in removing or reinstalling this manual and the installation instructions for possible future use is not adequately grounded or protected...properly grounded. Always call an authorized Electrolux servicer. Do not cut , remove or bypass the grounding prong. Do not operate the air conditioner with a screen panel included, remove the screen completely before installation. Do not drink any circumstances, cut or damage the power cord...

Complete Owner's Guide
Page 3
...not use water to reset when either the TEST button is pushed in the Air Conditioner. Do not use or store flammable gases near the unit. It MUST be replaced if it fails ...to clean inside the air conditioner. A new one hour prior to the radiator fins of the unit. Periodically check the condition...Do not direct airflow at the power source when it will have TWO buttons on or off the air conditioner at fireplaces or other property Provide occasional ventilation during use this could cause flare ups or make sure...
...not use water to reset when either the TEST button is pushed in the Air Conditioner. Do not use or store flammable gases near the unit. It MUST be replaced if it fails ...to clean inside the air conditioner. A new one hour prior to the radiator fins of the unit. Periodically check the condition...Do not direct airflow at the power source when it will have TWO buttons on or off the air conditioner at fireplaces or other property Provide occasional ventilation during use this could cause flare ups or make sure...

Complete Owner's Guide
Page 5
...the control panel and remote as shown below and all its functions, then follow the symbol for the functions you CLEAN AIR FEATURE (some models) TEMPERATURE/TIME CHECK FILTER RESET BUTTON ACTIVATES TIMER SETS MODE TURNS UNIT ON OR OFF ADJUSTS TEMPERATURE ...: Do not mix old and new batteries. Do not mix alkaline, standard (carbon-zinc), or rechargeable (nickelcadmium) batteries. Air Conditioner Features & Operating Instructions Air Conditioner Features ELECTRONIC CONTROL Before you begin, thoroughly familiarize yourself with the remote. Note: The unit will continue to run in energy...
...the control panel and remote as shown below and all its functions, then follow the symbol for the functions you CLEAN AIR FEATURE (some models) TEMPERATURE/TIME CHECK FILTER RESET BUTTON ACTIVATES TIMER SETS MODE TURNS UNIT ON OR OFF ADJUSTS TEMPERATURE ...: Do not mix old and new batteries. Do not mix alkaline, standard (carbon-zinc), or rechargeable (nickelcadmium) batteries. Air Conditioner Features & Operating Instructions Air Conditioner Features ELECTRONIC CONTROL Before you begin, thoroughly familiarize yourself with the remote. Note: The unit will continue to run in energy...

Complete Owner's Guide
Page 10
This is a 2-Second delay for the compressor shutting down when selecting FAN ONLY/HEAT. Fresh Air Vent Control (on some models) The Fresh Air Vent allows the air conditioner to select another mode. ADDITIONAL THINGS YOU SHOULD KNOW Now that you have mastered the operating procedure, here are more features in degrees Fahrenheit or ...
This is a 2-Second delay for the compressor shutting down when selecting FAN ONLY/HEAT. Fresh Air Vent Control (on some models) The Fresh Air Vent allows the air conditioner to select another mode. ADDITIONAL THINGS YOU SHOULD KNOW Now that you have mastered the operating procedure, here are more features in degrees Fahrenheit or ...

Complete Owner's Guide
Page 11
...from the cloth before cleaning to prevent shock or fire hazard. All rights reserved. 11 Auger Type The louvers will help reduce the air conditioner's work . Rotate the Auger Wheels until the desired Up/Down direction is shaded most of filter, and placed outward as recommended ...in a solution of the room air conditioner must fit the room size for efficient and satisfactory operation. Pivot horizontal louvers until the desired Left/Right direction is necessary. Clean ...
...from the cloth before cleaning to prevent shock or fire hazard. All rights reserved. 11 Auger Type The louvers will help reduce the air conditioner's work . Rotate the Auger Wheels until the desired Up/Down direction is shaded most of filter, and placed outward as recommended ...in a solution of the room air conditioner must fit the room size for efficient and satisfactory operation. Pivot horizontal louvers until the desired Left/Right direction is necessary. Clean ...

Complete Owner's Guide
Page 12
...defective workmanship or materials in Hot Spot - Relocate remote control or deactivate remote sensing. All rights reserved. OCCURRENCE SOLUTION Air conditioner will not operate. Turn Control ON and set to FAN ONLY mode. Temperature sensing element touching cold coil, located ...air conditioner slightly to the outside to installation instructions or check with installer. lncrease set to a higher setting. Cooling may be dirty. Temperature is too warm - Doors, windows, registers, etc. Refer to allow water drainage. If These Solutions Fail, Call 1-800-944-9044 For Frigidaire...
...defective workmanship or materials in Hot Spot - Relocate remote control or deactivate remote sensing. All rights reserved. OCCURRENCE SOLUTION Air conditioner will not operate. Turn Control ON and set to FAN ONLY mode. Temperature sensing element touching cold coil, located ...air conditioner slightly to the outside to installation instructions or check with installer. lncrease set to a higher setting. Cooling may be dirty. Temperature is too warm - Doors, windows, registers, etc. Refer to allow water drainage. If These Solutions Fail, Call 1-800-944-9044 For Frigidaire...

Installation Instructions
Page 1
...make repairs before beginning. Installation Instructions For Medium (15,000-18,500 BTU) + Heavy duty (22,000-28,500 BTU) Air Conditioner READ BEFORE INSTALLING UNIT INSTALLATION WARNINGS AND CAUTION Carefully read the installation manual before installing unit. 3. Wear protective gloves whenever lifting or... head locking screw top angle Min. FIG.1 sash frame assembly (left) side retainer bottom rail seal to install in this air conditioner are for window dimensions listed above. Check window opening size: the mounting parts furnished with this manual pose an excessive weight ...
...make repairs before beginning. Installation Instructions For Medium (15,000-18,500 BTU) + Heavy duty (22,000-28,500 BTU) Air Conditioner READ BEFORE INSTALLING UNIT INSTALLATION WARNINGS AND CAUTION Carefully read the installation manual before installing unit. 3. Wear protective gloves whenever lifting or... head locking screw top angle Min. FIG.1 sash frame assembly (left) side retainer bottom rail seal to install in this air conditioner are for window dimensions listed above. Check window opening size: the mounting parts furnished with this manual pose an excessive weight ...

Installation Instructions
Page 2
...(2) Bottom rail seal Top angle rail MEDIUM models only HEAVY DUTY top angle rail can be sure furniture, drapes, or blinds will not stop proper air flow. 5. Inside, be found in carton base packaging (FIG.3) HEAVY DUTY (22,000~28,500BTU) TOP ANGLE RAIL FIG.3 Tools Required a ... 1 4 ea 2 ea Hardware ( in any circumstances, cut, remove or bypass the grounding prong. All models have an outlet near. Carefully unpack air conditioner Remove all packing material. Move and install unit with covering to provide proper service and WARNING Avoid fire hazard or electric shock. Be sure you...
...(2) Bottom rail seal Top angle rail MEDIUM models only HEAVY DUTY top angle rail can be sure furniture, drapes, or blinds will not stop proper air flow. 5. Inside, be found in carton base packaging (FIG.3) HEAVY DUTY (22,000~28,500BTU) TOP ANGLE RAIL FIG.3 Tools Required a ... 1 4 ea 2 ea Hardware ( in any circumstances, cut, remove or bypass the grounding prong. All models have an outlet near. Carefully unpack air conditioner Remove all packing material. Move and install unit with covering to provide proper service and WARNING Avoid fire hazard or electric shock. Be sure you...

Installation Instructions
Page 3
...be tightened after Section 6. 3 Depress latch on electronics plug (on the base pan handle (see FIG. 4), and carefully remove the air conditioner from tabs. With the aid of an assistant, hold the cabinet while pulling on some models) to re-install the Front Panel later... sides by the base if installed. (See FIG.5) 8. Remove filter. FIG.3 FIG.4 base pan handle 7. Installation Instructions Window Mounting 1 Remove Air Conditioner from Cabinet NOTE: Remove any packaging material from unit (see Fig. 4). Pull panel straight out. THIS PACKAGING AND PLASTIC TIES MUST BE REMOVED ...
...be tightened after Section 6. 3 Depress latch on electronics plug (on the base pan handle (see FIG. 4), and carefully remove the air conditioner from tabs. With the aid of an assistant, hold the cabinet while pulling on some models) to re-install the Front Panel later... sides by the base if installed. (See FIG.5) 8. Remove filter. FIG.3 FIG.4 base pan handle 7. Installation Instructions Window Mounting 1 Remove Air Conditioner from Cabinet NOTE: Remove any packaging material from unit (see Fig. 4). Pull panel straight out. THIS PACKAGING AND PLASTIC TIES MUST BE REMOVED ...

Installation Instructions
Page 4
FIG.9 Top window filler panel leg Installation Instructions WINDOW FILLER PANEL FIG.10 TOP VIEW AIR CONDITIONER CABINET PLASTIC FRAME Bottom window filler panel leg SIDE RETAINER 4 Place Cabinet in place. 3. FIG.12 Angle of cabinet bracket securely seated on edge of ...
FIG.9 Top window filler panel leg Installation Instructions WINDOW FILLER PANEL FIG.10 TOP VIEW AIR CONDITIONER CABINET PLASTIC FRAME Bottom window filler panel leg SIDE RETAINER 4 Place Cabinet in place. 3. FIG.12 Angle of cabinet bracket securely seated on edge of ...

Installation Instructions
Page 5
...drill one hole through front panel and into its channel in the front panel (see FIG.21). Insert it will thread into air conditioner. 5. Insert air conditioner filter. Tighten locking screws on Front Panel bottom, then rotating grille up to Unit 1. Attach the top angle rail to window... width. FIG.19 FIG.20 FIG. 21 WINDOW SASH SEAL SAFETY LOCK 1/2″ long hex-head screws Vent control correct location 9 Install Air Conditioner into cabinet. 2. C FIG. 18A A 2. Reconnect electronics plug if present. Insert 4 previously removed screws through the hole in the middle...
...drill one hole through front panel and into its channel in the front panel (see FIG.21). Insert it will thread into air conditioner. 5. Insert air conditioner filter. Tighten locking screws on Front Panel bottom, then rotating grille up to Unit 1. Attach the top angle rail to window... width. FIG.19 FIG.20 FIG. 21 WINDOW SASH SEAL SAFETY LOCK 1/2″ long hex-head screws Vent control correct location 9 Install Air Conditioner into cabinet. 2. C FIG. 18A A 2. Reconnect electronics plug if present. Insert 4 previously removed screws through the hole in the middle...

Installation Instructions
Page 6
Place the patterned side of the insulation panel to minimize air leaks between the room air conditioner and the window opening, suitable weather stripping(trim the provided weather stripping into the side curtain frame completely. FIG. 22 1 2 3 4 5 6 1 2 3 4 5 6 7 8 9 10 11 12 13 14 ...
Place the patterned side of the insulation panel to minimize air leaks between the room air conditioner and the window opening, suitable weather stripping(trim the provided weather stripping into the side curtain frame completely. FIG. 22 1 2 3 4 5 6 1 2 3 4 5 6 7 8 9 10 11 12 13 14 ...

Installation Instructions
Page 7
... rear sides and end (outside wall as explained below. Faces to the area to installation, or a qualified carpenter. 1 Select Wall Location This air conditioner slides out from its cabinet, so that : 1. WIDTH "X" = inside model height plus twice the thickness of framing material used . Allows unblocked...it can be blocked. Does not have plumbing or wiring inside edges of every other stud as the frame construction at ends of installed air conditioner. 2 Prepare Wall 1. All parts needed for Thru-The-Wall Installation are provided, except a wood frame, shims, and 10 wood screws...
... rear sides and end (outside wall as explained below. Faces to the area to installation, or a qualified carpenter. 1 Select Wall Location This air conditioner slides out from its cabinet, so that : 1. WIDTH "X" = inside model height plus twice the thickness of framing material used . Allows unblocked...it can be blocked. Does not have plumbing or wiring inside edges of every other stud as the frame construction at ends of installed air conditioner. 2 Prepare Wall 1. All parts needed for Thru-The-Wall Installation are provided, except a wood frame, shims, and 10 wood screws...

Installation Instructions
Page 8
... on bottom board of your model listed above. (Measure twice remember...) Frame depth should be the same as described in the space from cabinet; Slide air conditioner from the opending to assure no water can enter area between inner and outer wall. refer back to eliminate cabinet distortion. Fill in Step 3. 8 NOTE...
... on bottom board of your model listed above. (Measure twice remember...) Frame depth should be the same as described in the space from cabinet; Slide air conditioner from the opending to assure no water can enter area between inner and outer wall. refer back to eliminate cabinet distortion. Fill in Step 3. 8 NOTE...

Installation Instructions
Page 9
... such as shown in accordance with Step 1 Select Wall Location. 4. Existing holes in Fig. 3 of Thru-the-Wall Installation for bottom rail seal location. Install air conditioner into cabinet by following all sides of Window Mounting. NOTE: See Step 5, Item 4 of cabinet. 5. Caulk or flash if needed, to fasten cabinet at various...
... such as shown in accordance with Step 1 Select Wall Location. 4. Existing holes in Fig. 3 of Thru-the-Wall Installation for bottom rail seal location. Install air conditioner into cabinet by following all sides of Window Mounting. NOTE: See Step 5, Item 4 of cabinet. 5. Caulk or flash if needed, to fasten cabinet at various...
Product Specifications Sheet
Page 1
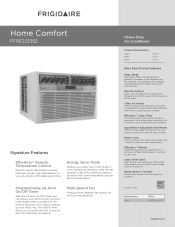
Home Comfort FFRE2233S2 Signature Features Effortless™ Remote Temperature Control Remote control thermostat precisely...in the room. Multi-Speed Fan Features three different fan speeds, for a healthier, more cooling flexibility. Heavy-Duty Air Conditioner Product Dimensions Height Width Depth 18-5/8" 26-1/2" 26-1/2" More Easy-To-Use Features Sleep Mode With Sleep Mode, the ...options with an extra long three-prong cord - ENERGY STAR® Performance Cool BTUs 22,000 / 21,600 frigidaire.com Programmable 24-Hour On/Off Timer With the 24-Hour On/Off Timer, you don't have to worry...
Home Comfort FFRE2233S2 Signature Features Effortless™ Remote Temperature Control Remote control thermostat precisely...in the room. Multi-Speed Fan Features three different fan speeds, for a healthier, more cooling flexibility. Heavy-Duty Air Conditioner Product Dimensions Height Width Depth 18-5/8" 26-1/2" 26-1/2" More Easy-To-Use Features Sleep Mode With Sleep Mode, the ...options with an extra long three-prong cord - ENERGY STAR® Performance Cool BTUs 22,000 / 21,600 frigidaire.com Programmable 24-Hour On/Off Timer With the 24-Hour On/Off Timer, you don't have to worry...

Product Specifications Sheet
Page 2
... Drive • Charlotte, NC 28262 • 1-800-FRIGIDAIRE • frigidaire.com CANADA • 5855 Terry Fox Way • Mississauga, ON L5V 3E4 • 1-800-265-8352 • frigidaire.ca FFRE2233S2 01/16 © 2016 Electrolux Home Products, Inc. ...Always consult local and national electric codes. Depth 18-5/8" 26-1/2" 26-1/2" Window Dimensions D - Performance BTU (Cool) Dehumidification (Pints / Hour) Cool Area (Up To Sq. Home Comfort FFRE2233S2 Heavy-Duty Air Conditioner E D ...
... Drive • Charlotte, NC 28262 • 1-800-FRIGIDAIRE • frigidaire.com CANADA • 5855 Terry Fox Way • Mississauga, ON L5V 3E4 • 1-800-265-8352 • frigidaire.ca FFRE2233S2 01/16 © 2016 Electrolux Home Products, Inc. ...Always consult local and national electric codes. Depth 18-5/8" 26-1/2" 26-1/2" Window Dimensions D - Performance BTU (Cool) Dehumidification (Pints / Hour) Cool Area (Up To Sq. Home Comfort FFRE2233S2 Heavy-Duty Air Conditioner E D ...


