
Quick Specs
Page 1
...for 9' and 10' ceilings 42" min. 52" max. 12 30 18 Hood Installation Height (24" to your Monogram,® GE Profile™ or GE® appliance questions, visit our website at GEAppliances.com or call GE Answer Center® service, 800.626.2000. JV966D - ceiling 96") Telescopes... for 9' and 10' ceilings Hood Installation Height (24" to 36") Installation Information...
...for 9' and 10' ceilings 42" min. 52" max. 12 30 18 Hood Installation Height (24" to your Monogram,® GE Profile™ or GE® appliance questions, visit our website at GEAppliances.com or call GE Answer Center® service, 800.626.2000. JV966D - ceiling 96") Telescopes... for 9' and 10' ceilings Hood Installation Height (24" to 36") Installation Information...

Quick Specs
Page 2
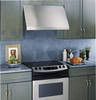
GJEVP9r3of5il/e9™6356"DDesigner Hood Features and Benefits • 36" Cooktop • 600 CFM Rating • 4-Speed Fan Control • Dual Halogen Lighting (Off/High/Night) • Dishwasher Safe Filter Cleaning • Hidden Controls Profile • 7 Sones Rating • 7" Round Duct Size (Vertical Only) • Model JV966DSS - JV966D - Stainless steel Specification Revised 7/09 220956
GJEVP9r3of5il/e9™6356"DDesigner Hood Features and Benefits • 36" Cooktop • 600 CFM Rating • 4-Speed Fan Control • Dual Halogen Lighting (Off/High/Night) • Dishwasher Safe Filter Cleaning • Hidden Controls Profile • 7 Sones Rating • 7" Round Duct Size (Vertical Only) • Model JV966DSS - JV966D - Stainless steel Specification Revised 7/09 220956

Use and Care Manual
Page 1
Vented Range Hoods GEAppliances.com Safety Instructions 2, 3 Operating Instructions Fan Control 4 Light Control 4 Care and Cleaning Grease Filters 5 Hood Lights 6 Stainless Steel Surfaces 5 Installation Instructions . . .7-18 Troubleshooting Tips 19 Consumer Support Consumer Support 24 Owner Registration 21, 22 Warranty 23 Owner's Manual and Installation Instructions JV936 JV966 Write the model and serial numbers here: Model Serial You can find them on a label on the inside of the hood. LI1P4H 49-80520-2 06-09 JR
Vented Range Hoods GEAppliances.com Safety Instructions 2, 3 Operating Instructions Fan Control 4 Light Control 4 Care and Cleaning Grease Filters 5 Hood Lights 6 Stainless Steel Surfaces 5 Installation Instructions . . .7-18 Troubleshooting Tips 19 Consumer Support Consumer Support 24 Owner Registration 21, 22 Warranty 23 Owner's Manual and Installation Instructions JV936 JV966 Write the model and serial numbers here: Model Serial You can find them on a label on the inside of the hood. LI1P4H 49-80520-2 06-09 JR

Use and Care Manual
Page 3
...USE ONLY METAL DUCTWORK. ■ Do not attempt to a qualified technician. READ AND FOLLOW THIS SAFETY INFORMATION CAREFULLY. READ AND SAVE THESE INSTRUCTIONS 3 Always turn hood ON when cooking on low or medium settings. C. B. C. Ducted fans must be referred to repair or replace any part of your... hood unless it is needed for the size of fuel burning equipment to accumulate on fan or filter. Safety Instructions Operating Instructions Care and Cleaning ...
...USE ONLY METAL DUCTWORK. ■ Do not attempt to a qualified technician. READ AND FOLLOW THIS SAFETY INFORMATION CAREFULLY. READ AND SAVE THESE INSTRUCTIONS 3 Always turn hood ON when cooking on low or medium settings. C. B. C. Ducted fans must be referred to repair or replace any part of your... hood unless it is needed for the size of fuel burning equipment to accumulate on fan or filter. Safety Instructions Operating Instructions Care and Cleaning ...

Use and Care Manual
Page 4
... fan system while cooking helps keep the kitchen comfortable and less humid. Consumer Support Troubleshooting Tips Care and Cleaning Operating Instructions Safety Instructions Using the hood controls. Continuous use as needed. It also reduces cooking odors and soiling moisture that the fan is operating on the LO setting, it will be...
... fan system while cooking helps keep the kitchen comfortable and less humid. Consumer Support Troubleshooting Tips Care and Cleaning Operating Instructions Safety Instructions Using the hood controls. Continuous use as needed. It also reduces cooking odors and soiling moisture that the fan is operating on the LO setting, it will be...

Use and Care Manual
Page 5
... forward and out. To clean the stainless steel surface, use abrasives or oven cleaners. Always wipe the surface in the direction of the vent hood. They also help prevent flaming foods on the cooktop. Stainless Steel Surfaces Do not use ammonia or ammonia products because they will scratch the surface... stops and push the bottom end back until it will darken the metal. Place the top end of the filter against the inside of the hood. Light brushing can be cleaned once a month, or as needed. To inquire about purchasing stainless steel appliance cleaner or polish, or to remove...
... forward and out. To clean the stainless steel surface, use abrasives or oven cleaners. Always wipe the surface in the direction of the vent hood. They also help prevent flaming foods on the cooktop. Stainless Steel Surfaces Do not use ammonia or ammonia products because they will scratch the surface... stops and push the bottom end back until it will darken the metal. Place the top end of the filter against the inside of the hood. Light brushing can be cleaned once a month, or as needed. To inquire about purchasing stainless steel appliance cleaner or polish, or to remove...

Use and Care Manual
Page 6
... remove: Turn the glass cover counterclockwise until secure. For improved lighting, clean the glass cover frequently using a damp cloth. Receptacle Socket Hood Lights NOTE: The glass cover should be removed only when cold. Place the glass cover onto the socket and turn clockwise until the ...Receptacle CAUTION: Before replacing Bulb your safety, do not touch a hot bulb with bare fingers will significantly reduce the life of the vent hood. Reconnect electrical power to let the light cover and bulb cool completely. Be sure electrical power is completely cool. NOTE: Do not touch ...
... remove: Turn the glass cover counterclockwise until secure. For improved lighting, clean the glass cover frequently using a damp cloth. Receptacle Socket Hood Lights NOTE: The glass cover should be removed only when cold. Place the glass cover onto the socket and turn clockwise until the ...Receptacle CAUTION: Before replacing Bulb your safety, do not touch a hot bulb with bare fingers will significantly reduce the life of the vent hood. Reconnect electrical power to let the light cover and bulb cool completely. Be sure electrical power is completely cool. NOTE: Do not touch ...

Use and Care Manual
Page 7
Call 800.GE.CARES (800.432.2737) or Visit our Website at service panel...prominent warning device, such as a tag, to leave these instruc- Be sure to the service panel. Installation of this vent hood requires basic mechanical and electrical skills. • Completion time - 1 to 3 hours. • Proper installation is not ..." Wide Opening 12" 18" 21" 36" Models Requires a 36" Wide Opening 35-7/8" 7 Installation Instructions Range Hoods Questions? Keep these vent hoods and to reduce the risk of these instructions for local inspector's use. • IMPORTANT - CAUTION: Due to the...
Call 800.GE.CARES (800.432.2737) or Visit our Website at service panel...prominent warning device, such as a tag, to leave these instruc- Be sure to the service panel. Installation of this vent hood requires basic mechanical and electrical skills. • Completion time - 1 to 3 hours. • Proper installation is not ..." Wide Opening 12" 18" 21" 36" Models Requires a 36" Wide Opening 35-7/8" 7 Installation Instructions Range Hoods Questions? Keep these vent hoods and to reduce the risk of these instructions for local inspector's use. • IMPORTANT - CAUTION: Due to the...

Use and Care Manual
Page 8
...be installed onto a wall. or 24″ to 36″ Max. All accessories should be installed beneath a soffit or cabinet. • Install these hoods 24″ Min. WALL MOUNT INSTALLATION 24" MIN. 36" MAX. 2 Wood 2 Washers 2 Wall Screws Fasteners 4 Phillips Head Screws 2 Phillips Head Decorative...available to conceal the ductwork running from 12″ Min. See page 12 for details. 8 Installation Instructions INSTALLATION CLEARANCES These vent hoods are designed to be concealed in the soffit or upper cabinetry. Order the duct cover accessory at the time of the duct cover...
...be installed onto a wall. or 24″ to 36″ Max. All accessories should be installed beneath a soffit or cabinet. • Install these hoods 24″ Min. WALL MOUNT INSTALLATION 24" MIN. 36" MAX. 2 Wood 2 Washers 2 Wall Screws Fasteners 4 Phillips Head Screws 2 Phillips Head Decorative...available to conceal the ductwork running from 12″ Min. See page 12 for details. 8 Installation Instructions INSTALLATION CLEARANCES These vent hoods are designed to be concealed in the soffit or upper cabinetry. Order the duct cover accessory at the time of the duct cover...

Use and Care Manual
Page 9
...grounding conductor must be mounted beneath. WARNING: The improper connection of the equipment-grounding conductor can result in a risk of the vent hood. • Plan the route for vertical exhaust. A duct transition piece is heavy. Use locally supplied elbows to accurately locate the ...ductwork and electrical service. Wall Framing for Adequate Support • This vent hood is supplied for venting exhaust to use a JXCH Series Chimney Cover, or • You have an 8 ft. ceiling heights. Installation ...
...grounding conductor must be mounted beneath. WARNING: The improper connection of the equipment-grounding conductor can result in a risk of the vent hood. • Plan the route for vertical exhaust. A duct transition piece is heavy. Use locally supplied elbows to accurately locate the ...ductwork and electrical service. Wall Framing for Adequate Support • This vent hood is supplied for venting exhaust to use a JXCH Series Chimney Cover, or • You have an 8 ft. ceiling heights. Installation ...

Use and Care Manual
Page 10
... permissible equivalent lengths! The flexible metal duct should be straight and smooth and extended as much as those published by GE Evaluation Engineering and reflect requirements for through the back wall and: • You have a 12″cabinet or 12″ soffit... 7″ round transition 90° elbow 4 ft. 7″ Round wall cap with damper 3-1⁄4″ x 12″ wall cap with any ventilation hood. Duct Piece Dimensions 7″ Round, straight 3-1⁄4″ x 12″ straight 7″ 90° elbow Total Equivalent Quantity Equivalent Length* Used Length ...
... permissible equivalent lengths! The flexible metal duct should be straight and smooth and extended as much as those published by GE Evaluation Engineering and reflect requirements for through the back wall and: • You have a 12″cabinet or 12″ soffit... 7″ round transition 90° elbow 4 ft. 7″ Round wall cap with damper 3-1⁄4″ x 12″ wall cap with any ventilation hood. Duct Piece Dimensions 7″ Round, straight 3-1⁄4″ x 12″ straight 7″ 90° elbow Total Equivalent Quantity Equivalent Length* Used Length ...

Use and Care Manual
Page 11
...• 7" round metal duct, 3-1/4" x 10" rectangular duct or 3-1/4" x 12" rectangular duct length to the back side of the hood. Properly grounded branch circuit. • Strain relief for later installation. Pencil and tape measure Phillips and Flat blade screwdrivers Duct tape Electric drill ...Instructions TOOLS AND MATERIALS REQUIRED (NOT SUPPLIED) REMOVE THE PACKAGING • Remove the small box housing the motor. • Lift the hood out of hood. • Remove all tape and packing material from the "V" shaped cardboard insert. • Remove junction box cover and knockout. &#...
...• 7" round metal duct, 3-1/4" x 10" rectangular duct or 3-1/4" x 12" rectangular duct length to the back side of the hood. Properly grounded branch circuit. • Strain relief for later installation. Pencil and tape measure Phillips and Flat blade screwdrivers Duct tape Electric drill ...Instructions TOOLS AND MATERIALS REQUIRED (NOT SUPPLIED) REMOVE THE PACKAGING • Remove the small box housing the motor. • Lift the hood out of hood. • Remove all tape and packing material from the "V" shaped cardboard insert. • Remove junction box cover and knockout. &#...

Use and Care Manual
Page 12
...check contents. 2 Aluminum Grease Filters Screws, wall fasteners, washers Duct Transition with Damper Filter Support DUCT COVER REQUIREMENTS We recommend that the vent hood and decorative duct cover (if used) be used alone to fill a 12″ height. 11" • For heights over 12&#...8243;, the ceiling bracket must be installed to secure the cover at the top. 12" 12" 12" To avoid unsightly gaps, plan the hood installation height for your installation situation. Ceiling 12" 30" 9 ft. to ensure a trouble free installation using the duct cover accessory. 8 ft....
...check contents. 2 Aluminum Grease Filters Screws, wall fasteners, washers Duct Transition with Damper Filter Support DUCT COVER REQUIREMENTS We recommend that the vent hood and decorative duct cover (if used) be used alone to fill a 12″ height. 11" • For heights over 12&#...8243;, the ceiling bracket must be installed to secure the cover at the top. 12" 12" 12" To avoid unsightly gaps, plan the hood installation height for your installation situation. Ceiling 12" 30" 9 ft. to ensure a trouble free installation using the duct cover accessory. 8 ft....

Use and Care Manual
Page 13
...hole on the wall intersecting the centerline. hole through a soffit or upper cabinet. • Follow the same procedure for the bottom of the hood. 6-7/8" Centerline To Wall 7-1/2" Dia. Draw a horizontal line on the ceiling. - House wiring may enter the junction box from the bottom ... for 36" Models 11-1/8" for 30" Models 5-7/8" 10-1/16" 14-1/8" for 36" models 11-1/8" for later installation. Installation Instructions DETERMINE HOOD, DUCTWORK AND WIRING LOCATIONS • Keep the wood support piece and its screws for 30" models 13 Draw another horizontal line to the inside...
...hole on the wall intersecting the centerline. hole through a soffit or upper cabinet. • Follow the same procedure for the bottom of the hood. 6-7/8" Centerline To Wall 7-1/2" Dia. Draw a horizontal line on the ceiling. - House wiring may enter the junction box from the bottom ... for 36" Models 11-1/8" for 30" Models 5-7/8" 10-1/16" 14-1/8" for 36" models 11-1/8" for later installation. Installation Instructions DETERMINE HOOD, DUCTWORK AND WIRING LOCATIONS • Keep the wood support piece and its screws for 30" models 13 Draw another horizontal line to the inside...

Use and Care Manual
Page 14
...bottom holes. Tap anchors for Ductwork 2 INSTALL TRANSITION IMPORTANT: Remove shipping tape from junction box. The arrow shaped cutout in the hood should protrude forward 1/4″ . The screws should engage the protruding mounting screws. Drill Bottom Mounting Hole Locations • Drill 1/8 ...″pilot holes into the studs. Tighten upper screws. Secure transition to hood with 4 screws provided. • Use duct tape to seal the connection. 15-3/8" Wood Support 24" to 3/8″. Remove screws. ...
...bottom holes. Tap anchors for Ductwork 2 INSTALL TRANSITION IMPORTANT: Remove shipping tape from junction box. The arrow shaped cutout in the hood should protrude forward 1/4″ . The screws should engage the protruding mounting screws. Drill Bottom Mounting Hole Locations • Drill 1/8 ...″pilot holes into the studs. Tighten upper screws. Secure transition to hood with 4 screws provided. • Use duct tape to seal the connection. 15-3/8" Wood Support 24" to 3/8″. Remove screws. ...

Use and Care Manual
Page 15
... For Ductwork 10-3/4″W x 8-7/16″D 10-3/4″W x 8-7/16″D • Mounting screws must be capable of the hood. • Lift hood onto mounting screws. "A") at the rear or the top of soffit or cabinet for duct transition as shown. • Drive mounting ...35-7/8" Top View, Front Side • Drill four 1/8″ pilot holes in locations shown. - Installation Instructions 4 Alternate Mounting Method INSTALL HOOD TO SOFFIT OR BENEATH CABINETS SKIP THIS STEP IF USING WALL MOUNTING METHOD IMPORTANT: Soffit framing must be secured to Wall Add Shims If ...
... For Ductwork 10-3/4″W x 8-7/16″D 10-3/4″W x 8-7/16″D • Mounting screws must be capable of the hood. • Lift hood onto mounting screws. "A") at the rear or the top of soffit or cabinet for duct transition as shown. • Drive mounting ...35-7/8" Top View, Front Side • Drill four 1/8″ pilot holes in locations shown. - Installation Instructions 4 Alternate Mounting Method INSTALL HOOD TO SOFFIT OR BENEATH CABINETS SKIP THIS STEP IF USING WALL MOUNTING METHOD IMPORTANT: Soffit framing must be secured to Wall Add Shims If ...

Use and Care Manual
Page 16
.... • Mark the 2 screw hole locations. • Drill 1/8″ pilot holes in place at the transition to span 24″ or more height above the hood. Use wall anchors if needed. Use larger holes for wood screws with wood screws and washers. Pre-tapping the holes will insure ease of holes...
.... • Mark the 2 screw hole locations. • Drill 1/8″ pilot holes in place at the transition to span 24″ or more height above the hood. Use wall anchors if needed. Use larger holes for wood screws with wood screws and washers. Pre-tapping the holes will insure ease of holes...

Use and Care Manual
Page 17
...When house wiring is not 2-wire with the attachment screw location. • Secure the motor to black. • Push wires into the mating hood connector. WARNING: If house wiring is aluminum, be provided by the installer. To install the 2-piece duct cover: • Place the 2-piece ...duct cover on top of the hood. • Secure the cover to use U.L. See illustration, page 16. • Extend the inside section upwards to meet the ceiling and ceiling bracket...
...When house wiring is not 2-wire with the attachment screw location. • Secure the motor to black. • Push wires into the mating hood connector. WARNING: If house wiring is aluminum, be provided by the installer. To install the 2-piece duct cover: • Place the 2-piece ...duct cover on top of the hood. • Secure the cover to use U.L. See illustration, page 16. • Extend the inside section upwards to meet the ceiling and ceiling bracket...

Use and Care Manual
Page 23
..., misused, or used for service. Safety Instructions Operating Instructions Care and Cleaning Troubleshooting Tips Consumer Support GE Range Hood Warranty. To schedule service on-line, visit us at GEAppliances.com, or call 800.GE.CARES (800.432.2737). In Alaska, the warranty excludes the cost of the range... hood which vary from state to your receipt here. Warrantor: General Electric Company. Staple your home. For The Period...
..., misused, or used for service. Safety Instructions Operating Instructions Care and Cleaning Troubleshooting Tips Consumer Support GE Range Hood Warranty. To schedule service on-line, visit us at GEAppliances.com, or call 800.GE.CARES (800.432.2737). In Alaska, the warranty excludes the cost of the range... hood which vary from state to your receipt here. Warrantor: General Electric Company. Staple your home. For The Period...


