
Quick Specs
Page 2
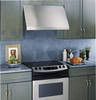
GJEVP9r3of5il/e9™6356"DDesigner Hood Features and Benefits • 36" Cooktop • 600 CFM Rating • 4-Speed Fan Control • Dual Halogen Lighting (Off/High/Night) • Dishwasher Safe Filter Cleaning • Hidden Controls Profile • 7 Sones Rating • 7" Round Duct Size (Vertical Only) • Model JV966DSS - Stainless steel Specification Revised 7/09 220956 JV966D -
GJEVP9r3of5il/e9™6356"DDesigner Hood Features and Benefits • 36" Cooktop • 600 CFM Rating • 4-Speed Fan Control • Dual Halogen Lighting (Off/High/Night) • Dishwasher Safe Filter Cleaning • Hidden Controls Profile • 7 Sones Rating • 7" Round Duct Size (Vertical Only) • Model JV966DSS - Stainless steel Specification Revised 7/09 220956 JV966D -

Use and Care Manual
Page 1
Vented Range Hoods GEAppliances.com Safety Instructions 2, 3 Operating Instructions Fan Control 4 Light Control 4 Care and Cleaning Grease Filters 5 Hood Lights 6 Stainless Steel Surfaces 5 Installation Instructions . . .7-18 Troubleshooting Tips 19 Consumer Support Consumer Support 24 Owner Registration 21, 22 Warranty 23 Owner's Manual and Installation Instructions JV936 JV966 Write the model and serial numbers here: Model Serial You can find them on a label on the inside of the hood. LI1P4H 49-80520-2 06-09 JR
Vented Range Hoods GEAppliances.com Safety Instructions 2, 3 Operating Instructions Fan Control 4 Light Control 4 Care and Cleaning Grease Filters 5 Hood Lights 6 Stainless Steel Surfaces 5 Installation Instructions . . .7-18 Troubleshooting Tips 19 Consumer Support Consumer Support 24 Owner Registration 21, 22 Warranty 23 Owner's Manual and Installation Instructions JV936 JV966 Write the model and serial numbers here: Model Serial You can find them on a label on the inside of the hood. LI1P4H 49-80520-2 06-09 JR

Use and Care Manual
Page 4
Throughout this manual, features and appearance may vary from your model. FAN Control Turn the FAN speed control to NITE for use of the fan system while cooking helps keep the kitchen comfortable and less humid. ...
Throughout this manual, features and appearance may vary from your model. FAN Control Turn the FAN speed control to NITE for use of the fan system while cooking helps keep the kitchen comfortable and less humid. ...

Use and Care Manual
Page 7
..., securely fasten a prominent warning device, such as a tag, to Consumer - PRODUCT DIMENSIONS 12" 18" 21" 29-7/8" 30" Models Requires a 30" Wide Opening 12" 18" 21" 36" Models Requires a 36" Wide Opening 35-7/8" 7 tions with the Consumer. • Note to the service panel. CAUTION: Due to the...to improper installation is the responsibility of personal injury or damage to the product, TWO PEOPLE ARE REQUIRED FOR PROPER INSTALLATION. Call 800.GE.CARES (800.432.2737) or Visit our Website at service panel and lock the service disconnecting means to 3 hours. • Proper...
..., securely fasten a prominent warning device, such as a tag, to Consumer - PRODUCT DIMENSIONS 12" 18" 21" 29-7/8" 30" Models Requires a 30" Wide Opening 12" 18" 21" 36" Models Requires a 36" Wide Opening 35-7/8" 7 tions with the Consumer. • Note to the service panel. CAUTION: Due to the...to improper installation is the responsibility of personal injury or damage to the product, TWO PEOPLE ARE REQUIRED FOR PROPER INSTALLATION. Call 800.GE.CARES (800.432.2737) or Visit our Website at service panel and lock the service disconnecting means to 3 hours. • Proper...

Use and Care Manual
Page 8
... to 36″ Max. See page 12 for details. 8 to the ceiling. • The duct cover accessory fits both 30″ and 36″ wide models. above the countertop. ceiling heights. The duct cover will be installed onto a wall. WALL MOUNT INSTALLATION 24" MIN. 36" MAX. 2 Wood 2 Washers 2 Wall Screws Fasteners...
... to 36″ Max. See page 12 for details. 8 to the ceiling. • The duct cover accessory fits both 30″ and 36″ wide models. above the countertop. ceiling heights. The duct cover will be installed onto a wall. WALL MOUNT INSTALLATION 24" MIN. 36" MAX. 2 Wood 2 Washers 2 Wall Screws Fasteners...

Use and Care Manual
Page 9
... = 39 ft. Remove house fuse or open circuit breaker before final framing and wall finishing. Use locally supplied elbows to fit both model widths. DUCTING CHART - 30" and 36" Models Equivalent Length in Feet For 7" Round Duct Air Volume in advance. to the ceiling or soffit. A duct transition piece is available to...
... = 39 ft. Remove house fuse or open circuit breaker before final framing and wall finishing. Use locally supplied elbows to fit both model widths. DUCTING CHART - 30" and 36" Models Equivalent Length in Feet For 7" Round Duct Air Volume in advance. to the ceiling or soffit. A duct transition piece is available to...

Use and Care Manual
Page 13
...cover will be relocated to draw the cooktop centerline location. • Measure 15-3/8″ up from the horizontal line for 30″ models or 14-1/8″ to 36″ Max. See illustrations for later installation. To route house wiring through a soffit or upper cabinet.... • Follow the same procedure for 36″ models. FOR DUCTING THROUGH REAR WALL: • Measure the supplied duct transition with any straight run length of Hood FOR VERTICAL (Straight Up) DUCTING...
...cover will be relocated to draw the cooktop centerline location. • Measure 15-3/8″ up from the horizontal line for 30″ models or 14-1/8″ to 36″ Max. See illustrations for later installation. To route house wiring through a soffit or upper cabinet.... • Follow the same procedure for 36″ models. FOR DUCTING THROUGH REAR WALL: • Measure the supplied duct transition with any straight run length of Hood FOR VERTICAL (Straight Up) DUCTING...

Use and Care Manual
Page 15
... the rear wall. • Pull house wiring through bottom of a cabinet with wall fasteners. 30" Models 2-9/16" 14-1/2" 14-1/2" 2-3/8" 10-3/4" 7-1/16" 12" C 8-7/16" 2-1/4" 29-7/8" Top View, Front Side 2-9/16" 36" Models 17-1/2" 17-1/2" 2-3/8" 10-3/4" 7-1/16" 12" C 8-7/16" 2-1/4" 35-7/8" Top View, Front Side...so that the hood also be secured to the back wall with a recessed bottom, install shims to fill the gap. 30″ Models 36″ Models "A" Centerline to Center of Stud 14-1/2 ″ 17-1/2 ″ "B" Opening For Ductwork 10-3/4″W x 8-7/16″D 10...
... the rear wall. • Pull house wiring through bottom of a cabinet with wall fasteners. 30" Models 2-9/16" 14-1/2" 14-1/2" 2-3/8" 10-3/4" 7-1/16" 12" C 8-7/16" 2-1/4" 29-7/8" Top View, Front Side 2-9/16" 36" Models 17-1/2" 17-1/2" 2-3/8" 10-3/4" 7-1/16" 12" C 8-7/16" 2-1/4" 35-7/8" Top View, Front Side...so that the hood also be secured to the back wall with a recessed bottom, install shims to fill the gap. 30″ Models 36″ Models "A" Centerline to Center of Stud 14-1/2 ″ 17-1/2 ″ "B" Opening For Ductwork 10-3/4″W x 8-7/16″D 10...

Use and Care Manual
Page 23
...particular purpose, are , consult your local or state consumer affairs office or your home to teach you may also have serial number and model number available when calling for service. Any implied warranties, including the implied warranties of the original purchase date is product repair as provided...circuit breakers. ■ Damage to the product caused by accident, fire, floods or acts of shipping or service calls to an Authorized GE Service Location for service. Please have other than the intended purpose or used for a trip charge or you how to your state's Attorney...
...particular purpose, are , consult your local or state consumer affairs office or your home to teach you may also have serial number and model number available when calling for service. Any implied warranties, including the implied warranties of the original purchase date is product repair as provided...circuit breakers. ■ Damage to the product caused by accident, fire, floods or acts of shipping or service calls to an Authorized GE Service Location for service. Please have other than the intended purpose or used for a trip charge or you how to your state's Attorney...