

Manual
Page 2
... owners. Please do not remove any errors or omissions which may appear in this document nor does it make a commitment to rapid change in any from without the expressed, written permission of GBT. Notice Due to update the information contained herein. May. 14, 2004 Taipei, Taiwan GV-R80P256D(V) Graphics Accelerator - 2 - English Chapter 1 User's Manual Copyright Copyright by GIGA-BYTE TECHNOLOGY CO., LTD. ("GBT") No part...
... owners. Please do not remove any errors or omissions which may appear in this document nor does it make a commitment to rapid change in any from without the expressed, written permission of GBT. Notice Due to update the information contained herein. May. 14, 2004 Taipei, Taiwan GV-R80P256D(V) Graphics Accelerator - 2 - English Chapter 1 User's Manual Copyright Copyright by GIGA-BYTE TECHNOLOGY CO., LTD. ("GBT") No part...

Manual
Page 3
...English Table of Content SOFTWARE INSTALLATION 9 3.1. Driver Installation 12 3.1.4. BIOS FLASH UTILITY 31 4. Troubleshooting Tips 32 5. Utilities on driver CD 15 3.1.5.Taskbar Icon ...18 3.1.6. Table of Contents 1.INTRODUCTION 4 1.1. HARDWARE INSTALLATION 7 3. WIN® 98/98SE / WIN® 2000 / WIN® ME DRIVER INSTALLATION 31 3.3. KEY FEATURES 4 2. HARDWARE INSTALLATION 5 2.1. DirectX Installation 10 3.1.3. DisplayProperties pages 22 3.2. Appendix 33 5.1. How to reflash the BIOS 33 5.2. Resolutions and Color Depth Table (In Windows® XP 34...
...English Table of Content SOFTWARE INSTALLATION 9 3.1. Driver Installation 12 3.1.4. BIOS FLASH UTILITY 31 4. Troubleshooting Tips 32 5. Utilities on driver CD 15 3.1.5.Taskbar Icon ...18 3.1.6. Table of Contents 1.INTRODUCTION 4 1.1. HARDWARE INSTALLATION 7 3. WIN® 98/98SE / WIN® 2000 / WIN® ME DRIVER INSTALLATION 31 3.3. KEY FEATURES 4 2. HARDWARE INSTALLATION 5 2.1. DirectX Installation 10 3.1.3. DisplayProperties pages 22 3.2. Appendix 33 5.1. How to reflash the BIOS 33 5.2. Resolutions and Color Depth Table (In Windows® XP 34...
Manual
Page 4
KEY FEATURES n Powered by RADEON™ X800 Pro Visual Processing Unit (VPU) n First to fully support DirectX® 9.0 n Supports the new AGP 8X standard n First 12-pixelpipeline architecture n All new 256-bit memory interface n 256MB DDRIII memory accelerates the latest 3D games n First to use pixel shaders to the chip. 1.2. GV-R80P256D/GV-R80P256V supports the new AGP 8Xstandard, which allows large volumes of memory to accelerate latest 3D games and new SMARTSHADER™...
KEY FEATURES n Powered by RADEON™ X800 Pro Visual Processing Unit (VPU) n First to fully support DirectX® 9.0 n Supports the new AGP 8X standard n First 12-pixelpipeline architecture n All new 256-bit memory interface n 256MB DDRIII memory accelerates the latest 3D games n First to use pixel shaders to the chip. 1.2. GV-R80P256D/GV-R80P256V supports the new AGP 8Xstandard, which allows large volumes of memory to accelerate latest 3D games and new SMARTSHADER™...

Manual
Page 5
... you work on your hands to a safely grounded object or to D-Sub adapter l TVOut cable l Video in its original packing until it is installed. M DO NOT APPLY POWER TO YOUR SYSTEM IF IT HAS BEEN DAMAGED ON THE CARD. UNPACKING The GV-R80P256D or GV-R80P256V package contains the following: l The GV-R80P256Dor GV-R80P256Vgraphics accelerator l USER'S MANUAL l Driver CD l Power DVD CD l Power Director (R80P256V only) l Game CD l DVI...
... you work on your hands to a safely grounded object or to D-Sub adapter l TVOut cable l Video in its original packing until it is installed. M DO NOT APPLY POWER TO YOUR SYSTEM IF IT HAS BEEN DAMAGED ON THE CARD. UNPACKING The GV-R80P256D or GV-R80P256V package contains the following: l The GV-R80P256Dor GV-R80P256Vgraphics accelerator l USER'S MANUAL l Driver CD l Power DVD CD l Power Director (R80P256V only) l Game CD l DVI...

Manual
Page 7
... your graphics accelerator card: 1. Formore information, see youcomputer documentation. - 7 - Or, if your computer has any existing graphics card from the back of your computer. Now that you haveprepared yourcomputer, you are ready toinstall yourgraphicsaccelerator card. Hardware Installation Power off the computer and monitor, then disconnect the display cable from your computer. 2. Remove any on-board graphicscapability, youmay needto disable it onthe motherboard. HARDWARE INSTALLATION Installing Your Graphics card. To install your computer's manual for...
... your graphics accelerator card: 1. Formore information, see youcomputer documentation. - 7 - Or, if your computer has any existing graphics card from the back of your computer. Now that you haveprepared yourcomputer, you are ready toinstall yourgraphicsaccelerator card. Hardware Installation Power off the computer and monitor, then disconnect the display cable from your computer. 2. Remove any on-board graphicscapability, youmay needto disable it onthe motherboard. HARDWARE INSTALLATION Installing Your Graphics card. To install your computer's manual for...

Manual
Page 8
... now ready to proceed with a DVI connector, you can connect a flat panel display to the appropriate connector, as shown below... Locate the AGP slot. then align your card; If your GV-R80P256D/ GV-R80P256V graphics card, or system will not boot. 6. Replacethe screwto fastenthe cardinplace, and replace the computer cover. then turn on the computer and monitor. After installation, please connect the power cable to next chapter for detailed instructions. Please...
... now ready to proceed with a DVI connector, you can connect a flat panel display to the appropriate connector, as shown below... Locate the AGP slot. then align your card; If your GV-R80P256D/ GV-R80P256V graphics card, or system will not boot. 6. Replacethe screwto fastenthe cardinplace, and replace the computer cover. then turn on the computer and monitor. After installation, please connect the power cable to next chapter for detailed instructions. Please...
Manual
Page 9
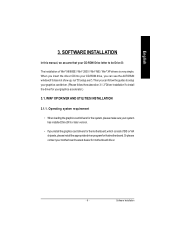
... this manual, we assume that your CD-ROM drive, you can see the AUTORUN window (if it does not show up, run "D:\setup.exe"). English 3. Then you can follow the guides to setup your graphics card driver. (Please follow the subsection 3.1.3 "Driver installation"to be Drive D: The installation of SIS or VIA chipsets, please installthe appropriate driver programfor thatmotherboard. Operating system requirement • When loading the graphics card drivers...
... this manual, we assume that your CD-ROM drive, you can see the AUTORUN window (if it does not show up, run "D:\setup.exe"). English 3. Then you can follow the guides to setup your graphics card driver. (Please follow the subsection 3.1.3 "Driver installation"to be Drive D: The installation of SIS or VIA chipsets, please installthe appropriate driver programfor thatmotherboard. Operating system requirement • When loading the graphics card drivers...

Manual
Page 12
... system will ask for your computer at the first time, the windows will automatically detect a new hardware in order to complete the VGA driver installation. GV-R80P256D(V) Graphics Accelerator - 12 - Step 1: New Hardware Found After GV-R80P256D/GV-R80P256V is the step-by-step installation guide. Step 4: System Setting Change 2.Click "Finish" icon. Step 2: Update Device Driver Wizard: Standard PCI Graphics Adapter(VGA) 1.Click "Next" icon. If you don't have the CD, you press...
... system will ask for your computer at the first time, the windows will automatically detect a new hardware in order to complete the VGA driver installation. GV-R80P256D(V) Graphics Accelerator - 12 - Step 1: New Hardware Found After GV-R80P256D/GV-R80P256V is the step-by-step installation guide. Step 4: System Setting Change 2.Click "Finish" icon. Step 2: Update Device Driver Wizard: Standard PCI Graphics Adapter(VGA) 1.Click "Next" icon. If you don't have the CD, you press...

Manual
Page 13
After the system has finished loading, insert the GV-R80P256D/GV-R80P256V driver CD disk into your CD-ROM, and then you can see the AUTORUN window. Click "Install Display Drivers (Radeon X800 series)" item. 2.Click "Next". - 13 - Step 5: Driver Setup (Pictures below are shown in Windows XP) 1. English 3..Click "No" icon. If it does not show up, please run "D:\setup.exe". Software Installation
After the system has finished loading, insert the GV-R80P256D/GV-R80P256V driver CD disk into your CD-ROM, and then you can see the AUTORUN window. Click "Install Display Drivers (Radeon X800 series)" item. 2.Click "Next". - 13 - Step 5: Driver Setup (Pictures below are shown in Windows XP) 1. English 3..Click "No" icon. If it does not show up, please run "D:\setup.exe". Software Installation

Manual
Page 18
... opens the GBT control panel, showing a menu composed of shortcute of the display drivers, you will find an GBT icon on the taskbar's status area. Right clickthe icon. Click the appropriate tab to GBT website for updated information about the graphicscard,latest drivers,and other functions. GV-R80P256D(V) Graphics Accelerator - 18 - Taskbar Icon After installation of the graphics card's enhanced and other...
... opens the GBT control panel, showing a menu composed of shortcute of the display drivers, you will find an GBT icon on the taskbar's status area. Right clickthe icon. Click the appropriate tab to GBT website for updated information about the graphicscard,latest drivers,and other functions. GV-R80P256D(V) Graphics Accelerator - 18 - Taskbar Icon After installation of the graphics card's enhanced and other...

Manual
Page 21
... to theATI Icon. English After installation of HYDRAVISION™ . GV-R80P256D GV-R80P256Vgraphic cards that have more than one display output can benefit fully from this icon open the ATi control panel. 1.Using Single Display HYDRAVISION™ HYDRAVISION™ and the Desktop Manager are activated whenever Windows® starts. HYDRAVISION™ installation enables the Desktop Manager and creates a Windows® programgroup for multiple monitor settings. Installing HYDRAVISION™ adds menu...
... to theATI Icon. English After installation of HYDRAVISION™ . GV-R80P256D GV-R80P256Vgraphic cards that have more than one display output can benefit fully from this icon open the ATi control panel. 1.Using Single Display HYDRAVISION™ HYDRAVISION™ and the Desktop Manager are activated whenever Windows® starts. HYDRAVISION™ installation enables the Desktop Manager and creates a Windows® programgroup for multiple monitor settings. Installing HYDRAVISION™ adds menu...

Manual
Page 22
... DVI display. (This setting has no effectwhen using a DVI-to-VGA adapter.) n Alternate DVI operational mode Use this feature must be enabled forATIhotkeysupport. R80P2 56V Ye s Ye s Ye s Ye s n Version Information provides the Packing version numberinformation. n Re-activate all warning messages allows you to reactivate any disabled graphics warning messages. n Enable ATI taskbar icon application enables or disables the ATI taskbar icon. GV-R80P256D(V) Graphics Accelerator - 22 - Click "Advanced" icon for windows...
... DVI display. (This setting has no effectwhen using a DVI-to-VGA adapter.) n Alternate DVI operational mode Use this feature must be enabled forATIhotkeysupport. R80P2 56V Ye s Ye s Ye s Ye s n Version Information provides the Packing version numberinformation. n Re-activate all warning messages allows you to reactivate any disabled graphics warning messages. n Enable ATI taskbar icon application enables or disables the ATI taskbar icon. GV-R80P256D(V) Graphics Accelerator - 22 - Click "Advanced" icon for windows...

Manual
Page 23
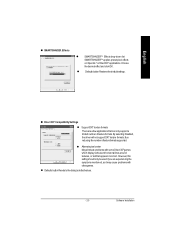
.... n Compatibilitysettings button Accesses advanced settings thatmay solve compatibility issues for advanced users only. Saved profiles are selected from the Current Profile drop-down window.To delete a profile, select it from the Current Profile drop-down window and press the Delete button. n Performance/Quality silder Controls the overall performance/image qualityofyour graphic application. English Direct 3D Properties: The Direct 3D properties page allows you to...
.... n Compatibilitysettings button Accesses advanced settings thatmay solve compatibility issues for advanced users only. Saved profiles are selected from the Current Profile drop-down window.To delete a profile, select it from the Current Profile drop-down window and press the Delete button. n Performance/Quality silder Controls the overall performance/image qualityofyour graphic application. English Direct 3D Properties: The Direct 3D properties page allows you to...
Manual
Page 25
... can only support a limited number of texture formats. By selecting Disabled, the driver will notsupport DXT texture formats,thus reducing thenumber oftextureformats supported. Effects l SMARTSHADERTM Effects drop-down list SMARTSHADERTM applies presetpixel effects on OpenGL® orDirect3D® applications.Choose the desired effect and click OK. l Defaults button Restoresthe defaultsettings. l Alternate pixel center Mayeliminate problems with othergames. Software Installation English...
... can only support a limited number of texture formats. By selecting Disabled, the driver will notsupport DXT texture formats,thus reducing thenumber oftextureformats supported. Effects l SMARTSHADERTM Effects drop-down list SMARTSHADERTM applies presetpixel effects on OpenGL® orDirect3D® applications.Choose the desired effect and click OK. l Defaults button Restoresthe defaultsettings. l Alternate pixel center Mayeliminate problems with othergames. Software Installation English...

Manual
Page 26
If there is enabled in Custom Settings. n VPU Recover l Enable VPU Recover checkbox Enables VPU Recover. GV-R80P256D(V) Graphics Accelerator - 26 - To disable this l Defaults button feature remain disabled. Most applications will work best when Disabled is selected l Triple Buffering Improves the frame rate of games when Wait for Vertical Sync is insufficient memory available to support this feature it will be less frame-buffer memory available...
If there is enabled in Custom Settings. n VPU Recover l Enable VPU Recover checkbox Enables VPU Recover. GV-R80P256D(V) Graphics Accelerator - 26 - To disable this l Defaults button feature remain disabled. Most applications will work best when Disabled is selected l Triple Buffering Improves the frame rate of games when Wait for Vertical Sync is insufficient memory available to support this feature it will be less frame-buffer memory available...

Manual
Page 27
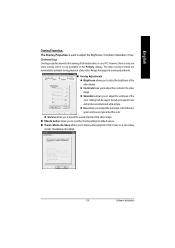
... your display. Software Installation Note thatthe configured settings will only be changed. English Color Properties: The Color Properties is NOT supported in Windows NT4.0) n Default resets the desktop brightness and color settings to adjust the color settings. Set Desktop and Video Overlay brightness (gamma) levels can change red, green, and blue display colors. n All Colors checkbox adjust the RGB individually or adjust all display devices mapped to configure the color settings for video playing of Direct 3D and OpenGL games playedin fullscreen mode.(NOTE...
... your display. Software Installation Note thatthe configured settings will only be changed. English Color Properties: The Color Properties is NOT supported in Windows NT4.0) n Default resets the desktop brightness and color settings to adjust the color settings. Set Desktop and Video Overlay brightness (gamma) levels can change red, green, and blue display colors. n All Colors checkbox adjust the RGB individually or adjust all display devices mapped to configure the color settings for video playing of Direct 3D and OpenGL games playedin fullscreen mode.(NOTE...

Manual
Page 28
...an S-Video or Composite video connection. 4. Select Display Type Enable / Disable "Extend my windows desktop ontothis monitor" The Display tab provides the multi monitor features. Using an S-Video cable or the supplied adapter cable, attach one end ofthe cable to your graphics card and the other to -Composite video adapter. 1. Ensure your graphics card was installed correctly. (For information aboutplacing the card in which case you can use a second output device (e.q. English Display Properties: If your VGAcard is equipped with a S-Video connector, you can enable/disable display...
...an S-Video or Composite video connection. 4. Select Display Type Enable / Disable "Extend my windows desktop ontothis monitor" The Display tab provides the multi monitor features. Using an S-Video cable or the supplied adapter cable, attach one end ofthe cable to your graphics card and the other to -Composite video adapter. 1. Ensure your graphics card was installed correctly. (For information aboutplacing the card in which case you can use a second output device (e.q. English Display Properties: If your VGAcard is equipped with a S-Video connector, you can enable/disable display...
Manual
Page 29
... to display video playback in full screen on the Primary display. Sliding it all the way to adjust the overall intensity of full-motion video on your PC. n Theater Mode checkbox allows you to adjust the contrastin the video image. l Contrast allows you to default values. English Overlay Properties: The Overlay Properties is only available on a secondary monitor, ifavailable and enabled. - 29 - Overlay properties allows...
... to display video playback in full screen on the Primary display. Sliding it all the way to adjust the overall intensity of full-motion video on your PC. n Theater Mode checkbox allows you to adjust the contrastin the video image. l Contrast allows you to default values. English Overlay Properties: The Overlay Properties is only available on a secondary monitor, ifavailable and enabled. - 29 - Overlay properties allows...

Manual
Page 31
..., resolutions, and special graphics features of the graphics card. Win® 98/98SE / Win® 2000 / Win® ME driver installation With Windows running on "Install Display Drivers" to reflash the BIOS". - 31 - To install the graphics card driver for the file. If Windows® does not show up. Click "Next". 7. Click "Yes"to install the driver. BIOS FLASH UTILITY BIOS update procedure: MNote: Please download the newest BIOS fromour website (www.gigabyte.com.tw) or contact your CD-ROM drive...
..., resolutions, and special graphics features of the graphics card. Win® 98/98SE / Win® 2000 / Win® ME driver installation With Windows running on "Install Display Drivers" to reflash the BIOS". - 31 - To install the graphics card driver for the file. If Windows® does not show up. Click "Next". 7. Click "Yes"to install the driver. BIOS FLASH UTILITY BIOS update procedure: MNote: Please download the newest BIOS fromour website (www.gigabyte.com.tw) or contact your CD-ROM drive...

Manual
Page 32
... card's display connector. n Ensure that the card is securely fastened to the monitor's manual.) GV-R80P256D(V) Graphics Accelerator - 32 - n If you installed the graphics driver. n Check that the display cable is seated properly in the AGP slot. For more advanced troubleshooting information. Troubleshooting Tips The following troubleshooting tips may help if you are plugged in Safe Mode. Then select the number for Safe Mode, and press Enter. (You can also use the Troubleshooting Guide...
... card's display connector. n Ensure that the card is securely fastened to the monitor's manual.) GV-R80P256D(V) Graphics Accelerator - 32 - n If you installed the graphics driver. n Check that the display cable is seated properly in the AGP slot. For more advanced troubleshooting information. Troubleshooting Tips The following troubleshooting tips may help if you are plugged in Safe Mode. Then select the number for Safe Mode, and press Enter. (You can also use the Troubleshooting Guide...


