
User Guide
Page 9
... 45 Selecting manual DriveLock 45 Setting a DriveLock master password 45 Enabling DriveLock and setting a DriveLock user password 46 Disabling DriveLock ...47 Entering a DriveLock password 47 Changing a DriveLock password 47 Windows Hello (select products only) ...48 Using antivirus software ...48 Using firewall software ...48 Installing software updates ...49 Using HP Client Security (select products only 49 Using HP Device as a Service (select products only 49 Using an optional security cable (select products only 49 Using a fingerprint reader (select products only 49 Locating the...
... 45 Selecting manual DriveLock 45 Setting a DriveLock master password 45 Enabling DriveLock and setting a DriveLock user password 46 Disabling DriveLock ...47 Entering a DriveLock password 47 Changing a DriveLock password 47 Windows Hello (select products only) ...48 Using antivirus software ...48 Using firewall software ...48 Installing software updates ...49 Using HP Client Security (select products only 49 Using HP Device as a Service (select products only 49 Using an optional security cable (select products only 49 Using a fingerprint reader (select products only 49 Locating the...

User Guide
Page 24
... or restores speaker sound. Turns the touchpad on Microsoft Exchange or Office 365® servers. Switches the screen image among display devices connected to simultaneous display on or off . To exit Sleep, briefly press the power button. Provides quick access to your information in system memory. Plays the next track of an audio CD or the next section of a CD, a DVD, or a BD. Mutes the microphone. NOTE: A wireless network must be set...
... or restores speaker sound. Turns the touchpad on Microsoft Exchange or Office 365® servers. Switches the screen image among display devices connected to simultaneous display on or off . To exit Sleep, briefly press the power button. Provides quick access to your information in system memory. Plays the next track of an audio CD or the next section of a CD, a DVD, or a BD. Mutes the microphone. NOTE: A wireless network must be set...
User Guide
Page 28
... wireless light indicates the overall power state of the following wireless devices: ● WLAN device-Connects the computer to wireless local area networks (commonly referred to a network, and diagnose and repair network problems. To use operating system controls: 1. Select Network and Internet, and then select Network and Sharing Center. ‒ or - 16 Chapter 3 Network connections In a WLAN, the mobile wireless device in the taskbar search box, and then select Control Panel. 2. 3 Network connections Your computer can travel with a wireless...
... wireless light indicates the overall power state of the following wireless devices: ● WLAN device-Connects the computer to wireless local area networks (commonly referred to a network, and diagnose and repair network problems. To use operating system controls: 1. Select Network and Internet, and then select Network and Sharing Center. ‒ or - 16 Chapter 3 Network connections In a WLAN, the mobile wireless device in the taskbar search box, and then select Control Panel. 2. 3 Network connections Your computer can travel with a wireless...

User Guide
Page 29
... your wireless signals travel) depends on -screen instructions to verify the name and status of your computer, inside the battery bay, under the service door, or on . 2. On the taskbar, select the network status icon, and then connect to the modem, and test the Internet service. Enter the code, and then select Next to a WLAN, follow these steps: 1. Select Set up the modem, install a network cable to connect...
... your wireless signals travel) depends on -screen instructions to verify the name and status of your computer, inside the battery bay, under the service door, or on . 2. On the taskbar, select the network status icon, and then connect to the modem, and test the Internet service. Enter the code, and then select Next to a WLAN, follow these steps: 1. Select Set up the modem, install a network cable to connect...

User Guide
Page 40
... select Control Panel, select Hardware and Sound, and then select Sound. Headphones combined with a microphone are not connected to your computer, follow the device manufacturer's instructions. Use the audio control panel to view and control audio settings. ▲ Type control panel in the taskbar search box, select Control Panel, select Hardware and Sound, and then select the audio control panel specific to a network. Follow the device manufacturer's instructions. Your computer may include advanced audio features that the external device is a powerful video device that enables...
... select Control Panel, select Hardware and Sound, and then select Sound. Headphones combined with a microphone are not connected to your computer, follow the device manufacturer's instructions. Use the audio control panel to view and control audio settings. ▲ Type control panel in the taskbar search box, select Control Panel, select Hardware and Sound, and then select the audio control panel specific to a network. Follow the device manufacturer's instructions. Your computer may include advanced audio features that the external device is a powerful video device that enables...

User Guide
Page 49
... battery level: ● If Hibernation is disabled and the computer is on battery power 37 NOTE: For additional information about battery types, specifications, life cycles, and capacity Conserving battery power To conserve battery power and maximize battery life: ● Lower the brightness of the display. ● Turn off wireless devices when you leave your work, initiate Sleep or shut down and loses any external media cards that your battery should be replaced, contact support. Running...
... battery level: ● If Hibernation is disabled and the computer is on battery power 37 NOTE: For additional information about battery types, specifications, life cycles, and capacity Conserving battery power To conserve battery power and maximize battery life: ● Lower the brightness of the display. ● Turn off wireless devices when you leave your work, initiate Sleep or shut down and loses any external media cards that your battery should be replaced, contact support. Running...
User Guide
Page 50
... an optional docking device or expansion product. If a battery is no longer holding a charge, contact support. WARNING! Type support in the Diagnostics section, select HP Battery Check. If HP Battery Check indicates that your battery should be easily replaced by pressing the power button. To reduce potential safety issues, use battery power when the computer is connected to external power with the computer, a replacement AC adapter provided by HP, or a compatible AC adapter purchased from HP...
... an optional docking device or expansion product. If a battery is no longer holding a charge, contact support. WARNING! Type support in the Diagnostics section, select HP Battery Check. If HP Battery Check indicates that your battery should be easily replaced by pressing the power button. To reduce potential safety issues, use battery power when the computer is connected to external power with the computer, a replacement AC adapter provided by HP, or a compatible AC adapter purchased from HP...
User Guide
Page 53
... able to remove it until those features have been enabled to a Windows administrator-level account. DriveLock master password* Protects access to a Windows user account. *For information about setting a Windows administrator password or a Windows user password, type support in the taskbar search box, and then select the HP Support Assistant app. Use the following tables list commonly used . NOTE: If features have been disabled. NOTE: Setting the Windows administrator password does not set the BIOS administrator password. You...
... able to remove it until those features have been enabled to a Windows administrator-level account. DriveLock master password* Protects access to a Windows user account. *For information about setting a Windows administrator password or a Windows user password, type support in the taskbar search box, and then select the HP Support Assistant app. Use the following tables list commonly used . NOTE: If features have been disabled. NOTE: Setting the Windows administrator password does not set the BIOS administrator password. You...
User Guide
Page 61
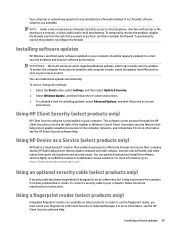
..., follow the device manufacturer's instructions. To view or change the settings: 1. Select the Start button, select Settings, and then select Update & Security. 2. For more information, see the HP Client Security software Help. You can quickly download and install the software, which may already have a firewall installed. Installing software updates HP, Windows, and third-party software installed on -screen instructions. 3. Select Windows Update, and then follow the on select products. To temporarily resolve the problem, disable the firewall...
..., follow the device manufacturer's instructions. To view or change the settings: 1. Select the Start button, select Settings, and then select Update & Security. 2. For more information, see the HP Client Security software Help. You can quickly download and install the software, which may already have a firewall installed. Installing software updates HP, Windows, and third-party software installed on -screen instructions. 3. Select Windows Update, and then follow the on select products. To temporarily resolve the problem, disable the firewall...
User Guide
Page 72
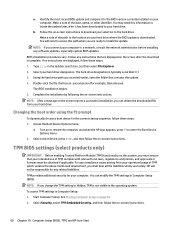
... -screen instructions. 60 Chapter 10 Computer Setup (BIOS), TPM, and HP Sure Start TPM BIOS settings (select products only) IMPORTANT: Before enabling Trusted Platform Module (TPM) functionality on the screen after it to enter the Boot Device Options menu. 2. You can delete the downloaded file from your computer. Start Computer Setup. NOTE: If you connect your hard drive. a. b. NOTE: If you change the TPM setting to your computer to a network, consult the network administrator before installing...
... -screen instructions. 60 Chapter 10 Computer Setup (BIOS), TPM, and HP Sure Start TPM BIOS settings (select products only) IMPORTANT: Before enabling Trusted Platform Module (TPM) functionality on the screen after it to enter the Boot Device Options menu. 2. You can delete the downloaded file from your computer. Start Computer Setup. NOTE: If you connect your hard drive. a. b. NOTE: If you change the TPM setting to your computer to a network, consult the network administrator before installing...

User Guide
Page 74
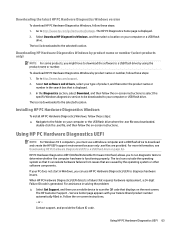
... Diagnostics Windows is installed, follow the onscreen instructions. Select HP PC Hardware Diagnostics Windows. - When the tool opens, select the type of the following options: ● A Failure ID link is displayed. NOTE: If you need to diagnose hardware failures. With a mobile device, scan the code and then follow the on-screen instructions. ● A Quick Response (QR) code is displayed. To access HP PC Hardware Diagnostics Windows from HP Help and Support: a. c. When HP PC Hardware Diagnostics Windows detects a failure that you want to run diagnostic tests to download...
... Diagnostics Windows is installed, follow the onscreen instructions. Select HP PC Hardware Diagnostics Windows. - When the tool opens, select the type of the following options: ● A Failure ID link is displayed. NOTE: If you need to diagnose hardware failures. With a mobile device, scan the code and then follow the on-screen instructions. ● A Quick Response (QR) code is displayed. To access HP PC Hardware Diagnostics Windows from HP Help and Support: a. c. When HP PC Hardware Diagnostics Windows detects a failure that you want to run diagnostic tests to download...
User Guide
Page 75
... Support - or - For assistance in Windows, you must use a Windows computer and a USB flash drive to scan the QR code that are provided. Follow the on the next screen. Using HP PC Hardware Diagnostics UEFI NOTE: For Windows 10 S computers, you can isolate hardware failures from issues that displays on -screen instructions. - Service Center page appears with your type of product, and then enter the product name or number in . Select Download HP Diagnostics Windows, and then select a location...
... Support - or - For assistance in Windows, you must use a Windows computer and a USB flash drive to scan the QR code that are provided. Follow the on the next screen. Using HP PC Hardware Diagnostics UEFI NOTE: For Windows 10 S computers, you can isolate hardware failures from issues that displays on -screen instructions. - Service Center page appears with your type of product, and then enter the product name or number in . Select Download HP Diagnostics Windows, and then select a location...

User Guide
Page 88
...HP LAN-Wireless Protection 20 HP MAC Address Pass Through 21 HP PC Hardware Diagnostics UEFI downloading 64 starting 64 using 63 HP PC Hardware Diagnostics Windows downloading 62 installing 63 using 62 HP Recovery media recovery 56 HP resources 1 HP Sure Recover 57 HP Touchpoint Manager 49 I initiating Sleep and Hibernation 34 input power 67 integrated numeric keypad, identifying 11 internal microphones, identifying 6 International Association of Accessibility Professionals 70 J jacks audio-out (headphone)/audio-in (microphone) combo 3 network 4 RJ-45 (network) 4 K keyboard and optional mouse...
...HP LAN-Wireless Protection 20 HP MAC Address Pass Through 21 HP PC Hardware Diagnostics UEFI downloading 64 starting 64 using 63 HP PC Hardware Diagnostics Windows downloading 62 installing 63 using 62 HP Recovery media recovery 56 HP resources 1 HP Sure Recover 57 HP Touchpoint Manager 49 I initiating Sleep and Hibernation 34 input power 67 integrated numeric keypad, identifying 11 internal microphones, identifying 6 International Association of Accessibility Professionals 70 J jacks audio-out (headphone)/audio-in (microphone) combo 3 network 4 RJ-45 (network) 4 K keyboard and optional mouse...

User Guide
Page 89
... 5 USB Type-C port, connecting 29, 33 USB Type-C power connector port, identifying 4 USB Type-C SuperSpeed port, identifying 4 user password 41 using the keyboard and optional mouse 26 using the touchpad 22 V vents, identifying 5, 9, 13 video 28 DisplayPort device 29 HDMI port 30 USB Type-C 29 wireless displays 32 volume adjusting 12 mute 12 W Windows backup 55 recovery media 55 system restore point 55 Windows application key, identifying 11 Windows Hello 27 using 65 resources, accessibility 73 restoring 55 right control zone, identifying 7 right side components 3 RJ-45 (network) jack...
... 5 USB Type-C port, connecting 29, 33 USB Type-C power connector port, identifying 4 USB Type-C SuperSpeed port, identifying 4 user password 41 using the keyboard and optional mouse 26 using the touchpad 22 V vents, identifying 5, 9, 13 video 28 DisplayPort device 29 HDMI port 30 USB Type-C 29 wireless displays 32 volume adjusting 12 mute 12 W Windows backup 55 recovery media 55 system restore point 55 Windows application key, identifying 11 Windows Hello 27 using 65 resources, accessibility 73 restoring 55 right control zone, identifying 7 right side components 3 RJ-45 (network) jack...

Maintenance and Service Guide
Page 70
...Start button, and then select HP Help and Support. Type support in the taskbar. c. To download HP PC Hardware Diagnostics Windows, see Downloading HP PC Hardware Diagnostics Windows on page 62. Select HP PC Hardware Diagnostics Windows. - Select Troubleshooting and fixes. When HP PC Hardware Diagnostics Windows detects a failure that requires hardware replacement, a 24-digit Failure ID code is generated. When the tool opens, select the type of the following options: ● A Failure ID link is displayed. 7 Using HP PC Hardware Diagnostics Using HP PC Hardware Diagnostics...
...Start button, and then select HP Help and Support. Type support in the taskbar. c. To download HP PC Hardware Diagnostics Windows, see Downloading HP PC Hardware Diagnostics Windows on page 62. Select HP PC Hardware Diagnostics Windows. - Select Troubleshooting and fixes. When HP PC Hardware Diagnostics Windows detects a failure that requires hardware replacement, a 24-digit Failure ID code is generated. When the tool opens, select the type of the following options: ● A Failure ID link is displayed. 7 Using HP PC Hardware Diagnostics Using HP PC Hardware Diagnostics...

Maintenance and Service Guide
Page 82
... the "Press the ESC key for Startup Menu" message is displayed at the bottom of the drive by using Disk Sanitizer, it cannot be recovered. j. Reboot the system. l. a. Select the Security menu and scroll down to continue. - Under Utilities, select Secure Erase, select the hard drive storing the data you want to clear, and then follow the on-screen instructions to the Utilities menu. Click Yes at...
... the "Press the ESC key for Startup Menu" message is displayed at the bottom of the drive by using Disk Sanitizer, it cannot be recovered. j. Reboot the system. l. a. Select the Security menu and scroll down to continue. - Under Utilities, select Secure Erase, select the hard drive storing the data you want to clear, and then follow the on-screen instructions to the Utilities menu. Click Yes at...
Maintenance and Service Guide
Page 84
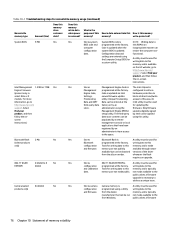
... to this configuration Tools for products only) configuration programmed using the Computer Setup (BIOS) or a custom utility. Does this memory retain data when power is this How is removed? What is the purpose of this How is data entered into this memory memory? Code is programmed at the factory. Table 10-1 Troubleshooting steps for Bluetooth programmed at the factory. System BIOS code is updated via Intel secure firmware update utility. NOTE: Writing...
... to this configuration Tools for products only) configuration programmed using the Computer Setup (BIOS) or a custom utility. Does this memory retain data when power is this How is removed? What is the purpose of this How is data entered into this memory memory? Code is programmed at the factory. Table 10-1 Troubleshooting steps for Bluetooth programmed at the factory. System BIOS code is updated via Intel secure firmware update utility. NOTE: Writing...
Maintenance and Service Guide
Page 91
... caps lock light, identifying 10 card reader board removal 42 spare part number 16, 42 cautions electrostatic discharge 22 components bottom 13 display 8 keyboard area 9 left side 7 right side 5 Computer Setup navigating and selecting 58 restoring factory settings 58 starting 58 computer setup 58 computer specifications 70 connector, power 6 D display assembly removal 50 spare part numbers 17, 50 display bezel spare part numbers 17 display components 8 display panel product description 1 display rear cover spare part number 18 display specifications 71 docking product description 3 drive light...
... caps lock light, identifying 10 card reader board removal 42 spare part number 16, 42 cautions electrostatic discharge 22 components bottom 13 display 8 keyboard area 9 left side 7 right side 5 Computer Setup navigating and selecting 58 restoring factory settings 58 starting 58 computer setup 58 computer specifications 70 connector, power 6 D display assembly removal 50 spare part numbers 17, 50 display bezel spare part numbers 17 display components 8 display panel product description 1 display rear cover spare part number 18 display specifications 71 docking product description 3 drive light...

Maintenance and Service Guide
Page 92
... part numbers 20 power lights 10 power requirements, product description 3 processor product description 1 product description audio 1 camera 1 display panel 1 docking 3 graphics 1 keyboard 3 media card reader 2 memory module 1 microphone 1 mini card 1 operating system 3 optical drive 1 pointing devices 3 ports 2 power requirements 3 processors 1 product name 1 RJ-45 (network) 2 security 3 sensors 3 serviceability 4 wireless 2 product name 1 product name and number, computer 14 R recovery 67 discs 68 HP Recovery partition 68 media 68 USB flash drive 68 recovery media creating using HP Cloud...
... part numbers 20 power lights 10 power requirements, product description 3 processor product description 1 product description audio 1 camera 1 display panel 1 docking 3 graphics 1 keyboard 3 media card reader 2 memory module 1 microphone 1 mini card 1 operating system 3 optical drive 1 pointing devices 3 ports 2 power requirements 3 processors 1 product name 1 RJ-45 (network) 2 security 3 sensors 3 serviceability 4 wireless 2 product name 1 product name and number, computer 14 R recovery 67 discs 68 HP Recovery partition 68 media 68 USB flash drive 68 recovery media creating using HP Cloud...

Maintenance and Service Guide
Page 93
... Remote HP PC Hardware Diagnostics UEFI settings customizing 65 using 65 removal/replacement procedures, Authorized Service Provider 26 removing personal data from volatile system memory 73 restoring 67 right side components 5 RJ-45 (network) jack, identifying 5 RJ-45 (network) lights, identifying 5 RJ-45 (network), product description 2 RTC battery removal 44 spare part number 16, 44 S Screw Kit, spare part number 20 security cable slot, identifying 7 security, product description 3 sensors product description 3 serial number, computer 14 service labels, locating...
... Remote HP PC Hardware Diagnostics UEFI settings customizing 65 using 65 removal/replacement procedures, Authorized Service Provider 26 removing personal data from volatile system memory 73 restoring 67 right side components 5 RJ-45 (network) jack, identifying 5 RJ-45 (network) lights, identifying 5 RJ-45 (network), product description 2 RTC battery removal 44 spare part number 16, 44 S Screw Kit, spare part number 20 security cable slot, identifying 7 security, product description 3 sensors product description 3 serial number, computer 14 service labels, locating...


