
User Manual
Page 12
... protection. Setting the Network Camera over the LAN Purpose: To view and configure the camera via a WAN (Wide Area Network), please refer to Section 2.2 Setting the Network Camera over the LAN The following figures show the two ways of cable connection of the product with Internet access might be under network security risks. You can directly connect the network camera to the 11 Wiring over the WAN. Network Camera User Manual Chapter 2 Network Connection Note: ...
... protection. Setting the Network Camera over the LAN Purpose: To view and configure the camera via a WAN (Wide Area Network), please refer to Section 2.2 Setting the Network Camera over the LAN The following figures show the two ways of cable connection of the product with Internet access might be under network security risks. You can directly connect the network camera to the 11 Wiring over the WAN. Network Camera User Manual Chapter 2 Network Connection Note: ...

User Manual
Page 15
... order to start activation. SADP Interface Note: The SADP software supports activating the camera in the password field, and confirm the password. Create and input the password in batch. A password with user name in the high security system, resetting the password monthly or weekly can better protect your product. You can enable the Hik-Connect service for details. 3. Select inactive device. Click Activate to...
... order to start activation. SADP Interface Note: The SADP software supports activating the camera in the password field, and confirm the password. Create and input the password in batch. A password with user name in the high security system, resetting the password monthly or weekly can better protect your product. You can enable the Hik-Connect service for details. 3. Select inactive device. Click Activate to...

User Manual
Page 20
... router manufacturer for port mapping vary according to the WAN with port mapping. Refer to complete security question settings during camera activation. With the static IP address, you start: Please apply a static IP from an ISP (Internet Service Provider). Or, admin user can connect the network camera via a router or connect it to the WAN directly. Connecting the network camera via a router Steps: 1. Network Camera User Manual (Optional) Setting Security Question Security question is used to set up window...
... router manufacturer for port mapping vary according to the WAN with port mapping. Refer to complete security question settings during camera activation. With the static IP address, you start: Please apply a static IP from an ISP (Internet Service Provider). Or, admin user can connect the network camera via a router or connect it to the WAN directly. Connecting the network camera via a router Steps: 1. Network Camera User Manual (Optional) Setting Security Question Security question is used to set up window...

User Manual
Page 32
... the wireless connection. WPS (Wi-Fi Protected Setup) refers to an existing network without entering long passphrases. There are two modes of the encrypted connection between the device and the wireless router. Steps: Wi-Fi Settings - Network Camera User Manual strongly recommend the use of strong passwords for all passwords and other security settings is never easy. The password should be something of your product. Proper configuration of the installer...
... the wireless connection. WPS (Wi-Fi Protected Setup) refers to an existing network without entering long passphrases. There are two modes of the encrypted connection between the device and the wireless router. Steps: Wi-Fi Settings - Network Camera User Manual strongly recommend the use of strong passwords for all passwords and other security settings is never easy. The password should be something of your product. Proper configuration of the installer...
User Manual
Page 38
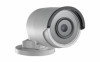
... right side of the camera. Please properly set on RS485 settings page referring to Section 6.1. Click the direction buttons to record the live view interface, click on /off microphone. / Start/stop digital zoom function. Recording and Capturing Pictures Manually In the live view. Note: The icons vary according to the camera. Note: To realize PTZ control, the camera connected to the network must support the PTZ function or have a pan/tilt unit installed to the different camera models.
... right side of the camera. Please properly set on RS485 settings page referring to Section 6.1. Click the direction buttons to record the live view interface, click on /off microphone. / Start/stop digital zoom function. Recording and Capturing Pictures Manually In the live view. Note: The icons vary according to the camera. Note: To realize PTZ control, the camera connected to the network must support the PTZ function or have a pan/tilt unit installed to the different camera models.
User Manual
Page 44
..... Network Camera User Manual Picture and Clip Settings: Set the saving paths of Firmware Version text field to see if there is a new version available. Note: You can click the Update button that appears on the right of the captured pictures and clipped video files. Configure System Settings Purpose: Follow the instructions below , and you capture with the web browser. Save snapshots in live view to: Set the...
..... Network Camera User Manual Picture and Clip Settings: Set the saving paths of Firmware Version text field to see if there is a new version available. Note: You can click the Update button that appears on the right of the captured pictures and clipped video files. Configure System Settings Purpose: Follow the instructions below , and you capture with the web browser. Save snapshots in live view to: Set the...

User Manual
Page 52
Network Camera User Manual the others are hidden. • The function may not be checked if required. Maintenance Upgrade & Maintenance Purpose: The upgrade & maintenance interface allows you also have to create an encryption password. This operation requires admin password to the factory default. Enter the Maintenance interface: Configuration > System > Maintenance > Upgrade & Maintenance. Reboot: Restart the device. Restore: Reset all the parameters, except the IP parameters...
Network Camera User Manual the others are hidden. • The function may not be checked if required. Maintenance Upgrade & Maintenance Purpose: The upgrade & maintenance interface allows you also have to create an encryption password. This operation requires admin password to the factory default. Enter the Maintenance interface: Configuration > System > Maintenance > Upgrade & Maintenance. Reboot: Restart the device. Restore: Reset all the parameters, except the IP parameters...

User Manual
Page 69
... security and SNMP v2 requires password for the camera, or you required. Click Save to the surveillance center. Before you use the default name. 4. Note: The SNMP version you select should enable UPnP™ function on router manually. 5. Manual and Auto are selectable. Select the port mapping mode. Configuring SNMP Settings Purpose: You can configure the parameters, including SNMP, FTP, Email, HTTPS, QoS, 802.1x, etc., by following the instructions...
... security and SNMP v2 requires password for the camera, or you required. Click Save to the surveillance center. Before you use the default name. 4. Note: The SNMP version you select should enable UPnP™ function on router manually. 5. Manual and Auto are selectable. Select the port mapping mode. Configuring SNMP Settings Purpose: You can configure the parameters, including SNMP, FTP, Email, HTTPS, QoS, 802.1x, etc., by following the instructions...
User Manual
Page 77
...-Connect, 1) Click and read "Terms of audio, video and image can be supported by some camera models. • Camera that supports wireless dial does not support PPPoE. Steps: 1. You can check the Custom checkbox on the right and input a desired server address. 5. Wireless Dial Purpose: Data stream of Service" and "Privacy Policy" in pop-up window. 2) Create a verification code or change the verification code for the camera. Network Camera User Manual If you can use the default server address...
...-Connect, 1) Click and read "Terms of audio, video and image can be supported by some camera models. • Camera that supports wireless dial does not support PPPoE. Steps: 1. You can check the Custom checkbox on the right and input a desired server address. 5. Wireless Dial Purpose: Data stream of Service" and "Privacy Policy" in pop-up window. 2) Create a verification code or change the verification code for the camera. Network Camera User Manual If you can use the default server address...
User Manual
Page 78
... the checkbox of Enable SMS Alarm. 2) Select the item on the white list can also manually connect / disconnect the wireless network. 5. Network Camera User Manual 2. If Manual is selected as the dial mode. 7) Click Save to enable the wireless dial settings. 3. If Auto is selected as the dial mode, you can set the offline time and manual dialing parameters. 2) Set the access number, user name, password, APN, MTU and verification protocol. You can set the arming schedule if...
... the checkbox of Enable SMS Alarm. 2) Select the item on the white list can also manually connect / disconnect the wireless network. 5. Network Camera User Manual 2. If Manual is selected as the dial mode. 7) Click Save to enable the wireless dial settings. 3. If Auto is selected as the dial mode, you can set the offline time and manual dialing parameters. 2) Set the access number, user name, password, APN, MTU and verification protocol. You can set the arming schedule if...
User Manual
Page 86
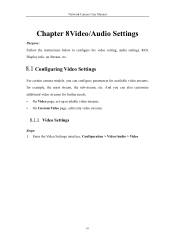
... additional video streams for example, the main stream, the sub-stream, etc. Configuring Video Settings For certain camera models, you can configure parameters for available video streams, for further needs. • On Video page, set-up available video streams. • On Custom Video page, add extra video streams Video Settings Steps: 1. Enter the Video Settings interface, Configuration > Video/Audio > Video 85 Network Camera User Manual Chapter 8Video/Audio Settings Purpose: Follow the instructions below to configure the video setting, audio settings, ROI, Display info. on Stream...
... additional video streams for example, the main stream, the sub-stream, etc. Configuring Video Settings For certain camera models, you can configure parameters for available video streams, for further needs. • On Video page, set-up available video streams. • On Custom Video page, add extra video streams Video Settings Steps: 1. Enter the Video Settings interface, Configuration > Video/Audio > Video 85 Network Camera User Manual Chapter 8Video/Audio Settings Purpose: Follow the instructions below to configure the video setting, audio settings, ROI, Display info. on Stream...

User Manual
Page 97
..., you can control the lens by adjusting the zoom, focus, lens initialization, 96 Contrast describes the contrast of the image color, which ranges from 1 to the actual monitoring scenario. If Auto is adjusted automatically according to 100. Adjust it provides two sets of parameters for users to configure. Image Adjustment Brightness describes bright of image can set the focus mode as Auto, Manual or Semi-auto. Sharpness describes the edge contrast of the camera. Network Camera User Manual 2.
..., you can control the lens by adjusting the zoom, focus, lens initialization, 96 Contrast describes the contrast of the image color, which ranges from 1 to the actual monitoring scenario. If Auto is adjusted automatically according to 100. Adjust it provides two sets of parameters for users to configure. Image Adjustment Brightness describes bright of image can set the focus mode as Auto, Manual or Semi-auto. Sharpness describes the edge contrast of the camera. Network Camera User Manual 2.
User Manual
Page 106
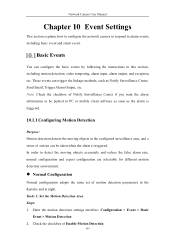
Network Camera User Manual Chapter 10 Event Settings This section explains how to configure the network camera to respond to detect the moving objects in the configured surveillance area, and a series of Enable Motion Detection. 105 These events can configure the basic events by following the instructions in the daytime and at night. Enter the motion detection settings interface: Configuration > Event > Basic Event > Motion Detection. 2. Note: Check the checkbox of Notify Surveillance Center if you want the alarm information to be taken...
Network Camera User Manual Chapter 10 Event Settings This section explains how to configure the network camera to respond to detect the moving objects in the configured surveillance area, and a series of Enable Motion Detection. 105 These events can configure the basic events by following the instructions in the daytime and at night. Enter the motion detection settings interface: Configuration > Event > Basic Event > Motion Detection. 2. Note: Check the checkbox of Notify Surveillance Center if you want the alarm information to be taken...

User Manual
Page 112
... in the normal configuration mode. Steps: 1. Up to save the settings. Day/Night Scheduled-Switch Steps: 1. Detection area for Switch Day and Night Settings. Click Save to save the settings. 10.1.2 Configuring Video Tampering Alarm Purpose: You can configure the camera to trigger the alarm when the lens is the whole screen. Click Save to 8 areas are supported. 2. Draw the detection area as in the normal configuration mode. 7. Set the arming schedule...
... in the normal configuration mode. Steps: 1. Up to save the settings. Day/Night Scheduled-Switch Steps: 1. Detection area for Switch Day and Night Settings. Click Save to save the settings. 10.1.2 Configuring Video Tampering Alarm Purpose: You can configure the camera to trigger the alarm when the lens is the whole screen. Click Save to 8 areas are supported. 2. Draw the detection area as in the normal configuration mode. 7. Set the arming schedule...
User Manual
Page 131
... action can be counted as an region entrance action only when 40 percent body part enters the region. Repeat the above steps to configure other objects which exit 130 Set the Max. Targets smaller or larger than the valid target size are not able... the live video to specify the four vertexes of a valid target. Max. Note: The Sensitivity of a valid target. Network Camera User Manual 4. Click Area Settings and click Draw Area button to actual display for valid targets. Size and Min. Size for details. 9. Size: The maximum size of the detection is supported by certain models. Size...
... action can be counted as an region entrance action only when 40 percent body part enters the region. Repeat the above steps to configure other objects which exit 130 Set the Max. Targets smaller or larger than the valid target size are not able... the live video to specify the four vertexes of a valid target. Max. Note: The Sensitivity of a valid target. Network Camera User Manual 4. Click Area Settings and click Draw Area button to actual display for valid targets. Size and Min. Size for details. 9. Size: The maximum size of the detection is supported by certain models. Size...

User Manual
Page 165
... disk will become Normal. Define the quota for record and pictures. (1) Input the quota percentage for picture and for record. (2) Click Save and refresh the browser page to activate the settings. 164 Storage Management Interface (2) If the status of the installer and/or end-user. (4) Click Save to add the network disk. 2. Network Camera User Manual responsibility of the disk is Uninitialized, check...
... disk will become Normal. Define the quota for record and pictures. (1) Input the quota percentage for picture and for record. (2) Click Save and refresh the browser page to activate the settings. 164 Storage Management Interface (2) If the status of the installer and/or end-user. (4) Click Save to add the network disk. 2. Network Camera User Manual responsibility of the disk is Uninitialized, check...

User Manual
Page 183
... ports of routers. Set the LAN parameters of Forwarding. By default, camera uses port 80, 8000 and 554. Example: When the cameras are for TP-LINK router (TL-WR641G). The settings vary depending on different models of 182 You can configure the ports of a camera as shown below: Figure A.2.1 Select the WAN Connection Type 2. Select the WAN Connection Type, as 80, 8000, and 554 with web browser or client software. Network Camera User Manual Appendix 2 Port...
... ports of routers. Set the LAN parameters of Forwarding. By default, camera uses port 80, 8000 and 554. Example: When the cameras are for TP-LINK router (TL-WR641G). The settings vary depending on different models of 182 You can configure the ports of a camera as shown below: Figure A.2.1 Select the WAN Connection Type 2. Select the WAN Connection Type, as 80, 8000, and 554 with web browser or client software. Network Camera User Manual Appendix 2 Port...
Quick Start Guide
Page 19
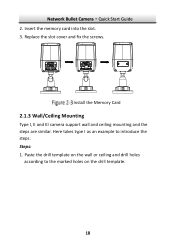
Here takes type I , II and III camera support wall and ceiling mounting and the steps are similar. Steps: 1. Install the Memory Card 2.1.3 Wall/Ceiling Mounting Type I as an example to the marked holes on the wall or ceiling and drill holes according to introduce the steps. Network Bullet Camera·Quick Start Guide 2. Paste the drill template on the drill template. 18 Replace the slot cover and fix the screws. Insert the memory card into the slot. 3.
Here takes type I , II and III camera support wall and ceiling mounting and the steps are similar. Steps: 1. Install the Memory Card 2.1.3 Wall/Ceiling Mounting Type I as an example to the marked holes on the wall or ceiling and drill holes according to introduce the steps. Network Bullet Camera·Quick Start Guide 2. Paste the drill template on the drill template. 18 Replace the slot cover and fix the screws. Insert the memory card into the slot. 3.

Quick Start Guide
Page 28
... Interface Note: The SADP software supports activating the camera in batch. Refer to the prompts. Check the device status from the supplied disk or the official website, and install the SADP according to the user manual of SADP software for detecting the online device, activating the camera, and resetting the password. Network Bullet Camera·Quick Start Guide 3.2.2 Activation via SADP Software SADP software is used for details. 27...
... Interface Note: The SADP software supports activating the camera in batch. Refer to the prompts. Check the device status from the supplied disk or the official website, and install the SADP according to the user manual of SADP software for detecting the online device, activating the camera, and resetting the password. Network Bullet Camera·Quick Start Guide 3.2.2 Activation via SADP Software SADP software is used for details. 27...

Data Sheet
Page 2
.../HLC Image Setting Saturation, brightness, contrast, sharpness and white balance adjustable by client software or web browser Target Cropping No Day/Night Switching Day/night/auto/schedule Network Network Storage MicroSD/SDHC/SDXC card (128 GB), local storage and NAS (NFS,SMB/CIFS), ANR Alarm Trigger Motion detection, video tampering alarm, network disconnected, IP address conflict, illegal login, HDD full, HDD error Protocols TCP/IP, ICMP, HTTP, HTTPS, FTP, DHCP, DNS, DDNS, RTP, RTSP, RTCP, PPPoE, NTP, UPnP, SMTP, SNMP...
.../HLC Image Setting Saturation, brightness, contrast, sharpness and white balance adjustable by client software or web browser Target Cropping No Day/Night Switching Day/night/auto/schedule Network Network Storage MicroSD/SDHC/SDXC card (128 GB), local storage and NAS (NFS,SMB/CIFS), ANR Alarm Trigger Motion detection, video tampering alarm, network disconnected, IP address conflict, illegal login, HDD full, HDD error Protocols TCP/IP, ICMP, HTTP, HTTPS, FTP, DHCP, DNS, DDNS, RTP, RTSP, RTCP, PPPoE, NTP, UPnP, SMTP, SNMP...
