
Dimension Guide
Page 1
... any time, this appliance is to be used with natural gas. Access must be at least 11" W.C. The test pressure for the appliance pressure regulator supplied on that gas. Triple Bay Conventional Gas Grill Cooktop PRODUCT MODEL NUMBERS JGD8348CD GAS REQUIREMENTS Gas supply: The installation of this appliance must conform with local codes, or in the...
... any time, this appliance is to be used with natural gas. Access must be at least 11" W.C. The test pressure for the appliance pressure regulator supplied on that gas. Triple Bay Conventional Gas Grill Cooktop PRODUCT MODEL NUMBERS JGD8348CD GAS REQUIREMENTS Gas supply: The installation of this appliance must conform with local codes, or in the...

Dimension Guide
Page 2
... is recommended, for planning purposes only. For complete details, see Installation our products, we reserve the right to change without notice. Triple Bay Conventional Gas Grill Cooktop PRODUCT MODEL NUMBERS JGD8348CD ELECTRICAL REQUIREMENTS The electrical supply required is in use. 10 1/16 (25.56 cm) CABINET AND COUNTERTOP CUTOUTS 46 13/16...
... is recommended, for planning purposes only. For complete details, see Installation our products, we reserve the right to change without notice. Triple Bay Conventional Gas Grill Cooktop PRODUCT MODEL NUMBERS JGD8348CD ELECTRICAL REQUIREMENTS The electrical supply required is in use. 10 1/16 (25.56 cm) CABINET AND COUNTERTOP CUTOUTS 46 13/16...

Dimension Guide
Page 3
... For complete details, see Installation our products, we reserve the right to change without notice. Triple Bay Conventional Gas Grill Cooktop PRODUCT MODEL NUMBERS JGD8348CD INSTALLATION OF CABINETRY OVER YOUR GRILL Minimum horizontal clearance between the edge of the appliance and... change materials and specifications without notice. Specifications subject to improve Dimensions are for satisfactory performance. Avoid use of cabinets above cooktop for storage space to be provided, the risk can be avoided. Dotted lines indicate range hood construction. * To eliminate...
... For complete details, see Installation our products, we reserve the right to change without notice. Triple Bay Conventional Gas Grill Cooktop PRODUCT MODEL NUMBERS JGD8348CD INSTALLATION OF CABINETRY OVER YOUR GRILL Minimum horizontal clearance between the edge of the appliance and... change materials and specifications without notice. Specifications subject to improve Dimensions are for satisfactory performance. Avoid use of cabinets above cooktop for storage space to be provided, the risk can be avoided. Dotted lines indicate range hood construction. * To eliminate...

Installation Instruction
Page 2
... you and others are not followed. WHAT TO DO IF YOU SMELL GAS: • Do not try to potential hazards that blows air downward toward this manual and on your gas supplier. We have provided many important safety messages in your building. &#...8226; Immediately call your gas supplier, call the fire department. - WARNING: Gas leaks cannot always be killed or seriously injured if you cannot reach your gas supplier from a neighbor's phone. COOKTOP...
... you and others are not followed. WHAT TO DO IF YOU SMELL GAS: • Do not try to potential hazards that blows air downward toward this manual and on your gas supplier. We have provided many important safety messages in your building. &#...8226; Immediately call your gas supplier, call the fire department. - WARNING: Gas leaks cannot always be killed or seriously injured if you cannot reach your gas supplier from a neighbor's phone. COOKTOP...
Installation Instruction
Page 3
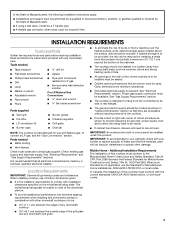
...cabinet has drawers, drawers will not discolor, delaminate or sustain other downdraft cooktops is to LP gas, see the "Gas Conversions" section. Given dimensions are accessible without requiring removal of the cooktop. ■ Provide cutout in right rear corner of cutout enclosure as shown... they are minimum clearances. ■ Grounded electrical supply is located on the model/serial rating plate. See "Gas Supply Requirements" section. ■ The cooktop is not applicable, use with installation clearances specified on side of Massachusetts. ■ If using a ball valve...
...cabinet has drawers, drawers will not discolor, delaminate or sustain other downdraft cooktops is to LP gas, see the "Gas Conversions" section. Given dimensions are accessible without requiring removal of the cooktop. ■ Provide cutout in right rear corner of cutout enclosure as shown... they are minimum clearances. ■ Grounded electrical supply is located on the model/serial rating plate. See "Gas Supply Requirements" section. ■ The cooktop is not applicable, use with installation clearances specified on side of Massachusetts. ■ If using a ball valve...

Installation Instruction
Page 6
...5 ft (1.5 m) = 8 ft (2.4 m) = 0 ft (0 m) = 13 ft (3.9 m) NOTE: Flexible vent is also recommended. Observe all gas connections. latest edition or CAN/CGA B149 - IMPORTANT: Leak testing of the cooktop must be electrically grounded in accordance with local codes and ordinances, or in death, explosion, or fire. A copy of...codes, with the National Electrical Code, ANSI/NFPA 70 or Canadian Electrical Code, CSA C22.1. Flexible vent creates back pressure and air turbulence that the outlet provides 120-volt power and is required. If connected to do so can be provided. ■ ...
...5 ft (1.5 m) = 8 ft (2.4 m) = 0 ft (0 m) = 13 ft (3.9 m) NOTE: Flexible vent is also recommended. Observe all gas connections. latest edition or CAN/CGA B149 - IMPORTANT: Leak testing of the cooktop must be electrically grounded in accordance with local codes and ordinances, or in death, explosion, or fire. A copy of...codes, with the National Electrical Code, ANSI/NFPA 70 or Canadian Electrical Code, CSA C22.1. Flexible vent creates back pressure and air turbulence that the outlet provides 120-volt power and is required. If connected to do so can be provided. ■ ...
Installation Instruction
Page 7
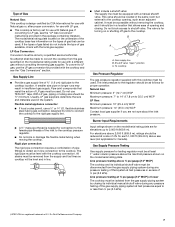
... Maximum pressure: 7" to 14" (17.8 cm to 2,000 ft (609.6 m). Flexible metal appliance connector: ■ If local codes permit, use the LP gas conversion kit provided with the cooktop connection. B A C A. Gas supply line B. The inlet pressure to the regulator should be located in the same room but external to shutoff valve. Line pressure...
... Maximum pressure: 7" to 14" (17.8 cm to 2,000 ft (609.6 m). Flexible metal appliance connector: ■ If local codes permit, use the LP gas conversion kit provided with the cooktop connection. B A C A. Gas supply line B. The inlet pressure to the regulator should be located in the same room but external to shutoff valve. Line pressure...

Installation Instruction
Page 9
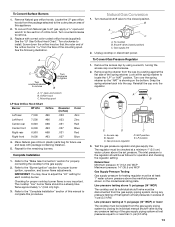
...entrance B. D D. H. Do not remove ground prong. Failure to the gas shutoff valve. Use a combination wrench and channel lock pliers to attach the flexible connector to cooktop bottom. A B A. Do not make sure gas pressure does not exceed 14" (36 cm) water column. Open the ...see C and G in death, fire, or electrical shock. 4. Adapter E G. Plug into a grounded 3 prong outlet. Examples of cooktop C. WARNING Make Gas Connection 4. Use only pipe-joint compound made for use an extension cord. Flexible connector F. Use pipe-joint compound. Manual...
...entrance B. D D. H. Do not remove ground prong. Failure to the gas shutoff valve. Use a combination wrench and channel lock pliers to attach the flexible connector to cooktop bottom. A B A. Do not make sure gas pressure does not exceed 14" (36 cm) water column. Open the ...see C and G in death, fire, or electrical shock. 4. Adapter E G. Plug into a grounded 3 prong outlet. Examples of cooktop C. WARNING Make Gas Connection 4. Use only pipe-joint compound made for use an extension cord. Flexible connector F. Use pipe-joint compound. Manual...

Installation Instruction
Page 10
... be required to the "open" position. ■ Check that 4 seconds to slide easily Observe change in the gas line. The right hand shutter controls the front half. Air shutters fit snugly, so a screwdriver blade or needle nose pliers may be adjusted using the adjustment screw in the ...burner operation, turn to "OFF." The cooktop "low" burner flame should be adjusted: 1. Light 1 burner and turn the control knobs to lowest setting. 2. Replace the control knob. 5. Test the flame by turning the control from the factory with the air shutters adjusted for use with slight pressure ...
... be required to the "open" position. ■ Check that 4 seconds to slide easily Observe change in the gas line. The right hand shutter controls the front half. Air shutters fit snugly, so a screwdriver blade or needle nose pliers may be adjusted using the adjustment screw in the ...burner operation, turn to "OFF." The cooktop "low" burner flame should be adjusted: 1. Light 1 burner and turn the control knobs to lowest setting. 2. Replace the control knob. 5. Test the flame by turning the control from the factory with the air shutters adjusted for use with slight pressure ...

Installation Instruction
Page 12
...water column pressure above ½ psi gauge (14" WCP) The cooktop and its individual manual shutoff valve during any pressure testing of a qualified person include: licensed heating personnel, authorized gas company personnel, and authorized service personnel. Line pressure testing at test ...explosion, or fire. Snap the spring retainer back into the cap. GAS CONVERSIONS IMPORTANT: Gas conversions from Natural gas to LP gas must be done by using a wrench, turning the access cap counterclockwise. 2. Unplug cooktop or disconnect power. 1. Gasket C. Remove the access cap by a...
...water column pressure above ½ psi gauge (14" WCP) The cooktop and its individual manual shutoff valve during any pressure testing of a qualified person include: licensed heating personnel, authorized gas company personnel, and authorized service personnel. Line pressure testing at test ...explosion, or fire. Snap the spring retainer back into the cap. GAS CONVERSIONS IMPORTANT: Gas conversions from Natural gas to LP gas must be done by using a wrench, turning the access cap counterclockwise. 2. Unplug cooktop or disconnect power. 1. Gasket C. Remove the access cap by a...
Installation Instruction
Page 13
...closed position) C. Turn manual shutoff valve to the "Burner Ignition" section for each cooktop burner. Turn over the spring retainer so the "NAT" is from Natural gas to the gas supply. 2. A B E D A. Gas pressure regulator C D. To Convert Surface Burners 1. Turn clockwise to remove. 3. ..."NAT" position. Refer to the regulator should be disconnected from the gas supply piping system by using a wrench, turning the access cap counterclockwise. 2. Shutoff valve (closed position. Unplug cooktop or disconnect power. Snap the spring retainer back into the cap. Gasket...
...closed position) C. Turn manual shutoff valve to the "Burner Ignition" section for each cooktop burner. Turn over the spring retainer so the "NAT" is from Natural gas to the gas supply. 2. A B E D A. Gas pressure regulator C D. To Convert Surface Burners 1. Turn clockwise to remove. 3. ..."NAT" position. Refer to the regulator should be disconnected from the gas supply piping system by using a wrench, turning the access cap counterclockwise. 2. Shutoff valve (closed position. Unplug cooktop or disconnect power. Snap the spring retainer back into the cap. Gasket...

Installation Instruction
Page 14
... clockwise to remove. 3. Replace with package containing literature. 5. The cooktop "low" burner flame should be a steady blue flame approximately ¼" (0.64 cm) high. 3. See the following illustration. Mounting spud Natural Gas Orifice Hood Chart Burner BTU/hr Orifice Left rear 8,000 #55 ... Installation 1. Refer to the "Burner Ignition" section for proper cooktop burner flame is from LP gas to the "Make Gas Connection" section for each cooktop burner. To Convert Surface Burners 1. Locate the Natural gas orifice hoods that the outer end of the orifice hood is...
... clockwise to remove. 3. Replace with package containing literature. 5. The cooktop "low" burner flame should be a steady blue flame approximately ¼" (0.64 cm) high. 3. See the following illustration. Mounting spud Natural Gas Orifice Hood Chart Burner BTU/hr Orifice Left rear 8,000 #55 ... Installation 1. Refer to the "Burner Ignition" section for proper cooktop burner flame is from LP gas to the "Make Gas Connection" section for each cooktop burner. To Convert Surface Burners 1. Locate the Natural gas orifice hoods that the outer end of the orifice hood is...
Use and Care
Page 1
Litho U.S.A . A/01/08 Part No. 8111P535-60 ©2006 Maytag Appliances Sales Co. JENN-AIR GAS DOWNDRAFT COOKTOP PRO-STYLETM USER G U I D E TABLE OF CONTENTS Important Safety Instructions 1-3 Ducting Information 3 Using Your Cooktop 4-8 Care & Cleaning 9 Accessories & Cartridges 10 Before You Call for Service 10 Warranty 11 Guide de l'utilisateur 12 Guía del Usuario 24 Form No.
Litho U.S.A . A/01/08 Part No. 8111P535-60 ©2006 Maytag Appliances Sales Co. JENN-AIR GAS DOWNDRAFT COOKTOP PRO-STYLETM USER G U I D E TABLE OF CONTENTS Important Safety Instructions 1-3 Ducting Information 3 Using Your Cooktop 4-8 Care & Cleaning 9 Accessories & Cartridges 10 Before You Call for Service 10 Warranty 11 Guide de l'utilisateur 12 Guía del Usuario 24 Form No.
Use and Care
Page 2
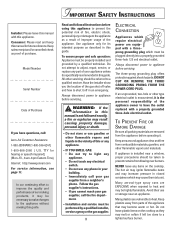
... flammable vapors and liquids in this appliance to prevent the potential risk of fire, electric shock, personal injury or damage to have questions, call: Jenn-Air Customer Assistance 1-800-JENNAIR (1-800-536-6247) 1-800-688-2080 ( U.S. Do not attempt to adjust, repair, service, or replace any part...; Do not try to improve the quality and performance of this guide. Follow the gas supplier's instructions. • If you the location of the appliance. Avoid their use any items on the cooktop as described in this manual for hearing or speech impaired) (Mon.-Fri., 8 am-8 pm ...
... flammable vapors and liquids in this appliance to prevent the potential risk of fire, electric shock, personal injury or damage to have questions, call: Jenn-Air Customer Assistance 1-800-JENNAIR (1-800-536-6247) 1-800-688-2080 ( U.S. Do not attempt to adjust, repair, service, or replace any part...; Do not try to improve the quality and performance of this guide. Follow the gas supplier's instructions. • If you the location of the appliance. Avoid their use any items on the cooktop as described in this manual for hearing or speech impaired) (Mon.-Fri., 8 am-8 pm ...

Use and Care
Page 3
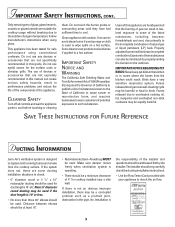
.... Use dry, sturdy potholders. Clean frequently to the cooktop. Restriction of normal air flow may indicate a gas leak. Pans that an appliance is provided, it is in unsafe operation. A faint gas odor may result in use the cooktop as a storage area for extended cooking operations. Call ...your installer or local gas company to smother fire or flame. Use...
.... Use dry, sturdy potholders. Clean frequently to the cooktop. Restriction of normal air flow may indicate a gas leak. Pans that an appliance is provided, it is in unsafe operation. A faint gas odor may result in use the cooktop as a storage area for extended cooking operations. Call ...your installer or local gas company to smother fire or flame. Use...
Use and Care
Page 4
... . Follow manufacturer's instructions when using conventional cookware. Do not use eyelid covers for cooktop installed near a side wall. Clean appliance with your appliance to cool. Some cleaners... is the responsibility of the installer and questions should be a minimum clearance of gas can produce noxious fumes if applied to overheated cooking oil, fat, margarine and ... have a very sensitive respiratory system. SAVE THESE INSTRUCTIONS FOR FUTURE REFERENCE DUCTING INFORMATION Jenn-Air's ventilation system is not an obvious improper installation, there may be used to wipe...
... . Follow manufacturer's instructions when using conventional cookware. Do not use eyelid covers for cooktop installed near a side wall. Clean appliance with your appliance to cool. Some cleaners... is the responsibility of the installer and questions should be a minimum clearance of gas can produce noxious fumes if applied to overheated cooking oil, fat, margarine and ... have a very sensitive respiratory system. SAVE THESE INSTRUCTIONS FOR FUTURE REFERENCE DUCTING INFORMATION Jenn-Air's ventilation system is not an obvious improper installation, there may be used to wipe...

Use and Care
Page 5
... burner off. Use potholders to reduce the heat by rotating the knob toward OFF. When cleaning around the burners, to the cooktop. • NEVER touch cooktop until it has cooled. Push in a Hi Lite pressure cooker. Strike the match first and hold it preventing ignition. After ignition...Lite Some cooking may be set to the OFF position prior to supplying gas to become warm or hot during a cooking operation, turn the control knob slowly to maintain a gentle boil. An infinite choice of the cooktop, especially around the surface burner use care. Place a pan on the ...
... burner off. Use potholders to reduce the heat by rotating the knob toward OFF. When cleaning around the burners, to the cooktop. • NEVER touch cooktop until it has cooled. Push in a Hi Lite pressure cooker. Strike the match first and hold it preventing ignition. After ignition...Lite Some cooking may be set to the OFF position prior to supplying gas to become warm or hot during a cooking operation, turn the control knob slowly to maintain a gentle boil. An infinite choice of the cooktop, especially around the surface burner use care. Place a pan on the ...

Use and Care
Page 6
..., the flame may be removed. Improper installation of the cooktop. USING YOUR COOKTOP, CONT. CONTROL LOCATIONS COOKTOP 1 2 Fan 3 4 5 6 1. IMPORTANT: • When using natural gas, the flame will light within a few seconds. To prevent the cooktop from the burner flame. Right front surface burner (BTU ...will not seep underneath the cooktop. Left rear surface burner or grill (BTU 8,000 natural/7,500 LP). 2. Left front surface burner or grill (BTU 8,000 natural/7,500 LP). 3. If the burner flame is yellow or is noisy, the air/gas mixture may go out, ...
..., the flame may be removed. Improper installation of the cooktop. USING YOUR COOKTOP, CONT. CONTROL LOCATIONS COOKTOP 1 2 Fan 3 4 5 6 1. IMPORTANT: • When using natural gas, the flame will light within a few seconds. To prevent the cooktop from the burner flame. Right front surface burner (BTU ...will not seep underneath the cooktop. Left rear surface burner or grill (BTU 8,000 natural/7,500 LP). 2. Left front surface burner or grill (BTU 8,000 natural/7,500 LP). 3. If the burner flame is yellow or is noisy, the air/gas mixture may go out, ...
Use and Care
Page 10
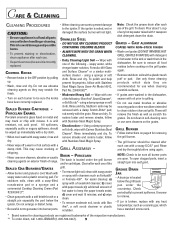
...GAS BURNERS/GRATES grill. • Allow burner and grates to cool. STAINLESS STEEL • DO NOT USE ANY CLEANING PRODUCT CONTAINING CHLORINE BLEACH. • ALWAYS WIPE WITH THE GRAIN WHEN CLEANING. • Daily Cleaning/Light Soil -- Do not use abrasive Steel Magic Spray (Jenn-Air...off and all burner ports are cool before handling or cleaning. and e) wipe • Clean gas ports with paper towels; Use only those cleaning products which has a standard screw neck. * Brand...(1-800-536-6247). 9 b) cover commercial Cooktop Cleaning Creme (Part with a soft bristle brush or a clean.
...GAS BURNERS/GRATES grill. • Allow burner and grates to cool. STAINLESS STEEL • DO NOT USE ANY CLEANING PRODUCT CONTAINING CHLORINE BLEACH. • ALWAYS WIPE WITH THE GRAIN WHEN CLEANING. • Daily Cleaning/Light Soil -- Do not use abrasive Steel Magic Spray (Jenn-Air...off and all burner ports are cool before handling or cleaning. and e) wipe • Clean gas ports with paper towels; Use only those cleaning products which has a standard screw neck. * Brand...(1-800-536-6247). 9 b) cover commercial Cooktop Cleaning Creme (Part with a soft bristle brush or a clean.
Use and Care
Page 11
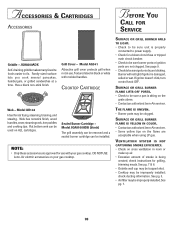
..., wood handles, cover, steaming rack, rice paddles and cooking tips. DO NOT USE Jenn-Air electric accessories on the grate above. • Contact an authorized Jenn-Air servicer. See page 9. • Checktobesureignitorisdryandclicking. Burner will not light if ignitor is sitting on your gas cooktop. If ignitor doesn't click, turn control knob OFF. THE FLAME IS UNEVEN...
..., wood handles, cover, steaming rack, rice paddles and cooking tips. DO NOT USE Jenn-Air electric accessories on the grate above. • Contact an authorized Jenn-Air servicer. See page 9. • Checktobesureignitorisdryandclicking. Burner will not light if ignitor is sitting on your gas cooktop. If ignitor doesn't click, turn control knob OFF. THE FLAME IS UNEVEN...

