Jenn-Air JXU9130HP Support and Manuals
Get Help and Manuals for this Jenn-Air item
View All Support Options Below
Free Jenn-Air JXU9130HP manuals!
Problems with Jenn-Air JXU9130HP?
Ask a Question
Free Jenn-Air JXU9130HP manuals!
Problems with Jenn-Air JXU9130HP?
Ask a Question
Jenn-Air JXU9130HP Videos

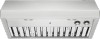
Jenn-Air JXU9130HP Ventilation
Duration: :33
Total Views: 30
Duration: :33
Total Views: 30
Jenn-Air JXU9130HP Hotte
Duration: :30
Total Views: 3
Duration: :30
Total Views: 3
Popular Jenn-Air JXU9130HP Manual Pages
Owners Manual and Install - Page 2

... REQUIREMENTS 4
Tools and Parts 4 Location Requirements 4 Venting Requirements 5 Electrical Requirements 6 INSTALLATION INSTRUCTIONS 7 Prepare Location 7 Install Range Hood 9 Make Electrical Connection 9 Install Vent Covers (Optional 10 Complete Installation 10 RANGE HOOD USE 10 Range Hood Controls 10 RANGE HOOD CARE 11 Cleaning 11 WIRING DIAGRAM 12 ASSISTANCE OR SERVICE 13 In the...
Owners Manual and Install - Page 4

...Part 328 (formerly the Federal Standard for Manufactured Home Installation 1982 (Manufactured Home Sites, Communities and Setups) ANSI A225.1/NFPA 501A, or latest edition, or with local codes. The model... ■■ Metal snips ■■ Phillips screwdriver ■■ Metric hex key set for 36" (91.4 cm) model ■■ T20® Torx®† adapter ■■ 4 - 5 ...
Owners Manual and Install - Page 5

...building codes may require the use of makeup air systems when using ventilation systems greater than specified CFM of canopy
13" (33.0 cm)
to locale. Venting Methods
This canopy hood is factory set for installations ... close as part of the vent system. Consult your area. To vent out of the top of the range hood and through a wall, a 90° elbow is needed for specific requirements in...
Owners Manual and Install - Page 8

... right and left of the 4 keyhole mounting slots on the wall. Set range hood aside on a covered surface. Mark on the underside of cabinet... Mark centers of the cabinet. A
3. Set range hood aside on a covered surface. Leave about 1/4" (6.4 cm) space between screw heads and cabinet to screw into, additional wall framing supports may be installed into place.
¹⁄₄" (6.4...
Owners Manual and Install - Page 9

... rectangular knockout. Replace all parts and panels before servicing. Disconnect power.
Vent knockouts E. Green (or bare) and yellow-green ground wire E. Remove knockout from damper flap. Install Range Hood
1....Remove terminal box cover and set aside. 4. Seal joints with each other. Black wires C. There must be installed up to 1" (2.5 cm) on your installation, remove either side of...
Owners Manual and Install - Page 11

...service. 1. Cleaning Method:
■■ Liquid detergent soap and water, or all-purpose cleanser
■■ Wipe with damp soft cloth or nonabrasive sponge, then rinse with a GU10 base. Replacing... rear handle and set the front of the grease filter into rear track.
2. Replace bulb, using tissue...front handle to the following instructions. Remove the bulb and replace it with a 120 V, ...
Owners Manual and Install - Page 13

... replacement parts in the United States.
■■ Features and specifications on our full line of service. Our consultants provide assistance with :
■■ Scheduling of appliances.
■■ Referrals to local JennAir® appliance dealers.
■■ Installation information.
■■ Use and maintenance procedures.
■■ Accessory and repair parts...
Owners Manual - Page 2

... REQUIREMENTS 4
Tools and Parts 4 Location Requirements 4 Venting Requirements 5 Electrical Requirements 6 INSTALLATION INSTRUCTIONS 7 Prepare Location 7 Install Range Hood 9 Make Electrical Connection 9 Install Vent Covers (Optional 10 Complete Installation 10 RANGE HOOD USE 10 Range Hood Controls 10 RANGE HOOD CARE 11 Cleaning 11 WIRING DIAGRAM 12 ASSISTANCE OR SERVICE 13 In the...
Owners Manual - Page 4

...Part 280) or when such standard is located behind the left filter on the model/serial rating plate. Cabinet opening dimensions that all governing codes and ordinances. Grounded electrical outlet is factory set
Parts... INSTALLATION REQUIREMENTS
Tools and Parts
Gather the required tools and parts before starting installation. Read and follow the instructions provided with installation ...
Owners Manual - Page 5

...) models 11" (27.9 cm): 36" (91.4 cm) models
Wiring knockout
1 3.2...Install Range Hood" section for details for installations...system is needed for specific requirements in your HVAC professional for installation (not included). Vent... set for installations ...codes may require the use a 4" (10.2 cm) laundry-type wall cap.
■■ Use metal vent only. The hood exhaust opening width
(If installed...
Owners Manual - Page 6

... the National Electrical Code, ANSI/NFPA 70 (latest edition), or CSA Standards C22. 1-94, Canadian Electrical Code, Part 1 and C22.2 No. 0-M91 (latest edition) and all governing codes and ordinances. See "Install Range Hood" section...elbow
6 ft (1.8 m)
2 ft (0.6 m)
Wall cap
A. The model/serial/rating plate is located behind the left filter on the rear wall of the appliance as specified on the...
Owners Manual - Page 8

...mark on the centerline on the wall.
Set range hood aside on a covered surface.
Drill pilot hole. 6. Install the 2 - 5 x 45 mm mounting screws. 4.
For Wall Installations:
Cabinet cutouts
*³⁄₈" (1.0...of the screw head to screw into, additional wall framing supports may be installed into place.
¹⁄₄" (6.4 mm)
7.
Leave a 1/4"
(6.4 mm) gap ...
Owners Manual - Page 9

...the large end of the slots. E
A
B
C
D
F
E
B
C
A. Replace all parts and panels before servicing.
Rear venting
A. Black wires C. Use UL listed wire connectors and connect white wires (A)...work .
4. Connect ventwork to the National Electrical Code or CSA Standards and local codes and ordinances. There must be installed up to accommodate off center duct work properly....
Owners Manual - Page 11

..., push toward the rear of the range hood and pull down on the rear handle and set the front of the new bulb, do not use steel wool or
Always wipe dry to ... steps 2-3 for the other bulb if needed.
5. RANGE HOOD CARE
Cleaning
IMPORTANT:
before calling service. 1. Remove the bulb and replace it into place.
4. Reconnect power.
11 Exterior Surfaces: To avoid damage to the exterior surface...
Owners Manual - Page 13

...■ Installation information. ■ Use and maintenance procedures. ■ Accessory and repair parts sales....manual.
JennAir® appliances designated
and provide after -warranty service anywhere in your correspondence.
ASSISTANCE OR SERVICE
If you need service Please refer to build every new appliance. If you need replacement parts If you need to order replacement parts...
Jenn-Air JXU9130HP Reviews
We have not received any reviews for Jenn-Air yet.