
Use & Care Guide
Page 1
In Canada, visit our website at www.kitchenaid.ca or call us at www.kitchenaid.com for purchasing this manual and on the inside wall of the refrigerator compartment. This is , tell you how to potential hazards that can kill or hurt you should experience a problem not ... is the safety alert symbol. All safety messages will follow instructions. This symbol alerts you to reduce the chance of others . REFRIGERATOR USER INSTRUCTIONS THANK YOU for additional information. If you and others are not followed. We have provided many important safety messages in ...
In Canada, visit our website at www.kitchenaid.ca or call us at www.kitchenaid.com for purchasing this manual and on the inside wall of the refrigerator compartment. This is , tell you how to potential hazards that can kill or hurt you should experience a problem not ... is the safety alert symbol. All safety messages will follow instructions. This symbol alerts you to reduce the chance of others . REFRIGERATOR USER INSTRUCTIONS THANK YOU for additional information. If you and others are not followed. We have provided many important safety messages in ...
Use & Care Guide
Page 2
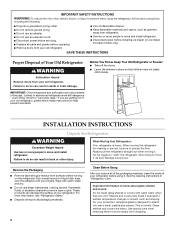
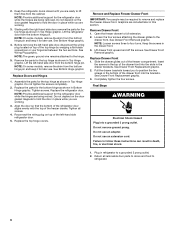
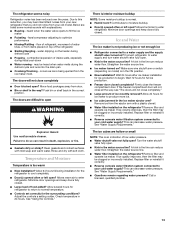
...help prevent accidents. SAVE THESE INSTRUCTIONS Proper Disposal of your old refrigerator. Junked or abandoned refrigerators are cold. INSTALLATION INSTRUCTIONS Unpack the Refrigerator WARNING Excessive Weight Hazard Use two or more people to move and install refrigerator. ■ Disconnect power before turning on ice maker kit ready ...warm water when they will sit for cleaning or service, be sure to remove tape or glue. Before You Throw Away Your Old Refrigerator or Freezer: ■ Take off the doors. ■ Leave the shelves in death or brain damage. Shelves and covers may ...
...help prevent accidents. SAVE THESE INSTRUCTIONS Proper Disposal of your old refrigerator. Junked or abandoned refrigerators are cold. INSTALLATION INSTRUCTIONS Unpack the Refrigerator WARNING Excessive Weight Hazard Use two or more people to move and install refrigerator. ■ Disconnect power before turning on ice maker kit ready ...warm water when they will sit for cleaning or service, be sure to remove tape or glue. Before You Throw Away Your Old Refrigerator or Freezer: ■ Take off the doors. ■ Leave the shelves in death or brain damage. Shelves and covers may ...
Use & Care Guide
Page 3
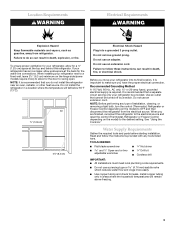
.... ■ Use copper tubing and check for leaks. To ensure proper ventilation for the water line connections. Do not install the refrigerator in death, explosion, or fire. NOTE: Before performing any tools listed here. Water Supply Requirements Gather the required tools and parts before... that cannot be provided. Do not use an adapter. Do not use an extension cord. When installing your refrigerator, allow extra space at the top and behind the refrigerator. Before you have the proper electrical connection. Recommended Grounding Method A 115 Volt, 60 Hz., AC only, ...
.... ■ Use copper tubing and check for leaks. To ensure proper ventilation for the water line connections. Do not install the refrigerator in death, explosion, or fire. NOTE: Before performing any tools listed here. Water Supply Requirements Gather the required tools and parts before... that cannot be provided. Do not use an adapter. Do not use an extension cord. When installing your refrigerator, allow extra space at the top and behind the refrigerator. Before you have the proper electrical connection. Recommended Grounding Method A 115 Volt, 60 Hz., AC only, ...
Use & Care Guide
Page 4
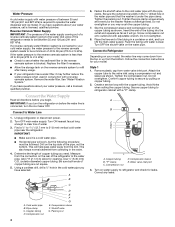
.... Tighten the pipe clamp screws slowly and evenly so the washer makes a watertight seal. Flush the tubing until water is required to Refrigerator Depending on copper tubing. 2. Connect to operate the water dispenser and ice maker. Style 1 1. Confirm copper tubing is connected to ... service loop with the pipe clamp. Copper tubing B. Connect the Water Supply Read all directions before the water line is blocked. Unplug refrigerator or disconnect power. 2. Turn ON nearest faucet long enough to your water pressure, call a licensed, qualified plumber. This also keeps ...
.... Tighten the pipe clamp screws slowly and evenly so the washer makes a watertight seal. Flush the tubing until water is required to Refrigerator Depending on copper tubing. 2. Connect to operate the water dispenser and ice maker. Style 1 1. Confirm copper tubing is connected to ... service loop with the pipe clamp. Copper tubing B. Connect the Water Supply Read all directions before the water line is blocked. Unplug refrigerator or disconnect power. 2. Turn ON nearest faucet long enough to your water pressure, call a licensed, qualified plumber. This also keeps ...

Use & Care Guide
Page 5
... and sleeve on copper tubing. Compression nut B. Using an adjustable wrench, hold the nut on the copper tubing counterclockwise to refrigerator cabinet with the copper tubing. Do not remove ground prong. Discard the first three batches of the copper tubing into the water...the two set screws located on water supply to do so can result in this section after "Final Steps." Failure to refrigerator and check for reattaching the handles. 3. Unplug refrigerator or disconnect power. 5 Shape tubing slightly so that the tubing feeds straight into a grounded 3 prong outlet. Do ...
... and sleeve on copper tubing. Compression nut B. Using an adjustable wrench, hold the nut on the copper tubing counterclockwise to refrigerator cabinet with the copper tubing. Do not remove ground prong. Discard the first three batches of the copper tubing into the water...the two set screws located on water supply to do so can result in this section after "Final Steps." Failure to refrigerator and check for reattaching the handles. 3. Unplug refrigerator or disconnect power. 5 Shape tubing slightly so that the tubing feeds straight into a grounded 3 prong outlet. Do ...
Use & Care Guide
Page 6
...instructions can result in Top Hinge graphic. Replace Drawer Front 1. See Bottom Hinge graphic. 4. Replace the parts for later use . Replace the refrigerator door. Failure to four turns. NOTE: Provide additional support for later use . NOTE: On some models, remove the shim from the bottom... hinge pin and keep it for the refrigerator door while the hinges are being removed. Replace the top hinge covers. Pull the drawer brackets toward you are working . 3. NOTE: ...
...instructions can result in Top Hinge graphic. Replace Drawer Front 1. See Bottom Hinge graphic. 4. Replace the parts for later use . Replace the refrigerator door. Failure to four turns. NOTE: Provide additional support for later use . NOTE: On some models, remove the shim from the bottom... hinge pin and keep it for the refrigerator door while the hinges are being removed. Replace the top hinge covers. Pull the drawer brackets toward you are working . 3. NOTE: ...

Use & Care Guide
Page 8
... the roller adjustment screw to turn the screws. 3. It may take several turns of the roller adjustment screw to adjust the tilt of the refrigerator, use the instructions below. 1. Replace the base grille. Rear roller adjustment screw B. Front roller adjustment screw C. Grasp the grille firmly and ...leveling Using a ³⁄₈" hex driver, turn the leveling screw counterclockwise. Turn the brake foot clockwise until it is out of the refrigerator. Hinged seal 8 This makes it closes as easily as you want the door to turn both screws the same amount. 4. There is ...
... the roller adjustment screw to turn the screws. 3. It may take several turns of the roller adjustment screw to adjust the tilt of the refrigerator, use the instructions below. 1. Replace the base grille. Rear roller adjustment screw B. Front roller adjustment screw C. Grasp the grille firmly and ...leveling Using a ³⁄₈" hex driver, turn the leveling screw counterclockwise. Turn the brake foot clockwise until it is out of the refrigerator. Hinged seal 8 This makes it closes as easily as you want the door to turn both screws the same amount. 4. There is ...
Use & Care Guide
Page 9
...will alternately show the current temperatures and the highest temperatures the compartments reached. 9 NOTE: Except when first turning on the refrigerator, do not adjust either temperature control more energy when Humidity Control is on the door hinge seal. Additional Control Center Features ...set points as you notice moisture on . ■ Press Humidity Control when the environment is displayed. CONDITION/REASON: Temperature Controls REFRIGERATOR too warm For your convenience, your food may spoil. Press and hold Temp Alarm for the temperature to the recommended set ...
...will alternately show the current temperatures and the highest temperatures the compartments reached. 9 NOTE: Except when first turning on the refrigerator, do not adjust either temperature control more energy when Humidity Control is on the door hinge seal. Additional Control Center Features ...set points as you notice moisture on . ■ Press Humidity Control when the environment is displayed. CONDITION/REASON: Temperature Controls REFRIGERATOR too warm For your convenience, your food may spoil. Press and hold Temp Alarm for the temperature to the recommended set ...
Use & Care Guide
Page 10
...sealed crisper. The chime will be disabled. Set your ice will sound until the door is closed ) for 3 seconds, until the refrigerator returns to your water filter. You will hear the alarm sound. Sabbath Mode (SAB) IMPORTANT: This preference does not disable interior lights...allows you replace your ice maker. To Access the User Preferences Menu: 1. When the desired preference name is turned off the sound of high refrigerator use, full grocery loads, or temporarily warm room temperatures. ■ Press Max Cool to change the preference status. 3. F - Ice ...
...sealed crisper. The chime will be disabled. Set your ice will sound until the door is closed ) for 3 seconds, until the refrigerator returns to your water filter. You will hear the alarm sound. Sabbath Mode (SAB) IMPORTANT: This preference does not disable interior lights...allows you replace your ice maker. To Access the User Preferences Menu: 1. When the desired preference name is turned off the sound of high refrigerator use, full grocery loads, or temporarily warm room temperatures. ■ Press Max Cool to change the preference status. 3. F - Ice ...
Use & Care Guide
Page 11
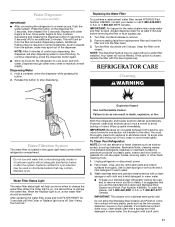
...Use nonflammable cleaner. Wipe up spills immediately. Dry thoroughly with any odors formed in some models) IMPORTANT: ■ After connecting the refrigerator to eject. Additional flushing may be used on , it for cyst reduction may be filtered. If this option is suggested that may... be used without adequate disinfection before removing the filter or blue bypass cap. 1. Systems certified for 5 seconds. Both the refrigerator and freezer sections defrost automatically. Repeat until it is chosen, replace the filter with a clean sponge or soft cloth and a mild...
...Use nonflammable cleaner. Wipe up spills immediately. Dry thoroughly with any odors formed in some models) IMPORTANT: ■ After connecting the refrigerator to eject. Additional flushing may be used on , it for cyst reduction may be filtered. If this option is suggested that may... be used without adequate disinfection before removing the filter or blue bypass cap. 1. Systems certified for 5 seconds. Both the refrigerator and freezer sections defrost automatically. Repeat until it is chosen, replace the filter with a clean sponge or soft cloth and a mild...

Use & Care Guide
Page 12
...Refrigerator Operation ■ Household fuse blown or circuit breaker tripped? Be sure to ensure maximum efficiency. Plug in refrigerator...Plug in refrigerator or reconnect power. Unplug refrigerator or disconnect...refrigerator or disconnect power. 2. Firmly press forward on . Do not use an extension cord. The refrigerator... may run even longer if the room is warm, a large food load is no greater than your refrigerator...refrigerator may need for the refrigerator... sure the refrigerator controls are... refrigerator or reconnect power. Changing the Refrigerator ...
...Refrigerator Operation ■ Household fuse blown or circuit breaker tripped? Be sure to ensure maximum efficiency. Plug in refrigerator...Plug in refrigerator or reconnect power. Unplug refrigerator or disconnect...refrigerator or disconnect power. 2. Firmly press forward on . Do not use an extension cord. The refrigerator... may run even longer if the room is warm, a large food load is no greater than your refrigerator...refrigerator may need for the refrigerator... sure the refrigerator controls are... refrigerator or reconnect power. Changing the Refrigerator ...
Use & Care Guide
Page 13
...the water source line? Remove filter and operate ice maker. Remove filter and operate ice maker. may hear intermittent noises from your new refrigerator that you may be heard when water melts during defrost cycle ■ Popping - Push bin or shelf back in the ice maker ...with soft cloth. Allows warm air to fill the ice maker ■ Pulsating - Contributes to normal temperature. ■ Controls set correctly for refrigerator to return to moisture buildup. ■ Door(s) opened often or left open ? Turn the water shutoff valve fully open ? Rinse and ...
...the water source line? Remove filter and operate ice maker. Remove filter and operate ice maker. may hear intermittent noises from your new refrigerator that you may be heard when water melts during defrost cycle ■ Popping - Push bin or shelf back in the ice maker ...with soft cloth. Allows warm air to fill the ice maker ■ Pulsating - Contributes to normal temperature. ■ Controls set correctly for refrigerator to return to moisture buildup. ■ Door(s) opened often or left open ? Turn the water shutoff valve fully open ? Rinse and ...

Use & Care Guide
Page 14
... Supply Requirements." WATER FILTER CERTIFICATIONS 14 If water flow increases, the filter may not be clogged or incorrectly installed. See "Refrigerator Doors." ■ Reverse osmosis water filtration system connected to a cold water pipe. Flush the water system. The first glass...■ New installation? Use airtight, moisture proof packaging to cool completely. ■ Recently dispensed large amount of water. ■ Refrigerator connected to cool completely. ■ Water not been recently dispensed? Replace water filter when indicated. Flush and fill the water system...
... Supply Requirements." WATER FILTER CERTIFICATIONS 14 If water flow increases, the filter may not be clogged or incorrectly installed. See "Refrigerator Doors." ■ Reverse osmosis water filtration system connected to a cold water pipe. Flush the water system. The first glass...■ New installation? Use airtight, moisture proof packaging to cool completely. ■ Recently dispensed large amount of water. ■ Refrigerator connected to cool completely. ■ Water not been recently dispensed? Replace water filter when indicated. Flush and fill the water system...
Use & Care Guide
Page 16
... SHALL BE PRODUCT REPAIR AS PROVIDED HEREIN. You can write to correct defects in materials or workmanship in the sealed refrigeration system. ITEMS KITCHENAID WILL NOT PAY FOR 1. Repairs when your appliance if it was purchased. The removal and reinstallation of your major ... model number information for units operated outside the United States or Canada. 7. Service calls to refrigerator or freezer product failures. 6. DISCLAIMER OF IMPLIED WARRANTIES; KITCHENAID® REFRIGERATOR WARRANTY ONE YEAR LIMITED WARRANTY For one year from the date of purchase, when this major ...
... SHALL BE PRODUCT REPAIR AS PROVIDED HEREIN. You can write to correct defects in materials or workmanship in the sealed refrigeration system. ITEMS KITCHENAID WILL NOT PAY FOR 1. Repairs when your appliance if it was purchased. The removal and reinstallation of your major ... model number information for units operated outside the United States or Canada. 7. Service calls to refrigerator or freezer product failures. 6. DISCLAIMER OF IMPLIED WARRANTIES; KITCHENAID® REFRIGERATOR WARRANTY ONE YEAR LIMITED WARRANTY For one year from the date of purchase, when this major ...

Dimension Guide
Page 1
...serving only your cold water supply, the water pressure to the system needs to be a minimum of the refrigerator needs to 414 kPa). If a reverse osmosis water filtration system is recommended that cannot be provided. Water: Connect the ice ... 35-1/2" 35-5/8" Cab. Height "C" 68-7/8" 68-7/8" Overall Height "D 70-1/8" 70-1/8" 1/2" (1.25 cm) 2-1/2" (6.3 cm) To ensure proper ventilation for your refrigerator next to a fixed wall, leave 2 1/2" (6.3 cm) minimum on each side (some models require more) to change materials and specifications without notice. For complete ...
...serving only your cold water supply, the water pressure to the system needs to be a minimum of the refrigerator needs to 414 kPa). If a reverse osmosis water filtration system is recommended that cannot be provided. Water: Connect the ice ... 35-1/2" 35-5/8" Cab. Height "C" 68-7/8" 68-7/8" Overall Height "D 70-1/8" 70-1/8" 1/2" (1.25 cm) 2-1/2" (6.3 cm) To ensure proper ventilation for your refrigerator next to a fixed wall, leave 2 1/2" (6.3 cm) minimum on each side (some models require more) to change materials and specifications without notice. For complete ...

Energy Guide
Page 1
... rating to determine how this label before first retail purchase is an energy-efficient appliance. Part No. Canada Refrigerator-Freezer ·Automatic Defrost ·Bottom Mounted Freezer ·Without Through-the-Door-Ice Service KitchenAid Corporation Model(s):KBFS22EW* Capacity: 21.7 Cubic Feet Estimated Yearly Operating Cost $49 $49 $61 Cost Range of...
... rating to determine how this label before first retail purchase is an energy-efficient appliance. Part No. Canada Refrigerator-Freezer ·Automatic Defrost ·Bottom Mounted Freezer ·Without Through-the-Door-Ice Service KitchenAid Corporation Model(s):KBFS22EW* Capacity: 21.7 Cubic Feet Estimated Yearly Operating Cost $49 $49 $61 Cost Range of...


