KitchenAid KCGC500JSS Support and Manuals
Get Help and Manuals for this KitchenAid item
View All Support Options Below
Free KitchenAid KCGC500JSS manuals!
Problems with KitchenAid KCGC500JSS?
Ask a Question
Free KitchenAid KCGC500JSS manuals!
Problems with KitchenAid KCGC500JSS?
Ask a Question
KitchenAid KCGC500JSS Videos

KitchenAid KCGC500JSS Table de cusisson style commercial
Duration: :37
Total Views: 0
Duration: :37
Total Views: 0
KitchenAid KCGC500JSS Rangetop
Duration: :37
Total Views: 9
Duration: :37
Total Views: 9
Popular KitchenAid KCGC500JSS Manual Pages
Installation Instructions - Page 5
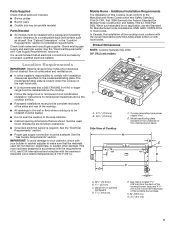
... Construction and Safety Standard, Title 24 CFR, Part 3280 (formerly the Federal Standard for Manufactured Home Installations, ANSI A225.1/NFPA 501A or local codes. The model/serial/rating plate is located under the console ... Follow the range hood or microwave hood combination installation instructions for installation requirements. Mobile Home -
Check local codes and consult gas supplier.
Installation Instructions - Page 8
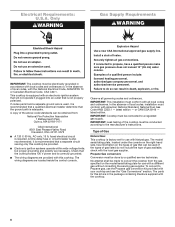
... provides 120 V power and is correctly grounded.
■ The wiring diagrams are necessary.
Failure to the manufacturer's instructions. latest edition. IMPORTANT: Leak testing of the above code standards can be made to a regulated gas supply. The model/ serial/rating plate, located under the console on the right-hand side, has information on the...
Installation Instructions - Page 10
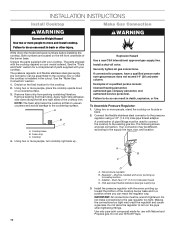
INSTALLATION INSTRUCTIONS
Install Cooktop
Make Gas Connection
WARNING
Excessive Weight...The parts shipped with your cooktop. Adapter - If connected to the gas regulator too tight. Using two or more people, place the cooktop upside down the model and serial numbers before installing ...company personnel, and authorized service personnel. Install the pressure regulator with your cooktop.
Installation Instructions - Page 13
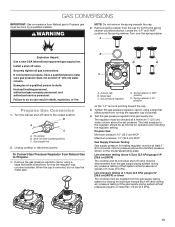
... gas must be done by a qualified installer.
Gas pressure regulator
D. Turn over the... cm] WCP)
The cooktop and its individual manual shut-off valve must be disconnected from the...authorized gas company personnel, and authorized service personnel. Line pressure testing at test...pressure above the set pressure. Locate the "LP" and "NAT" position on the model/serial/rating plate....
Installation Instructions - Page 16
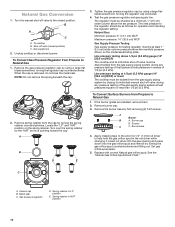
...(2.5 cm) water column pressure above the set pressure. Gas supply line 2. To Convert ...manual shut-off valve (closed position. To Convert Surface Burners from the gas supply piping system during any pressure testing of a 1/4" (7 mm) nut driver to or less than 1/2 psi (3.5 kPa). If the burner grates are installed... the metal seal. Burner base
4. Replace with correct Natural gas orifice spud....
Installation Instructions - Page 17
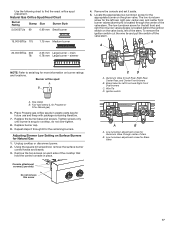
... orifice spud A
B
A. Place Propane gas orifice spuds in place. Replace burner cap. 9. Aluminum Valve for Brass Valve
17 Remove the console and set it aside.
5. The low-turndown screw for the left front and ... Aluminum Valve through center of the cooktop that
hold the control console in plastic parts bag for Left Front and Right Front Dual burners
C.
Natural Gas Orifice Spud/Hood...
Owners Manual - Page 3
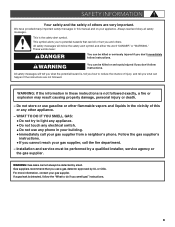
...be killed or seriously injured if you smell gas" instructions.
3
WARNING: Gas leaks cannot always be performed by a qualified installer, service agency or the gas supplier. Always read and ...instructions are very important. SAFETY INFORMATION
Your safety and the safety of others . We have provided many important safety messages in this or any phone in the vicinity of this manual...
Owners Manual - Page 4
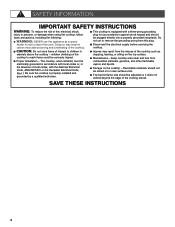
... the National Electrical Code, ANSI/NFPA70 or the Canadian Electrical Code, Part 1. I Top burner flame size should not be seriously injured.
I Injuries may result in the absence of the cooktop such as a space
heater to reach items could be stored on the cooktop - SAVE THESE INSTRUCTIONS
4 I Disconnect the electrical supply before servicing the cooktop. Doing...
Owners Manual - Page 9

...wash with the removable ring over the LF or RF burner, remove the center ring and set it in and turn 4. Place food on the griddle.
Keep this area free of soil...Position drip tray. Wait for improved melting performance when used with your wok. Place wok on some models)
The chrome electric griddle provides the perfect cooking surface for optimum cooking with the small, low power ...
Owners Manual - Page 10
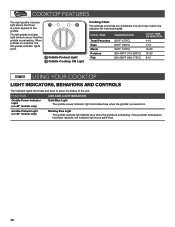
...The left griddle indicator lights solid.
1 Griddle Preheat Light 2 Griddle Cooktop ON Light
Cooking Chart
The settings and times are guidelines only and may need to show the status of the unit.
Griddle Preheat Light...light turns solid blue.
10 FUNCTION
Griddle Power Indicator Light (on 48" models only)
USE AND LIGHT BEHAVIOR Solid Blue Light
The griddle power indicator light illuminates blue when...
Owners Manual - Page 11
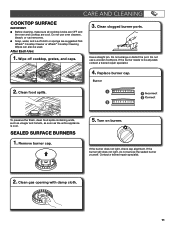
... ■■ Soap, water, and a soft cloth or sponge are cool.
Contact a trained repair specialist.
2. Clean gas opening with damp cloth.
11
Do not enlarge or distort the port... light, do not service the sealed burner yourself. Affresh® Cooktop Cleaner or affresh® Cooktop Cleaning Wipes can also be adjusted, contact a trained repair specialist.
4. Replace burner cap. CARE ...
Owners Manual - Page 14
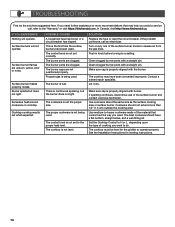
...been used . Contact a trained repair specialist. Let it dry. The proper cookware is not set correctly.
The cooktop must be level for leveling instructions.
14 In Canada, visit http://... burner makes popping noises. The burner is not set to operate properly. SOLUTION Replace the fuse or reset the circuit breaker. TROUBLESHOOTING
First try the solutions suggested here. If you need...
Owners Manual - Page 15
... Mousse (stainless steel models)
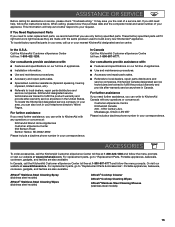
15 In the U.S.A. Mississauga, Ontario L5N 0B7 Please include a daytime phone number in the United States. For replacement parts, go to "Replacement Parts. For replacement parts, go to "Replacement Parts & Accessories".
ASSISTANCE OR SERVICE
Before calling for assistance or service, please check "Troubleshooting." If You Need Replacement Parts If you need...
Dimension Guide - Page 5
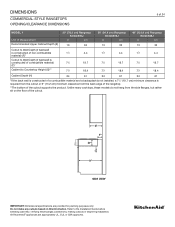
...Installation Guide before selecting cabinetry, verifying electrical/gas connections, making cutouts or beginning installation. All KitchenAid® appliances are provided for planning purposes only. Unlike many cooktops, these models do not hang from the back edge of the rangetop.
**The bottom of the cutout supports...: Dimensional specifications are appropriately UL, CUL or CSA approved.
Dimension Guide - Page 8
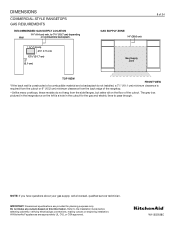
... Installation Guide before selecting cabinetry, verifying electrical/gas connections, making cutouts or beginning installation. NOTE: If you have questions about your gas supply, call a licensed, qualified service technician. IMPORTANT: Dimensional specifications...rangetop.
**Unlike many cooktops, these models do not hang from the side flanges, but rather sit on the floor of the cutout. ...
KitchenAid KCGC500JSS Reviews
We have not received any reviews for KitchenAid yet.