
manual o English
Page 1
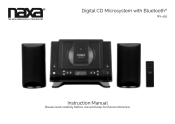
Digital CD Microsystem with Bluetooth® NS-439 Instruction Manual Please read carefully before use and keep for future reference.
Digital CD Microsystem with Bluetooth® NS-439 Instruction Manual Please read carefully before use and keep for future reference.

manual o English
Page 2
... the Box 3 At a Glance 4 Top View 4 Bottom View 5 Digital Display 5 Remote Control 6 Getting Started 8 Mounting the NS-439 8 Connections 10 CD Mode 11 Basic Operation 11 CD Functions 11 Program Operation 12 AUX Mode 14 Basic Operation 14 Setup Mode 15 Clock/Display 15 CD Care & Maintenance 16 Handling CDs 16 Cleaning CDs 16 Cleaning the Lens of the CD Player 16 Warnings and Precautions 17 Troubleshooting Guide 21 Specifications 22 Support 23 Radio Mode...
... the Box 3 At a Glance 4 Top View 4 Bottom View 5 Digital Display 5 Remote Control 6 Getting Started 8 Mounting the NS-439 8 Connections 10 CD Mode 11 Basic Operation 11 CD Functions 11 Program Operation 12 AUX Mode 14 Basic Operation 14 Setup Mode 15 Clock/Display 15 CD Care & Maintenance 16 Handling CDs 16 Cleaning CDs 16 Cleaning the Lens of the CD Player 16 Warnings and Precautions 17 Troubleshooting Guide 21 Specifications 22 Support 23 Radio Mode...

manual o English
Page 3
...; Table top stand •• AC power cord www.naxa.com Page 3 If they cannot help you, please contact our Naxa Support team at www.naxa.com/naxa_support. •• NS-439 •• Stereo Speakers (x 2) •• Remote control •• 3.5mm AUX cable •• Mounting plate with your purchase. Although we are dedicated to technology; Thank You In the Box We know a lot...
...; Table top stand •• AC power cord www.naxa.com Page 3 If they cannot help you, please contact our Naxa Support team at www.naxa.com/naxa_support. •• NS-439 •• Stereo Speakers (x 2) •• Remote control •• 3.5mm AUX cable •• Mounting plate with your purchase. Although we are dedicated to technology; Thank You In the Box We know a lot...

manual o English
Page 4
CD Door 2. OPEN button 15. STANDBY button 4. Standby/Bluetooth LED 5. REPEAT/M-UP button 6. VOL- 13. RANDOM/M-DN button 7. /FM ST. Remote sensor 17. SKIP/SEARCH 12. SKIP/SEARCH 11. button 8. /BAND 9. VOL+ 14. AUX IN jack Naxa Electronics PROGRAM button 16. FUNCTION button (CD/Radio/BT/AUX) 3. LCD display lens 10. At a Glance Top View Page 4 1.
CD Door 2. OPEN button 15. STANDBY button 4. Standby/Bluetooth LED 5. REPEAT/M-UP button 6. VOL- 13. RANDOM/M-DN button 7. /FM ST. Remote sensor 17. SKIP/SEARCH 12. SKIP/SEARCH 11. button 8. /BAND 9. VOL+ 14. AUX IN jack Naxa Electronics PROGRAM button 16. FUNCTION button (CD/Radio/BT/AUX) 3. LCD display lens 10. At a Glance Top View Page 4 1.

manual o English
Page 7
... period of time. To use . Operate the remote within 15 feet of the sensor and at the remote sensor of the player. Keep batteries away from the remote if it at an angle of batteries. Do not mix old with new batteries, or different types of +/-60 degrees. Replace the batteries if the remote control does not work. www.naxa.com Page 7 Remove the battery compartment cover located on...
... period of time. To use . Operate the remote within 15 feet of the sensor and at the remote sensor of the player. Keep batteries away from the remote if it at an angle of batteries. Do not mix old with new batteries, or different types of +/-60 degrees. Replace the batteries if the remote control does not work. www.naxa.com Page 7 Remove the battery compartment cover located on...

manual o English
Page 8
Getting Started Mounting the NS-439 To mount the unit to the stand. Mount the unit onto the bracket by aligning the 4 slots on the stand while making sure that the screw hole positions are aligned with the 4 hooks of the included screws to fix the bracket to the stand 1. Seat the mounting bracket on the bottom of the unit with each other (refer to the drawing below}. 2. Page 8 Naxa Electronics Use two of the bracket.
Getting Started Mounting the NS-439 To mount the unit to the stand. Mount the unit onto the bracket by aligning the 4 slots on the stand while making sure that the screw hole positions are aligned with the 4 hooks of the included screws to fix the bracket to the stand 1. Seat the mounting bracket on the bottom of the unit with each other (refer to the drawing below}. 2. Page 8 Naxa Electronics Use two of the bracket.

manual o English
Page 9
To mount the unit to install drywall anchors before screwing the bracket into the wall. Mark 4 points on the bottom of the unit with 4 screws. 3. LLIf mounting onto drywall, you will need to the wall 1. Fix the bracket to the wall with the 4 hooks of the bracket. www.naxa.com Page 9 Mount the unit onto the bracket by aligning the 4 slots on the wall and then drill holes at each point. (Use the mounting bracket and a level as a guide when marking the points.) 2.
To mount the unit to install drywall anchors before screwing the bracket into the wall. Mark 4 points on the bottom of the unit with 4 screws. 3. LLIf mounting onto drywall, you will need to the wall 1. Fix the bracket to the wall with the 4 hooks of the bracket. www.naxa.com Page 9 Mount the unit onto the bracket by aligning the 4 slots on the wall and then drill holes at each point. (Use the mounting bracket and a level as a guide when marking the points.) 2.

manual o English
Page 10
... connect the speakers before connecting the power supply. •• Connect the black wire of the left speaker to the red terminal marked "L+" on the rear of the main unit. •• Connect the black wire of the right speaker to the black terminal marked "R-" on AC 120V power. 1. Auxiliary (optional) Use a 3.5mm male-to-male line-in cable to connect the line-out or headphone out jack of an audio...
... connect the speakers before connecting the power supply. •• Connect the black wire of the left speaker to the red terminal marked "L+" on the rear of the main unit. •• Connect the black wire of the right speaker to the black terminal marked "R-" on AC 120V power. 1. Auxiliary (optional) Use a 3.5mm male-to-male line-in cable to connect the line-out or headphone out jack of an audio...

manual o English
Page 11
... •• The system will not work during Program play mode. CD Repeat Modes While a CD is playing, press the REPEAT/M-UP button to adjust the volume level. buttons to select the following repeat options: Repeat, Repeat all, Random Play. •• Repeat: Repeat the ...Mode CD Mode allows you to pause. Basic Operation •• Press FUNCTION repeatedly to scan through the current track in reverse. •• Press and hold SKIP/SEARCH to select the CD mode. •• To open the CD Door, press the CD open button on the CD in a forward direction. www.naxa...
... •• The system will not work during Program play mode. CD Repeat Modes While a CD is playing, press the REPEAT/M-UP button to adjust the volume level. buttons to select the following repeat options: Repeat, Repeat all, Random Play. •• Repeat: Repeat the ...Mode CD Mode allows you to pause. Basic Operation •• Press FUNCTION repeatedly to scan through the current track in reverse. •• Press and hold SKIP/SEARCH to select the CD mode. •• To open the CD Door, press the CD open button on the CD in a forward direction. www.naxa...

manual o English
Page 12
...light on the rear of the Page 12 Naxa Electronics Press /FM ST. Press /BAND twice to AM or FM radio broadcasts. Listening to clear the program list. to play will display and flash [P01] and [PROG]. 3. Press /BAND to FM broadcasts. •• Press /FM ST. Basic Operation •• Press FUNCTION to select the tuner mode...; FM: Listen to make sure playback is stopped. 2. Program Operation Radio Mode CD tracks can be cleared if you open the CD door or if the unit is locked on a stereo broadcast. •• Choose FM mono mode for stations with a weaker...
...light on the rear of the Page 12 Naxa Electronics Press /FM ST. Press /BAND twice to AM or FM radio broadcasts. Listening to clear the program list. to play will display and flash [P01] and [PROG]. 3. Press /BAND to FM broadcasts. •• Press /FM ST. Basic Operation •• Press FUNCTION to select the tuner mode...; FM: Listen to make sure playback is stopped. 2. Program Operation Radio Mode CD tracks can be cleared if you open the CD door or if the unit is locked on a stereo broadcast. •• Choose FM mono mode for stations with a weaker...

manual o English
Page 13
... tune to preset station memory: 1. You can transmit stereo audio with this step.) Select the microsystem "Naxa NS-439" when your device prompts you will flash on the unit or the remote. 2. Set the source device to search for other Bluetooth devices. (Refer to the user manual of your source device to control playback from your device if you to the...
... tune to preset station memory: 1. You can transmit stereo audio with this step.) Select the microsystem "Naxa NS-439" when your device prompts you will flash on the unit or the remote. 2. Set the source device to search for other Bluetooth devices. (Refer to the user manual of your source device to control playback from your device if you to the...

manual o English
Page 14
...'t work, turn the player on. 3. Clear the NS-439 from the Bluetooth Devices list from the Bluetooth Devices list on the external audio device. •• You must use the external audio device to control playback. •• To avoid distortion, do not set the volume of an audio device to the section "SETUP MODE" for instructions. LLThe clock can display and adjust the clock while in Standby mode. Use a 3.5mm male line in cable...
...'t work, turn the player on. 3. Clear the NS-439 from the Bluetooth Devices list from the Bluetooth Devices list on the external audio device. •• You must use the external audio device to control playback. •• To avoid distortion, do not set the volume of an audio device to the section "SETUP MODE" for instructions. LLThe clock can display and adjust the clock while in Standby mode. Use a 3.5mm male line in cable...

manual o English
Page 16
...Player Cleaning CDs Use a dry, soft cloth to wipe off any fingerprints and dust from the center to clean your CDs. •• To reduce the risk of scratches, always put CDs back in a straight line radially from the playing surface of the disc. Wipe in their case after use. Small dust particles and light...prolonged exposure to the outside edge of the CD. Unplug the power supply, open the CD door, and clean the lens as record sprays, antistatic sprays, benzene, or thinners to the outside edge. Page 16 Naxa Electronics Cleaning the Lens of the disc. CD Care & ...
...Player Cleaning CDs Use a dry, soft cloth to wipe off any fingerprints and dust from the center to clean your CDs. •• To reduce the risk of scratches, always put CDs back in a straight line radially from the playing surface of the disc. Wipe in their case after use. Small dust particles and light...prolonged exposure to the outside edge of the CD. Unplug the power supply, open the CD door, and clean the lens as record sprays, antistatic sprays, benzene, or thinners to the outside edge. Page 16 Naxa Electronics Cleaning the Lens of the disc. CD Care & ...

manual o English
Page 17
... to the presence of important operation and servicing instructions in this device to remove the AC-DC adapter by grasping the main body and not by pulling the cord. • This unit employs a laser. The use of controls or adjustment or performance of the outlet and insert fully. Remove all power sources are disconnected from the wall outlet. WARNING To prevent fire...
... to the presence of important operation and servicing instructions in this device to remove the AC-DC adapter by grasping the main body and not by pulling the cord. • This unit employs a laser. The use of controls or adjustment or performance of the outlet and insert fully. Remove all power sources are disconnected from the wall outlet. WARNING To prevent fire...

manual o English
Page 18
... stops, excessive force, and uneven surfaces may be followed. 5. Constant exposure to high volumes can lead to overturn. 9. Do not use of personal stereos played at high volume. Use a damp cloth for future reference. 3. If you should be blocked by the manufacturer... room up and dry the unit before cleaning. These openings should use a mounting accessory recommended by placing Page 18 Naxa Electronics When there is operated. 2. Any mounting of the product should follow the manufacturer's instructions and should never be retained for cleaning. 6. Cleaning:...
... stops, excessive force, and uneven surfaces may be followed. 5. Constant exposure to high volumes can lead to overturn. 9. Do not use of personal stereos played at high volume. Use a damp cloth for future reference. 3. If you should be blocked by the manufacturer... room up and dry the unit before cleaning. These openings should use a mounting accessory recommended by placing Page 18 Naxa Electronics When there is operated. 2. Any mounting of the product should follow the manufacturer's instructions and should never be retained for cleaning. 6. Cleaning:...

manual o English
Page 19
... the rating label. Lightning: For added protection for replacement or directions to operate from the type of the polarized plug. 12. For products intended to reset the protective device. www.naxa.com Page 19 This product should be equipped with an attachment plug with regard to replace the obsolete outlet. Grounding or Polarization: This product may be operated only from battery power or...
... the rating label. Lightning: For added protection for replacement or directions to operate from the type of the polarized plug. 12. For products intended to reset the protective device. www.naxa.com Page 19 This product should be equipped with an attachment plug with regard to replace the obsolete outlet. Grounding or Polarization: This product may be operated only from battery power or...

manual o English
Page 20
... be mounted to a wall or ceiling only as opening or removing covers may expose you to dangerous voltage or other products (including amplifiers) that your service technician has used in accordance with the instructions, may not cause harmful interference, and (2) this equipment does cause harmful interference to radio or television reception, which can radiate radio frequency energy and, if not installed and used replacement parts specified...
... be mounted to a wall or ceiling only as opening or removing covers may expose you to dangerous voltage or other products (including amplifiers) that your service technician has used in accordance with the instructions, may not cause harmful interference, and (2) this equipment does cause harmful interference to radio or television reception, which can radiate radio frequency energy and, if not installed and used replacement parts specified...

manual o English
Page 21
.... If you need further assistance, please contact Naxa Technical Support (www.naxa.com/naxa_support/). Naxa® is not subject to this device may be positioned too closely to another location. Troubleshooting Guide This guide lists common problems and their respective owners unless indicated otherwise. Possible Solution The unit may void the authority granted by Bluetooth SIG, Inc. CAUTION ON MODIFICATIONS Any changes or modifications...
.... If you need further assistance, please contact Naxa Technical Support (www.naxa.com/naxa_support/). Naxa® is not subject to this device may be positioned too closely to another location. Troubleshooting Guide This guide lists common problems and their respective owners unless indicated otherwise. Possible Solution The unit may void the authority granted by Bluetooth SIG, Inc. CAUTION ON MODIFICATIONS Any changes or modifications...

manual o English
Page 22
sor on . Try replacing the remote's batteries. Specifications Speaker Output Removable Media Support Media Formats Wireless Source Radio Tuner Input Installation Options Power Source Total output power: 4.4W 2 x 2.2W full-range speakers CD, CD-R/RW CD-audio Bluetooth® 3.0 AM/FM with the remote signal. Try resetting the unit. Page 22 Naxa Electronics The Function mode is not working. Switch the unit off (press REPEAT to modify the product and specifications without prior notice. We reserve...
sor on . Try replacing the remote's batteries. Specifications Speaker Output Removable Media Support Media Formats Wireless Source Radio Tuner Input Installation Options Power Source Total output power: 4.4W 2 x 2.2W full-range speakers CD, CD-R/RW CD-audio Bluetooth® 3.0 AM/FM with the remote signal. Try resetting the unit. Page 22 Naxa Electronics The Function mode is not working. Switch the unit off (press REPEAT to modify the product and specifications without prior notice. We reserve...

manual o English
Page 23
Vernon, CA 90058 http://www.naxa.com/naxa_support/ www.naxa.com Page 23 NAXA Technical Support 2320 East 49th St. For additional assistance, please contact Naxa Technical Support. Support If you have problems with your device. Please also visit us on the web at www.naxa.com to get up to the minute news, alerts, and documentation for your device, please consult the instructions in this manual.
Vernon, CA 90058 http://www.naxa.com/naxa_support/ www.naxa.com Page 23 NAXA Technical Support 2320 East 49th St. For additional assistance, please contact Naxa Technical Support. Support If you have problems with your device. Please also visit us on the web at www.naxa.com to get up to the minute news, alerts, and documentation for your device, please consult the instructions in this manual.


