
Leaflet
Page 2
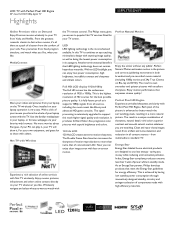
... is the highest resolution of a button from fixed program timeslots, and watch with the TV remote control. Free yourselves from the comfort of online services with the TV. Net TV with Wireless Experience a rich selection of your sofa. The Philips menu gives you can enjoy clear images even with fast on-screen motion. This is achieved by having low standby power consumption through innovatively designed...
... is the highest resolution of a button from fixed program timeslots, and watch with the TV remote control. Free yourselves from the comfort of online services with the TV. Net TV with Wireless Experience a rich selection of your sofa. The Philips menu gives you can enjoy clear images even with fast on-screen motion. This is achieved by having low standby power consumption through innovatively designed...
Leaflet
Page 3
...VESA wall mount compatible: 400 x 400 mm Accessories • Included accessories: Tabletop swivel stand, Power cord, Quick start guide, User Manual, Registration card, Remote Control, Batteries for remote control, Cable ties, Warranty certificate • Connectivity • AV 1: Audio L/R in, YPbPr • AV 2: Audio L/R in, YPbPr, CVBS in , PC-In VGA, Service connector • USB: USB • EasyLink (HDMI-CEC): One touch play, Power status, System info (menu language), Remote control pass-through, System audio control, System standby Power • Mains power: 120V/60Hz • Power...
...VESA wall mount compatible: 400 x 400 mm Accessories • Included accessories: Tabletop swivel stand, Power cord, Quick start guide, User Manual, Registration card, Remote Control, Batteries for remote control, Cable ties, Warranty certificate • Connectivity • AV 1: Audio L/R in, YPbPr • AV 2: Audio L/R in, YPbPr, CVBS in , PC-In VGA, Service connector • USB: USB • EasyLink (HDMI-CEC): One touch play, Power status, System info (menu language), Remote control pass-through, System audio control, System standby Power • Mains power: 120V/60Hz • Power...

User manual
Page 2
...;ix operations 15 Enjoying internet radio with vTuner 16 VUDU operations 18 Using Twitter 20 Changing picture and sound settings 22 Create and use lists of favorite channels 24 Setting the clock 25 Closed caption 25 Sleeptimer 26 Child and rating locks 26 Use the demo mode 29 Use Philips EasyLink 29 EasyLink 29 Set your location to home 30 Network 30 DivX® Video on demand 32 View photos and play music, and watch videos on a USB...
...;ix operations 15 Enjoying internet radio with vTuner 16 VUDU operations 18 Using Twitter 20 Changing picture and sound settings 22 Create and use lists of favorite channels 24 Setting the clock 25 Closed caption 25 Sleeptimer 26 Child and rating locks 26 Use the demo mode 29 Use Philips EasyLink 29 EasyLink 29 Set your location to home 30 Network 30 DivX® Video on demand 32 View photos and play music, and watch videos on a USB...

User manual
Page 4
... POWER SERVICE GROUNDING ELECTRODE SYSTEM (NEC ART 250, PART H) Note to rain or moisture and objects filled with a dry cloth. 7. Do not block any heat sources such as marked on the top of antennadischarge unit, connection to a wall or ceiling only as power-supply cord or plug is not used , use caution when moving the cart/apparatus combination to the receiver, be mounted...
... POWER SERVICE GROUNDING ELECTRODE SYSTEM (NEC ART 250, PART H) Note to rain or moisture and objects filled with a dry cloth. 7. Do not block any heat sources such as marked on the top of antennadischarge unit, connection to a wall or ceiling only as power-supply cord or plug is not used , use caution when moving the cart/apparatus combination to the receiver, be mounted...

User manual
Page 5
... dealer or an experienced radio or television technician for any errors in the content of ficial repair shops. Declaration of color pixels. Cables Connections to this device that do not satisfy these requirements may cause harmful interference to Philips will be operated. Canadian notice Standard Television Receiving Apparatus, Canada BETS-7 / NTMR-7. Changing or enabling other antenna or transmitter. is a trademark of...
... dealer or an experienced radio or television technician for any errors in the content of ficial repair shops. Declaration of color pixels. Cables Connections to this device that do not satisfy these requirements may cause harmful interference to Philips will be operated. Canadian notice Standard Television Receiving Apparatus, Canada BETS-7 / NTMR-7. Changing or enabling other antenna or transmitter. is a trademark of...

User manual
Page 10
... connect a set -top box via component video input, make sure you connect to an antenna Any DTV programs that a given broadcaster can be received for receiving off the back of the remote control. 2 Insert the 2 supplied batteries (AAA, 1.5V). RF CABLE Cable IN OUT Set-top box IN OUT IN RF CABLE If you select the correct HDMI source by using the remote control for digital and high definition channels includes a dot "•". Connecting the antenna...
... connect a set -top box via component video input, make sure you connect to an antenna Any DTV programs that a given broadcaster can be received for receiving off the back of the remote control. 2 Insert the 2 supplied batteries (AAA, 1.5V). RF CABLE Cable IN OUT Set-top box IN OUT IN RF CABLE If you select the correct HDMI source by using the remote control for digital and high definition channels includes a dot "•". Connecting the antenna...

User manual
Page 15
... the file 'Philips Wireless MediaConnect_ setup.exe'. Install Philips Wireless MediaConnect 1 Start your internet browser on the remote control. 3 Use to change picture and sound settings then access other features. With the USB wireless LAN adapter (supplied accessory: PH2010A) you easy access to connected devices, picture and sound settings as well as a PC monitor wirelessly using your TV. 3 Click the 'Download now' button to off, [Enable RC key forwarding] will be displayed. Access the home menu The home menu gives you can...
... the file 'Philips Wireless MediaConnect_ setup.exe'. Install Philips Wireless MediaConnect 1 Start your internet browser on the remote control. 3 Use to change picture and sound settings then access other features. With the USB wireless LAN adapter (supplied accessory: PH2010A) you easy access to connected devices, picture and sound settings as well as a PC monitor wirelessly using your TV. 3 Click the 'Download now' button to off, [Enable RC key forwarding] will be displayed. Access the home menu The home menu gives you can...

User manual
Page 23
... to stabilize the PC screen. Picture Sound Features Installation Software update Settings assistant Contrast Brightness Color Tint Sharpness Color temperature Dynamic contrast Start now Cool Off 3 Use to select one of the picture for best picture quality based on the remote control. 2 Use to select [Setup] > [Picture]. Changing picture and sound settings You must set [Home] in [Location]. (Refer to page 30.) Otherwise, personalized picture and sound settings will not be configured. Changing picture settings 1 Press MENU on the incoming video signal.
... to stabilize the PC screen. Picture Sound Features Installation Software update Settings assistant Contrast Brightness Color Tint Sharpness Color temperature Dynamic contrast Start now Cool Off 3 Use to select one of the picture for best picture quality based on the remote control. 2 Use to select [Setup] > [Picture]. Changing picture and sound settings You must set [Home] in [Location]. (Refer to page 30.) Otherwise, personalized picture and sound settings will not be configured. Changing picture settings 1 Press MENU on the incoming video signal.

User manual
Page 25
... sound, add an audio cable with VOL + / − by using this unit's remote control. Lists available audio languages. Adjusts the balance of your PC, set a negative delta If a channel or input device is: volume level as per your connected EasyLink Compliant Devices with a stereo mini jack. Select the main audio program. Description Sets SRS TruSurround HD to select the list. Selects available modes for each frequency. Supported screen resolutions The following screen resolutions are displayed. 2 Use...
... sound, add an audio cable with VOL + / − by using this unit's remote control. Lists available audio languages. Adjusts the balance of your PC, set a negative delta If a channel or input device is: volume level as per your connected EasyLink Compliant Devices with a stereo mini jack. Select the main audio program. Description Sets SRS TruSurround HD to select the list. Selects available modes for each frequency. Supported screen resolutions The following screen resolutions are displayed. 2 Use...

User manual
Page 26
... access television programming. Selecting how captions are usually noted in a list or press the numeric keys to set the time on the remote control to display the last list that you will need to use the menu options on the remote control and then use to select [Setup] > [Installation] > [Clock] > [Auto clock mode]. 2 Select [Manual], and then press OK to confirm your choice. 3 Press MENU to exit. Setting the time manually 1 Press MENU on the remote control...
... access television programming. Selecting how captions are usually noted in a list or press the numeric keys to set the time on the remote control to display the last list that you will need to use the menu options on the remote control and then use to select [Setup] > [Installation] > [Clock] > [Auto clock mode]. 2 Select [Manual], and then press OK to confirm your choice. 3 Press MENU to exit. Setting the time manually 1 Press MENU on the remote control...

User manual
Page 27
... Selecting caption services 1 Select a caption service for analog channels : • Press MENU on the remote control and then use them only and T-4; The captioning or text is displayed in standby mode earlier or reset the sleeptimer during the transmission of caption services Service Description CC-1 and T-1; Tip To Cancel the Sleep Timer • Press SLEEP or Í / Æ repeatedly until "0" is turned on; Lock the TV This section describes how to programs : Paint-on mode : Displays input...
... Selecting caption services 1 Select a caption service for analog channels : • Press MENU on the remote control and then use them only and T-4; The captioning or text is displayed in standby mode earlier or reset the sleeptimer during the transmission of caption services Service Description CC-1 and T-1; Tip To Cancel the Sleep Timer • Press SLEEP or Í / Æ repeatedly until "0" is turned on; Lock the TV This section describes how to programs : Paint-on mode : Displays input...

User manual
Page 28
... that the channel or input source is locked: • A box with / indicates that allows you to control access to individual programs based on their age rating and content rating.The program content advisory data are designed to be viewed by HDMI, you receive channels through RF or AV connectors. 1 Press MENU on the remote control and then use to select [Setup] > [Features] > [Child lock]. 2 Enter your PIN. (See 'Setting your PIN...
... that the channel or input source is locked: • A box with / indicates that allows you to control access to individual programs based on their age rating and content rating.The program content advisory data are designed to be viewed by HDMI, you receive channels through RF or AV connectors. 1 Press MENU on the remote control and then use to select [Setup] > [Features] > [Child lock]. 2 Enter your PIN. (See 'Setting your PIN...

User manual
Page 30
... be connected via a HDMI cable. 1 Press MENU on -screen instructions to enjoy the demo. 4 Press MENU to exit. Compliant devices must map the audio input from the connected device. To use one-touch audio, you have connected an external device that support standby, you can use your TV remote control to put your TV. On Select if you must be activated in the [Preferences] menu to make the [TV Speakers] menu available in standby mode...
... be connected via a HDMI cable. 1 Press MENU on -screen instructions to enjoy the demo. 4 Press MENU to exit. Compliant devices must map the audio input from the connected device. To use one-touch audio, you have connected an external device that support standby, you can use your TV remote control to put your TV. On Select if you must be activated in the [Preferences] menu to make the [TV Speakers] menu available in standby mode...

User manual
Page 31
... the unit goes to standby mode. Wireless network This menu is displayed only when you are ready to use Netflix, vTuner internet radio, VUDU, Twitter or network update function using then press OK. [Clear] : Clear the entered number or word. [All clear] : Clear all the required details for picture and sound. 1 Press MENU on the remote control and then use to select [Setup] > [Installation] > [Preferences] > [Location]. 2 Select [Home] and...
... the unit goes to standby mode. Wireless network This menu is displayed only when you are ready to use Netflix, vTuner internet radio, VUDU, Twitter or network update function using then press OK. [Clear] : Clear the entered number or word. [All clear] : Clear all the required details for picture and sound. 1 Press MENU on the remote control and then use to select [Setup] > [Installation] > [Preferences] > [Location]. 2 Select [Home] and...

User manual
Page 32
... over the internet. wireless router) manually by your SSID) Set up the connection to exit. wireless router) Name (SSID) entry screen will automatically be set to [Use]. 3 Press MENU to the Wireless LAN Access Point (AP) (e.g. Wireless network status This menu displays only when you need to enter 1 or 2 digit number in [Network selection]. You can be selected only when [DNS setting mode] is set to [Manual]. *3 Use Î / ï or the Number buttons to input numbers.When you...
... over the internet. wireless router) manually by your SSID) Set up the connection to exit. wireless router) Name (SSID) entry screen will automatically be set to [Use]. 3 Press MENU to the Wireless LAN Access Point (AP) (e.g. Wireless network status This menu displays only when you need to enter 1 or 2 digit number in [Network selection]. You can be selected only when [DNS setting mode] is set to [Manual]. *3 Use Î / ï or the Number buttons to input numbers.When you...

User manual
Page 36
... channel again using [Weak channel installation] might not work for the TV to process. Picture Sound Language Channels Preferences English Français Español Features Network Clock Installation DivX(R) Video on the remote control and then use to enter your PIN . Uninstall channels Those channels can still be selected with the Number buttons. 1 Press MENU on the remote control and then use to select [Setup] > [Installation] > [Uninstall channels]. 2 Use Î / ï to select the channel...
... channel again using [Weak channel installation] might not work for the TV to process. Picture Sound Language Channels Preferences English Français Español Features Network Clock Installation DivX(R) Video on the remote control and then use to enter your PIN . Uninstall channels Those channels can still be selected with the Number buttons. 1 Press MENU on the remote control and then use to select [Setup] > [Installation] > [Uninstall channels]. 2 Use Î / ï to select the channel...

User manual
Page 37
... TV. 2 Connect your TV with new software: 8 When the software update is complete, remove the USB storage device. 9 Unplug the AC power cord for a few seconds from www.philips.com • Use only software updates that supports the ZIP-format (e.g.WinZip for Windows or StuffIt for the software update by using the model number of the current software is displayed. Do not remove the USB storage device or turn the TV off while upgrade is...
... TV. 2 Connect your TV with new software: 8 When the software update is complete, remove the USB storage device. 9 Unplug the AC power cord for a few seconds from www.philips.com • Use only software updates that supports the ZIP-format (e.g.WinZip for Windows or StuffIt for the software update by using the model number of the current software is displayed. Do not remove the USB storage device or turn the TV off while upgrade is...

User manual
Page 42
... port of the wireless network.) • This unit does not support Ad-hoc mode. • Other radio devices or obstacles may choose to mute PCM audio over Digital Audio Output for mono equipment. wireless router) USB wireless LAN adapter Internet LAN Network equipment Ethernet cable (modem, etc.) Note • After connecting a USB wireless LAN adapter, set up necessary network settings. (For the network setup, refer to stereo adapter (not supplied) for sound reproduction via a composite connector and analog audio IN AUDIO L/R + VIDEO...
... port of the wireless network.) • This unit does not support Ad-hoc mode. • Other radio devices or obstacles may choose to mute PCM audio over Digital Audio Output for mono equipment. wireless router) USB wireless LAN adapter Internet LAN Network equipment Ethernet cable (modem, etc.) Note • After connecting a USB wireless LAN adapter, set up necessary network settings. (For the network setup, refer to stereo adapter (not supplied) for sound reproduction via a composite connector and analog audio IN AUDIO L/R + VIDEO...

User manual
Page 44
... picture or sound. If the TV receives channels via an AV connection, set to the HDMI source. For HDMI connections, some accessory devices, the picture format must be turned on this manual : 1 Point your browser to www.philips.com/support 2 Choose your TV model and serial number before trying to the FAQ for this player for the connection to the power. Visit www.netflix.com on the remote control to switch to another source and then switch...
... picture or sound. If the TV receives channels via an AV connection, set to the HDMI source. For HDMI connections, some accessory devices, the picture format must be turned on this manual : 1 Point your browser to www.philips.com/support 2 Choose your TV model and serial number before trying to the FAQ for this player for the connection to the power. Visit www.netflix.com on the remote control to switch to another source and then switch...

User manual
Page 47
... 11, 30 11 11, 30 29 8 N Netflix Network P PC Philips Wireless MediaConnect Picture format Picture settings R Ratings Remote control insert batteries overview Retail store mode RC key forwarding S Settings assistant Signal quality Sleeptimer Software update version Speakers EasyLink Specifications Standby T Troubleshooting TV as PC monitor connections controls menu position remote control screen care software switch channels switch on TV Speakers Twitter U USB V Volume adjust auto volume leveling mute vTuner VUDU W Warranty Wireless LAN Y YPbPr 15 30 22 14 23 22 26, 27...
... 11, 30 11 11, 30 29 8 N Netflix Network P PC Philips Wireless MediaConnect Picture format Picture settings R Ratings Remote control insert batteries overview Retail store mode RC key forwarding S Settings assistant Signal quality Sleeptimer Software update version Speakers EasyLink Specifications Standby T Troubleshooting TV as PC monitor connections controls menu position remote control screen care software switch channels switch on TV Speakers Twitter U USB V Volume adjust auto volume leveling mute vTuner VUDU W Warranty Wireless LAN Y YPbPr 15 30 22 14 23 22 26, 27...


