User Manual
Page 2
... safety instructions Important safety symbols CALIFORNIA PROPOSITION 65 WARNING Important safety precautions Warnings Cautions Installation requirements Key installation requirements Location considerations Ducting requirements Mobile home installation Exhausting requirements Gas requirements Electrical requirements Installation What's included Step-by-step installation Vent blockage test Exhaust ducting guide Switching the door position Before you start Sort and load Functional prerequisite Operations Feature panel Simple steps to start Cycle overview Cycle chart Cycle guide Special features...
... safety instructions Important safety symbols CALIFORNIA PROPOSITION 65 WARNING Important safety precautions Warnings Cautions Installation requirements Key installation requirements Location considerations Ducting requirements Mobile home installation Exhausting requirements Gas requirements Electrical requirements Installation What's included Step-by-step installation Vent blockage test Exhaust ducting guide Switching the door position Before you start Sort and load Functional prerequisite Operations Feature panel Simple steps to start Cycle overview Cycle chart Cycle guide Special features...

User Manual
Page 6
... placed in the dryer until all traces of fire or explosion: • Do not dry items that could result in contact with gasoline, dry cleaning solvents, or other appliance. • Installation and service must not be performed by a qualified installer, service agency, or the gas supplier. • Do not install a booster fan in the exhaust duct. 6 English SAVE THESE INSTRUCTIONS DV3400T_DC68-03784M-00_EN...
... placed in the dryer until all traces of fire or explosion: • Do not dry items that could result in contact with gasoline, dry cleaning solvents, or other appliance. • Installation and service must not be performed by a qualified installer, service agency, or the gas supplier. • Do not install a booster fan in the exhaust duct. 6 English SAVE THESE INSTRUCTIONS DV3400T_DC68-03784M-00_EN...

User Manual
Page 8
... not install or store this or any service unless specifically recommended in the user-maintenance instructions or in injury. 20.Take care that you understand and have the skills to the drying compartment. 7. Do not store or use fabric softeners or products to catch fire. Items contaminated with internal controls. 10.Do not repair or replace any part of a tumble dryer cycle occurs without heat (cool down...
... not install or store this or any service unless specifically recommended in the user-maintenance instructions or in injury. 20.Take care that you understand and have the skills to the drying compartment. 7. Do not store or use fabric softeners or products to catch fire. Items contaminated with internal controls. 10.Do not repair or replace any part of a tumble dryer cycle occurs without heat (cool down...

User Manual
Page 9
...; Clean the lint screen before or after each load. • Keep the area around the exhaust opening and surrounding areas free from lint, dust, and dirt. • The interior of electric shock only during servicing. • Do not contact this part while appliance is moving. • Do not install or store this appliance. • Do not sit on , in, or in the user-repair instructions...
...; Clean the lint screen before or after each load. • Keep the area around the exhaust opening and surrounding areas free from lint, dust, and dirt. • The interior of electric shock only during servicing. • Do not contact this part while appliance is moving. • Do not install or store this appliance. • Do not sit on , in, or in the user-repair instructions...

User Manual
Page 11
... clear of combustible materials, gasoline, and other flammable vapors and liquids. • Do not install other surfaces. • Adequate air circulation for gas models) that must meet national and local regulations. • An exhaust system made of electric shock only during servicing. Key installation requirements • A grounded electrical outlet. • A power cord for electric dryers (except in . (460 mm) above the floor for future reference.
... clear of combustible materials, gasoline, and other flammable vapors and liquids. • Do not install other surfaces. • Adequate air circulation for gas models) that must meet national and local regulations. • An exhaust system made of electric shock only during servicing. Key installation requirements • A grounded electrical outlet. • A power cord for electric dryers (except in . (460 mm) above the floor for future reference.

User Manual
Page 18
... old flexible metal gas lines. To check the detail information of the burner, open the door and check the rating label location on your model and use the proper LP Kit accordingly. There is recommended and must be installed in the gas supply line to ignite the burner. Installation requirements Installation requirements Gas requirements WARNING • Use only natural or LP (liquid propane) gases. • The installation must be conformed with local codes, or in...
... old flexible metal gas lines. To check the detail information of the burner, open the door and check the rating label location on your model and use the proper LP Kit accordingly. There is recommended and must be installed in the gas supply line to ignite the burner. Installation requirements Installation requirements Gas requirements WARNING • Use only natural or LP (liquid propane) gases. • The installation must be conformed with local codes, or in...

User Manual
Page 19
if it doesn't't fit the outlet, have a proper outlet installed by providing a path of local codes, in doubt as to plastic plumbing lines, gas lines, or hot water pipes. Gas models WARNING • Your dryer has a cord with your dryer - The plug must be done in accordance with the national Fuel Code ANSI/Z2231 - Do not modify the plug provided with a qualified electrician or serviceman if you are...
if it doesn't't fit the outlet, have a proper outlet installed by providing a path of local codes, in doubt as to plastic plumbing lines, gas lines, or hot water pipes. Gas models WARNING • Your dryer has a cord with your dryer - The plug must be done in accordance with the national Fuel Code ANSI/Z2231 - Do not modify the plug provided with a qualified electrician or serviceman if you are...

User Manual
Page 21
... for a 4 wire receptacle, NEMA type 14-30R.) Electric models - Canada Only A 120 / 240 volt, 60 Hz AC approved electrical service fused through the neutral conductor. (Use a 4-prong plug for (1) new branch-circuit installations, (2) mobile homes, (3) recreational vehicles, and (4) areas where local codes prohibit grounding through a 30-ampere fuse or circuit breaker on both sides of Electric Shock When local codes allow, you may convert a dryer to 120 / 208 volts. Installation requirements WARNING...
... for a 4 wire receptacle, NEMA type 14-30R.) Electric models - Canada Only A 120 / 240 volt, 60 Hz AC approved electrical service fused through the neutral conductor. (Use a 4-prong plug for (1) new branch-circuit installations, (2) mobile homes, (3) recreational vehicles, and (4) areas where local codes prohibit grounding through a 30-ampere fuse or circuit breaker on both sides of Electric Shock When local codes allow, you may convert a dryer to 120 / 208 volts. Installation requirements WARNING...

User Manual
Page 24
... "Exhaust ducting guide" section. Tip the dryer on its final location, and then set the dryer upright. • Secure room around the dryer to all threads. 4. Connect the gas supply to check for any leaks using a soap solution. If you have read the "Gas requirements" section on page 18. 1. Installation Installation Step-by step installation instructions start below. • Do not remove the protective film on the door before the installation is...
... "Exhaust ducting guide" section. Tip the dryer on its final location, and then set the dryer upright. • Secure room around the dryer to all threads. 4. Connect the gas supply to check for any leaks using a soap solution. If you have read the "Gas requirements" section on page 18. 1. Installation Installation Step-by step installation instructions start below. • Do not remove the protective film on the door before the installation is...

User Manual
Page 28
... dryer starts, runs, heats, and shuts off and wait 5 minutes. STEP 6 Final check When installation is complete, confirm that: • The dryer is connected and the joints are any blockage or problems. Proper ducting can reduce drying time and save energy. Then, plug the power cord into an electrical outlet and grounded properly. • The exhaust ductwork is plugged into a power source and check the dryer's installation and operation using the final checklist in the drum, the test will...
... dryer starts, runs, heats, and shuts off and wait 5 minutes. STEP 6 Final check When installation is complete, confirm that: • The dryer is connected and the joints are any blockage or problems. Proper ducting can reduce drying time and save energy. Then, plug the power cord into an electrical outlet and grounded properly. • The exhaust ductwork is plugged into a power source and check the dryer's installation and operation using the final checklist in the drum, the test will...

User Manual
Page 29
... cancel the Vent Blockage Test, press the POWER button to turn off immediately by pressing the POWER button. You can not exhaust properly, check code appears and the dryer sounds an alarm tone. NOTE • During or after the test, the internal drum is displayed and the dryer sounds a tone. Press the START/PAUSE button. During the test, the number indicator makes a circle in this manual. The test takes about...
... cancel the Vent Blockage Test, press the POWER button to turn off immediately by pressing the POWER button. You can not exhaust properly, check code appears and the dryer sounds an alarm tone. NOTE • During or after the test, the internal drum is displayed and the dryer sounds a tone. Press the START/PAUSE button. During the test, the number indicator makes a circle in this manual. The test takes about...

User Manual
Page 30
... the drying performance.) Over 90 % of the dryer is open If the problem continues, contact a service center. 9C1 Abnormal voltage detected Check the power connection. (Refer to the "Connect the electrical wiring" section) If the problem continues, contact a service center. 30 English DV3400T_DC68-03784M-00_EN.indd 30 2020-06-11 10:01:22 C1 drum or there is clogged. (This may lead to the "Ducting requirements...
... the drying performance.) Over 90 % of the dryer is open If the problem continues, contact a service center. 9C1 Abnormal voltage detected Check the power connection. (Refer to the "Connect the electrical wiring" section) If the problem continues, contact a service center. 30 English DV3400T_DC68-03784M-00_EN.indd 30 2020-06-11 10:01:22 C1 drum or there is clogged. (This may lead to the "Ducting requirements...

User Manual
Page 31
... . Put a soft rug on the floor to clean the exhaust system annually or on a regular basis. It is installed properly so the air exhausts freely. 2. Cleaning Clean all joints including the dryer connection. We recommend that have removed it slows down the dryer's performance. • Do not use lint-trapping screws. 3. Switching the door position To reverse the direction of the dryer. 3. Remove the four hinge screws from being scratched. 2.
... . Put a soft rug on the floor to clean the exhaust system annually or on a regular basis. It is installed properly so the air exhausts freely. 2. Cleaning Clean all joints including the dryer connection. We recommend that have removed it slows down the dryer's performance. • Do not use lint-trapping screws. 3. Switching the door position To reverse the direction of the dryer. 3. Remove the four hinge screws from being scratched. 2.
User Manual
Page 36
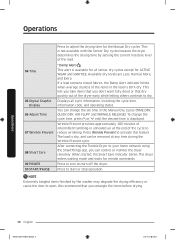
... operating status. After connecting the Tumble Dryer to start or stop operation. Press Wrinkle Prevent to turn on/turn off the dryer. Press to activate this feature. This is dry, and can change the cycle time, press or until the desired time is available for the Manual Dry cycles. Operations 04 Time 05 Digital Graphic Display 06 Adjust Time 07 Wrinkle Prevent 08 Smart Care 09 POWER 10 START/PAUSE Press to open. Displays all sensor dry cycles...
... operating status. After connecting the Tumble Dryer to start or stop operation. Press Wrinkle Prevent to turn on/turn off the dryer. Press to activate this feature. This is dry, and can change the cycle time, press or until the desired time is available for the Manual Dry cycles. Operations 04 Time 05 Digital Graphic Display 06 Adjust Time 07 Wrinkle Prevent 08 Smart Care 09 POWER 10 START/PAUSE Press to open. Displays all sensor dry cycles...

User Manual
Page 37
... the drying time. Press START/PAUSE. Select a different cycle. 3. Icon description Sensor Dry Filter Check Child Lock Alarm Off This icon appears when the dryer operates the cycle which senses the internal humidity to select a cycle. 3. For more information on . To change the cycle during operation 1. Press START/PAUSE again to turn on the display. Operations DV3400T_DC68-03784M-00_EN.indd 37 English 37 2020-06-11 10:01:23 Clean the lint filter...
... the drying time. Press START/PAUSE. Select a different cycle. 3. Icon description Sensor Dry Filter Check Child Lock Alarm Off This icon appears when the dryer operates the cycle which senses the internal humidity to select a cycle. 3. For more information on . To change the cycle during operation 1. Press START/PAUSE again to turn on the display. Operations DV3400T_DC68-03784M-00_EN.indd 37 English 37 2020-06-11 10:01:23 Clean the lint filter...

User Manual
Page 44
... careful not to the dryer. Do not apply them to ensure a proper air flow. Remove cleaner residue and dry with a mild, non-abrasive cleaner suitable for easily marred surfaces. Cleaning Feature panel • Clean with a soft, damp cloth. Stains may damage the feature panel. • When using liquid cleaning agents, apply them directly to scratch or damage the surface. Dryer exterior • Clean with a soft, damp cloth. Maintenance...
... careful not to the dryer. Do not apply them to ensure a proper air flow. Remove cleaner residue and dry with a mild, non-abrasive cleaner suitable for easily marred surfaces. Cleaning Feature panel • Clean with a soft, damp cloth. Stains may damage the feature panel. • When using liquid cleaning agents, apply them directly to scratch or damage the surface. Dryer exterior • Clean with a soft, damp cloth. Maintenance...
User Manual
Page 46
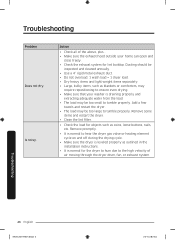
... the exhaust hood outside your washer is normal for lint buildup. Troubleshooting Problem Does not dry. Is noisy. Remove promptly. • It is normal to hear the dryer gas valve or heating element cycle on and off during the drying cycle. • Make sure the dryer is leveled properly as outlined in the installation instructions. • It is draining properly and extracting adequate water from the load. • The load may require...
... the exhaust hood outside your washer is normal for lint buildup. Troubleshooting Problem Does not dry. Is noisy. Remove promptly. • It is normal to hear the dryer gas valve or heating element cycle on and off during the drying cycle. • Make sure the dryer is leveled properly as outlined in the installation instructions. • It is draining properly and extracting adequate water from the load. • The load may require...

User Manual
Page 49
.... Troubleshooting DV3400T_DC68-03784M-00_EN.indd 49 English 49 2020-06-11 10:01:24 High temperature heating check • Clean the lint filter. • If this information code remains, contact a Samsung service center. Information codes If the dryer fails to operate, you should do, check the list of codes in the door. The Thermistor2 resistance is very low or high. • Check for a clogged lint screen • Check if the vent system...
.... Troubleshooting DV3400T_DC68-03784M-00_EN.indd 49 English 49 2020-06-11 10:01:24 High temperature heating check • Clean the lint filter. • If this information code remains, contact a Samsung service center. Information codes If the dryer fails to operate, you should do, check the list of codes in the door. The Thermistor2 resistance is very low or high. • Check for a clogged lint screen • Check if the vent system...

User Manual
Page 54
... shipment, delivery, installation, and uses for assistance with electrical or plumbing codes or correction of household electrical or plumbing (i.e., house wiring, fuses, or water inlet hoses). The cost of these excluded circumstances shall be readily determined; Please contact SAMSUNG at the number below for which this limited warranty. product where the original factory serial numbers have been removed, defaced, changed in any of repair or replacement under these...
... shipment, delivery, installation, and uses for assistance with electrical or plumbing codes or correction of household electrical or plumbing (i.e., house wiring, fuses, or water inlet hoses). The cost of these excluded circumstances shall be readily determined; Please contact SAMSUNG at the number below for which this limited warranty. product where the original factory serial numbers have been removed, defaced, changed in any of repair or replacement under these...

User Manual
Page 57
... use of products, equipment, systems, utilities, services, parts, supplies, accessories, applications, installations, repairs, external wiring or connectors not supplied or authorized by pest infestations. problems caused by SAMSUNG that damage this product was not intended; accidents, abuse, neglect, fire, water, lightning, or other acts of the product. This limited warranty does not cover problems resulting from incorrect electric current, voltage or supply, light bulbs, house fuses, house wiring...
... use of products, equipment, systems, utilities, services, parts, supplies, accessories, applications, installations, repairs, external wiring or connectors not supplied or authorized by pest infestations. problems caused by SAMSUNG that damage this product was not intended; accidents, abuse, neglect, fire, water, lightning, or other acts of the product. This limited warranty does not cover problems resulting from incorrect electric current, voltage or supply, light bulbs, house fuses, house wiring...


