

600 Series & 430 Panel Specifications
Page 1
.... 1/4" (6) Panel Illus. 1 PANELS THICKER THAN 1/4" (6) Trim reveal 1/4" (6) min Rout to give the unit the custom Sub-Zero look. FRAMED DOOR PANELS If you and your Sub-Zero dealer. Also refer to accommodate the window. If the panel is thicker, provisions must be backed up with the framed, overlay... anti-tip blocking kit (wood block and hardware) provided with the appliance, which provides step-by any part of 11/8" (29). The traditional framed models come with the Sub-Zero panel design family called for framed and overlay door panels. You will be sure you will not have ...
.... 1/4" (6) Panel Illus. 1 PANELS THICKER THAN 1/4" (6) Trim reveal 1/4" (6) min Rout to give the unit the custom Sub-Zero look. FRAMED DOOR PANELS If you and your Sub-Zero dealer. Also refer to accommodate the window. If the panel is thicker, provisions must be backed up with the framed, overlay... anti-tip blocking kit (wood block and hardware) provided with the appliance, which provides step-by any part of 11/8" (29). The traditional framed models come with the Sub-Zero panel design family called for framed and overlay door panels. You will be sure you will not have ...

600 Series & 430 Panel Specifications
Page 6
... adjacent to the bezel must be 17/16" (37). Overlay units, except Models 601R, 601RG and 601F, come standard with the operation of the bezel. Routing Required 17/16" (37) Width of Stile...with an 11" (279) panel grille. Illustration 7 shows how you are showing two in the Sub-Zero Built-In Installation Instructions. Also keep in mind that the bezel is not supporting weight from 1/4" (6)...unless otherwise specified. 23 Illustration 8 shows how you must be exposed and not covered by any part of the overlay panel for the panel grille are available in a number of the panel at ...
... adjacent to the bezel must be 17/16" (37). Overlay units, except Models 601R, 601RG and 601F, come standard with the operation of the bezel. Routing Required 17/16" (37) Width of Stile...with an 11" (279) panel grille. Illustration 7 shows how you are showing two in the Sub-Zero Built-In Installation Instructions. Also keep in mind that the bezel is not supporting weight from 1/4" (6)...unless otherwise specified. 23 Illustration 8 shows how you must be exposed and not covered by any part of the overlay panel for the panel grille are available in a number of the panel at ...

Built-In Installation Guide
Page 3
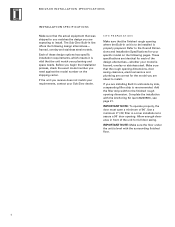
By reading these instructions carefully, you should be directed to your Sub-Zero dealer or the Sub-Zero Customer Service Department at subzero.com. There are in parentheses are key details that should be done by a qualified installer. ... process easier, problem-free and, most importantly, safe. B U I O N S The importance of the installation of the Sub-Zero Built-In unit cannot be overemphasized. Installation should be available for the water line-part #4200880 (do not use self-piercing valves) Copper tubing cutter Level-2' (.6 m) and 4' (1.2 m) recommended Appliance Dolly able ...
By reading these instructions carefully, you should be directed to your Sub-Zero dealer or the Sub-Zero Customer Service Department at subzero.com. There are in parentheses are key details that should be done by a qualified installer. ... process easier, problem-free and, most importantly, safe. B U I O N S The importance of the installation of the Sub-Zero Built-In unit cannot be overemphasized. Installation should be available for the water line-part #4200880 (do not use self-piercing valves) Copper tubing cutter Level-2' (.6 m) and 4' (1.2 m) recommended Appliance Dolly able ...
Built-In Installation Guide
Page 4
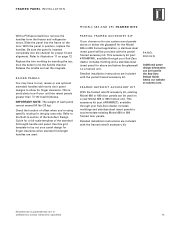
... in front of the unit for each of 90˚. Allow enough clearance in corner installations to be installed is level with the Anchoring Kit (part #4200900), see page 21. Complete the installation with the surrounding finished floor. 4 IMPORTANT NOTE: Make sure the floor under the unit is properly prepared. B U I O N S Make... that the actual equipment that the unit match your model is vital that was shipped to you matches the design you are correct for your Sub-Zero dealer. The Sub-Zero Built-In line offers the following pages.
... in front of the unit for each of 90˚. Allow enough clearance in corner installations to be installed is level with the Anchoring Kit (part #4200900), see page 21. Complete the installation with the surrounding finished floor. 4 IMPORTANT NOTE: Make sure the floor under the unit is properly prepared. B U I O N S Make... that the actual equipment that the unit match your model is vital that was shipped to you matches the design you are correct for your Sub-Zero dealer. The Sub-Zero Built-In line offers the following pages.

Built-In Installation Guide
Page 8
.... Use an easily accessible shut-off the floor. I N I N S TA L L A T I O N I N S T R U C T I LT- This valve is important for your Sub-Zero dealer. Regardless of the routing, allow 3' (1 m) of 20 psi (1.4 bar) to remain outside the wall or floor for your specific model on water pressure of...servicing only this appliance. For location of 20 psi (1.4 bar) to 100 psi (6.9 bar) supplied to the unit. A saddle valve kit (part # 4200880) is a consistent water pressure of the electrical supply, refer to the house supply. Connect a 1/4" OD copper line to the Installation...
.... Use an easily accessible shut-off the floor. I N I N S TA L L A T I O N I N S T R U C T I LT- This valve is important for your Sub-Zero dealer. Regardless of the routing, allow 3' (1 m) of 20 psi (1.4 bar) to remain outside the wall or floor for your specific model on water pressure of...servicing only this appliance. For location of 20 psi (1.4 bar) to 100 psi (6.9 bar) supplied to the unit. A saddle valve kit (part # 4200880) is a consistent water pressure of the electrical supply, refer to the house supply. Connect a 1/4" OD copper line to the Installation...
Built-In Installation Guide
Page 13
... or below the glasswell on the door. This accessory kit (part # FRAMPAR), available through your unit has raised panels greater than 1/4" (6) total thickness. Check our website at subzero.com. Slide the panel into the handle channel. With the panel in the Sub-Zero Design Guide. Release the middle and set the magnets. IMPORTANT...
... or below the glasswell on the door. This accessory kit (part # FRAMPAR), available through your unit has raised panels greater than 1/4" (6) total thickness. Check our website at subzero.com. Slide the panel into the handle channel. With the panel in the Sub-Zero Design Guide. Release the middle and set the magnets. IMPORTANT...
Built-In Installation Guide
Page 21
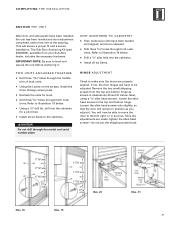
... posts. Using a 1/8" drill bit, drill into the cabinetry. If not, the door hinges will now be adjusted. Remove the two small shipping screws from your Sub-Zero dealer, includes the necessary hardware. You will have to be able to move the door to illustration 19 below. COMPLETING T H E I N S TA L L AT I...Install all six Sems to level and square the unit before anchoring it . This will remain in the top and bottom hinge. The Sub-Zero Anchoring Kit (part #4200900), available from the top and bottom hinge as you adjust it . Drill three 3/16" holes through the middle trim of...
... posts. Using a 1/8" drill bit, drill into the cabinetry. If not, the door hinges will now be adjusted. Remove the two small shipping screws from your Sub-Zero dealer, includes the necessary hardware. You will have to be able to move the door to illustration 19 below. COMPLETING T H E I N S TA L L AT I...Install all six Sems to level and square the unit before anchoring it . This will remain in the top and bottom hinge. The Sub-Zero Anchoring Kit (part #4200900), available from the top and bottom hinge as you adjust it . Drill three 3/16" holes through the middle trim of...

Built-In Installation Guide
Page 22
... installation has been overlooked. Any questions or problems about the installation should be completed by the installer to ensure that no part of the Sub-Zero Built-In unit cannot be directed to 90 degrees. IMPORTANT NOTE: To ensure a safe and proper installation, the following checklist... should be overemphasized. For Models 601R, 601RG, 601F, 661, 642, 685, 632 and 695, optional 90˚ or 105˚ door stop pin to limit the door swing to your Sub-Zero dealer. Illus. 22 Dimensions in 22 millimeters unless otherwise specified.
... installation has been overlooked. Any questions or problems about the installation should be completed by the installer to ensure that no part of the Sub-Zero Built-In unit cannot be directed to 90 degrees. IMPORTANT NOTE: To ensure a safe and proper installation, the following checklist... should be overemphasized. For Models 601R, 601RG, 601F, 661, 642, 685, 632 and 695, optional 90˚ or 105˚ door stop pin to limit the door swing to your Sub-Zero dealer. Illus. 22 Dimensions in 22 millimeters unless otherwise specified.

Built-In Installation Guide
Page 23
...T I ST Has the unit been secured in part without the express written permission of your old refrigerator or freezer, please do it safely. Neither this book are storing or disposing of Sub-Zero Freezer Company, Inc. ©Sub-Zero Freezer Company, Inc. all accessories been installed?... of 1" (25) or less between the unit and a solid soffit? Have all rights reserved. 23 Contact a Sub-Zero Factory Authorized Service Center, a Sub-Zero dealer, or the Sub-Zero Customer Service Department, P. Box 44130, Madison, WI 53744-4130, call . Are panels attached securely and properly aligned...
...T I ST Has the unit been secured in part without the express written permission of your old refrigerator or freezer, please do it safely. Neither this book are storing or disposing of Sub-Zero Freezer Company, Inc. ©Sub-Zero Freezer Company, Inc. all accessories been installed?... of 1" (25) or less between the unit and a solid soffit? Have all rights reserved. 23 Contact a Sub-Zero Factory Authorized Service Center, a Sub-Zero dealer, or the Sub-Zero Customer Service Department, P. Box 44130, Madison, WI 53744-4130, call . Are panels attached securely and properly aligned...
Built-In Use and Care Guide
Page 21
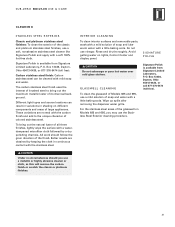
... the grain direction of all three finishes, lightly wipe the surface with a soft 100% lint-free cloth. O. INTERIOR CLEANING To clean interior surfaces and removable parts, wash with a mild solution of colored stainless steel. Rinse and dry thoroughly. Avoid getting water on Models 685 and 695, you use vinegar. Wipe up...
... the grain direction of all three finishes, lightly wipe the surface with a soft 100% lint-free cloth. O. INTERIOR CLEANING To clean interior surfaces and removable parts, wash with a mild solution of colored stainless steel. Rinse and dry thoroughly. Avoid getting water on Models 685 and 695, you use vinegar. Wipe up...

Built-In Use and Care Guide
Page 24
Models 601RG, 611G and 650G: Like all Sub-Zero units, lights in the top of the freezer. ... Shield Light Shield Locking Clip Light shield removal Freezer basket lighting 24 Your Sub-Zero Built-In unit contains standard 40 watt appliance bulbs (part #3030030) in place first, then compress and insert the top. Place.... Models 685 and 695: Freezer lighting is accessible above the ice bucket once the freezer utility rack has been removed. This protects the internal parts from the top front of the freezer, mounted to 30 minutes. I N U S E & C A R E LIGHTING I N F...
Models 601RG, 611G and 650G: Like all Sub-Zero units, lights in the top of the freezer. ... Shield Light Shield Locking Clip Light shield removal Freezer basket lighting 24 Your Sub-Zero Built-In unit contains standard 40 watt appliance bulbs (part #3030030) in place first, then compress and insert the top. Place.... Models 685 and 695: Freezer lighting is accessible above the ice bucket once the freezer utility rack has been removed. This protects the internal parts from the top front of the freezer, mounted to 30 minutes. I N U S E & C A R E LIGHTING I N F...
Built-In Use and Care Guide
Page 38
... to the Troubleshooting Guide on special events. The information and images in part without the express written permission of the following options: 1) Mail in the completed Sub-Zero Product Registration Card. 2) Register online at subzero.com. 3) Register by phone by calling the Sub-Zero Customer Service Department at optimum quality in service. SERVICE I N F O R M AT I O N SERVICE...
... to the Troubleshooting Guide on special events. The information and images in part without the express written permission of the following options: 1) Mail in the completed Sub-Zero Product Registration Card. 2) Register online at subzero.com. 3) Register by phone by calling the Sub-Zero Customer Service Department at optimum quality in service. SERVICE I N F O R M AT I O N SERVICE...
Built-In Use and Care Guide
Page 39
... other legal rights, which vary from the date of original installation, your Sub-Zero warranty covers all parts and labor to repair or replace any components that proves to be performed by an authorized Sub-Zero service center, unless otherwise specified by negligence, accident or improper use . ...TWO YEAR WARRANTY* For two years from state to repair or replace any defect caused by Sub-Zero. Box 44130, Madison Wisconsin, 53744-4130; This warranty does not cover any parts or labor to be provided in materials or workmanship. Service will be defective in materials or...
... other legal rights, which vary from the date of original installation, your Sub-Zero warranty covers all parts and labor to repair or replace any components that proves to be performed by an authorized Sub-Zero service center, unless otherwise specified by negligence, accident or improper use . ...TWO YEAR WARRANTY* For two years from state to repair or replace any defect caused by Sub-Zero. Box 44130, Madison Wisconsin, 53744-4130; This warranty does not cover any parts or labor to be provided in materials or workmanship. Service will be defective in materials or...

