Camera Manual
Page 25
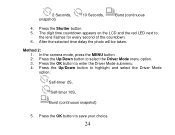
The digit time countdown appears on the LCD and the red LED next to highlight and select the Driver Mode option: Self-timer 2S, Self-timer 10S, Burst (continuous snapshot) 5. In the camera mode, press the MENU button. 2. Press the Up/Down button to... 6. 2 Seconds, snapshot) 10 Seconds, Burst (continuous 4. After the selected time delay the photo will be taken. Method 2: 1. Press the Up/Down button to enter the Driver Mode submenu. 4. Press the Shutter button. 5. Press the OK button to select the Driver Mode menu option. 3. Press the OK button to save your choice. 24
The digit time countdown appears on the LCD and the red LED next to highlight and select the Driver Mode option: Self-timer 2S, Self-timer 10S, Burst (continuous snapshot) 5. In the camera mode, press the MENU button. 2. Press the Up/Down button to... 6. 2 Seconds, snapshot) 10 Seconds, Burst (continuous 4. After the selected time delay the photo will be taken. Method 2: 1. Press the Up/Down button to enter the Driver Mode submenu. 4. Press the Shutter button. 5. Press the OK button to select the Driver Mode menu option. 3. Press the OK button to save your choice. 24

Camera Manual
Page 26
.... 25 Burst Take 3 consecutive photos automatically. The Burst option is found together with intervals of the LCD. 2. The camcorder will need enough memory in the Driver Mode submenu. Press the MENU button to exit the Setting menu and revert to the lens flashes for every second of the LCD screen. 8. After...
.... 25 Burst Take 3 consecutive photos automatically. The Burst option is found together with intervals of the LCD. 2. The camcorder will need enough memory in the Driver Mode submenu. Press the MENU button to exit the Setting menu and revert to the lens flashes for every second of the LCD screen. 8. After...

Camera Manual
Page 28
Resolution The image size and quality settings determine the number of photos that can select and change from the menu that appears. Press the Up/Down button to select the Setting you wish to change the Resolution pixel size, Quality, Metering, White Balance, Exposure, Driver Mode, Effect and Date Stamp of memory required for the Capture mode: 1. The higher the 27 The camera setting allows you to manage the way you wish to take photos. You can be saved and the amount of the photos. Press the MENU button. 2. To enter the Settings options for each photo.
Resolution The image size and quality settings determine the number of photos that can select and change from the menu that appears. Press the Up/Down button to select the Setting you wish to change the Resolution pixel size, Quality, Metering, White Balance, Exposure, Driver Mode, Effect and Date Stamp of memory required for the Capture mode: 1. The higher the 27 The camera setting allows you to manage the way you wish to take photos. You can be saved and the amount of the photos. Press the MENU button. 2. To enter the Settings options for each photo.
Camera Manual
Page 33
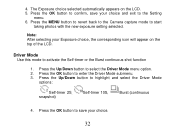
..., the corresponding icon will appear on the LCD. 5. Press the MENU button to revert back to the Camera capture mode to highlight and select the Driver Mode options: Self-timer 2S, snapshot) Self-timer 10S, Burst (continuous 4. Press the OK button to confirm, save your choice and exit to... activate the Self-timer or the Burst continuous shot function 1. Driver Mode Use this mode to the Setting menu. 6. The Exposure choice selected automatically appears on the top of the LCD. Press the OK button to...
..., the corresponding icon will appear on the LCD. 5. Press the MENU button to revert back to the Camera capture mode to highlight and select the Driver Mode options: Self-timer 2S, snapshot) Self-timer 10S, Burst (continuous 4. Press the OK button to confirm, save your choice and exit to... activate the Self-timer or the Burst continuous shot function 1. Driver Mode Use this mode to the Setting menu. 6. The Exposure choice selected automatically appears on the top of the LCD. Press the OK button to...
Camera Manual
Page 63
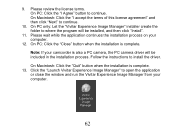
... is complete. On PC only: Let the "Vivitar Experience Image Manager" installer create the folder to where the program will be installed, and then click "Install". 11. Note: If your camcorder is also a PC camera, the PC camera driver will be included in the installation process. Click the... "Launch Vivitar Experience Image Manager" to continue. 10. Please review the license terms. On PC: Click the "I accept the terms ...
... is complete. On PC only: Let the "Vivitar Experience Image Manager" installer create the folder to where the program will be installed, and then click "Install". 11. Note: If your camcorder is also a PC camera, the PC camera driver will be included in the installation process. Click the... "Launch Vivitar Experience Image Manager" to continue. 10. Please review the license terms. On PC: Click the "I accept the terms ...
Camera Manual
Page 69
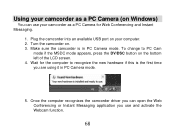
... on your computer. 2. Make sure the camcorder is the first time you use your camcorder as a PC Camera (on . 3. Once the computer recognizes the camcorder driver you can use and activate the Webcam function. 68 Plug the camcorder into an available USB port on the bottom left of the LCD screen...
... on your computer. 2. Make sure the camcorder is the first time you use your camcorder as a PC Camera (on . 3. Once the computer recognizes the camcorder driver you can use and activate the Webcam function. 68 Plug the camcorder into an available USB port on the bottom left of the LCD screen...