
Camera Manual
Page 1
All other trademarks are registered trademarks of their respective companies. DVR 528 Digital Video Camera User Manual © 2010 Sakar International, Inc. All rights reserved. Windows and the Windows logo are the property of Microsoft Corporation.
All other trademarks are registered trademarks of their respective companies. DVR 528 Digital Video Camera User Manual © 2010 Sakar International, Inc. All rights reserved. Windows and the Windows logo are the property of Microsoft Corporation.
Camera Manual
Page 2
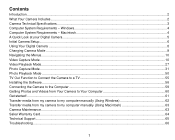
... Technical Specifications ...3 Computer System Requirements - Macintosh 4 A Quick Look at your Digital Camera ...5 Initial Camera Setup...6 Using Your Digital Camera ...8 Changing Camera Mode ...9 Navigating the Menus...10 Video Capture Mode ...10 Video Playback Mode...27 Photo Capture Mode ...31 Photo Playback Mode ...50 TV Out Function to Connect the Camera to a TV 55 Installing the Software ...56 Connecting the Camera to the Computer ...59 Getting Photos and Videos from Your Camera to Your Computer 60 Get started! ...61 Transfer media from my camera to my computer manually (Using Windows...
... Technical Specifications ...3 Computer System Requirements - Macintosh 4 A Quick Look at your Digital Camera ...5 Initial Camera Setup...6 Using Your Digital Camera ...8 Changing Camera Mode ...9 Navigating the Menus...10 Video Capture Mode ...10 Video Playback Mode...27 Photo Capture Mode ...31 Photo Playback Mode ...50 TV Out Function to Connect the Camera to a TV 55 Installing the Software ...56 Connecting the Camera to the Computer ...59 Getting Photos and Videos from Your Camera to Your Computer 60 Get started! ...61 Transfer media from my camera to my computer manually (Using Windows...
Camera Manual
Page 3
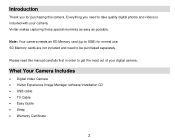
... Memory card (up to be purchased separately. What Your Camera Includes Digital Video Camera Vivitar Experience Image Manager software Installation CD USB cable TV Cable Easy Guide Strap Warranty Certificate 2 Introduction Thank you need to 8GB) for purchasing this manual carefully first in order to take quality digital photos and videos is included with your digital camera. Please read this camera. Everything you for normal use...
... Memory card (up to be purchased separately. What Your Camera Includes Digital Video Camera Vivitar Experience Image Manager software Installation CD USB cable TV Cable Easy Guide Strap Warranty Certificate 2 Introduction Thank you need to 8GB) for purchasing this manual carefully first in order to take quality digital photos and videos is included with your digital camera. Please read this camera. Everything you for normal use...
Camera Manual
Page 4
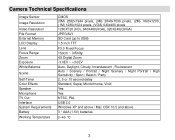
Camera Technical Specifications Image Sensor Image Resolution Video Resolution File Format External Memory LCD Display Lens Focus Range Zoom Exposure White Balance Scene Self-Timer Color Effects Speaker Microphone TV Out Interface System Requirements Battery Working Temperature CMOS (5M) 2592x1944 pixels, (3M) 2048x1536 pixels, (2M) 1600x1200, (1M) 1280x1024 pixels, (VGA) 640x480 pixels 1280X720 (HD), 640X480(VGA), 320X240(QVGA) JPEG/AVI SD Card (up to 8GB) 1.5 Inch TFT F3.0 Fixed Focus 150cm ~ infinity 4X Digital Zoom -3.0EV...
Camera Technical Specifications Image Sensor Image Resolution Video Resolution File Format External Memory LCD Display Lens Focus Range Zoom Exposure White Balance Scene Self-Timer Color Effects Speaker Microphone TV Out Interface System Requirements Battery Working Temperature CMOS (5M) 2592x1944 pixels, (3M) 2048x1536 pixels, (2M) 1600x1200, (1M) 1280x1024 pixels, (VGA) 640x480 pixels 1280X720 (HD), 640X480(VGA), 320X240(QVGA) JPEG/AVI SD Card (up to 8GB) 1.5 Inch TFT F3.0 Fixed Focus 150cm ~ infinity 4X Digital Zoom -3.0EV...
Camera Manual
Page 9
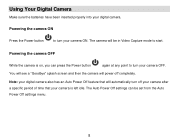
... idle. Using Your Digital Camera Make sure the batteries have been inserted properly into your camera ON. Powering the camera ON Press the Power button to turn your digital camera. The Auto Power Off settings can press the Power button again at any point to turn your camera is on, you can be in Video Capture mode to start. You will see a "Goodbye" splash screen and then the camera will be set from the Auto Power Off settings menu. 8
... idle. Using Your Digital Camera Make sure the batteries have been inserted properly into your camera ON. Powering the camera ON Press the Power button to turn your digital camera. The Auto Power Off settings can press the Power button again at any point to turn your camera is on, you can be in Video Capture mode to start. You will see a "Goodbye" splash screen and then the camera will be set from the Auto Power Off settings menu. 8
Camera Manual
Page 10
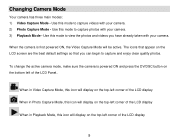
... quality photos. When the camera is powered ON and press the DV/DSC button on the top-left of the LCD display 9 To change the active camera mode, make sure the camera is first powered ON, the Video Capture Mode will display on the bottom left corner of the LCD Panel.. Changing Camera Mode Your camera has three main modes: 1) Video Capture Mode - Use this mode to view the photos and videos you can begin to capture photos with your camera. 2) Photo Capture Mode - Use this...
... quality photos. When the camera is powered ON and press the DV/DSC button on the top-left of the LCD display 9 To change the active camera mode, make sure the camera is first powered ON, the Video Capture Mode will display on the bottom left corner of the LCD Panel.. Changing Camera Mode Your camera has three main modes: 1) Video Capture Mode - Use this mode to view the photos and videos you can begin to capture photos with your camera. 2) Photo Capture Mode - Use this...

Camera Manual
Page 12
.../Zoom Out buttons on the left of the LCD Panel to better set the camera display if desired. 3) Press the LED ON/OFF button on the left of the LCD Panel to turn the LED light on to give more light. 4) Press the Shutter button on the top of the camera to start the video capture. 5) You will automatically be saved to the SD card memory card. Video Capture Mode Quick Function Buttons Your digital camera has a four-directional...
.../Zoom Out buttons on the left of the LCD Panel to better set the camera display if desired. 3) Press the LED ON/OFF button on the left of the LCD Panel to turn the LED light on to give more light. 4) Press the Shutter button on the top of the camera to start the video capture. 5) You will automatically be saved to the SD card memory card. Video Capture Mode Quick Function Buttons Your digital camera has a four-directional...
Camera Manual
Page 14
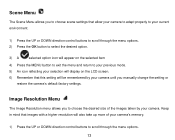
... a higher resolution will display on the LCD screen. 6) Remember that allow your camera to adapt properly to your current environment. 1) Press the UP or DOWN direction control buttons to scroll through the menu options. 13 Image Resolution Menu The Image Resolution menu allows you manually change the setting or restore the camera's default factory settings. Scene Menu The Scene Menu allows you to choose scene settings that this setting will be remembered by...
... a higher resolution will display on the LCD screen. 6) Remember that allow your camera to adapt properly to your current environment. 1) Press the UP or DOWN direction control buttons to scroll through the menu options. 13 Image Resolution Menu The Image Resolution menu allows you manually change the setting or restore the camera's default factory settings. Scene Menu The Scene Menu allows you to choose scene settings that this setting will be remembered by...
Camera Manual
Page 15
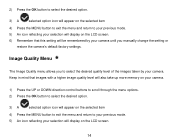
... selected item 4) Press the MENU button to exit the menu and return to your previous mode. 5) An icon reflecting your selection will display on the LCD screen. 6) Remember that images with a higher image quality level will also take up more memory on your camera. 1) Press the UP or DOWN direction control buttons to scroll through the menu options. 2) Press the OK button to select the desired option...
... selected item 4) Press the MENU button to exit the menu and return to your previous mode. 5) An icon reflecting your selection will display on the LCD screen. 6) Remember that images with a higher image quality level will also take up more memory on your camera. 1) Press the UP or DOWN direction control buttons to scroll through the menu options. 2) Press the OK button to select the desired option...
Camera Manual
Page 18
... direction control buttons to scroll through the menu options. 2) Press the OK button to select the desired option. 3) A selected option icon will appear on the LCD screen 6) Remember that this setting will display on the selected item 4) Press the MENU button to exit the menu and return to your previous mode. 5) An icon reflecting your selection will be remembered by your camera until you manually change...
... direction control buttons to scroll through the menu options. 2) Press the OK button to select the desired option. 3) A selected option icon will appear on the LCD screen 6) Remember that this setting will display on the selected item 4) Press the MENU button to exit the menu and return to your previous mode. 5) An icon reflecting your selection will be remembered by your camera until you manually change...
Camera Manual
Page 19
... or DOWN direction control buttons to scroll through the menu options. 2) Press the OK button to select the desired option. 3) A selected option icon will be adjusted when the environment is needed , increase the exposure setting (by your camera's lens. Light Exposure Menu The Light Exposure setting helps you manually change the setting or restore the camera's default factory settings. This setting should be remembered by using the negative count) to your previous mode. 18
... or DOWN direction control buttons to scroll through the menu options. 2) Press the OK button to select the desired option. 3) A selected option icon will be adjusted when the environment is needed , increase the exposure setting (by your camera's lens. Light Exposure Menu The Light Exposure setting helps you manually change the setting or restore the camera's default factory settings. This setting should be remembered by using the negative count) to your previous mode. 18
Camera Manual
Page 28
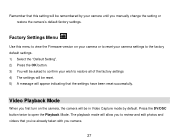
... this menu to view the Firmware version on the camera, the camera will appear indicating that you've already taken with you camera. 27 Press the DV/DSC button twice to open the Playback Mode. Factory Settings Menu Use this setting will be reset. 5) A message will be in Video Capture mode by your wish to restore all of the factory settings 4) The settings will be remembered by default. Video Playback Mode When you first turn on your camera...
... this menu to view the Firmware version on the camera, the camera will appear indicating that you've already taken with you camera. 27 Press the DV/DSC button twice to open the Playback Mode. Factory Settings Menu Use this setting will be reset. 5) A message will be in Video Capture mode by your wish to restore all of the factory settings 4) The settings will be remembered by default. Video Playback Mode When you first turn on your camera...

Camera Manual
Page 32
Taking a Picture 1) While in Photo Capture mode, use the LCD display on the back of the camera to direct the camera at the scene you to capture pictures with your digital camera. Photo Capture Mode Quick Function Buttons Your digital camera has a four-directional pad that functions as Quick Function buttons: Left Up Right Down No Function Zoom In Self-Timer Zoom Out 31 Photo Capture Mode The Photo Capture mode allows you would like to capture. 2) Click the Up/Zoom In and Down/Zoom Out buttons to zoom in/out if...
Taking a Picture 1) While in Photo Capture mode, use the LCD display on the back of the camera to direct the camera at the scene you to capture pictures with your digital camera. Photo Capture Mode Quick Function Buttons Your digital camera has a four-directional pad that functions as Quick Function buttons: Left Up Right Down No Function Zoom In Self-Timer Zoom Out 31 Photo Capture Mode The Photo Capture mode allows you would like to capture. 2) Click the Up/Zoom In and Down/Zoom Out buttons to zoom in/out if...

Camera Manual
Page 33
... the DISPLAY button once to hide the display of the icons on the screen. LED Flash Light To add more light in your camera's Photo Capture Mode: 32 The LCD will go blank. 7) Press the DISPLAY button again to turn the LED Off Photo Capture Mode Menus The following are the menus that appear in a dark situation the camera has a LED flash light. 1) Press the LED ON/OFF button once to turn the...
... the DISPLAY button once to hide the display of the icons on the screen. LED Flash Light To add more light in your camera's Photo Capture Mode: 32 The LCD will go blank. 7) Press the DISPLAY button again to turn the LED Off Photo Capture Mode Menus The following are the menus that appear in a dark situation the camera has a LED flash light. 1) Press the LED ON/OFF button once to turn the...

Camera Manual
Page 36
1) Press the UP or DOWN direction control buttons to scroll through the menu options. 2) Press the OK button to your previous mode. 6) An icon reflecting your selection will display on the selected item. 35 Image Resolution Menu The Image Resolution menu allows you to choose the desired size of your camera's memory. 1) Press the UP or DOWN direction control buttons to scroll through the menu options. 2) Press the OK...
1) Press the UP or DOWN direction control buttons to scroll through the menu options. 2) Press the OK button to your previous mode. 6) An icon reflecting your selection will display on the selected item. 35 Image Resolution Menu The Image Resolution menu allows you to choose the desired size of your camera's memory. 1) Press the UP or DOWN direction control buttons to scroll through the menu options. 2) Press the OK...

Camera Manual
Page 37
... MENU button to exit the menu and return to your previous mode. 6) An icon reflecting your selection will display on the LCD screen. 7) Remember that this setting will be remembered by your camera until you manually change the setting or restore the camera's default factory settings. Keep in mind that images with a higher image quality level will also take up more memory on your camera. 1) Press the UP or DOWN direction control buttons...
... MENU button to exit the menu and return to your previous mode. 6) An icon reflecting your selection will display on the LCD screen. 7) Remember that this setting will be remembered by your camera until you manually change the setting or restore the camera's default factory settings. Keep in mind that images with a higher image quality level will also take up more memory on your camera. 1) Press the UP or DOWN direction control buttons...

Camera Manual
Page 42
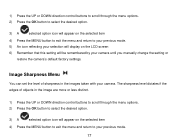
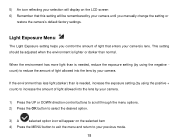
Image Sharpness Menu You can set the level of light that this setting will be adjusted when the environment is lighter or darker than normal. 41 Light Exposure Menu The Light Exposure setting helps you manually change the setting or restore the camera's default factory settings. The sharpness level dictates if the edges of objects in the images taken with your camera's lens. This setting should be remembered by your camera until you control the amount...
Image Sharpness Menu You can set the level of light that this setting will be adjusted when the environment is lighter or darker than normal. 41 Light Exposure Menu The Light Exposure setting helps you manually change the setting or restore the camera's default factory settings. The sharpness level dictates if the edges of objects in the images taken with your camera's lens. This setting should be remembered by your camera until you control the amount...
Camera Manual
Page 57
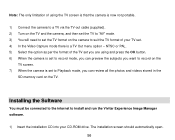
... to set . 4) In the Video Capture mode there is now not portable. 1) Connect the camera to a TV via the TV-out cable (supplied). 2) Turn on the TV and the camera, and then set the TV to "AV" mode. 3) You will need to install and run the Vivitar Experience Image Manager software. 1) Insert the installation CD into your TV set the TV format on the TV. The installation screen should automatically open. 56 NTSC...
... to set . 4) In the Video Capture mode there is now not portable. 1) Connect the camera to a TV via the TV-out cable (supplied). 2) Turn on the TV and the camera, and then set the TV to "AV" mode. 3) You will need to install and run the Vivitar Experience Image Manager software. 1) Insert the installation CD into your TV set the TV format on the TV. The installation screen should automatically open. 56 NTSC...
Camera Manual
Page 59
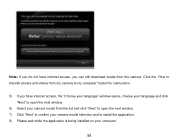
Click the "How to transfer photos and videos from my camera to my computer" button for instructions. 5) If you can still download media from the list and click "Next" to open the next window. 7) Click "Next" to confirm your camera model selection and to open the next window. 6) Select your computer. 58 Note: If you do not have internet access, you have internet access, the "Choose your language" window opens, choose your language and click "Next" to install the application. 8) Please wait while the application is being installed on your camera model from the camera.
Click the "How to transfer photos and videos from my camera to my computer" button for instructions. 5) If you can still download media from the list and click "Next" to open the next window. 7) Click "Next" to confirm your camera model selection and to open the next window. 6) Select your computer. 58 Note: If you do not have internet access, you have internet access, the "Choose your language" window opens, choose your language and click "Next" to install the application. 8) Please wait while the application is being installed on your camera model from the camera.

Camera Manual
Page 64
... copy the images into the Pictures folder and the videos into your computer. Doing so will cancel the transfer of any files on the device icon and open the DCIM folder and the folder inside to heat sources. Camera Maintenance The digital camera is a delicate device. Then select a folder and choose Paste from the Finder's Edit menu. Please handle your camera with your camera to connect...
... copy the images into the Pictures folder and the videos into your computer. Doing so will cancel the transfer of any files on the device icon and open the DCIM folder and the folder inside to heat sources. Camera Maintenance The digital camera is a delicate device. Then select a folder and choose Paste from the Finder's Edit menu. Please handle your camera with your camera to connect...


