
Camera Manual
Page 1
Windows and the Windows logo are the property of Microsoft Corporation. All other trademarks are registered trademarks of their respective companies. All rights reserved. DVR 528 Digital Video Camera User Manual © 2010 Sakar International, Inc.
Windows and the Windows logo are the property of Microsoft Corporation. All other trademarks are registered trademarks of their respective companies. All rights reserved. DVR 528 Digital Video Camera User Manual © 2010 Sakar International, Inc.
Camera Manual
Page 2
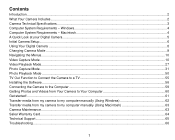
... and Videos from Your Camera to Your Computer 60 Get started! ...61 Transfer media from my camera to my computer manually (Using Windows 62 Transfer media from my camera to my computer manually (Using Macintosh 63 Camera Maintenance ...63 Sakar Warranty Card...64 Technical Support...65 Troubleshooting...66 1 Contents Introduction ...2 What Your...
... and Videos from Your Camera to Your Computer 60 Get started! ...61 Transfer media from my camera to my computer manually (Using Windows 62 Transfer media from my camera to my computer manually (Using Macintosh 63 Camera Maintenance ...63 Sakar Warranty Card...64 Technical Support...65 Troubleshooting...66 1 Contents Introduction ...2 What Your...
Camera Manual
Page 3
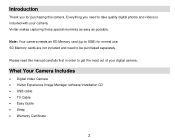
Note: Your camera needs an SD Memory card (up to 8GB) for purchasing this manual carefully first in order to get the most out of your camera. SD Memory cards are not included and need to take quality digital photos ... your digital camera. Introduction Thank you need to be purchased separately. Everything you for normal use. What Your Camera Includes Digital Video Camera Vivitar Experience Image Manager software Installation CD USB cable TV Cable Easy Guide Strap Warranty Certificate 2 Please read this camera...
Note: Your camera needs an SD Memory card (up to 8GB) for purchasing this manual carefully first in order to get the most out of your camera. SD Memory cards are not included and need to take quality digital photos ... your digital camera. Introduction Thank you need to be purchased separately. Everything you for normal use. What Your Camera Includes Digital Video Camera Vivitar Experience Image Manager software Installation CD USB cable TV Cable Easy Guide Strap Warranty Certificate 2 Please read this camera...
Camera Manual
Page 8
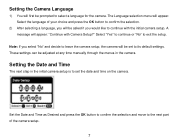
... Setup?" The Language selection menu will be asked if you would like to select a language for the camera. A message will be adjusted at any time manually through the menus in the initial camera setup is to set to leave the camera setup, the camera will appear: "Continue with the initial camera...
... Setup?" The Language selection menu will be asked if you would like to select a language for the camera. A message will be adjusted at any time manually through the menus in the initial camera setup is to set to leave the camera setup, the camera will appear: "Continue with the initial camera...
Camera Manual
Page 14
... the LCD screen. 6) Remember that allow your camera to adapt properly to scroll through the menu options. 13 Scene Menu The Scene Menu allows you manually change the setting or restore the camera's default factory settings. Keep in mind that images with a higher resolution will also take up more of the...
... the LCD screen. 6) Remember that allow your camera to adapt properly to scroll through the menu options. 13 Scene Menu The Scene Menu allows you manually change the setting or restore the camera's default factory settings. Keep in mind that images with a higher resolution will also take up more of the...
Camera Manual
Page 15
Image Quality Menu The Image Quality menu allows you manually change the setting or restore the camera's default factory settings. 2) Press the OK button to your previous mode. 5) An icon reflecting your camera. Keep in ...
Image Quality Menu The Image Quality menu allows you manually change the setting or restore the camera's default factory settings. 2) Press the OK button to your previous mode. 5) An icon reflecting your camera. Keep in ...
Camera Manual
Page 16
6) Remember that this setting will be remembered by your camera until you manually change the setting or restore the camera's default factory settings. 15 Anti-Shake Menu The Anti-Shake feature reduces image corruption that can be caused ... previous mode. 5) An icon reflecting your selection will display on the LCD screen. 6) Remember that this setting will be remembered by your camera until you manually change the setting or restore the camera's default factory settings.
6) Remember that this setting will be remembered by your camera until you manually change the setting or restore the camera's default factory settings. 15 Anti-Shake Menu The Anti-Shake feature reduces image corruption that can be caused ... previous mode. 5) An icon reflecting your selection will display on the LCD screen. 6) Remember that this setting will be remembered by your camera until you manually change the setting or restore the camera's default factory settings.
Camera Manual
Page 17
... images that this setting will be remembered by your selection will allow the camera to your previous mode. 5) An icon reflecting your camera until you manually change the setting or restore the camera's default factory settings. Color Effect Menu You can choose to add a color effect to the images taken with...
... images that this setting will be remembered by your selection will allow the camera to your previous mode. 5) An icon reflecting your camera until you manually change the setting or restore the camera's default factory settings. Color Effect Menu You can choose to add a color effect to the images taken with...
Camera Manual
Page 18
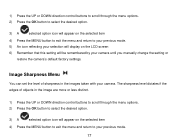
... 6) Remember that this setting will appear on the selected item 4) Press the MENU button to exit the menu and return to your camera until you manually change the setting or restore the camera's default factory settings. Image Sharpness Menu You can set the level of objects in the images taken with...
... 6) Remember that this setting will appear on the selected item 4) Press the MENU button to exit the menu and return to your camera until you manually change the setting or restore the camera's default factory settings. Image Sharpness Menu You can set the level of objects in the images taken with...
Camera Manual
Page 19
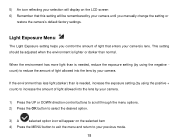
Light Exposure Menu The Light Exposure setting helps you manually change the setting or restore the camera's default factory settings. If the environment has less light (darker) than normal. 5) An icon reflecting your selection will ...
Light Exposure Menu The Light Exposure setting helps you manually change the setting or restore the camera's default factory settings. If the environment has less light (darker) than normal. 5) An icon reflecting your selection will ...
Camera Manual
Page 20
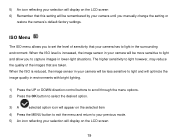
... allows you to set the level of the images that your camera will be remembered by your camera until you to light and allow you manually change the setting or restore the camera's default factory settings.
... allows you to set the level of the images that your camera will be remembered by your camera until you to light and allow you manually change the setting or restore the camera's default factory settings.
Camera Manual
Page 21
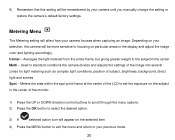
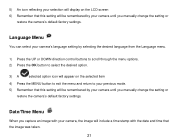
... of the LCD to select the desired option. 3) A selected option icon will appear on your selection, the camera will affect how your camera until you manually change the setting or restore the camera's default factory settings. Used in standard conditions the camera divides and adjusts the settings of the image into...
... of the LCD to select the desired option. 3) A selected option icon will appear on your selection, the camera will affect how your camera until you manually change the setting or restore the camera's default factory settings. Used in standard conditions the camera divides and adjusts the settings of the image into...
Camera Manual
Page 22
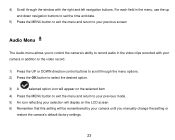
... scroll through the menu options. 2) Press the OK button to your previous mode. 5) Remember that this setting will be remembered by your camera until you manually change the setting or restore the camera's default factory settings. 5) An icon reflecting your selection will display on the selected item 4) Press the MENU button... select the desired option. 3) A selected option icon will appear on the LCD screen 6) Remember that this setting will be remembered by your camera until you manually change the setting or restore the camera's default factory settings.
... scroll through the menu options. 2) Press the OK button to your previous mode. 5) Remember that this setting will be remembered by your camera until you manually change the setting or restore the camera's default factory settings. 5) An icon reflecting your selection will display on the selected item 4) Press the MENU button... select the desired option. 3) A selected option icon will appear on the LCD screen 6) Remember that this setting will be remembered by your camera until you manually change the setting or restore the camera's default factory settings.

Camera Manual
Page 23
... and return to your previous mode. 5) Remember that will be taken with your camera's date and time as desired. The Date/Time menu allows you manually change the setting or restore the camera's default factory settings. On -
... and return to your previous mode. 5) Remember that will be taken with your camera's date and time as desired. The Date/Time menu allows you manually change the setting or restore the camera's default factory settings. On -
Camera Manual
Page 24
... and down navigation buttons to set the time and date. 5) Press the MENU button to exit the menu and return to your camera until you manually change the setting or restore the camera's default factory settings. 23 For each field in the video clips recorded with the right and left navigation...
... and down navigation buttons to set the time and date. 5) Press the MENU button to exit the menu and return to your camera until you manually change the setting or restore the camera's default factory settings. 23 For each field in the video clips recorded with the right and left navigation...

Camera Manual
Page 25
... lighting sources in order to a frequency that this setting will automatically power off completely and will need to be remembered by your camera until you manually change the setting or restore the camera's default factory settings.
... lighting sources in order to a frequency that this setting will automatically power off completely and will need to be remembered by your camera until you manually change the setting or restore the camera's default factory settings.

Camera Manual
Page 26
This option can use the delete menu in mind that this setting will permanently delete all of the content at one time. If you manually change the setting or restore the camera's default factory settings. Keep in the camera's Playback mode. 25 UK, Europe and Australia 60Hz - US, Canada and ...
This option can use the delete menu in mind that this setting will permanently delete all of the content at one time. If you manually change the setting or restore the camera's default factory settings. Keep in the camera's Playback mode. 25 UK, Europe and Australia 60Hz - US, Canada and ...
Camera Manual
Page 28
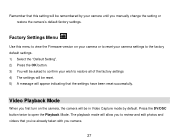
... your wish to restore all of the factory settings 4) The settings will be reset. 5) A message will appear indicating that you've already taken with you manually change the setting or restore the camera's default factory settings.
... your wish to restore all of the factory settings 4) The settings will be reset. 5) A message will appear indicating that you've already taken with you manually change the setting or restore the camera's default factory settings.

Camera Manual
Page 36
Image Resolution Menu The Image Resolution menu allows you manually change the setting or restore the camera's default factory settings. Keep in mind that images with a higher resolution will also take up more of the ...
Image Resolution Menu The Image Resolution menu allows you manually change the setting or restore the camera's default factory settings. Keep in mind that images with a higher resolution will also take up more of the ...

Camera Manual
Page 37
...6) An icon reflecting your selection will display on the LCD screen. 7) Remember that this setting will be remembered by your camera until you manually change the setting or restore the camera's default factory settings. 36 Image Quality Menu The Image Quality menu allows you to select the desired ...quality level of the images taken by your camera until you manually change the setting or restore the camera's default factory settings. 4) Press the LEFT or RIGHT button to select the next menu item. 5)...
...6) An icon reflecting your selection will display on the LCD screen. 7) Remember that this setting will be remembered by your camera until you manually change the setting or restore the camera's default factory settings. 36 Image Quality Menu The Image Quality menu allows you to select the desired ...quality level of the images taken by your camera until you manually change the setting or restore the camera's default factory settings. 4) Press the LEFT or RIGHT button to select the next menu item. 5)...


