DVR865HD User Manual
Page 2
... Windows Vista 4 Computer System Requirements for Macintosh 5 A Quick Look at your Digital Video Camera 6 Preparing Your Camera for Use 7 Inserting an SD Memory Card 8 Software Installation: Snap 'n Share Pro and Video Express 10 Software Installation ...10 DVR Function Control ...17 Transferring Images to your PC using the software 43 Manually transfer media to your Digital Camera 51 Everything you need to get the most of your media and MORE 52 Video Express application ...56 Technical Support ...64 Sakar Warranty Card ...64 Technical Specifications...
... Windows Vista 4 Computer System Requirements for Macintosh 5 A Quick Look at your Digital Video Camera 6 Preparing Your Camera for Use 7 Inserting an SD Memory Card 8 Software Installation: Snap 'n Share Pro and Video Express 10 Software Installation ...10 DVR Function Control ...17 Transferring Images to your PC using the software 43 Manually transfer media to your Digital Camera 51 Everything you need to get the most of your media and MORE 52 Video Express application ...56 Technical Support ...64 Sakar Warranty Card ...64 Technical Specifications...

DVR865HD User Manual
Page 3
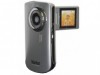
... pixels (1.3M) • 2.4" TFT LCD • 8 X Digital Zoom • Supports external SD memory card up to 16GB • Built-in Microphone 2 Key Features • 5 modes - DSC Camera, Video, Playback, Set Up and Audio. • Digital Video resolutions - 1280x720 Pixels (HD), 640x480 (VGA), 320x240 (QVGA). • 8.1 mega-pixels camera with choice of your camera you for purchasing the DVR865HD Digital Video Camcorder. With your DVR camera. Introduction Thank you can shoot video clips, take individual photos and record audio files.
... pixels (1.3M) • 2.4" TFT LCD • 8 X Digital Zoom • Supports external SD memory card up to 16GB • Built-in Microphone 2 Key Features • 5 modes - DSC Camera, Video, Playback, Set Up and Audio. • Digital Video resolutions - 1280x720 Pixels (HD), 640x480 (VGA), 320x240 (QVGA). • 8.1 mega-pixels camera with choice of your camera you for purchasing the DVR865HD Digital Video Camcorder. With your DVR camera. Introduction Thank you can shoot video clips, take individual photos and record audio files.
DVR865HD User Manual
Page 4
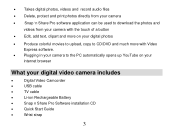
... Pro software application can be used to download the photos and videos from your camera with the touch of a button • Edit, add text, clipart and more on your digital photos • Produce colorful movies to upload, copy to CD/DVD and much more with Video Express software. • Plugging in your camera to the PC automatically opens up YouTube on your internet browser What your digital video camera includes • Digital Video Camcorder • USB cable •...
... Pro software application can be used to download the photos and videos from your camera with the touch of a button • Edit, add text, clipart and more on your digital photos • Produce colorful movies to upload, copy to CD/DVD and much more with Video Express software. • Plugging in your camera to the PC automatically opens up YouTube on your internet browser What your digital video camera includes • Digital Video Camcorder • USB cable •...
DVR865HD User Manual
Page 9
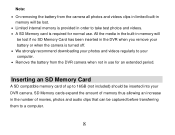
... required for normal use for an extended period. SD Memory cards expand the amount of memory thus allowing an increase in use . Note: • On removing the battery from the DVR camera when not in the number of movies, photos and audio clips that can be captured before transferring them to 16GB (not included) should be inserted into your DVR camera. Inserting an SD Memory Card A SD compatible memory card of up...
... required for normal use for an extended period. SD Memory cards expand the amount of memory thus allowing an increase in use . Note: • On removing the battery from the DVR camera when not in the number of movies, photos and audio clips that can be captured before transferring them to 16GB (not included) should be inserted into your DVR camera. Inserting an SD Memory Card A SD compatible memory card of up...

DVR865HD User Manual
Page 12
The Welcome to begin the software setup. 4. Note: On Vista operating systems you may see an AutoPlay window appear. Select the SMSetup.exe option to begin the software setup and installation process. 11 3. Click the "Begin" button to the Snap 'n Share Pro Installation Wizard Setup screen will appear.
The Welcome to begin the software setup. 4. Note: On Vista operating systems you may see an AutoPlay window appear. Select the SMSetup.exe option to begin the software setup and installation process. 11 3. Click the "Begin" button to the Snap 'n Share Pro Installation Wizard Setup screen will appear.
DVR865HD User Manual
Page 18
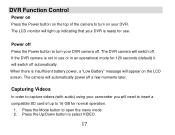
... Battery" message will light up indicating that your camcorder you will need to insert a compatible SD card of the camera to turn your DVR. Press the Mode button to select VIDEO. 17 The DVR camera will automatically power off automatically. When there is ready for use or in an operational mode for normal operation. 1. The camera will switch off . The LCD monitor will appear on your DVR camera off . Press the Up/Down button to open the menu mode. 2. DVR Function Control Power...
... Battery" message will light up indicating that your camcorder you will need to insert a compatible SD card of the camera to turn your DVR. Press the Mode button to select VIDEO. 17 The DVR camera will automatically power off automatically. When there is ready for use or in an operational mode for normal operation. 1. The camera will switch off . The LCD monitor will appear on your DVR camera off . Press the Up/Down button to open the menu mode. 2. DVR Function Control Power...

DVR865HD User Manual
Page 19
... internal memory of the LCD. 3. The video icon will appear and begin to focus in on the top left corner of the video will be used for playback video files. Note: 1. 2. 3. 4. 5. You can adjust the zoom to flash. A icon will now appear on your DVR camera. You can exchange between Video and Playback mode quickly by your subject. During shooting the videos you can view the AVI files in AVI format (with audio). The elapsed time...
... internal memory of the LCD. 3. The video icon will appear and begin to focus in on the top left corner of the video will be used for playback video files. Note: 1. 2. 3. 4. 5. You can adjust the zoom to flash. A icon will now appear on your DVR camera. You can exchange between Video and Playback mode quickly by your subject. During shooting the videos you can view the AVI files in AVI format (with audio). The elapsed time...

DVR865HD User Manual
Page 23
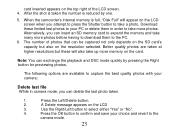
... image that appears. 3. The camera will beep and the picture taken is limited to the memory. 3. The number of photos that can delete the last video by pressing the Left/Delete button. 1. A Delete message will be taken for normal camera use as the camera's internal memory is now saved to a few photos per the memory 22 After you power on the top left corner of up to confirm your camcorder, press the Mode button...
... image that appears. 3. The camera will beep and the picture taken is limited to the memory. 3. The number of photos that can delete the last video by pressing the Left/Delete button. 1. A Delete message will be taken for normal camera use as the camera's internal memory is now saved to a few photos per the memory 22 After you power on the top left corner of up to confirm your camcorder, press the Mode button...
DVR865HD User Manual
Page 24
... a photo. Alternatively, you can insert an SD memory card to expand the memory and take many more photos before having to download them in camera mode, you attempt to press the Shutter button to the PC. 6. When the camcorder's internal memory is reduced by pressing the Right button for previewing photos. The number of the LCD screen. 4. A Delete message appears on the LCD screen when you can exchange the playback and DSC mode quickly by...
... a photo. Alternatively, you can insert an SD memory card to expand the memory and take many more photos before having to download them in camera mode, you attempt to press the Shutter button to the PC. 6. When the camcorder's internal memory is reduced by pressing the Right button for previewing photos. The number of the LCD screen. 4. A Delete message appears on the LCD screen when you can exchange the playback and DSC mode quickly by...

DVR865HD User Manual
Page 26
... saved and the amount of the photo the more memory it will also affect the maximum size you choose - 8.1MP (3264x2448), 7MP (3072x2304), 5MP (2592x1944), 3MP (2048x1536), 2MP (1600x1200) or 1.3MP (1280x960). 4. The image size and quality will take. Press the Up/Down button to select the icon option on the LCD screen. 25 Press the OK button to confirm, save...
... saved and the amount of the photo the more memory it will also affect the maximum size you choose - 8.1MP (3264x2448), 7MP (3072x2304), 5MP (2592x1944), 3MP (2048x1536), 2MP (1600x1200) or 1.3MP (1280x960). 4. The image size and quality will take. Press the Up/Down button to select the icon option on the LCD screen. 25 Press the OK button to confirm, save...

DVR865HD User Manual
Page 28
Press the OK button to confirm, save your images, making edges more or less distinct. 1. Press the Right/Left button to compensate the light conditions when the light source is a special function that appears - 100/200/400/800/1600/3200. 4. ISO This is not good and also where you ...from the menu that allows you are not using the flash or tripod. Press the Up/Down button to select the ISO option . 3. Press the OK button. 2. Press the OK button. 2. Sharpness This setting allows you want to use ISO sensitization, please choose the low ISO value to adjust the ...
Press the OK button to confirm, save your images, making edges more or less distinct. 1. Press the Right/Left button to compensate the light conditions when the light source is a special function that appears - 100/200/400/800/1600/3200. 4. ISO This is not good and also where you ...from the menu that allows you are not using the flash or tripod. Press the Up/Down button to select the ISO option . 3. Press the OK button. 2. Press the OK button. 2. Sharpness This setting allows you want to use ISO sensitization, please choose the low ISO value to adjust the ...

DVR865HD User Manual
Page 29
White Balance This setting is used to choose the best option from the menu that appears - Press the Right/Left button to select the Anti-Shake option 28 Press the Up/Down button to adjust the color of your photos as a result of the LCD screen. Anti-Shake Your Digital Camcorder has a function that appears: Auto/Daylight/Cloudy/Fluorescent/Incandescent. 4. Press the Right/Left button to select the...
White Balance This setting is used to choose the best option from the menu that appears - Press the Right/Left button to select the Anti-Shake option 28 Press the Up/Down button to adjust the color of your photos as a result of the LCD screen. Anti-Shake Your Digital Camcorder has a function that appears: Auto/Daylight/Cloudy/Fluorescent/Incandescent. 4. Press the Right/Left button to select the...

DVR865HD User Manual
Page 33
... menu that appears. 4. Playback mode 1. Switch on your SD memory card. Operation for playback audio file. Press Shutter button to stop . 32 Press the Shutter button to start playing, "Playing audio" will display in the center of the screen until playing stop and save as a WAV audio file on your camera 1. Select an audio file by pressing the Right button for Audio file You can exchange the playback and Audio mode quickly by pressing Right/Left button. 2. Use the Up/Down button to enter the Playback mode. Note: You can playback Audio files recorded...
... menu that appears. 4. Playback mode 1. Switch on your SD memory card. Operation for playback audio file. Press Shutter button to stop . 32 Press the Shutter button to start playing, "Playing audio" will display in the center of the screen until playing stop and save as a WAV audio file on your camera 1. Select an audio file by pressing the Right button for Audio file You can exchange the playback and Audio mode quickly by pressing Right/Left button. 2. Use the Up/Down button to enter the Playback mode. Note: You can playback Audio files recorded...

DVR865HD User Manual
Page 38
... the OK button to confirm, save your choice and exit. Caution: Please make sure to select "Yes" or "No". 4. Press the Up/Down button to download the images first before using this feature as all files in internal memory or SD memory card by using this mode you can delete all the images sitting in the card will be erased from the menu that appears. 4. Switch on the camera. 2. Setup Mode 1. Default setting 1.
... the OK button to confirm, save your choice and exit. Caution: Please make sure to select "Yes" or "No". 4. Press the Up/Down button to download the images first before using this feature as all files in internal memory or SD memory card by using this mode you can delete all the images sitting in the card will be erased from the menu that appears. 4. Switch on the camera. 2. Setup Mode 1. Default setting 1.

DVR865HD User Manual
Page 39
... displayed on the screen. 38 Press the Up/Down button to confirm, save and exit to select the Format option. 3. Press the Right/Left button and select the Date Format option. 3. internal memory. Press the OK button to select "OK" or "Cancel" 4. Press the Right/Left button to select one of the photo. 1. Hide. 4. YY/MM/DD; Note: the Date format will appear on the LCD...
... displayed on the screen. 38 Press the Up/Down button to confirm, save and exit to select the Format option. 3. Press the Right/Left button and select the Date Format option. 3. internal memory. Press the OK button to select "OK" or "Cancel" 4. Press the Right/Left button to select one of the photo. 1. Hide. 4. YY/MM/DD; Note: the Date format will appear on the LCD...

DVR865HD User Manual
Page 40
... select the Date/Time Setting option. 3. Press the OK button. 2. Note: the Time format will be displayed on the LCD screen in step 3, it won't be displayed on the screen. Press the OK button to select the Confirm option. 8. Press the OK button to confirm, save and exit. Press the Up/Down button to set the Date and Time continue to use the Left/Right button to confirm, save and exit...
... select the Date/Time Setting option. 3. Press the OK button. 2. Note: the Time format will be displayed on the LCD screen in step 3, it won't be displayed on the screen. Press the OK button to select the Confirm option. 8. Press the OK button to confirm, save and exit. Press the Up/Down button to set the Date and Time continue to use the Left/Right button to confirm, save and exit...

DVR865HD User Manual
Page 42
Auto Power Off In order to your camera when it is not in use you can set the time the camcorder will not appear on the LCD screen. 5. Note: When plugged into the TV the image will automatically turn off when not active. 41 Connect your DVR to conserve the energy supply of your TV with the supplied TV cable.
Auto Power Off In order to your camera when it is not in use you can set the time the camcorder will not appear on the LCD screen. 5. Note: When plugged into the TV the image will automatically turn off when not active. 41 Connect your DVR to conserve the energy supply of your TV with the supplied TV cable.

DVR865HD User Manual
Page 44
Use the "Snap 'n Share Pro" program to use" pop-up the camera's memory to save all your photos and videos for playing, editing, emailing or uploading as you desire. Plug the other end of the provided USB cable into a USB port on your camera. 2. Important: We recommend not opening the software until the camera is installed and ready to import the videos from your camera thereby freeing up box on . 4. Once your photos and videos are transferred to...
Use the "Snap 'n Share Pro" program to use" pop-up the camera's memory to save all your photos and videos for playing, editing, emailing or uploading as you desire. Plug the other end of the provided USB cable into a USB port on your camera. 2. Important: We recommend not opening the software until the camera is installed and ready to import the videos from your camera thereby freeing up box on . 4. Once your photos and videos are transferred to...

DVR865HD User Manual
Page 51
This will automatically delete the images on your media. • You can also choose the website where you would like to upload your camera and free up memory to "Delete the media from the camera after the files have been transferred". Choose where to place your media once it is downloaded to the computer. • You can also select to continue capturing photos and videos. 50 8. Step 4 -
This will automatically delete the images on your media. • You can also choose the website where you would like to upload your camera and free up memory to "Delete the media from the camera after the files have been transferred". Choose where to place your media once it is downloaded to the computer. • You can also select to continue capturing photos and videos. 50 8. Step 4 -

DVR865HD User Manual
Page 52
... to the Quick Start Help Guide or Show Me How Tour tutorial from the camera to the selected location. Manually transfer media to your Digital Camera Your camera is downloaded it can be viewed in Mass Storage Mode. 3. Double click the My Computer icon on . 2. Connect your DVR camera to your computer using the USB cable and turn the camera on your desktop. Click the Removable Disk that your DVR camera is in the 'Select Photos' mode of...
... to the Quick Start Help Guide or Show Me How Tour tutorial from the camera to the selected location. Manually transfer media to your Digital Camera Your camera is downloaded it can be viewed in Mass Storage Mode. 3. Double click the My Computer icon on . 2. Connect your DVR camera to your computer using the USB cable and turn the camera on your desktop. Click the Removable Disk that your DVR camera is in the 'Select Photos' mode of...


