User Manual
Page 2
... MOUNT...11 USING THE TRIPOD ...12 Camera Technical Specifications 13 Using Your Action Camera ...14 POWERING ON YOUR CAMERA ...14 CHANGING CAMERA MODE ...14 VIDEO CAPTURE MODE ...15 PHOTO CAPTURE MODE ...18 CAMERA SETTINGS MENU ...20 Playback Mode...22 Vivitar 360 View - Desktop Application 29 Vivitar Experience Image Manager Software 31 COMPUTER SYSTEM REQUIREMENTS ...31 INSTALLING THE SOFTWARE...32 CONNECTING THE CAMERA TO THE COMPUTER ...32 GETTING VIDEOS FROM THE CAMERA TO THE COMPUTER ...33 GETTING STARTED! ...34 TRANSFERRING IMAGES MANUALLY FROM THE CAMERA TO...
... MOUNT...11 USING THE TRIPOD ...12 Camera Technical Specifications 13 Using Your Action Camera ...14 POWERING ON YOUR CAMERA ...14 CHANGING CAMERA MODE ...14 VIDEO CAPTURE MODE ...15 PHOTO CAPTURE MODE ...18 CAMERA SETTINGS MENU ...20 Playback Mode...22 Vivitar 360 View - Desktop Application 29 Vivitar Experience Image Manager Software 31 COMPUTER SYSTEM REQUIREMENTS ...31 INSTALLING THE SOFTWARE...32 CONNECTING THE CAMERA TO THE COMPUTER ...32 GETTING VIDEOS FROM THE CAMERA TO THE COMPUTER ...33 GETTING STARTED! ...34 TRANSFERRING IMAGES MANUALLY FROM THE CAMERA TO...
User Manual
Page 4
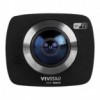
Please format the Micro SD Memory Card before use . NOTE: Your digital action camera supports a Class 6 - Vivitar makes capturing those special moments as easy as possible. Micro SD Memory cards are not included and need to take high definition digital videos and photos is adapted specifically for purchasing the Vivitar DVR 988D HD Wi-Fi Action Cam with Dual Lens 360° View. Class 10 Micro SD card with your camera. Everything you for this manual carefully...
Please format the Micro SD Memory Card before use . NOTE: Your digital action camera supports a Class 6 - Vivitar makes capturing those special moments as easy as possible. Micro SD Memory cards are not included and need to take high definition digital videos and photos is adapted specifically for purchasing the Vivitar DVR 988D HD Wi-Fi Action Cam with Dual Lens 360° View. Class 10 Micro SD card with your camera. Everything you for this manual carefully...
User Manual
Page 7
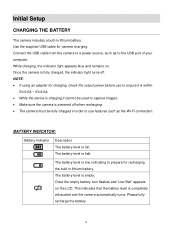
... USB port of your computer. Please fully recharge the battery. 6 While charging, the indicator light appears blue and remains on the LCD. BATTERY INDICATOR: Battery Indicator Description The battery level is half. This indicates that the battery level is empty. The battery level is fully charged, the indicator light turns off when recharging. The camera must be fully charged in lithium battery. Once the empty battery icon flashes and 'Low Bat!' Initial Setup CHARGING THE BATTERY...
... USB port of your computer. Please fully recharge the battery. 6 While charging, the indicator light appears blue and remains on the LCD. BATTERY INDICATOR: Battery Indicator Description The battery level is half. This indicates that the battery level is empty. The battery level is fully charged, the indicator light turns off when recharging. The camera must be fully charged in lithium battery. Once the empty battery icon flashes and 'Low Bat!' Initial Setup CHARGING THE BATTERY...
User Manual
Page 9
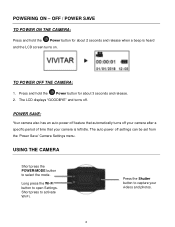
... 'Power Save' Camera Settings menu. The auto power off . USING THE CAMERA Short press the POWER/MODE button to capture your camera is heard and the LCD screen turns on. Press the Shutter button to select the mode. OFF / POWER SAVE TO POWER ON THE CAMERA: Press and hold the Power button for about 3 seconds and release. 2. TO POWER OFF THE CAMERA: 1. POWER SAVE: Your camera also has an auto power off feature that automatically turns off your camera after a specific period of time that your videos...
... 'Power Save' Camera Settings menu. The auto power off . USING THE CAMERA Short press the POWER/MODE button to capture your camera is heard and the LCD screen turns on. Press the Shutter button to select the mode. OFF / POWER SAVE TO POWER ON THE CAMERA: Press and hold the Power button for about 3 seconds and release. 2. TO POWER OFF THE CAMERA: 1. POWER SAVE: Your camera also has an auto power off feature that automatically turns off your camera after a specific period of time that your videos...

User Manual
Page 10
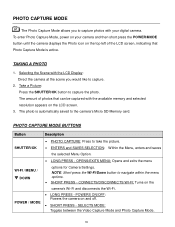
... recording. The picture is in Video Mode. Photo Capture Mode Use this mode to your photo. Press the Shutter/OK button again to toggle between the camera modes. To record a video, please check that the camera is automatically saved to capture videos with your camera. If the photo icon is automatically saved to capture pictures with your camera's memory card. Video Capture Mode Use this mode to your digital camera. The video is not displayed on the LCD screen, short press the Power/Mode button until it appears. To start recording...
... recording. The picture is in Video Mode. Photo Capture Mode Use this mode to your photo. Press the Shutter/OK button again to toggle between the camera modes. To record a video, please check that the camera is automatically saved to capture videos with your camera. If the photo icon is automatically saved to capture pictures with your camera's memory card. Video Capture Mode Use this mode to your digital camera. The video is not displayed on the LCD screen, short press the Power/Mode button until it appears. To start recording...
User Manual
Page 11
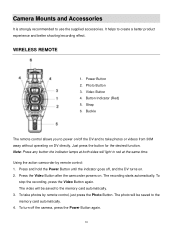
... 6. It helps to use the supplied accessories. Buckle The remote control allows you to the memory card automatically. 4. Using the action camcorder by remote control, just press the Photo Button. Press the Video Button after the camcorder powers on . 2. The recording starts automatically. The photo will be saved to take photos by remote control: 1. Camera Mounts and Accessories It is strongly recommended to create a better product experience and better shooting/recording effect. Button Indicator (Red) 5. WIRELESS REMOTE 1. Photo Button 3. To turn off...
... 6. It helps to use the supplied accessories. Buckle The remote control allows you to the memory card automatically. 4. Using the action camcorder by remote control, just press the Photo Button. Press the Video Button after the camcorder powers on . 2. The recording starts automatically. The photo will be saved to take photos by remote control: 1. Camera Mounts and Accessories It is strongly recommended to create a better product experience and better shooting/recording effect. Button Indicator (Red) 5. WIRELESS REMOTE 1. Photo Button 3. To turn off...
User Manual
Page 14
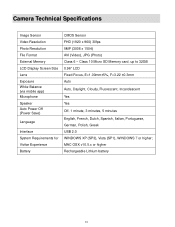
... 0.96'' LCD Fixed Focus, E=1.00mm±5%, F=3.22 ±0.3mm Auto Auto, Daylight, Cloudy, Fluorescent, Incandescent Yes Yes Off, 1 minute, 3 minutes, 5 minutes English, French, Dutch, Spanish, Italian, Portuguese, German, Polish, Greek USB 2.0 WINDOWS XP (SP3), Vista (SP1), WINDOWS 7 or higher; MAC OSX v10.5.x or higher Rechargeable Lithium battery 13 Camera Technical Specifications Image Sensor Video Resolution Photo Resolution File Format External Memory LCD Display Screen Size Lens Exposure White Balance (via mobile app) Microphone Speaker Auto Power Off (Power Save) Language Interface...
... 0.96'' LCD Fixed Focus, E=1.00mm±5%, F=3.22 ±0.3mm Auto Auto, Daylight, Cloudy, Fluorescent, Incandescent Yes Yes Off, 1 minute, 3 minutes, 5 minutes English, French, Dutch, Spanish, Italian, Portuguese, German, Polish, Greek USB 2.0 WINDOWS XP (SP3), Vista (SP1), WINDOWS 7 or higher; MAC OSX v10.5.x or higher Rechargeable Lithium battery 13 Camera Technical Specifications Image Sensor Video Resolution Photo Resolution File Format External Memory LCD Display Screen Size Lens Exposure White Balance (via mobile app) Microphone Speaker Auto Power Off (Power Save) Language Interface...
User Manual
Page 15
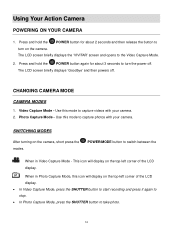
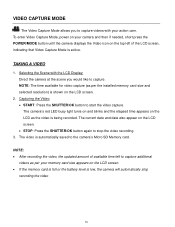
... POWER button again for about 3 seconds to turn on the top-left corner of the LCD display. In Video Capture Mode, press the SHUTTER button to start recording and press it again to stop. In Photo Capture Mode, press the SHUTTER button to switch between the When in Photo Capture Mode, this icon will display on the camera, short press the modes. CHANGING CAMERA MODE CAMERA MODES 1. When in Video Capture Mode - Video Capture Mode - Use this mode to the Video Capture Mode...
... POWER button again for about 3 seconds to turn on the top-left corner of the LCD display. In Video Capture Mode, press the SHUTTER button to start recording and press it again to stop. In Photo Capture Mode, press the SHUTTER button to switch between the When in Photo Capture Mode, this icon will display on the camera, short press the modes. CHANGING CAMERA MODE CAMERA MODES 1. When in Video Capture Mode - Video Capture Mode - Use this mode to the Video Capture Mode...
User Manual
Page 16
... video recording. 3. NOTE: The time available for video capture (as the video is automatically saved to the camera's Micro SD Memory card. To enter Video Capture Mode, power on your memory card size appears on the LCD as per your camera and then if needed, short press the POWER/MODE button until the camera displays the Video icon on the LCD screen. 2. The current date and date also appear on the LCD screen. STOP: Press the SHUTTER/OK button again to start the video...
... video recording. 3. NOTE: The time available for video capture (as the video is automatically saved to the camera's Micro SD Memory card. To enter Video Capture Mode, power on your memory card size appears on the LCD as per your camera and then if needed, short press the POWER/MODE button until the camera displays the Video icon on the LCD screen. 2. The current date and date also appear on the LCD screen. STOP: Press the SHUTTER/OK button again to start the video...

User Manual
Page 17
... MODE: Toggles between the Video Capture Mode and Photo Capture Mode. 16 SHUTTER / OK ENTERS SUBMENU/SAVES SELECTION: Within the Menu, enters the selected menu's submenu list and saves the selected submenu option. LONG PRESS - OPENS/EXITS MENU: Opens and exits the menu WI-FI / MENU / DOWN options for Camera Settings. VIDEO CAPTURE MODE BUTTONS Button Description STARTS/STOPS: Starts and stops the video capture. POWERS ON/OFF: Powers the camera on the POWER / MODE camera...
... MODE: Toggles between the Video Capture Mode and Photo Capture Mode. 16 SHUTTER / OK ENTERS SUBMENU/SAVES SELECTION: Within the Menu, enters the selected menu's submenu list and saves the selected submenu option. LONG PRESS - OPENS/EXITS MENU: Opens and exits the menu WI-FI / MENU / DOWN options for Camera Settings. VIDEO CAPTURE MODE BUTTONS Button Description STARTS/STOPS: Starts and stops the video capture. POWERS ON/OFF: Powers the camera on the POWER / MODE camera...
User Manual
Page 19
... to capture. 2. OPENS/EXITS MENU: Opens and exits the menu WI-FI / MENU / DOWN POWER / MODE options for Camera Settings. The amount of the LCD screen, indicating that can be captured with your camera and then short press the POWER/MODE button until the camera displays the Photo icon on the top left of photos that Photo Capture Mode is automatically saved to take the picture. PHOTO CAPTURE MODE BUTTONS Button Description PHOTO CAPTURE: Press to the camera's Micro SD Memory card.
... to capture. 2. OPENS/EXITS MENU: Opens and exits the menu WI-FI / MENU / DOWN POWER / MODE options for Camera Settings. The amount of the LCD screen, indicating that can be captured with your camera and then short press the POWER/MODE button until the camera displays the Photo icon on the top left of photos that Photo Capture Mode is automatically saved to take the picture. PHOTO CAPTURE MODE BUTTONS Button Description PHOTO CAPTURE: Press to the camera's Micro SD Memory card.

User Manual
Page 22
... the camera display language. 21 CAMERA SETTINGS OPTIONS The following menu options appear: Power Save, Date & Time, Language, Factory Reset, System, Format Menu Name and Description Menu Options Menu Options Details Power Save Off You can select your camera's language setting by selecting the desired language from the Video Capture Mode menu. The camera remains on until you press the button. Short press the POWER/MODE button to toggle and move between each time and date setting. Press the SHUTTER/OK button to be...
... the camera display language. 21 CAMERA SETTINGS OPTIONS The following menu options appear: Power Save, Date & Time, Language, Factory Reset, System, Format Menu Name and Description Menu Options Menu Options Details Power Save Off You can select your camera's language setting by selecting the desired language from the Video Capture Mode menu. The camera remains on until you press the button. Short press the POWER/MODE button to toggle and move between each time and date setting. Press the SHUTTER/OK button to be...
User Manual
Page 23
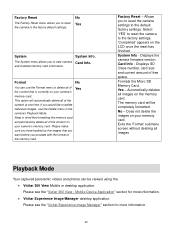
The System menu allows you to reset Yes the camera to the factory default settings. Automatically deletes all of the content on the memory card. Exits the 'Format' submenu screen without deleting all images Playback Mode Your captured panoramic videos and photos can use the Delete menu in mind that formatting the memory card will permanently delete all images on your camera's memory card. This option will be viewed using the: Vivitar 360 View Mobile or desktop application. Keep in the camera's Playback Mode. Please make sure...
The System menu allows you to reset Yes the camera to the factory default settings. Automatically deletes all of the content on the memory card. Exits the 'Format' submenu screen without deleting all images Playback Mode Your captured panoramic videos and photos can use the Delete menu in mind that formatting the memory card will permanently delete all images on your camera's memory card. This option will be viewed using the: Vivitar 360 View Mobile or desktop application. Keep in the camera's Playback Mode. Please make sure...
User Manual
Page 24
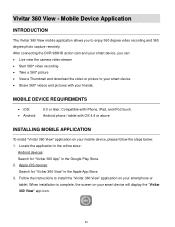
... will display the "Vivitar 360 View" app icon. 23 Android phone / tablet with iPhone, iPad, and iPod touch. Mobile Device Application INTRODUCTION The Vivitar 360 View mobile application allows you can: Live view the camera video stream Start 360° video recording Take a 360° picture View a Thumbnail and download the video or picture to install the "Vivitar 360 View" application on your smartphone or tablet. Compatible with...
... will display the "Vivitar 360 View" app icon. 23 Android phone / tablet with iPhone, iPad, and iPod touch. Mobile Device Application INTRODUCTION The Vivitar 360 View mobile application allows you can: Live view the camera video stream Start 360° video recording Take a 360° picture View a Thumbnail and download the video or picture to install the "Vivitar 360 View" application on your smartphone or tablet. Compatible with...
User Manual
Page 26
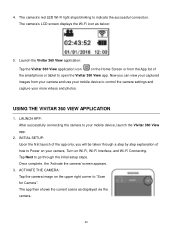
... Next to "Scan for Camera". The camera's red LED Wi-Fi light stops blinking to your more videos and photos. The camera's LCD screen displays the Wi-Fi icon as displayed via the camera. 25 USING THE VIVITAR 360 VIEW APPLICATION 1. Once complete, the 'Activate the camera' screen appears. 3. INITIAL SETUP: Upon the first launch of the smartphone or tablet to Power on your camera, Turn on the Home Screen or from the App...
... Next to "Scan for Camera". The camera's red LED Wi-Fi light stops blinking to your more videos and photos. The camera's LCD screen displays the Wi-Fi icon as displayed via the camera. 25 USING THE VIVITAR 360 VIEW APPLICATION 1. Once complete, the 'Activate the camera' screen appears. 3. INITIAL SETUP: Upon the first launch of the smartphone or tablet to Power on your camera, Turn on the Home Screen or from the App...
User Manual
Page 29
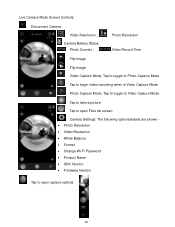
... Photo Capture Mode Tap to begin video recording when in Video Capture Mode Photo Capture Mode, Tap to toggle to Video Capture Mode Tap to take a picture Tap to open Files list screen Camera Settings: The following options/details are shown Photo Resolution Video Resolution White Balance Format Change Wi-Fi Password Product Name SDK Version Firmware Version Tap to open capture options: 28 Camera Battery Status Photo Counter ; Live Camera Mode Screen Controls: Disconnect Camera Video...
... Photo Capture Mode Tap to begin video recording when in Video Capture Mode Photo Capture Mode, Tap to toggle to Video Capture Mode Tap to take a picture Tap to open Files list screen Camera Settings: The following options/details are shown Photo Resolution Video Resolution White Balance Format Change Wi-Fi Password Product Name SDK Version Firmware Version Tap to open capture options: 28 Camera Battery Status Photo Counter ; Live Camera Mode Screen Controls: Disconnect Camera Video...
User Manual
Page 33
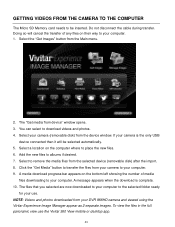
Create albums, edit photos and use 'Geotagging'. Use the supplied USB cable to connect your camera to your computer. 2. The file for installing the software automatically begins to download to your computer. CONNECTING THE CAMERA TO THE COMPUTER 1. Download and install the Vivitar Experience Image Manager Software via the following online links: WINDOWS OS: http://tinyurl.com/viviwin MAC OS: http://tinyurl.com/vivimac 1. Follow all instructions 6. The first time you connect the device to...
Create albums, edit photos and use 'Geotagging'. Use the supplied USB cable to connect your camera to your computer. 2. The file for installing the software automatically begins to download to your computer. CONNECTING THE CAMERA TO THE COMPUTER 1. Download and install the Vivitar Experience Image Manager Software via the following online links: WINDOWS OS: http://tinyurl.com/viviwin MAC OS: http://tinyurl.com/vivimac 1. Follow all instructions 6. The first time you connect the device to...
User Manual
Page 34
... DVR 988HD camera and viewed using the Vivitar Experience Image Manager appear as 2 separate images. NOTE: Videos and photos downloaded from the device window. To view the files in the full panoramic view use . Select your camera (removable disk) from your computer. 1. Select to remove the media files from your camera to your computer. You can select to albums if desired. 7. A message appears when the download is the only USB device connected then it will cancel the transfer...
... DVR 988HD camera and viewed using the Vivitar Experience Image Manager appear as 2 separate images. NOTE: Videos and photos downloaded from the device window. To view the files in the full panoramic view use . Select your camera (removable disk) from your computer. 1. Select to remove the media files from your camera to your computer. You can select to albums if desired. 7. A message appears when the download is the only USB device connected then it will cancel the transfer...
User Manual
Page 37
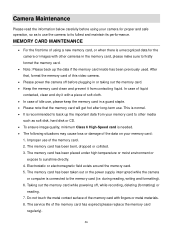
... connected to sunshine directly. 4. After that, format the memory card of this video camera. Please power the camera off , while recording, deleting (formatting) or reading. 7. during reading, writing and formatting). 6. This is normal. It is needed. The following situations may cause loss or damage of the data on your memory card to other cameras in the memory card, please make sure to its fullest and maintain its performance. Improper use...
... connected to sunshine directly. 4. After that, format the memory card of this video camera. Please power the camera off , while recording, deleting (formatting) or reading. 7. during reading, writing and formatting). 6. This is normal. It is needed. The following situations may cause loss or damage of the data on your memory card to other cameras in the memory card, please make sure to its fullest and maintain its performance. Improper use...
User Manual
Page 40
... that I deleted images using the Vivitar Experience Image Manager are saved to change without notice. Q: How do ? This camera requires a Micro SD card for the most current information. Troubleshooting Q: I don't lose important pictures? What do I do I make sure I have in Australia call from my computer. The images were also deleted from anywhere else, please visit www.vivitar.com for ? All images deleted using the Vivitar Experience Image Manager. Can't find manuals, software and...
... that I deleted images using the Vivitar Experience Image Manager are saved to change without notice. Q: How do ? This camera requires a Micro SD card for the most current information. Troubleshooting Q: I don't lose important pictures? What do I do I make sure I have in Australia call from my computer. The images were also deleted from anywhere else, please visit www.vivitar.com for ? All images deleted using the Vivitar Experience Image Manager. Can't find manuals, software and...


