
Camera Manual
Page 6
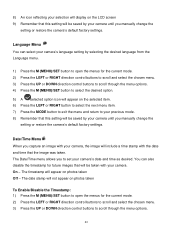
...: "Continue with the initial camera setup. Setting the ViviLink Default Option Once the Date and Time have been set, you will be asked to set the default ViviLink destination for the camera. The Language selection menu will appear. These settings can be adjusted at any time manually through the menus in the initial camera setup is now ready to use. 5 Setting the Camera Language 1) You will first be prompted to select a language for photos and videos...
...: "Continue with the initial camera setup. Setting the ViviLink Default Option Once the Date and Time have been set, you will be asked to set the default ViviLink destination for the camera. The Language selection menu will appear. These settings can be adjusted at any time manually through the menus in the initial camera setup is now ready to use. 5 Setting the Camera Language 1) You will first be prompted to select a language for photos and videos...
Camera Manual
Page 7
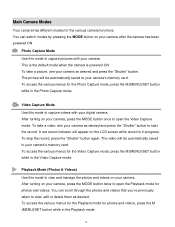
... switch modes by pressing the MODE button on your camera as desired and press the "Shutter" button. This is the default mode when the camera is in the Playback mode. 6 To take a video, aim your camera‟s memory card. A red record indicator will be automatically saved to your digital camera. Playback Mode (Photos & Videos) Use this mode to capture pictures with your camera‟s memory card. To access the various menus for the Video Capture mode, press the M (MENU)/SET button while in the Photo Capture mode. Video Capture Mode Use this mode to view...
... switch modes by pressing the MODE button on your camera as desired and press the "Shutter" button. This is the default mode when the camera is in the Playback mode. 6 To take a video, aim your camera‟s memory card. A red record indicator will be automatically saved to your digital camera. Playback Mode (Photos & Videos) Use this mode to capture pictures with your camera‟s memory card. To access the various menus for the Video Capture mode, press the M (MENU)/SET button while in the Photo Capture mode. Video Capture Mode Use this mode to view...
Camera Manual
Page 8
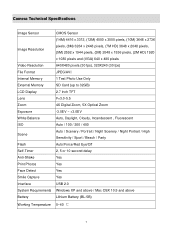
...), 320X240 (30 fps) File Format Internal Memory External Memory JPEG/AVI 1 Test Photo Use Only SD Card (up to 32GB) LCD Display Lens Zoom 2.7 Inch TFT F=3.0-5.5 4X Digital Zoom, 5X Optical Zoom Exposure White Balance ISO -3.0EV ~ +3.0EV Auto, Daylight, Cloudy, Incandescent , Fluorescent Auto / 100 / 200 / 400 Scene Auto / Scenery / Portrait / Night Scenery / Night Portrait / High Sensitivity / Sport / Beach / Party Flash Self-Timer Anti-Shake Auto/Force/Red Eye/Off 2, 5 or 10 second delay Yes Print Photos Yes Face Detect...
...), 320X240 (30 fps) File Format Internal Memory External Memory JPEG/AVI 1 Test Photo Use Only SD Card (up to 32GB) LCD Display Lens Zoom 2.7 Inch TFT F=3.0-5.5 4X Digital Zoom, 5X Optical Zoom Exposure White Balance ISO -3.0EV ~ +3.0EV Auto, Daylight, Cloudy, Incandescent , Fluorescent Auto / 100 / 200 / 400 Scene Auto / Scenery / Portrait / Night Scenery / Night Portrait / High Sensitivity / Sport / Beach / Party Flash Self-Timer Anti-Shake Auto/Force/Red Eye/Off 2, 5 or 10 second delay Yes Print Photos Yes Face Detect...
Camera Manual
Page 10
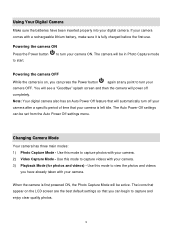
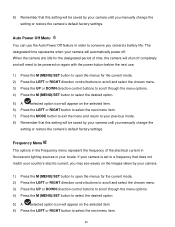
... settings menu. The camera will automatically turn off completely. The Auto Power Off settings can press the Power button again at any point to capture photos with a rechargeable lithium battery, make sure it is on the LCD screen are the best default settings so that your camera is first powered ON, the Photo Capture Mode will power off your camera after a specific period of time that you can begin to capture videos with your camera. Using Your Digital Camera Make...
... settings menu. The camera will automatically turn off completely. The Auto Power Off settings can press the Power button again at any point to capture photos with a rechargeable lithium battery, make sure it is on the LCD screen are the best default settings so that your camera is first powered ON, the Photo Capture Mode will power off your camera after a specific period of time that you can begin to capture videos with your camera. Using Your Digital Camera Make...

Camera Manual
Page 16
.... 5) A selected option icon will appear on the selected item. 6) Press the LEFT or RIGHT button to select the next menu item. 7) Press the MODE button to exit the menu and return to your previous mode. 8) An icon reflecting your selection will display on the LCD screen. 9) Remember that the camera‟s shutter button is an optimal feature if you manually change the setting or restore the camera‟s default factory settings.
.... 5) A selected option icon will appear on the selected item. 6) Press the LEFT or RIGHT button to select the next menu item. 7) Press the MODE button to exit the menu and return to your previous mode. 8) An icon reflecting your selection will display on the LCD screen. 9) Remember that the camera‟s shutter button is an optimal feature if you manually change the setting or restore the camera‟s default factory settings.
Camera Manual
Page 17
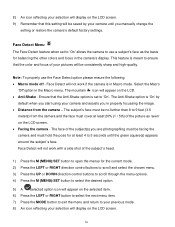
... the LCD screen. 9) Remember that this setting will be saved by default when you start using your camera and assists you in properly focussing the image. Distance from the camera and the face must hold the pose for at least 20% (1 / 5th) of the subject`s head. 1) Press the M (MENU)/SET button to open the menus for balancing the other colors and focus in the camera‟s display. The mountain icon...
... the LCD screen. 9) Remember that this setting will be saved by default when you start using your camera and assists you in properly focussing the image. Distance from the camera and the face must hold the pose for at least 20% (1 / 5th) of the subject`s head. 1) Press the M (MENU)/SET button to open the menus for balancing the other colors and focus in the camera‟s display. The mountain icon...
Camera Manual
Page 18
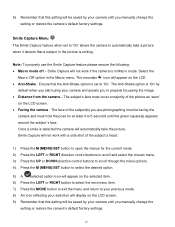
... option icon will appear on the LCD screen. Facing the camera - The face of the subject`s head. 1) Press the M (MENU)/SET button to open the menus for at least 4 to automatically take the picture. Smile Capture will be saved by your camera until you manually change the setting or restore the camera‟s default factory settings. 17 The subject‟s face must be saved by default when you start using your selection...
... option icon will appear on the LCD screen. Facing the camera - The face of the subject`s head. 1) Press the M (MENU)/SET button to open the menus for at least 4 to automatically take the picture. Smile Capture will be saved by your camera until you manually change the setting or restore the camera‟s default factory settings. 17 The subject‟s face must be saved by default when you start using your selection...
Camera Manual
Page 19
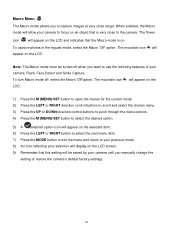
.... 7) Press the MODE button to exit the menu and return to use the following features of your selection will be turned off , select the Macro „Off‟option. To turn Macro mode off when you manually change the setting or restore the camera‟s default factory settings. 18 Note: The Macro mode must be saved by your camera until you want to your previous mode. 8) An icon reflecting your camera: Flash, Face Detect...
.... 7) Press the MODE button to exit the menu and return to use the following features of your selection will be turned off , select the Macro „Off‟option. To turn Macro mode off when you manually change the setting or restore the camera‟s default factory settings. 18 Note: The Macro mode must be saved by your camera until you want to your previous mode. 8) An icon reflecting your camera: Flash, Face Detect...
Camera Manual
Page 22
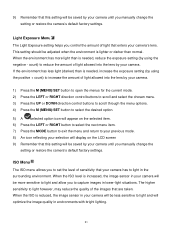
... ISO level is needed , reduce the exposure setting (by your camera‟s lens. This setting should be adjusted when the environment is lighter or darker than is increased, the image sensor in your camera will be less sensitive to capture images in your camera will be saved by your camera until you manually change the setting or restore the camera‟s default factory settings. ISO Menu The ISO menu allows you to your previous mode. 8) An icon...
... ISO level is needed , reduce the exposure setting (by your camera‟s lens. This setting should be adjusted when the environment is lighter or darker than is increased, the image sensor in your camera will be less sensitive to capture images in your camera will be saved by your camera until you manually change the setting or restore the camera‟s default factory settings. ISO Menu The ISO menu allows you to your previous mode. 8) An icon...

Camera Manual
Page 23
... option icon will appear on the selected item. 6) Press the LEFT or RIGHT button to select the next menu item. 7) Press the MODE button to exit the menu and return to your previous mode. 8) An icon reflecting your selection will display on the LCD screen 9) Remember that this setting will be more sensitive to focusing on particular areas in the display and adjust the image color and lighting...
... option icon will appear on the selected item. 6) Press the LEFT or RIGHT button to select the next menu item. 7) Press the MODE button to exit the menu and return to your previous mode. 8) An icon reflecting your selection will display on the LCD screen 9) Remember that this setting will be more sensitive to focusing on particular areas in the display and adjust the image color and lighting...
Camera Manual
Page 24
... you manually change the setting or restore the camera‟s default factory settings. Date/Time Menu When you capture an image with your camera, the image will include a time stamp with the date and time that this setting will be saved by your camera until you to your previous mode. 8) Remember that will be taken with your camera. The timestamp will appear on photos taken Off - 8) An icon reflecting your selection will display on the LCD screen...
... you manually change the setting or restore the camera‟s default factory settings. Date/Time Menu When you capture an image with your camera, the image will include a time stamp with the date and time that this setting will be saved by your camera until you to your previous mode. 8) Remember that will be taken with your camera. The timestamp will appear on photos taken Off - 8) An icon reflecting your selection will display on the LCD screen...
Camera Manual
Page 26
... previous mode. 8) Remember that does not match your country‟s electric current, you may see waves on again with the power button before the next use the Auto Power Off feature in the Frequency menu represent the frequency of time, the camera will shut off . 8) Remember that this setting will be saved by your camera until you manually change the setting or restore the camera‟s default factory settings.
... previous mode. 8) Remember that does not match your country‟s electric current, you may see waves on again with the power button before the next use the Auto Power Off feature in the Frequency menu represent the frequency of time, the camera will shut off . 8) Remember that this setting will be saved by your camera until you manually change the setting or restore the camera‟s default factory settings.
Camera Manual
Page 27
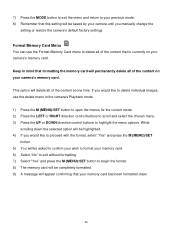
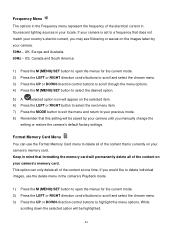
... format. 8) The memory card will be completely formatted. 9) A message will appear confirming that formatting the memory card will be saved by your camera until you would like to delete individual images, use the Format Memory Card menu to delete all of the content that this setting will delete all of the content at one time. 7) Press the MODE button to exit the menu and return to your previous mode. 8) Remember that is currently on your camera's memory card. Format Memory Card Menu...
... format. 8) The memory card will be completely formatted. 9) A message will appear confirming that formatting the memory card will be saved by your camera until you would like to delete individual images, use the Format Memory Card menu to delete all of the content that this setting will delete all of the content at one time. 7) Press the MODE button to exit the menu and return to your previous mode. 8) Remember that is currently on your camera's memory card. Format Memory Card Menu...
Camera Manual
Page 29
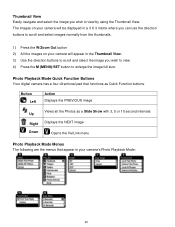
... W/Zoom Out button 2) All the images on your camera will appear in your camera will be displayed in a 3 X 3 matrix where you wish to view. 4) Press the M (MENU)/SET button to enlarge the image full size. Photo Playback Mode Quick Function Buttons Your digital camera has a four-directional pad that appear in the Thumbnail View. 3) Use the direction buttons to scroll and select the image you can use the direction buttons to view by using the Thumbnail View. The images on your camera‟s Photo Playback Mode: 28...
... W/Zoom Out button 2) All the images on your camera will appear in your camera will be displayed in a 3 X 3 matrix where you wish to view. 4) Press the M (MENU)/SET button to enlarge the image full size. Photo Playback Mode Quick Function Buttons Your digital camera has a four-directional pad that appear in the Thumbnail View. 3) Use the direction buttons to scroll and select the image you can use the direction buttons to view by using the Thumbnail View. The images on your camera‟s Photo Playback Mode: 28...
Camera Manual
Page 32
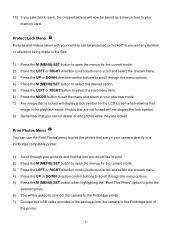
... use the Print Photos menu to print the photos that are on the LCD screen when viewing that you cannot delete or edit photos while they are not locked will now be asked to connect the camera to the Pictbridge printer. 7) Connect the USB cable provided in the package form the camera to your memory card. Print Photos Menu You can be protected or "locked" to prevent any deletion or alteration being made to the files. 1) Press the M (MENU)/SET button...
... use the Print Photos menu to print the photos that are on the LCD screen when viewing that you cannot delete or edit photos while they are not locked will now be asked to connect the camera to the Pictbridge printer. 7) Connect the USB cable provided in the package form the camera to your memory card. Print Photos Menu You can be protected or "locked" to prevent any deletion or alteration being made to the files. 1) Press the M (MENU)/SET button...
Camera Manual
Page 44
... DOWN direction control buttons to scroll through the menu options. 4) Press the M (MENU)/SET button to select the desired option. 5) A selected option icon will appear on the LCD screen. 9) Remember that this setting will be saved by your camera until you manually change the setting or restore the camera‟s default factory settings. The designated time represents when your camera will automatically power off completely and will need to be turned on again with your camera...
... DOWN direction control buttons to scroll through the menu options. 4) Press the M (MENU)/SET button to select the desired option. 5) A selected option icon will appear on the LCD screen. 9) Remember that this setting will be saved by your camera until you manually change the setting or restore the camera‟s default factory settings. The designated time represents when your camera will automatically power off completely and will need to be turned on again with your camera...
Camera Manual
Page 45
... the images taken by your camera until you manually change the setting or restore the camera‟s default factory settings. If you would like to delete individual images, use the Format Memory Card menu to delete all of the content that is set to highlight the menu options. This option can use the delete menu in the camera‟s Playback mode. 1) Press the M (MENU)/SET button to open the menus for the current mode. 2) Press the LEFT or RIGHT direction control buttons to...
... the images taken by your camera until you manually change the setting or restore the camera‟s default factory settings. If you would like to delete individual images, use the Format Memory Card menu to delete all of the content that is set to highlight the menu options. This option can use the delete menu in the camera‟s Playback mode. 1) Press the M (MENU)/SET button to open the menus for the current mode. 2) Press the LEFT or RIGHT direction control buttons to...

Camera Manual
Page 51
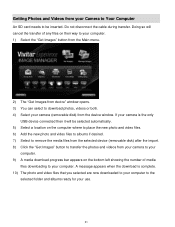
Click the "How to transfer photos and videos from my camera to my computer" button for instructions. 5) If you have internet access, the "Choose your language" window opens, choose your language and click "Next" to open the next window. 6) Select your camera model from the list and click "Next" to open the next window. 7) Click "Next" to confirm your camera model selection and to install the application. 8) Please wait while...
Click the "How to transfer photos and videos from my camera to my computer" button for instructions. 5) If you have internet access, the "Choose your language" window opens, choose your language and click "Next" to open the next window. 6) Select your camera model from the list and click "Next" to open the next window. 7) Click "Next" to confirm your camera model selection and to install the application. 8) Please wait while...
Camera Manual
Page 52
... remove the media files from the selected device (removable disk) after the import. 8) Click the "Get Images" button to transfer the photos and videos from your camera to your computer. 9) A media download progress bar appears on their way to your computer. 1) Select the "Get Images" button from the Main menu. 2) The "Get Images from device" window opens. 3) You can select to download photos, videos or both. 4) Select your camera (removable disk) from the device window...
... remove the media files from the selected device (removable disk) after the import. 8) Click the "Get Images" button to transfer the photos and videos from your camera to your computer. 9) A media download progress bar appears on their way to your computer. 1) Select the "Get Images" button from the Main menu. 2) The "Get Images from device" window opens. 3) You can select to download photos, videos or both. 4) Select your camera (removable disk) from the device window...

Camera Manual
Page 56
... SD memory card then all the photos should be retrieved from my computer. All images deleted using the Vivitar Experience Image Manager. For phone support in the US please call 1-800-592-9541, in the UK call 0800 917 4831, in fact taken photos. The images where also deleted from there. Can‟t find manuals, software and FAQ‟s at the website. Troubleshooting Q: I don't lose important pictures...
... SD memory card then all the photos should be retrieved from my computer. All images deleted using the Vivitar Experience Image Manager. For phone support in the US please call 1-800-592-9541, in the UK call 0800 917 4831, in fact taken photos. The images where also deleted from there. Can‟t find manuals, software and FAQ‟s at the website. Troubleshooting Q: I don't lose important pictures...


