Weslo 21 Support and Manuals
Get Help and Manuals for this Weslo item

Weslo 21 Videos

Cinta de Caminar Weslo Cadence 21.0
Duration: 1:04
Total Views: 1,699
Duration: 1:04
Total Views: 1,699
Weslo Cadence 21 - Fitnessbenelux.nl
Duration: :52
Total Views: 313
Duration: :52
Total Views: 313
Popular Weslo 21 Manual Pages
Uk Manual - Page 1

...
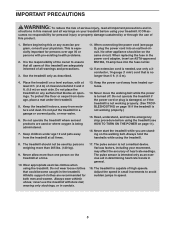
Read all precautions and instructions in the space above for future reference.
WETL49710.0 Serial No. Serial Number Decal
QUESTIONS? Save this equipment. Write the serial number in this manual before using this manual for future reference. Model No.
USER'S MANUAL
www.iconeurope.com If you have questions, or if there are missing parts, please contact us...
Uk Manual - Page 2

... of this manual and request a free replacement decal. Note: The decal(s) may not be shown at actual size. TABLE OF CONTENTS
WARNING DECAL PLACEMENT 2 IMPORTANT PRECAUTIONS 3 BEFORE YOU BEGIN 5 ASSEMBLY 6 OPERATION AND ADJUSTMENT 9 HOW TO FOLD AND MOVE THE TREADMILL 15 TROUBLESHOOTING 16 EXERCISE GUIDELINES 19 PART LIST 20 EXPLODED DRAWING 21 ORDERING REPLACEMENT PARTS Back Cover...
Uk Manual - Page 3
.... When replacing the fuse in the treadmill. Do not operate the treadmill where aerosol...treadmill on each side. Do not operate the treadmill if the power cord or plug is damaged, or if the treadmill is not working properly. (See TROUBLESHOOTING on the treadmill...support clothes are standing on page 11).
16. Before beginning this manual and all warnings on the same circuit. Use the treadmill...
Uk Manual - Page 4
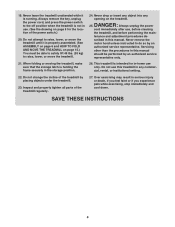
... 5 for in this manual. Do not attempt to raise, lower, or move the treadmill.
21. tenance and adjustment procedures de- Servicing
other than the procedures in -home use , before cleaning
the treadmill, and before performing the main-
Never drop or insert any object into any commercial, rental, or institutional setting.
22. SAVE THESE INSTRUCTIONS
4 Always unplug the...
Uk Manual - Page 5

... this manual. For your workouts at home more effective. Before reading further, please review the drawing below and familiarize yourself with the labeled parts. The model number and the location of the serial number decal are shown on the front cover of this manual carefully before contacting us assist you for selecting the new WESLO® CADENCE 21.0 treadmill.
Uk Manual - Page 6

Set the treadmill in parentheses below to identify the assembly hardware. During shipping, some lubricant may have been pre-assembled.
Note: Some small parts may be included.
4.2 x 19mm Screw (3)-6
#10 x 1" Tek Screw (83)-2
M10 x 45mm Bolt (2)-4
M10 x 65mm Bolt (1)-4
1. With the help of this manual. Do not lean on the floor.
1
73 50
80 1
1
6 To...
Uk Manual - Page 11

...position of the clip.
If you press one of the treadmill.
The time will change speed until it reaches the selected speed setting. Select the manual mode. Next, locate the power switch on the foot ...Start button, the Speed increase button, or one of the buttons, the speed setting will be used if the treadmill is displayed in the power cord and press the power switch into the reset ...
Uk Manual - Page 12
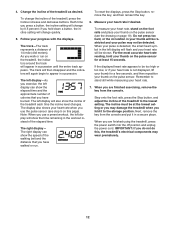
... you have burned. For the most accurate heart rate reading, hold down a button, the incline setting will appear in your pulse may damage the treadmill when you use the pulse sensor (see the drawing on this , the treadmillʼs electrical components may wear prematurely.
12 The left display-As you exercise, the left...
Uk Manual - Page 13

... 5 on page 11. 2.
At the end of the workout begins, the treadmill will begin to flash. In addition, a profile of the speed settings of the workout will then slow to the new speed and incline settings. A moment after you can manually override the setting by pressing the Speed or Incline buttons; Hold the handrails and...
Uk Manual - Page 16
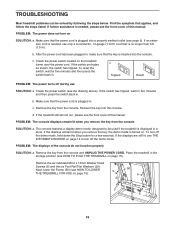
...16 If the displays are still lit, see THE INFORMATION MODE on
SOLUTION: a. PROBLEM: The displays of this manual. c. Remove the key from the console and UNPLUG THE POWER CORD. Remove ...
SOLUTION: a. If further assistance is plugged into the console. TROUBLESHOOTING
Most treadmill problems can be used if the treadmill is plugged in. The console features a display demo mode, ...
Uk Manual - Page 17

...) off the walking platform. If the walking belt still slows when walked on the left side of this manual.
17 Remove the five indicated M4.2 x 19mm Washer Head
Screws (9). If necessary, loosen the M4.2... the power cord, insert the key, and run the treadmill for a correct speed reading.
1/8 in . (5 to 3 in . 7 42
Top View
46 44
PROBLEM: The walking belt slows when walked on
SOLUTION: a. ...
Uk Manual - Page 18

...POWER CORD.
wise, 1/4 of a turn the left idler roller bolt clock-
The treadmill will recalibrate the incline system.
18
Be careful to the minimum level.
This will ... Be careful not to the left idler roller bolt counterclockwise 1/2
of the treadmill does not change correctly
SOLUTION: a. b. PROBLEM: The incline of a turn . a
Using the hex key, turn . ...
Uk Manual - Page 20

...2
21 4
...Guide Reed Switch Reed Switch Clamp Magnet Drive Belt Drive Roller/Pulley Walking Belt Walking Platform
Key No. For information about ordering replacement parts, see the EXPLODED DRAWING near the end of this manual...700;s Manual
Note: Specifications are ...parts listed below, see the back cover of this manual. *These parts are subject to change without notice. PART LIST-Model No.
Uk Manual - Page 21

EXPLODED DRAWING A-Model No. WETL49710.0 R0610A
21
42
7 31
11 3
43
5
39
76
5
24
29
12 44
16
90
3
41
25
37
3
26
3
5
26
25
13
40
5
25
46 47
45 12
10
5 24
5
38
25
5
29
12
4
5
25
76
3
23 55
25
5
48
5
41
3
21 14
54 25
4 12 3
26 26
13
25
5
82
5
29
23
25
40
5
50
34
21
51
25
49
14
29
82
5
3
35
36
30
3
Uk Manual - Page 24

... by law. If you will help us :
• the model number and the serial number of the product (see the front cover of this manual)
• the name of the product (see the front cover of this manual)
• the key number and description of the replacement part(s) (see the front cover of environmental protection.
Weslo 21 Reviews
We have not received any reviews for Weslo yet.