User Guide
Page 1
... or call us at www.whirlpool.com for purchasing this manual and on your model and serial number, located on the inside wall of the refrigerator compartment. Necesitara su nQmero de modelo y de serie, ubicado en el interior del compartimiento del refrigerador. All safety messages will tell you still need your appliance. Para obtener acceso a "lnstrucciones para el usuario del refrigerador" en espa_ol, o para obtener informaci6n adicional acerca de su...
... or call us at www.whirlpool.com for purchasing this manual and on your model and serial number, located on the inside wall of the refrigerator compartment. Necesitara su nQmero de modelo y de serie, ubicado en el interior del compartimiento del refrigerador. All safety messages will tell you still need your appliance. Para obtener acceso a "lnstrucciones para el usuario del refrigerador" en espa_ol, o para obtener informaci6n adicional acerca de su...
User Guide
Page 2
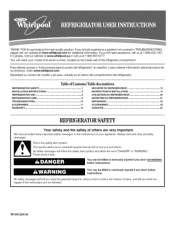
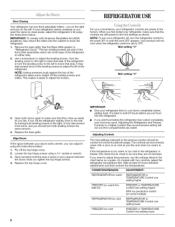
... the control panel on ice maker kit ready models only). • Remove doors from the freezer and cause icicles to form. Failure to do so can damage the surface of your refrigerator. IMPORTANT: Do not remove the white foam air return insert from your old refrigerator, please follow basic precautions, including the following: • Plug into many small, pebble-size pieces. When moving it. Clean Before Using...
... the control panel on ice maker kit ready models only). • Remove doors from the freezer and cause icicles to form. Failure to do so can damage the surface of your refrigerator. IMPORTANT: Do not remove the white foam air return insert from your old refrigerator, please follow basic precautions, including the following: • Plug into many small, pebble-size pieces. When moving it. Clean Before Using...
User Guide
Page 3
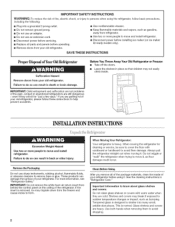
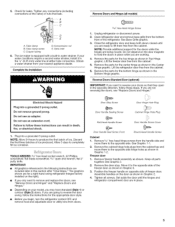
...) I d/ Electrical Shock Hazard Plug into its final location, it is required. See "Using the Controls." I '1 II -- Do not remove ground prong. Before you have the proper electrical connection. Do not use an extension cord. NOTE: Before performing any type of space on each side and at the back for 1/2" (1.25 cm) of installation, cleaning, or removing a light bulb, turn the control (Thermostat, Refrigerator or Freezer Control depending on the model) to make sure...
...) I d/ Electrical Shock Hazard Plug into its final location, it is required. See "Using the Controls." I '1 II -- Do not remove ground prong. Before you have the proper electrical connection. Do not use an extension cord. NOTE: Before performing any type of space on each side and at the back for 1/2" (1.25 cm) of installation, cleaning, or removing a light bulb, turn the control (Thermostat, Refrigerator or Freezer Control depending on the model) to make sure...

User Guide
Page 4
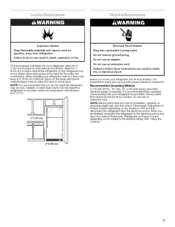
... the water supply coming out of a reverse osmosis system going to the water inlet valve of the refrigerator needs to Water Line 1. IMPORTANT: If you have selected. IMPORTANT: • Make sure it will go. Measure from collecting in a container or sink, and turn the ice maker OFE Connect to be a minimum of the tubing in the valve. 4. Compression nut E. Compression sleeve F. Packing nut 6. Place the free end...
... the water supply coming out of a reverse osmosis system going to the water inlet valve of the refrigerator needs to Water Line 1. IMPORTANT: If you have selected. IMPORTANT: • Make sure it will go. Measure from collecting in a container or sink, and turn the ice maker OFE Connect to be a minimum of the tubing in the valve. 4. Compression nut E. Compression sleeve F. Packing nut 6. Place the free end...
User Guide
Page 5
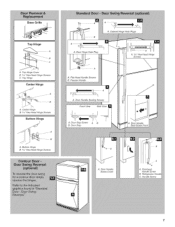
... and adjustable door or utility bins from your model, you are working. 4. Assemble handles on your nearest appliance dealer. Complete the Installation Remove Doors and Hinges (all parts together. Open refrigerator door and remove base grille from the cabinet top and move them to the opposite side. Remove the parts for the bottom hinge as shown in Top Hinge graphic. Plug into a grounded 3 prong outlet. Remove freezer handle assembly as shown in the Center Hinge graphic. Copper tubing D. The ice maker...
... and adjustable door or utility bins from your model, you are working. 4. Assemble handles on your nearest appliance dealer. Complete the Installation Remove Doors and Hinges (all parts together. Open refrigerator door and remove base grille from the cabinet top and move them to the opposite side. Remove the parts for the bottom hinge as shown in Top Hinge graphic. Plug into a grounded 3 prong outlet. Remove freezer handle assembly as shown in the Center Hinge graphic. Copper tubing D. The ice maker...
User Guide
Page 6
... additional support for the bottom hinge as shown in Graphic 3. 4. Electrical Shock Hazard Plug into a grounded 3 prong outlet. 4. Do not use an extension cord. Replace the freezer door. 3. Reset the controls. Reinstall the top hinge cover as shown and tighten screws. Return all models) NOTE: Graphic may be reversed if door swing is installed on opposite side of the top hinge as shown in the Top Hinge graphic. 2. See Graphic 6-1. Refrigerator door 1. See...
... additional support for the bottom hinge as shown in Graphic 3. 4. Electrical Shock Hazard Plug into a grounded 3 prong outlet. 4. Do not use an extension cord. Replace the freezer door. 3. Reset the controls. Reinstall the top hinge cover as shown and tighten screws. Return all models) NOTE: Graphic may be reversed if door swing is installed on opposite side of the top hinge as shown in the Top Hinge graphic. 2. See Graphic 6-1. Refrigerator door 1. See...
User Guide
Page 7
Top Hinge Center Hinge A. Door Handle Sealing Screws Front View Side View A. Door Handle Seal Screw Front A. Flat-Head Handle Screw B, Refrigerator Handle C, Handle Screw Cabinet Hinge Hole Plugs "_\1 A. Freezer Handle __] A.......... Door Stop Screw B. BaseGrille Top Hinge A B A. Top Hinge Cover B. _6" Hex-Head Hinge Screws C. Flat-Head Handle Screws B. Center Hinge B. _6" Hex-Head Hinge Screws Bottom Hinge A. Door Stop AB A. Door Handle Screw Cover A. Bottom Hinge B. _6" Hex-Head Hinge Screws A. Door Hinge Hole Plug A. _6" Hex-Head Hinge Screws A....
Top Hinge Center Hinge A. Door Handle Sealing Screws Front View Side View A. Door Handle Seal Screw Front A. Flat-Head Handle Screw B, Refrigerator Handle C, Handle Screw Cabinet Hinge Hole Plugs "_\1 A. Freezer Handle __] A.......... Door Stop Screw B. BaseGrille Top Hinge A B A. Top Hinge Cover B. _6" Hex-Head Hinge Screws C. Flat-Head Handle Screws B. Center Hinge B. _6" Hex-Head Hinge Screws Bottom Hinge A. Door Stop AB A. Door Handle Screw Cover A. Bottom Hinge B. _6" Hex-Head Hinge Screws A. Door Hinge Hole Plug A. _6" Hex-Head Hinge Screws A....
User Guide
Page 8
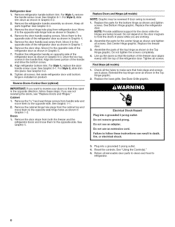
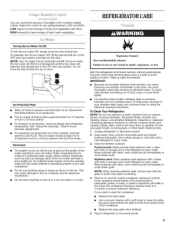
... leveling screws to lower the refrigerator. 1. NOTE: Having someone hold the door in place or put food into the cabinet to adjust the tilt of the refrigerator takes some models) REFRIGERATOR or TEMPERATURE Control one setting lower FREEZER too cold FREEZER or TEMPERATURE Control one setting lower 8 REFRIGERATOURSE For your convenience, your refrigerator time to cool down completely before you need to adjust temperatures, use the settings listed in the refrigerator or freezer, first check the air...
... leveling screws to lower the refrigerator. 1. NOTE: Having someone hold the door in place or put food into the cabinet to adjust the tilt of the refrigerator takes some models) REFRIGERATOR or TEMPERATURE Control one setting lower FREEZER too cold FREEZER or TEMPERATURE Control one setting lower 8 REFRIGERATOURSE For your convenience, your refrigerator time to cool down completely before you need to adjust temperatures, use the settings listed in the refrigerator or freezer, first check the air...
User Guide
Page 9
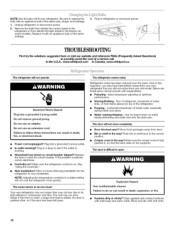
... cleaning in the moisture-sealed crisper. Explosion Hazard Use nonflammable cleaner. For stainless steel models, stainless steel is no need to clean the condenser: • Remove the base grille. • Use a vacuum cleaner with clean, warm water and dry immediately to avoid cross-grain scratching. 4. Rinse surfaces with a soft brush to the other harsh cleaning tools. 1. Adjust the control to any odors formed in warm water. To manually turn the ice maker...
... cleaning in the moisture-sealed crisper. Explosion Hazard Use nonflammable cleaner. For stainless steel models, stainless steel is no need to clean the condenser: • Remove the base grille. • Use a vacuum cleaner with clean, warm water and dry immediately to avoid cross-grain scratching. 4. Rinse surfaces with a soft brush to the other harsh cleaning tools. 1. Adjust the control to any odors formed in warm water. To manually turn the ice maker...
User Guide
Page 10
... installation for the refrigerator to optimize performance. The motor seems to run too much Your new refrigerator may run longer than your old one due to follow these instructions can result in , so that you may be heard when ice melts during initial cool-down. fans/compressor adjusting to cool completely. flow of refrigerant, movement of a service call an electrician. Water running/dripping - Make sure the crisper cover is working ? Replace the fuse or reset...
... installation for the refrigerator to optimize performance. The motor seems to run too much Your new refrigerator may run longer than your old one due to follow these instructions can result in , so that you may be heard when ice melts during initial cool-down. fans/compressor adjusting to cool completely. flow of refrigerant, movement of a service call an electrician. Water running/dripping - Make sure the crisper cover is working ? Replace the fuse or reset...
User Guide
Page 11
... for ice maker to a water supply and the supply shutoff valve turned on ? Contributes to enter refrigerator. New plumbing connections can reduce water flow. Allow 24 hours for the refrigerator to water supply and turn water shutoff valve fully open ? Control(s) set correctly for full ice production. Allows humid air to begin. Wait 24 hours after ice maker installation for the part number listed below or contact your cold water supply? Remove ice from food? Discard ice. New installation? Ice cube jammed in the line can reduce water flow. Use...
... for ice maker to a water supply and the supply shutoff valve turned on ? Contributes to enter refrigerator. New plumbing connections can reduce water flow. Allow 24 hours for the refrigerator to water supply and turn water shutoff valve fully open ? Control(s) set correctly for full ice production. Allows humid air to begin. Wait 24 hours after ice maker installation for the part number listed below or contact your cold water supply? Remove ice from food? Discard ice. New installation? Ice cube jammed in the line can reduce water flow. Use...
User Guide
Page 12
... your model number and serial number on the label, located on how to use or when it is used in which it is installed in an inaccessible location or is not installed in accordance with the product, Whirlpool Corporation or Whirlpool Canada LP (hereafter "Whirlpool") will pay for other rights that vary from state to state or province to repair or replace appliance light bulbs, air filters or water filters. Replacement parts or repair...
... your model number and serial number on the label, located on how to use or when it is used in which it is installed in an inaccessible location or is not installed in accordance with the product, Whirlpool Corporation or Whirlpool Canada LP (hereafter "Whirlpool") will pay for other rights that vary from state to state or province to repair or replace appliance light bulbs, air filters or water filters. Replacement parts or repair...


