Use and Care Guide
Page 2
...instructions. This symbol alerts you to reduce the chance of others . TABLE OF CONTENTS DRYER SAFETY 2 INSTALLATION INSTRUCTIONS 3 Tools and Parts 3 Options 4 Location Requirements 4 Electrical Requirements 6 Electrical Connection 8 Venting Requirements 13 Plan Vent System 14 Install Vent System 15 Install Leveling ...19 Additional Features 20 Changing Cycles, Options and Modifiers 21 Drying Rack Option 21 DRYER CARE 22 Cleaning the Dryer Location 22 Cleaning the Lint Screen 22 Cleaning the Dryer Interior 23 Removing Accumulated Lint 23 Vacation and Moving Care 23 ...
...instructions. This symbol alerts you to reduce the chance of others . TABLE OF CONTENTS DRYER SAFETY 2 INSTALLATION INSTRUCTIONS 3 Tools and Parts 3 Options 4 Location Requirements 4 Electrical Requirements 6 Electrical Connection 8 Venting Requirements 13 Plan Vent System 14 Install Vent System 15 Install Leveling ...19 Additional Features 20 Changing Cycles, Options and Modifiers 21 Drying Rack Option 21 DRYER CARE 22 Cleaning the Dryer Location 22 Cleaning the Lint Screen 22 Cleaning the Dryer Interior 23 Removing Accumulated Lint 23 Vacation and Moving Care 23 ...
Use and Care Guide
Page 21
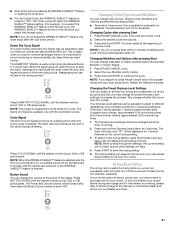
... consistently not as dry as you would normally line dry (for 1 second followed by pressing the WRINKLE SHIELD™ feature or opening the dryer door. ■ For the Casual Cycle, the WRINKLE SHIELD™ feature is finished. Press and hold the Dryness Level button for all ... the current drying setting. 3. Your Dryness Level settings can change will be accepted. To find out whether your model allows drying rack usage and for your dryer shuts down period. The Power and Cancel buttons will become your new preset drying setting for 5 seconds. The drying setting you...
... consistently not as dry as you would normally line dry (for 1 second followed by pressing the WRINKLE SHIELD™ feature or opening the dryer door. ■ For the Casual Cycle, the WRINKLE SHIELD™ feature is finished. Press and hold the Dryness Level button for all ... the current drying setting. 3. Your Dryness Level settings can change will be accepted. To find out whether your model allows drying rack usage and for your dryer shuts down period. The Power and Cancel buttons will become your new preset drying setting for 5 seconds. The drying setting you...
Use and Care Guide
Page 22
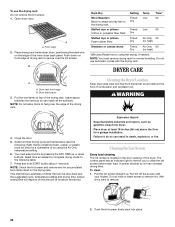
... tumbling. A screen blocked by pressing the DRY TIME up . Place drying rack inside dryer drum, positioning the back wire on a clothesline or by using the Air Only temperature setting. 6. Dryer rack front edge B. Open dryer door. This chart shows examples of the drying rack. To use automatic cycles with your fingers. NOTE: Do not allow items...
... tumbling. A screen blocked by pressing the DRY TIME up . Place drying rack inside dryer drum, positioning the back wire on a clothesline or by using the Air Only temperature setting. 6. Dryer rack front edge B. Open dryer door. This chart shows examples of the drying rack. To use automatic cycles with your fingers. NOTE: Do not allow items...
Use and Care Guide
Page 26
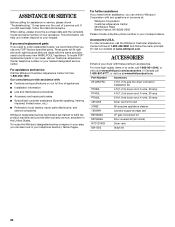
... PT400L 4 ft (1.2 m) dryer cord, 4-wire, 30 amp PT600L 6 ft (1.8 m) dryer cord, 4-wire, 30 amp 4210463 Dryer vent lint brush 31682 All-purpose appliance cleaner 1903WH Laundry supply storage cart 8576846A LP gas conversion kit 8579666A Door reversal kit (all colors) W10121663 Dryer rack 8541503 Stack kit 26 Accessories U.S.A. It may save you can write to Whirlpool Corporation with...
... PT400L 4 ft (1.2 m) dryer cord, 4-wire, 30 amp PT600L 6 ft (1.8 m) dryer cord, 4-wire, 30 amp 4210463 Dryer vent lint brush 31682 All-purpose appliance cleaner 1903WH Laundry supply storage cart 8576846A LP gas conversion kit 8579666A Door reversal kit (all colors) W10121663 Dryer rack 8541503 Stack kit 26 Accessories U.S.A. It may save you can write to Whirlpool Corporation with...


