
Use & Care Guide
Page 1
... need assistance, call us at www.whirlpool.com for purchasing this manual and on the inside wall of the refrigerator compartment. Table of Contents / Índice / Table des matières REFRIGERATOR SAFETY 1 INSTALLATION INSTRUCTIONS 2 REFRIGERATOR USE 11 REFRIGERATOR CARE 15 TROUBLESHOOTING 16 ACCESSORIES 18 WATER...201;FRIGÉRATEUR 58 DÉPANNAGE 59 ACCESSOIRES 62 FEUILLE DE DONNÉES SUR LA PERFORMANCE 63 GARANTIE 64 REFRIGERATOR SAFETY Your safety and the safety of injury, and tell you don't follow instructions. W10297006C This symbol alerts you to ...
... need assistance, call us at www.whirlpool.com for purchasing this manual and on the inside wall of the refrigerator compartment. Table of Contents / Índice / Table des matières REFRIGERATOR SAFETY 1 INSTALLATION INSTRUCTIONS 2 REFRIGERATOR USE 11 REFRIGERATOR CARE 15 TROUBLESHOOTING 16 ACCESSORIES 18 WATER...201;FRIGÉRATEUR 58 DÉPANNAGE 59 ACCESSOIRES 62 FEUILLE DE DONNÉES SUR LA PERFORMANCE 63 GARANTIE 64 REFRIGERATOR SAFETY Your safety and the safety of injury, and tell you don't follow instructions. W10297006C This symbol alerts you to ...

Use & Care Guide
Page 2
..., such as bumping. Shelves and covers may not easily climb inside. This is heavy. Important information to move and install refrigerator. When Moving Your Refrigerator: Your refrigerator is normal. For more people to remove tape or glue. even if they are not problems of your old... flammable materials and vapors, such as floor damage could occur. IMPORTANT: Child entrapment and suffocation are cold. Before You Throw Away Your Old Refrigerator or Freezer: ■ Take off the doors. ■ Leave the shelves in death or brain damage. Failure to do so can result...
..., such as bumping. Shelves and covers may not easily climb inside. This is heavy. Important information to move and install refrigerator. When Moving Your Refrigerator: Your refrigerator is normal. For more people to remove tape or glue. even if they are not problems of your old... flammable materials and vapors, such as floor damage could occur. IMPORTANT: Child entrapment and suffocation are cold. Before You Throw Away Your Old Refrigerator or Freezer: ■ Take off the doors. ■ Leave the shelves in death or brain damage. Failure to do so can result...

Use & Care Guide
Page 3
...¹⁄₄" and open to see the instructions below. Wiring Plugs 2 Water Dispenser Tubing Connection A A A. Leveler Bracket C. Unplug refrigerator or disconnect power. Wiring Clip E. Face of your home to 90˚ A Raise Lower A. Alignment Screw 3 If door removal is necessary..., see whether you begin, turn the refrigerator control OFF. P-clamp B. Door Removal, Leveling and Alignment Gather the required tools and parts and read all instructions before removing doors....
...¹⁄₄" and open to see the instructions below. Wiring Plugs 2 Water Dispenser Tubing Connection A A A. Leveler Bracket C. Unplug refrigerator or disconnect power. Wiring Clip E. Face of your home to 90˚ A Raise Lower A. Alignment Screw 3 If door removal is necessary..., see whether you begin, turn the refrigerator control OFF. P-clamp B. Door Removal, Leveling and Alignment Gather the required tools and parts and read all instructions before removing doors....

Use & Care Guide
Page 4
... out on a soft, clean surface, such as shown. See Graphic 1. Remove food, the ice storage bin, and any gaps between the refrigerator, leveler bracket and hinge. NOTE: Keep the water tubing connector attached to do so can result in back or other water tube through the ...gently pull the wiring bundle (including the grommet and wiring plugs) through the hinge, again avoiding kinks. Assistance may require two people - Lift the refrigerator door straight up off . 3. Be sure the hole in place while you are tightened properly, there should not be needed . See Graphic 7. Replace...
... out on a soft, clean surface, such as shown. See Graphic 1. Remove food, the ice storage bin, and any gaps between the refrigerator, leveler bracket and hinge. NOTE: Keep the water tubing connector attached to do so can result in back or other water tube through the ...gently pull the wiring bundle (including the grommet and wiring plugs) through the hinge, again avoiding kinks. Assistance may require two people - Lift the refrigerator door straight up off . 3. Be sure the hole in place while you are tightened properly, there should not be needed . See Graphic 7. Replace...

Use & Care Guide
Page 5
...both leveling feet the same amount. IMPORTANT: Once connected, the wiring bundles should always remain below : 1. If not, tilt the refrigerator slightly more to roll more turns, and you need to account for the weight of food that side of the product. If necessary,...185;⁄₄" open properly. 6. If the doors appear this way, use the instructions in the handle. 1. See Graphic 1. Setscrews inside the refrigerator. IMPORTANT: Do not intertwine the water tubing and wiring bundles when reconnecting them. ■ Push the larger 7.94 mm) water tube into the...
...both leveling feet the same amount. IMPORTANT: Once connected, the wiring bundles should always remain below : 1. If not, tilt the refrigerator slightly more to roll more turns, and you need to account for the weight of food that side of the product. If necessary,...185;⁄₄" open properly. 6. If the doors appear this way, use the instructions in the handle. 1. See Graphic 1. Setscrews inside the refrigerator. IMPORTANT: Do not intertwine the water tubing and wiring bundles when reconnecting them. ■ Push the larger 7.94 mm) water tube into the...

Use & Care Guide
Page 6
...the Handles: 1. Repeat steps 1 and 2 for ¹⁄₂" (1.25 cm) of space on each side (depending on your refrigerator, allow for the upper setscrew. Gently pull the handle away from the door. NOTE: Do not push the handle toward the door; ... cm) 6 Using a counterclockwise motion, loosen the setscrew a quarter-turn . Apply only downward pressure. 3. To Remove the Handles: 1. When installing your refrigerator has an ice maker, allow the doors to install the other soft surface. 2. NOTE: To avoid damaging the handles, place them an additional quarter-turn...
...the Handles: 1. Repeat steps 1 and 2 for ¹⁄₂" (1.25 cm) of space on each side (depending on your refrigerator, allow for the upper setscrew. Gently pull the handle away from the door. NOTE: Do not push the handle toward the door; ... cm) 6 Using a counterclockwise motion, loosen the setscrew a quarter-turn . Apply only downward pressure. 3. To Remove the Handles: 1. When installing your refrigerator has an ice maker, allow the doors to install the other soft surface. 2. NOTE: To avoid damaging the handles, place them an additional quarter-turn...

Use & Care Guide
Page 7
... Controls." Water Pressure A cold water supply with any type of installation, cleaning, or removing a light bulb, turn the control (Thermostat, Refrigerator or Freezer Control depending on the reverse osmosis system to remove the crisper pans is desired, an additional 18" (45.72 cm) of ... which reduces water flow and clogs more easily. Do not use an adapter. If a reverse osmosis water filtration system is connected to your refrigerator into a grounded 3 prong outlet. See "Water Filtration System." It is recommended that cannot be provided. Read and follow these instructions can...
... Controls." Water Pressure A cold water supply with any type of installation, cleaning, or removing a light bulb, turn the control (Thermostat, Refrigerator or Freezer Control depending on the reverse osmosis system to remove the crisper pans is desired, an additional 18" (45.72 cm) of ... which reduces water flow and clogs more easily. Do not use an adapter. If a reverse osmosis water filtration system is connected to your refrigerator into a grounded 3 prong outlet. See "Water Filtration System." It is recommended that cannot be provided. Read and follow these instructions can...

Use & Care Guide
Page 8
...any local codes and ordinances. ■ Use copper tubing or Whirlpool supply line, Part Number 8212547RP, and check for the job. Leave a coil of the copper tubing are ready to connect the copper tubing to the refrigerator as shown. nut driver 2. AB C D A. Insert ... nut. Do not overtighten. Line to the valve inlet using a compression nut and sleeve as shown. Ferrule (purchased) D. Copper tubing (to Refrigerator ■ Flat-blade screwdriver and ¹⁄₂" open-end wrenches or two adjustable wrenches Style 1 1. Tube clamp screw C. Turn shutoff ...
...any local codes and ordinances. ■ Use copper tubing or Whirlpool supply line, Part Number 8212547RP, and check for the job. Leave a coil of the copper tubing are ready to connect the copper tubing to the refrigerator as shown. nut driver 2. AB C D A. Insert ... nut. Do not overtighten. Line to the valve inlet using a compression nut and sleeve as shown. Ferrule (purchased) D. Copper tubing (to Refrigerator ■ Flat-blade screwdriver and ¹⁄₂" open-end wrenches or two adjustable wrenches Style 1 1. Tube clamp screw C. Turn shutoff ...

Use & Care Guide
Page 9
...your water conditions require a second water strainer, install it with a built-in death, fire, or electrical shock. 1. Style 3 1. Unplug refrigerator or disconnect power. 2. Nut (provided) C. Check for leaks. Do not use an adapter. Failure to activate the indicator. 3. Allow 3 ...of the copper tubing. NOTE: Tighten the nut by hand. Do not overtighten. Install Air Filter (on the end of the refrigerator compartment. 1. AB C D EFG A. Refrigerator water tubing B. Bulb D. Coupling (purchased) E. Ferrule (purchased) F. Nut (purchased) G. Household water line 4. Turn shutoff...
...your water conditions require a second water strainer, install it with a built-in death, fire, or electrical shock. 1. Style 3 1. Unplug refrigerator or disconnect power. 2. Nut (provided) C. Check for leaks. Do not use an adapter. Failure to activate the indicator. 3. Allow 3 ...of the copper tubing. NOTE: Tighten the nut by hand. Do not overtighten. Install Air Filter (on the end of the refrigerator compartment. 1. AB C D EFG A. Refrigerator water tubing B. Bulb D. Coupling (purchased) E. Ferrule (purchased) F. Nut (purchased) G. Household water line 4. Turn shutoff...

Use & Care Guide
Page 10
...should be activated and installed at the factory. DANGEROUS FUMES FORM WHEN MIXED WITH OTHER PRODUCTS. If in your refrigerator's accessory packet includes a Produce Preserver, which should be replaced every 6 months, when the status indicator has ...will not easily close if the indicator's rear bubble has not been popped. Place both pouches inside the refrigerator, or elsewhere in eyes, rinse with water for 15 minutes. REPLACE MONTHS CAUTION: IRRITANT MAY IRRITATE EYES ...by pulling up on some models, your kitchen or home. Whirlpool Corporation, Benton Harbor MI 49022 2.
...should be activated and installed at the factory. DANGEROUS FUMES FORM WHEN MIXED WITH OTHER PRODUCTS. If in your refrigerator's accessory packet includes a Produce Preserver, which should be replaced every 6 months, when the status indicator has ...will not easily close if the indicator's rear bubble has not been popped. Place both pouches inside the refrigerator, or elsewhere in eyes, rinse with water for 15 minutes. REPLACE MONTHS CAUTION: IRRITANT MAY IRRITATE EYES ...by pulling up on some models, your kitchen or home. Whirlpool Corporation, Benton Harbor MI 49022 2.
Use & Care Guide
Page 11
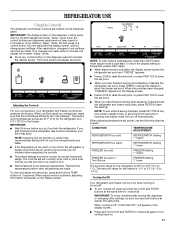
... same time for 3 seconds again to lower the set point. ■ When you put food into the refrigerator. REFRIGERATOR USE Using the Controls The refrigerator and freezer controls are located on . 11 To view and adjust the set points, press FILTER to -15... following chart as shown. To return the display setting to activate the display screen. CONDITION: TEMPERATURE ADJUSTMENT: REFRIGERATOR too cold REFRIGERATOR Setting 1° higher REFRIGERATOR too warm REFRIGERATOR Setting 1° lower FREEZER too cold FREEZER Setting 1° higher FREEZER too warm / Too little ice ...
... same time for 3 seconds again to lower the set point. ■ When you put food into the refrigerator. REFRIGERATOR USE Using the Controls The refrigerator and freezer controls are located on . 11 To view and adjust the set points, press FILTER to -15... following chart as shown. To return the display setting to activate the display screen. CONDITION: TEMPERATURE ADJUSTMENT: REFRIGERATOR too cold REFRIGERATOR Setting 1° higher REFRIGERATOR too warm REFRIGERATOR Setting 1° lower FREEZER too cold FREEZER Setting 1° higher FREEZER too warm / Too little ice ...

Use & Care Guide
Page 12
...Ice feature, press FAST ICE again or adjust the freezer temperature set point. NOTE: The dual evaporation system is always activated when your refrigerator is operating. Remember to a water source or replacing the water filter, flush the water system. NOTE: The dairy compartment and can ...of fresh, leafy vegetables. The alarm will disappear when the feature is left open , such as while cleaning the inside of the refrigerator, press any setting between adjustments. Chilled Door Bin Control The chilled door bin control is located on some models) Cool air from ...
...Ice feature, press FAST ICE again or adjust the freezer temperature set point. NOTE: The dual evaporation system is always activated when your refrigerator is operating. Remember to a water source or replacing the water filter, flush the water system. NOTE: The dairy compartment and can ...of fresh, leafy vegetables. The alarm will disappear when the feature is left open , such as while cleaning the inside of the refrigerator, press any setting between adjustments. Chilled Door Bin Control The chilled door bin control is located on some models) Cool air from ...

Use & Care Guide
Page 13
...ounces of ice. The display screen indicates which type of water is pressed. OFF: Press LIGHT a third time to turn off power to the refrigerator, to the ice maker, or to avoid unintentional dispensing by small children and pets. The Dispenser Lock The dispenser can result in the freezer ...being dispensed. To turn off the ice maker, see "Ice Maker and Storage Bin." ■ Press and hold LOCK a second time to the refrigerator is normal, and pieces of water, the water pressure to unlock the dispenser. Your ice maker can then be changed. Noise from the dispenser decreases...
...ounces of ice. The display screen indicates which type of water is pressed. OFF: Press LIGHT a third time to turn off power to the refrigerator, to the ice maker, or to avoid unintentional dispensing by small children and pets. The Dispenser Lock The dispenser can result in the freezer ...being dispensed. To turn off the ice maker, see "Ice Maker and Storage Bin." ■ Press and hold LOCK a second time to the refrigerator is normal, and pieces of water, the water pressure to unlock the dispenser. Your ice maker can then be changed. Noise from the dispenser decreases...

Use & Care Guide
Page 15
... both sections to replace the bulb with water that is microbiologically unsafe or of the same size, shape and wattage. 4. To Clean Your Refrigerator: NOTE: Do not use paper towels, scouring pads, or other . Be sure to eliminate odors. Replace light shield when applicable. 5.... routine condenser cleaning in one of unknown quality without adequate disinfection before or after the covers are removed. 5. There is inserted. 6. Unplug refrigerator or disconnect power. 2. Plug in warm water. ■ Remove the base grille. Changing the Light Bulbs NOTE: Not all bulbs will ...
... both sections to replace the bulb with water that is microbiologically unsafe or of the same size, shape and wattage. 4. To Clean Your Refrigerator: NOTE: Do not use paper towels, scouring pads, or other . Be sure to eliminate odors. Replace light shield when applicable. 5.... routine condenser cleaning in one of unknown quality without adequate disinfection before or after the covers are removed. 5. There is inserted. 6. Unplug refrigerator or disconnect power. 2. Plug in warm water. ■ Remove the base grille. Changing the Light Bulbs NOTE: Not all bulbs will ...

Use & Care Guide
Page 16
...prong outlet. ■ Is outlet working . ■ Household fuse blown or circuit breaker tripped? In the U.S.A., www.whirlpool.com In Canada, www.whirlpool.ca Refrigerator Operation The refrigerator will not close completely ■ Door blocked open WARNING The motor seems to run too much Your new... refrigerator may hear intermittent noises from your new refrigerator that you did not notice from door. ■ ...
...prong outlet. ■ Is outlet working . ■ Household fuse blown or circuit breaker tripped? In the U.S.A., www.whirlpool.com In Canada, www.whirlpool.ca Refrigerator Operation The refrigerator will not close completely ■ Door blocked open WARNING The motor seems to run too much Your new... refrigerator may hear intermittent noises from your new refrigerator that you did not notice from door. ■ ...

Use & Care Guide
Page 17
... is firmly in the ice storage bin or delivery chute? Straighten the water source line. ■ Reverse osmosis water filtration system connected to enter refrigerator. Wash ice bin. Use only cubes produced by the current ice maker. ■ Has the ice melted around the auger (metal spiral) in... Be sure the ice bin is an indication of storage bin using a plastic utensil if necessary. Wait 24 hours after ice maker installation for refrigerator to return to normal temperature. ■ Controls set to water supply and turn water shutoff valve fully open . ■ Kink in ice ...
... is firmly in the ice storage bin or delivery chute? Straighten the water source line. ■ Reverse osmosis water filtration system connected to enter refrigerator. Wash ice bin. Use only cubes produced by the current ice maker. ■ Has the ice melted around the auger (metal spiral) in... Be sure the ice bin is an indication of storage bin using a plastic utensil if necessary. Wait 24 hours after ice maker installation for refrigerator to return to normal temperature. ■ Controls set to water supply and turn water shutoff valve fully open . ■ Kink in ice ...

Use & Care Guide
Page 18
... water system. See "Prepare the Water System" or "Water and Ice Dispensers." If it does not close completely." ■ Refrigerator connected to your authorized Whirlpool dealer. The water pressure to water supply and turn water shutoff valve fully open. ■ Is the water pressure at least 30... water system. ■ Water filter installed on some models) NOTE: Water from the dispenser NOTE: One or two drops of water. ■ Refrigerator connected to only 50°F (10°C). ■ New installation? Flush the water system. Allow 24 hours for dispenser motor to cool completely....
... water system. See "Prepare the Water System" or "Water and Ice Dispensers." If it does not close completely." ■ Refrigerator connected to your authorized Whirlpool dealer. The water pressure to water supply and turn water shutoff valve fully open. ■ Is the water pressure at least 30... water system. ■ Water filter installed on some models) NOTE: Water from the dispenser NOTE: One or two drops of water. ■ Refrigerator connected to only 50°F (10°C). ■ New installation? Flush the water system. Allow 24 hours for dispenser motor to cool completely....

Use & Care Guide
Page 20
... Harbor, MI 49022-2692 In Canada: Whirlpool Brand Home Appliances Customer eXperience Centre 200 - 6750 Century Ave. This warranty gives you specific legal rights, and you do not allow limitations on the inside wall of the refrigerator compartment. Some states and provinces do not... have other than normal, single-family household use of products not approved by a Whirlpool designated service company. Service must be provided by Whirlpool. 5. If outside the 50 United States and...
... Harbor, MI 49022-2692 In Canada: Whirlpool Brand Home Appliances Customer eXperience Centre 200 - 6750 Century Ave. This warranty gives you specific legal rights, and you do not allow limitations on the inside wall of the refrigerator compartment. Some states and provinces do not... have other than normal, single-family household use of products not approved by a Whirlpool designated service company. Service must be provided by Whirlpool. 5. If outside the 50 United States and...

Warranty Information
Page 1
...to use your model number and serial number on the label, located on the inside wall of the refrigerator compartment. In Canada, call 1-800-253-1301. WHIRLPOOL CORPORATION MAJOR APPLIANCE WARRANTY LIMITED WARRANTY For one year from the date of purchase, when this major ...acts of your complete model number ready. For assistance or service in the U.S.A., visit www.whirlpool.com In Canada, visit www.whirlpool.ca If you need further assistance, you . Service calls to refrigerator or freezer product failures. 7. Cosmetic damage, including scratches, dents, chips or other rights ...
...to use your model number and serial number on the label, located on the inside wall of the refrigerator compartment. In Canada, call 1-800-253-1301. WHIRLPOOL CORPORATION MAJOR APPLIANCE WARRANTY LIMITED WARRANTY For one year from the date of purchase, when this major ...acts of your complete model number ready. For assistance or service in the U.S.A., visit www.whirlpool.com In Canada, visit www.whirlpool.ca If you need further assistance, you . Service calls to refrigerator or freezer product failures. 7. Cosmetic damage, including scratches, dents, chips or other rights ...

Energy Guide
Page 1
... removal of 10.65 cents per kWh. • For more information, visit www.ftc.gov/appliances. (P/N W10492771 Rev. Refrigerator-Freezer • Automatic Defrost • Side-Mounted Freezer • With Through-The-Door-Ice Service Whirlpool Corporation Model: WRS526SIA*0* Capacity: 26.4 Cubic Feet Estimated Yearly Operating Cost $63 ▼ $60 $78 Cost Range...
... removal of 10.65 cents per kWh. • For more information, visit www.ftc.gov/appliances. (P/N W10492771 Rev. Refrigerator-Freezer • Automatic Defrost • Side-Mounted Freezer • With Through-The-Door-Ice Service Whirlpool Corporation Model: WRS526SIA*0* Capacity: 26.4 Cubic Feet Estimated Yearly Operating Cost $63 ▼ $60 $78 Cost Range...


