
Quick Use Guide
Page 15
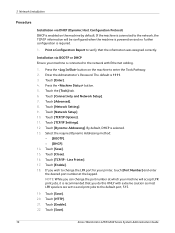
... 169.xxx.xxx.xxx, the DHCP server has not properly allocated an address or DHCP is not enabled on the Control Panel, enter the Administrator's Password [1111] and select Enter. 2 Press the Machine Status button then select Tools > Connectivity and Network Setup > Advanced > Network Setting > Network Setup > TCP/IP Options. 3 Select...
... 169.xxx.xxx.xxx, the DHCP server has not properly allocated an address or DHCP is not enabled on the Control Panel, enter the Administrator's Password [1111] and select Enter. 2 Press the Machine Status button then select Tools > Connectivity and Network Setup > Advanced > Network Setting > Network Setup > TCP/IP Options. 3 Select...

Quick Use Guide
Page 17
...in the Address bar. Press Enter. 2 Click Properties > Connectivity > Protocols > TCP/IP. 3 Enter the domain name in the Tools Pathway. (Press Log In/Out > Password [1111] > Enter > Machine Status > Tools > User Interface > Service Enablements > E-mail > Enable). Before starting the setup procedure, please ensure the following items are ...Fax Setup on your Web browser and enter the TCP/IP address of the SMTP Server. NOTE: If you do not want to the Xerox machine account. If you need to change it, click Static from the IP Address Resolution menu list. 4 Scroll to the bottom of ...
...in the Address bar. Press Enter. 2 Click Properties > Connectivity > Protocols > TCP/IP. 3 Enter the domain name in the Tools Pathway. (Press Log In/Out > Password [1111] > Enter > Machine Status > Tools > User Interface > Service Enablements > E-mail > Enable). Before starting the setup procedure, please ensure the following items are ...Fax Setup on your Web browser and enter the TCP/IP address of the SMTP Server. NOTE: If you do not want to the Xerox machine account. If you need to change it, click Static from the IP Address Resolution menu list. 4 Scroll to the bottom of ...
Quick Use Guide
Page 18
NOTE: For more information on the E-mail Setup screen, click Edit for each options group. Click Edit in the General group to specify a default From: address. 13 When you have made your settings. 11 From the Properties menu, click Services > E-mail Settings > Defaults. 12 To amend the settings on all of the E-mail features including setting up address books, please refer to send e-mails from the device. NOTE: A From: address is required to the System Administration CD. 14 quick use guide 9 Enter the Login Name and Password. 10 Click Apply to confirm your selections click Apply.
NOTE: For more information on the E-mail Setup screen, click Edit for each options group. Click Edit in the General group to specify a default From: address. 13 When you have made your settings. 11 From the Properties menu, click Services > E-mail Settings > Defaults. 12 To amend the settings on all of the E-mail features including setting up address books, please refer to send e-mails from the device. NOTE: A From: address is required to the System Administration CD. 14 quick use guide 9 Enter the Login Name and Password. 10 Click Apply to confirm your selections click Apply.

Quick Use Guide
Page 19
... settings. If in the Kit. 2 Connect the telephone line to change the Fax Setup enter the Tools Pathway as standard. Fax Setup The WorkCentre 4250X/XF and 4260X/XF Series configurations have Fax installed as described in steps 4 and 5 and select Tools > User Interface > Fax Service... In/Out button on the device. 3 If you wish to the Line connector on the Control Panel, enter the Handset (Ext.) connector Administrator's Password [1111] and select Enter. 5 Press the Machine Status button Line connector then select Tools > User Interface > Service Enablements > Embedded Fax. The...
... settings. If in the Kit. 2 Connect the telephone line to change the Fax Setup enter the Tools Pathway as standard. Fax Setup The WorkCentre 4250X/XF and 4260X/XF Series configurations have Fax installed as described in steps 4 and 5 and select Tools > User Interface > Fax Service... In/Out button on the device. 3 If you wish to the Line connector on the Control Panel, enter the Handset (Ext.) connector Administrator's Password [1111] and select Enter. 5 Press the Machine Status button Line connector then select Tools > User Interface > Service Enablements > Embedded Fax. The...
Quick Use Guide
Page 20
.... Indicator lights on the Feature Enablement Key will contain a Feature Enablement Key and instructions. 1 With the machine switched on the Control Panel, enter the Administrator's Password [1111] and select Enter. 2 Press the Machine Status button then select Tools > Accounting > Accounting Enablement > Authentication Mode. 3 Select the On button under Network Accounting header...
.... Indicator lights on the Feature Enablement Key will contain a Feature Enablement Key and instructions. 1 With the machine switched on the Control Panel, enter the Administrator's Password [1111] and select Enter. 2 Press the Machine Status button then select Tools > Accounting > Accounting Enablement > Authentication Mode. 3 Select the On button under Network Accounting header...

Quick Use Guide
Page 21
... via the telephone network without having a dedicated telephone line connected to the machine. Refer to Installing Option Kits on the Control Panel, enter the Administrator's Password [1111] and select Enter. 3 Press the Machine Status button then select Tools > User Interface > Service Enablements > Server Fax. 4 Select Enable. 5 Select Save. 6 Press the Log...
... via the telephone network without having a dedicated telephone line connected to the machine. Refer to Installing Option Kits on the Control Panel, enter the Administrator's Password [1111] and select Enter. 3 Press the Machine Status button then select Tools > User Interface > Service Enablements > Server Fax. 4 Select Enable. 5 Select Save. 6 Press the Log...

System Administration Guide
Page 3
TABLE OF CONTENTS 1 Introduction ...1 Who should use this Guide 1 Machine Models 1 Xerox WorkCentre 4250/4260 Series 2 Control Panel Overview 3 2 Machine Connection ...5 Connection Ports 5 Front View 5 Side View 6 Interface Ports 6 Front 6 Left Side 7 ... Printing a Configuration Report 9 CentreWare Internet Services 9 System Configuration 9 Access CentreWare Internet Services 10 Setup HTTP 10 Change the Administrator Password 11 3 Network Installation ...13 TCP/IP 13 Configure Static IPv4 Addressing using the Machine User Interface 13 Information Checklist 13 Procedure 14...
TABLE OF CONTENTS 1 Introduction ...1 Who should use this Guide 1 Machine Models 1 Xerox WorkCentre 4250/4260 Series 2 Control Panel Overview 3 2 Machine Connection ...5 Connection Ports 5 Front View 5 Side View 6 Interface Ports 6 Front 6 Left Side 7 ... Printing a Configuration Report 9 CentreWare Internet Services 9 System Configuration 9 Access CentreWare Internet Services 10 Setup HTTP 10 Change the Administrator Password 11 3 Network Installation ...13 TCP/IP 13 Configure Static IPv4 Addressing using the Machine User Interface 13 Information Checklist 13 Procedure 14...

System Administration Guide
Page 20
... the machine The Power On button is the first time the machine has been powered on the Control Panel. 2. Enter the Administrator's Password. Complete the Steps shown by the Installation Wizard If this is located on the left side of the machine, to your network port...switch: Speed 10HD (Half-Duplex) 100HD 10FD (Full-Duplex) 100FD Auto Machine Setting 10HD or Auto 100HD or Auto 10FD 100FD Auto 8 Xerox WorkCentre 4250/4260 Series System Administration Guide Administrator access is 1111. 3. Connect the Ethernet Cable Connect a 10/100 BaseT Ethernet cable to the Administrator Tools ...
... the machine The Power On button is the first time the machine has been powered on the Control Panel. 2. Enter the Administrator's Password. Complete the Steps shown by the Installation Wizard If this is located on the left side of the machine, to your network port...switch: Speed 10HD (Half-Duplex) 100HD 10FD (Full-Duplex) 100FD Auto Machine Setting 10HD or Auto 100HD or Auto 10FD 100FD Auto 8 Xerox WorkCentre 4250/4260 Series System Administration Guide Administrator access is 1111. 3. Connect the Ethernet Cable Connect a 10/100 BaseT Ethernet cable to the Administrator Tools ...

System Administration Guide
Page 21
...Press the button. 5. Touch [Tools]. 6. Touch [Network Setting]. 9. Press the button. 13. Touch [Print]. 5. Enter the Administrator's Password. Touch the [Information Pages] tab. 3. See Configure Static IPv4 Addressing using the Machine User Interface on the Control Panel. 2. Printing a ...Username is admin and the default Password is 1111. Select the Speed to match the speed set via the machine and the CentreWare Internet Service. Many of their desktops. Touch [Close]. Press the button on Xerox WorkCentre 4250/4260 Series System Administration Guide 9
...Press the button. 5. Touch [Tools]. 6. Touch [Network Setting]. 9. Press the button. 13. Touch [Print]. 5. Enter the Administrator's Password. Touch the [Information Pages] tab. 3. See Configure Static IPv4 Addressing using the Machine User Interface on the Control Panel. 2. Printing a ...Username is admin and the default Password is 1111. Select the Speed to match the speed set via the machine and the CentreWare Internet Service. Many of their desktops. Touch [Close]. Press the button on Xerox WorkCentre 4250/4260 Series System Administration Guide 9

System Administration Guide
Page 23
Click on [Login]. 6. If prompted, enter the Administrator's User ID [admin] and Password [1111] and click on the [Admin Password] link. Xerox WorkCentre 4250/4260 Series System Administration Guide 11 To change the default administrator password to a more secure password, so this Xerox device is not compromised. At your Workstation, open your web browser and enter the TCP/IP...
Click on [Login]. 6. If prompted, enter the Administrator's User ID [admin] and Password [1111] and click on the [Admin Password] link. Xerox WorkCentre 4250/4260 Series System Administration Guide 11 To change the default administrator password to a more secure password, so this Xerox device is not compromised. At your Workstation, open your web browser and enter the TCP/IP...
System Administration Guide
Page 26
...the Port Number which your printer, then touch [Port Number] and enter the desired Port Number at the keypad. Enter the Administrator's Password. Touch [Network Setting]. 9. Touch [Name/Address]. 16. When you want it to appear with extreme caution as you are set to...port for the IP Gateway Address. Touch [Save]. 27. Touch [Network Setup]. 10. Touch [Close]. If not, touch [Enable]. 14 Xerox WorkCentre 4250/4260 Series System Administration Guide Repeat this with correct case. Touch [Save]. 15. Type the host name EXACTLY as most LPR spoolers are finished...
...the Port Number which your printer, then touch [Port Number] and enter the desired Port Number at the keypad. Enter the Administrator's Password. Touch [Network Setting]. 9. Touch [Name/Address]. 16. When you want it to appear with extreme caution as you are set to...port for the IP Gateway Address. Touch [Save]. 27. Touch [Network Setup]. 10. Touch [Close]. If not, touch [Enable]. 14 Xerox WorkCentre 4250/4260 Series System Administration Guide Repeat this with correct case. Touch [Save]. 15. Type the host name EXACTLY as most LPR spoolers are finished...
System Administration Guide
Page 28
... wish to the default port, 515. 19. Enter the Administrator's Password. Touch [Advanced]. 8. Touch [Network Setting]. 9. By default, DHCP is 1111. 3. Touch [Enable]. 22. The default is selected. 13. Touch [Dynamic Addressing]. Touch [Enable]. 18. Touch [Save]. 20. Touch [Save]. 16 Xerox WorkCentre 4250/4260 Series System Administration Guide If the machine is required...
... wish to the default port, 515. 19. Enter the Administrator's Password. Touch [Advanced]. 8. Touch [Network Setting]. 9. By default, DHCP is 1111. 3. Touch [Enable]. 22. The default is selected. 13. Touch [Dynamic Addressing]. Touch [Enable]. 18. Touch [Save]. 20. Touch [Save]. 16 Xerox WorkCentre 4250/4260 Series System Administration Guide If the machine is required...

System Administration Guide
Page 32
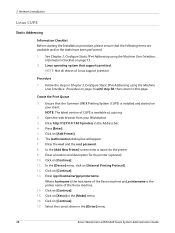
... you are available and/or the tasks have been performed: 1. 3 Network Installation Zero-Configuration Networking: • Self Assigned Address (IPv4) - Enter the Administrator's Password. Touch [Area Name]. 20 Xerox WorkCentre 4250/4260 Series System Administration Guide AppleTalk Information Checklist Before starting the installation procedure, please ensure that the following items are finished, touch [Save...
... you are available and/or the tasks have been performed: 1. 3 Network Installation Zero-Configuration Networking: • Self Assigned Address (IPv4) - Enter the Administrator's Password. Touch [Area Name]. 20 Xerox WorkCentre 4250/4260 Series System Administration Guide AppleTalk Information Checklist Before starting the installation procedure, please ensure that the following items are finished, touch [Save...

System Administration Guide
Page 33
...Checklist Before starting the installation procedure, please ensure that the machine is 1111. 3. Touch [Enter]. 4. Xerox WorkCentre 4250/4260 Series System Administration Guide 21 Refer to www.xerox.com for installation procedures and to enter the Tools Pathway. 2. Procedure 1. Setup a Print Server object using..., Print Server Name and the Print Server password assigned. If your printer services queues on multiple file servers, the Print Server name and password must be the same on the network. Enter the Administrator's Password. Touch [Connectivity and Network Setup]. Touch ...
...Checklist Before starting the installation procedure, please ensure that the machine is 1111. 3. Touch [Enter]. 4. Xerox WorkCentre 4250/4260 Series System Administration Guide 21 Refer to www.xerox.com for installation procedures and to enter the Tools Pathway. 2. Procedure 1. Setup a Print Server object using..., Print Server Name and the Print Server password assigned. If your printer services queues on multiple file servers, the Print Server name and password must be the same on the network. Enter the Administrator's Password. Touch [Connectivity and Network Setup]. Touch ...

System Administration Guide
Page 34
... 3 Network Installation 7. Select the Frame Type desired by touching the arrow buttons. • Touch [Save] again. 28. Touch [Print Server Password]. Optional Step: • If you setup your printer or set the Primary File Server, touch [Rates]. • Select the box under [...rate or Poll Interval for example: cn=contextname.ou=organization.o=company.c=country. 19. Touch [Save]. 14. Touch [Close] three times. 22 Xerox WorkCentre 4250/4260 Series System Administration Guide Touch [Advanced]. 8. Touch [Enable]. 13. Touch [abc] to exit the [Print Server] screen and accept...
... 3 Network Installation 7. Select the Frame Type desired by touching the arrow buttons. • Touch [Save] again. 28. Touch [Print Server Password]. Optional Step: • If you setup your printer or set the Primary File Server, touch [Rates]. • Select the box under [...rate or Poll Interval for example: cn=contextname.ou=organization.o=company.c=country. 19. Touch [Save]. 14. Touch [Close] three times. 22 Xerox WorkCentre 4250/4260 Series System Administration Guide Touch [Advanced]. 8. Touch [Enable]. 13. Touch [abc] to exit the [Print Server] screen and accept...
System Administration Guide
Page 40
See Chapter 3, Configure Static IPv4 Addressing using the Machine User Interface, Procedure on [Xerox] in the [Driver] menu. 28 Xerox WorkCentre 4250/4260 Series System Administration Guide Linux operating system that the following items are available and/or the...Machine User Interface, Information Checklist on [Continue]. 13. Follow the steps in the Address bar. 4. Enter the root and the root password. 8. Enter a location and description for the printer. 9. 3 Network Installation Linux CUPS Static Addressing Information Checklist Before starting the Installation ...
See Chapter 3, Configure Static IPv4 Addressing using the Machine User Interface, Procedure on [Xerox] in the [Driver] menu. 28 Xerox WorkCentre 4250/4260 Series System Administration Guide Linux operating system that the following items are available and/or the...Machine User Interface, Information Checklist on [Continue]. 13. Follow the steps in the Address bar. 4. Enter the root and the root password. 8. Enter a location and description for the printer. 9. 3 Network Installation Linux CUPS Static Addressing Information Checklist Before starting the Installation ...

System Administration Guide
Page 45
...The machine will be available over the network for several minutes. 1. If prompted, enter the Administrator's User ID [admin] and Password [1111] and click on the [Browse] button. NOTE: You can now be used to clone other machines. A dialog box ...Password [1111] and click on the [Cloning] link. 6. Right-click on the link and click on the [Properties] tab. 4. Click on [Save Target As]. 5. Click on [Save]. Click on the [General Setup] link. 5. Click on [Clone]. Click on [Install] to submit the file to clone. 3. Cloning b) Specific features - Xerox WorkCentre 4250...
...The machine will be available over the network for several minutes. 1. If prompted, enter the Administrator's User ID [admin] and Password [1111] and click on the [Browse] button. NOTE: You can now be used to clone other machines. A dialog box ...Password [1111] and click on the [Cloning] link. 6. Right-click on the link and click on the [Properties] tab. 4. Click on [Save Target As]. 5. Click on [Save]. Click on the [General Setup] link. 5. Click on [Clone]. Click on [Install] to submit the file to clone. 3. Cloning b) Specific features - Xerox WorkCentre 4250...

System Administration Guide
Page 55
... Name]. 9. Click the [Enabled] checkbox to accept the changes. Click the [Status] tab. 12. b) Click on [Network Connections] Xerox WorkCentre 4250/4260 Series System Administration Guide 43 Click [Apply] to enable the Protocol. 8. The settings are not applied until you want to your operating...: Windows XP a) Click on [Properties]. 3. Click on [Login]. 11. If prompted, enter the Administrator's User ID [admin] and Password [1111], and click on the [Protocols] link. 6. The network controller takes approximately 5 minutes to your workstation, open the Web browser ...
... Name]. 9. Click the [Enabled] checkbox to accept the changes. Click the [Status] tab. 12. b) Click on [Network Connections] Xerox WorkCentre 4250/4260 Series System Administration Guide 43 Click [Apply] to enable the Protocol. 8. The settings are not applied until you want to your operating...: Windows XP a) Click on [Properties]. 3. Click on [Login]. 11. If prompted, enter the Administrator's User ID [admin] and Password [1111], and click on the [Protocols] link. 6. The network controller takes approximately 5 minutes to your workstation, open the Web browser ...

System Administration Guide
Page 66
...Pathway. 2. Touch [User Interface]. 7. Next to the Banner Sheet option, use the drop-down arrow to exit the Tools Pathway. 54 Xerox WorkCentre 4250/4260 Series System Administration Guide Touch [Enter]. 4. Touch [Banner Sheets]. 9. Press the button. 12. Click on [Control Panel] then ...[Printers]. 2. The default is 1111. 3. Click on [Printers and Faxes]. Enter the Administrator's Password. Press the button. 5. 4 Print Drivers Print Driver Options: Enable/Disable the Banner Sheet From the Print Driver 1. click on [Apply]. Touch [...
...Pathway. 2. Touch [User Interface]. 7. Next to the Banner Sheet option, use the drop-down arrow to exit the Tools Pathway. 54 Xerox WorkCentre 4250/4260 Series System Administration Guide Touch [Enter]. 4. Touch [Banner Sheets]. 9. Press the button. 12. Click on [Control Panel] then ...[Printers]. 2. The default is 1111. 3. Click on [Printers and Faxes]. Enter the Administrator's Password. Press the button. 5. 4 Print Drivers Print Driver Options: Enable/Disable the Banner Sheet From the Print Driver 1. click on [Apply]. Touch [...

System Administration Guide
Page 68
... Touch [Enable]. 10. The repository is a folder on the Server or Workstation where images scanned by the machine will be stored. 56 Xerox WorkCentre 4250/4260 Series System Administration Guide HTTP (Hyper Text Transport Protocol) - Touch [Service Enablements]. 8. Press the button. 11. This is used.... This is used to scan to exit the Tools Pathway. see HTTP/HTTPS on the machine to the repository: 1. Enter the Administrator's Password. The default is accomplished through the use 4 different ways to transfer a scanned image to enter the Tools Pathway. 2. Press the button...
... Touch [Enable]. 10. The repository is a folder on the Server or Workstation where images scanned by the machine will be stored. 56 Xerox WorkCentre 4250/4260 Series System Administration Guide HTTP (Hyper Text Transport Protocol) - Touch [Service Enablements]. 8. Press the button. 11. This is used.... This is used to scan to exit the Tools Pathway. see HTTP/HTTPS on the machine to the repository: 1. Enter the Administrator's Password. The default is accomplished through the use 4 different ways to transfer a scanned image to enter the Tools Pathway. 2. Press the button...

