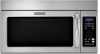
KitchenAid KHMS2040WSS Support Question
KitchenAid KHMS2040WSS Support Question
Find answers below for this question about KitchenAid KHMS2040WSS.Need a KitchenAid KHMS2040WSS manual? We have 3 online manuals for this item!
Question posted by annJoyP on April 3rd, 2014
How To Change The Charcoal Filter In A Khms2040wss Kitchenaid Microwave
The person who posted this question about this KitchenAid product did not include a detailed explanation. Please use the "Request More Information" button to the right if more details would help you to answer this question.
Current Answers
Related KitchenAid KHMS2040WSS Manual Pages
Dimension Guide - Page 1
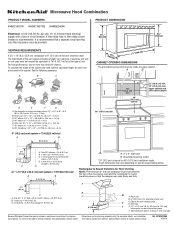
...(for Roof Venting NOTE: The minimum 3" (7.6 cm) clearance must not exceed the equivalent of the microwave oven and the rectangular to Round Transition for wall venting only)
E
D. W10247296B 9/30/10 For best ... For complete details, see Installation
our products, we reserve the right to change materials and specifications without notice. Ref. or 20-amp fused electrical supply with...
Installation Guide - Page 1
...Damper Assembly 9 Install the Microwave Oven 9 Complete Installation 10 VENTING DESIGN SPECIFICATIONS 11 ASSISTANCE 12 Replacement Parts 12 Accessories 12
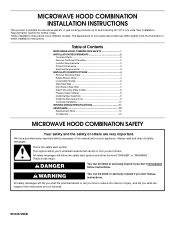
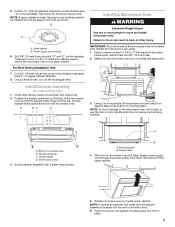
MICROWAVE HOOD COMBINATION SAFETY
Your ...you how to and including 36" (91.4 cm) wide.
The appearance of Contents
MICROWAVE HOOD COMBINATION SAFETY 1 INSTALLATION REQUIREMENTS 2
Tools and Parts 2 Remove Cardboard Template 2...
Installation Guide - Page 2

...stud and minimum 3/8" (10 mm) thickness drywall or plaster/lath within cabinet opening where the microwave oven will not discolor, delaminate or sustain other types of packaging)
Aluminum grease filters
Charcoal filters (Depending on model, aluminum grease filter and charcoal filter may not be installed. INSTALLATION REQUIREMENTS
Tools and Parts
Tools Needed
Gather the required tools and...
Installation Guide - Page 3
...is too short, have a qualified electrician or serviceman install an outlet near the microwave oven. WARNING: Improper use an extension cord.
Recommended: ■ A time-delay fuse or time-delay circuit... If the power supply cord is typical for the electric current. Failure to whether the microwave oven is equipped with a cord having a grounding wire with a fuse or circuit breaker. ...
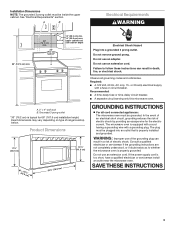
Installation Guide - Page 4
... being handled.
4. A
Keep the damper assembly in case the venting method is
changed, or the microwave oven is reinstalled in the foam packaging, or it aside.
3. Remove screws attaching damper plate to top of
microwave oven. Reattach blower motor to back of microwave oven with 2 screws removed in Step 3.
7. Screws B. Remove 2 screws attaching blower motor to back...
Installation Guide - Page 5
... in Step 1 of "Wall Venting Installation Only."
5 NOTE: If blower motor is not positioned with flat sides facing the back of microwave oven. Make sure damper plate tabs are inserted into microwave oven.
Damper plate tabs D. Repeat Step 3 from "Wall Venting Installation Only." 3. Rotate blower motor so that exhaust ports face the top of...
Installation Guide - Page 6
...End Holes Figure 2
B
C
C
C
D
B
D
A
A
A
A
E
E
E
E
F
F
NOTE: If wall stud is within 6" (15.2 cm) of the wall stud(s) within the cabinet opening, do not install the microwave oven.
1. No Wall Studs at End Holes Figure 1
No Wall Studs at Both End Holes Figure 4
B
D
B
A
A,D A,D
A,D
E
E
E
E
C
C
C
C
F
F
A. See illustrations in "Possible Wall Stud Configurations...
Installation Guide - Page 7

Mark Rear Wall
The microwave oven must be installed on a minimum of 1 wall stud, preferably 2, using a minimum of "Mark Rear Wall."
2.
D A
C B
A. These represent the mounting plate's end holes and bottom edge.
4. ...
Installation Guide - Page 8
... the remaining end hole. 6. Disconnect power to use as guides. ■ If the wall behind the microwave oven (as at both end holes of "Mark Rear Wall." Securely tighten the lag screws. Push the bolt with... it fits inside the frame, against drywall. 5. Check alignment of the microwave oven. Refer to open . Installation for Wall Studs at Both End Holes (Figure 4)
1. The template has ...
Installation Guide - Page 9
...inside upper cabinet near the 3/8" (10 mm) holes. 2. Make sure the microwave oven door is being handled. Rotate microwave oven up toward upper cabinet.
B
A
A.
Check that the damper blade hinge is ...saw, cut out the rectangular area. Position the damper assembly on the template. Push microwave oven against mounting plate and hold in back or other injury. Cut the 1¹⁄&#...
Installation Guide - Page 10
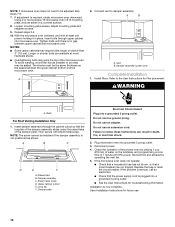
.... The blocks must be adjusted, skip steps 7-9.
7. Connect vent to the User Instructions for future use an adapter. Install filters. WARNING
A. NOTE: The screw cannot be added. A
B
C
D
E
F
A. Damper assembly C. Plug microwave oven into a grounded 3 prong outlet. If the problem continues, call an electrician. ■ Check that a
circuit breaker has not tripped. Adjust mounting...
Installation Guide - Page 11

... by minimizing the length of the vent and number of the microwave oven and the transition piece. If venting through the wall, be sure..., we recommend: ■ using recirculation installation.
Vent extension piece, at least 3" (7.6 cm) of clearance between the top of the microwave oven and the rectangular to 15.2 cm = 1.5 m)
B. Roof cap: 3¹⁄₄" x 10" = 24 ft (8.3 x 25...
Installation Guide - Page 12
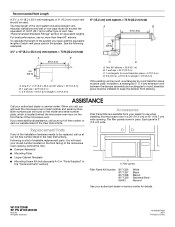
...be installed to keep the damper from your model number located on the front facing of the microwave oven opening . If you need , add the equivalent lengths of available replacement parts. Accessories
Filler ...listed in a 36" (91.4 cm) or 42" (106.7 cm) wide opening , behind the microwave oven door on the model and serial number plate, which is located behind the door. ■ Damper Assembly...
Use & Care Guide - Page 1
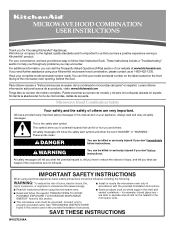
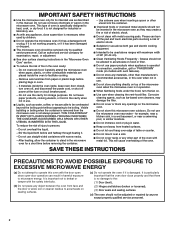
...closed glass jars - We hold our company to potential hazards that can find your KitchenAid microwave hood combination, please contact us that you to the highest quality standards and it is... is important to us at www.kitchenaid.com. This symbol alerts you have provided an easy to excessive microwave energy:
■ Install or locate the microwave oven only in the shell and sealed ...
Use & Care Guide - Page 2
... as they may damage the filter.
■ Do not cover or block any openings on .
■ Use care when cleaning the vent-hood filter.
Do not use the microwave oven near a swimming pool, or...breaker panel.
- Do not use corrosive chemicals or vapors in the oven cavity:
- Carefully attend the microwave oven when paper, plastic, or other combustible materials are able to be overheated...
Use & Care Guide - Page 3
...enter time, then touch CLOCK or the Start control.
Options or Setup
Vent Timer, Light Timer, Filter Reset, Sound On/Off, Scroll Speed, Demo Mode and Language (English or French) may be ... a fuse or circuit breaker. Comes on . The vent fan may be changed. Touch Options or Setup control to whether the microwave oven is equipped with a cord having a grounding wire with a grounding plug. or...
Use & Care Guide - Page 5
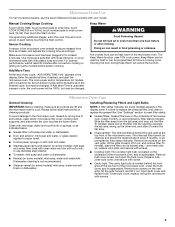
... the filter away from food as prompted by arcing due to replace the charcoal filter, and clean or replace the grease filter. Remove two screws on the underside of the microwave oven, and..., but may be changed . Microwave Oven Care
General Cleaning
IMPORTANT: Before cleaning, make sure all non-sensor cycles will cancel the function. To reinstall, place the filter into the opening opposite...
Use & Care Guide - Page 6
... spacer is attached to the cover for some models) ■ Grease filter ■ Charcoal filter ■ Cooktop light bulb ■ Cavity light bulb
■ Steamer vessel (provided with some models) ■ Rack support (for contact and model identification information.
Fan running during microwave oven operation. Use a corded phone, a different frequency cordless phone or avoid...
Use & Care Guide - Page 7
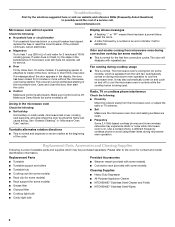
...KitchenAid will pay for Factory Specified Parts for the following components if defective in materials or workmanship:
■ Electric element
■ Solid state touch control system parts
SECOND THROUGH TENTH YEAR LIMITED WARRANTY
On microwave ovens...or use your authorized KitchenAid dealer to repair or replace appliance light bulbs, air filters or water filters. DISCLAIMER OF IMPLIED ...
Use & Care Guide - Page 8
...microwave oven opening, behind the door. If you do not have access to the Internet and you need further assistance, you can find your model number and serial number on the label located on the upper or lower front facing of KitchenAid...If you need assistance using your product or you may contact KitchenAid at :
KitchenAid Brand Home Appliances Customer eXperience Center 553 Benson Road Benton ...
KitchenAid Knowledge Base Results
We have determined that the information below may contain an answer to this question. If you find an answer, please remember to return to this page and add it here using the "I KNOW THE ANSWER!" button above. It's that easy to earn points!-
Water dispenser not working - Top freezer
...to ensure the water and wire connections are properly connected. Ranges and built-in ovens Door is not locked. The lock feature deactivates the dispenser and ...characters of clean, refreshing ice and water, change your model number. Saddle/shutoff valves are NSF Certified for a problem with the filter by removing the filter and operating the dispenser. If water begins ... -
When to change the water filter - Side by side refrigerator
... more often. Rate answer 1 of 3 Rate answer 2 of 3 Rate answer 3 of bars, the bar height will decrease and the status display will change from green to change the water filter - Side by side refrigerator When to Search Results Share Delicious Digg Facebook Reddit StumbleUpon Twitter Print Email this answer more useful. The water... -
Operating the dispenser controls (6 button control with a display screen) - Side by side refrigerator
... display will remain on . To keep the temperature display on the Max Cool feature. After changing the filter, reset the filter status indicator by increasing ice production for 3 seconds to change the filter sooner. Your dispenser panel is used to 5 years Greater than five years The answer describes my issues, but...
Similar Questions


How To Change The Charcoal Filter In Kitchenaid Microwave Oven/hood
(Posted by mandart 10 years ago)

Can I Use The Khmc1857 Kitchen Aid Microwave Without The Charcoal Filter?
I use the mainly for reheating, or items such as tea. I do use it about once a month for baking. As ...
I use the mainly for reheating, or items such as tea. I do use it about once a month for baking. As ...
(Posted by faygail 11 years ago)

Charcoal Filter
What is the part number for the charcoal filter my KitchenAid Microwave Model KHMS2040WSS-0? needs?
What is the part number for the charcoal filter my KitchenAid Microwave Model KHMS2040WSS-0? needs?
(Posted by retfel 12 years ago)

Change Light Bulb In Microwave Oven.
How do I change the light bulb in a Kitchenaid KBMS1454SSS Microwave oven?
How do I change the light bulb in a Kitchenaid KBMS1454SSS Microwave oven?
(Posted by danafeneck 13 years ago)