User Manual
Page 3
Refer to this owner's manual. Using the Hoveround® product safely depends upon your diligence in following the warnings, cautions, and instructions in death or serious injury. Neither HOVEROUND® CORPORATION nor its affiliates shall be liable to the purchaser of this product or... in this product. All rights reserved. Other product names used in this manual and apply to exercise good judgment and/or common sense. Hoveround® disclaims any and all rights in property damage. HOVEROUND® and Teknique™ are registered trademarks of the signal words. Indicates...
Refer to this owner's manual. Using the Hoveround® product safely depends upon your diligence in following the warnings, cautions, and instructions in death or serious injury. Neither HOVEROUND® CORPORATION nor its affiliates shall be liable to the purchaser of this product or... in this product. All rights reserved. Other product names used in this manual and apply to exercise good judgment and/or common sense. Hoveround® disclaims any and all rights in property damage. HOVEROUND® and Teknique™ are registered trademarks of the signal words. Indicates...
User Manual
Page 5
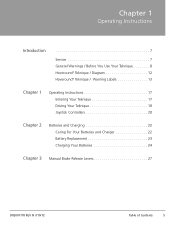
Chapter 1 Operating Instructions Introduction 7 Service 7 General Warnings / Before You Use Your Teknique 8 Hoveround® Teknique / Diagram 12 Hoveround® Teknique / Warning Labels 13 Chapter 1 Operating Instructions 17 Entering Your Teknique 17 Driving Your Teknique 18 Joystick Controllers 20 Chapter 2 Batteries and Charging 22 Caring For Your Batteries and Charger 22 Battery Replacement 23 Charging Your Batteries 24 Chapter 3 Manual Brake Release Levers 27 D82007778 REV N 7/10/12 Table of Contents 5
Chapter 1 Operating Instructions Introduction 7 Service 7 General Warnings / Before You Use Your Teknique 8 Hoveround® Teknique / Diagram 12 Hoveround® Teknique / Warning Labels 13 Chapter 1 Operating Instructions 17 Entering Your Teknique 17 Driving Your Teknique 18 Joystick Controllers 20 Chapter 2 Batteries and Charging 22 Caring For Your Batteries and Charger 22 Battery Replacement 23 Charging Your Batteries 24 Chapter 3 Manual Brake Release Levers 27 D82007778 REV N 7/10/12 Table of Contents 5
User Manual
Page 8
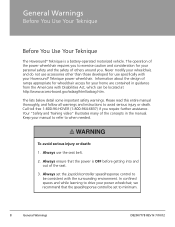
...the manual. Call toll free 1-800-96-HOVER (1-800-964-6837) if you to exercise caution and consideration for use the seat belt. 2. Keep your Hoveround® Teknique power wheelchair. In confined spaces and while learning to minimum. 8 General Warnings D82007778 REV N 7/10/12 The ... follow all warnings and instructions to when needed. To avoid serious injury or death: 1. General Warnings Before You Use Your Teknique Before You Use Your Teknique The Hoveround® Teknique is OFF before getting into and out of others around you. Never modify your wheelchair, and do not...
...the manual. Call toll free 1-800-96-HOVER (1-800-964-6837) if you to exercise caution and consideration for use the seat belt. 2. Keep your Hoveround® Teknique power wheelchair. In confined spaces and while learning to minimum. 8 General Warnings D82007778 REV N 7/10/12 The ... follow all warnings and instructions to when needed. To avoid serious injury or death: 1. General Warnings Before You Use Your Teknique Before You Use Your Teknique The Hoveround® Teknique is OFF before getting into and out of others around you. Never modify your wheelchair, and do not...
User Manual
Page 9
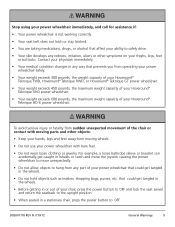
... capacity of your Hoveround® Teknique FWD, Hoveround® Teknique RWD, or Hoveround® Teknique GT power wheelchair. • Your weight exceeds 450 pounds, the maximum weight capacity of your Hoveround® Teknique XHD power wheelchair.... • Your weight exceeds 600 pounds, the maximum weight capacity of the chair or contact with moving wheels. • Do not use...
... capacity of your Hoveround® Teknique FWD, Hoveround® Teknique RWD, or Hoveround® Teknique GT power wheelchair. • Your weight exceeds 450 pounds, the maximum weight capacity of your Hoveround® Teknique XHD power wheelchair.... • Your weight exceeds 600 pounds, the maximum weight capacity of the chair or contact with moving wheels. • Do not use...

User Manual
Page 10
... the power wheelchair, drive in proper environments: • Do not drive across or sideways on a slope in reverse. • Avoid ramps and slopes that are using the chair's restraint. 10 General Warnings D82007778 REV N 7/10/12 For example, a 12-inch ruler with obstacles and other people, loss of surface to the...
... the power wheelchair, drive in proper environments: • Do not drive across or sideways on a slope in reverse. • Avoid ramps and slopes that are using the chair's restraint. 10 General Warnings D82007778 REV N 7/10/12 For example, a 12-inch ruler with obstacles and other people, loss of surface to the...
User Manual
Page 18
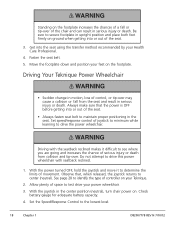
Move the footplate down and position your feet on your Teknique. 2. Allow plenty of a fall from collision and tip-over of control, or tip-over may cause a collision or fall or tip-over . Fasten the seat ... injury or death from the seat and result in serious injury or death. Driving with seatback reclined. 1. Get into the seat using the transfer method recommended by your power wheelchair. 3. Driving Your Teknique Power Wheelchair • Sudden change in motion, loss of the chair and can result in serious injury or death.
Move the footplate down and position your feet on your Teknique. 2. Allow plenty of a fall from collision and tip-over of control, or tip-over may cause a collision or fall or tip-over . Fasten the seat ... injury or death from the seat and result in serious injury or death. Driving with seatback reclined. 1. Get into the seat using the transfer method recommended by your power wheelchair. 3. Driving Your Teknique Power Wheelchair • Sudden change in motion, loss of the chair and can result in serious injury or death.
User Manual
Page 20
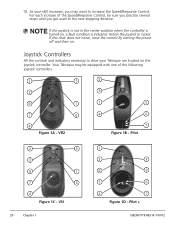
... does not move, reset the control by turning the power off and then on , a fault condition is indicated. Your Teknique may be sure you practice several stops until you may want to increase the Speed/Response Control. If the joystick is not... in the center position when the controller is turned on . Joystick Controllers All the controls and indicators necessary to drive your skill increases, you get used to center. For each increase of the Speed/Response Control, be equipped with one of the following joystick controllers. 2 5 2 3 3 9 1 1 5 7 6 4 6 4 Figure 1A - VSI 20 ...
... does not move, reset the control by turning the power off and then on , a fault condition is indicated. Your Teknique may be sure you practice several stops until you may want to increase the Speed/Response Control. If the joystick is not... in the center position when the controller is turned on . Joystick Controllers All the controls and indicators necessary to drive your skill increases, you get used to center. For each increase of the Speed/Response Control, be equipped with one of the following joystick controllers. 2 5 2 3 3 9 1 1 5 7 6 4 6 4 Figure 1A - VSI 20 ...
User Manual
Page 22
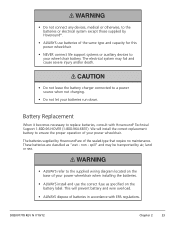
...Your Batteries • Completely read and follow all battery connections and screws are heavy. The battery contains corrosive chemicals and gases. Use proper lifting and handling practices to prevent dropping, pinching or lifting-related injuries. • ALWAYS make sure the protective terminal ... and toolboxes to touch the battery terminals as gloves and safety glasses when handling batteries. • NEVER attempt to the product. Use extreme care when handling batteries. ALWAYS wash your power wheelchair in well-ventilated areas only. • When handling and/or working on...
...Your Batteries • Completely read and follow all battery connections and screws are heavy. The battery contains corrosive chemicals and gases. Use proper lifting and handling practices to prevent dropping, pinching or lifting-related injuries. • ALWAYS make sure the protective terminal ... and toolboxes to touch the battery terminals as gloves and safety glasses when handling batteries. • NEVER attempt to the product. Use extreme care when handling batteries. ALWAYS wash your power wheelchair in well-ventilated areas only. • When handling and/or working on...
User Manual
Page 23
...no maintenance. D82007778 REV N 7/10/12 Chapter 2 23 The batteries supplied by Hoveround®. • ALWAYS use batteries of your power wheelchair when installing the batteries. • ALWAYS install and use the correct fuse as "wet - This will install the correct replacement battery to ...ensure the proper operation of batteries in accordance with Hoveround® Technical Support 1-800-96-HOVER (1-800-964-6837). non...
...no maintenance. D82007778 REV N 7/10/12 Chapter 2 23 The batteries supplied by Hoveround®. • ALWAYS use batteries of your power wheelchair when installing the batteries. • ALWAYS install and use the correct fuse as "wet - This will install the correct replacement battery to ...ensure the proper operation of batteries in accordance with Hoveround® Technical Support 1-800-96-HOVER (1-800-964-6837). non...

User Manual
Page 24
... is emitted during the charging process. • DO NOT smoke around your power wheelchair in close proximity to the cable or connectors. • DO NOT use extension cords to power the charger. • DO NOT connect the charging cables directly to the battery. 24 Chapter 2 D82007778 REV N 7/10/12 We recommend... be damaged by: • Traveling over the cable or connectors. • Yanking the cable out of several different chargers. Explosive gas is equipped with your Hoveround® power wheelchair. • DO NOT use the charger if the cables or connectors are damaged.
... is emitted during the charging process. • DO NOT smoke around your power wheelchair in close proximity to the cable or connectors. • DO NOT use extension cords to power the charger. • DO NOT connect the charging cables directly to the battery. 24 Chapter 2 D82007778 REV N 7/10/12 We recommend... be damaged by: • Traveling over the cable or connectors. • Yanking the cable out of several different chargers. Explosive gas is equipped with your Hoveround® power wheelchair. • DO NOT use the charger if the cables or connectors are damaged.

User Manual
Page 25
... hot. If it is fully seated in the charger port. Figure 2A - If your charger is equipped with the joystick controller in place. Refer to use the charger as a DC power source for any electrical or other equipment. • DO NOT attempt to charge AGM sealed lead acid batteries. Do not..., ensure that the charger is in the OFF position, along with an on the port and push the plug in the OFF position. 3. • ONLY USE to charge a frozen battery. 1. Connect the charger output cord into the charger port located on the front of battery. • DO NOT attempt to...
... hot. If it is fully seated in the charger port. Figure 2A - If your charger is equipped with the joystick controller in place. Refer to use the charger as a DC power source for any electrical or other equipment. • DO NOT attempt to charge AGM sealed lead acid batteries. Do not..., ensure that the charger is in the OFF position, along with an on the port and push the plug in the OFF position. 3. • ONLY USE to charge a frozen battery. 1. Connect the charger output cord into the charger port located on the front of battery. • DO NOT attempt to...

User Manual
Page 26
... AND the cord is red, the batteries are charged. 26 Chapter 2 D82007778 REV N 7/10/12 If only one green light is on , please check to use the chair: A. 4. Plug the other end of the charger, indicating power is working . 2.
... AND the cord is red, the batteries are charged. 26 Chapter 2 D82007778 REV N 7/10/12 If only one green light is on , please check to use the chair: A. 4. Plug the other end of the charger, indicating power is working . 2.

User Manual
Page 28
...in serious injury or death. Do not attempt to see where you are at signs of skin irritation or discomfort. • Do not use power wheelchair until evaluated and instructed to do so by a qualified clinician. • Improper seating position can result in contact with power wheelchair...injury or death from the seat and can lead to prolonged sitting or improper positioning. 28 Chapter 4 D82007778 REV N 7/10/12 Discontinue use and contact physician at increased chance of injury due to skin lesions or ulcers. Chapter 4 Seating and Pressure Relief • Unintentional or ...
...in serious injury or death. Do not attempt to see where you are at signs of skin irritation or discomfort. • Do not use power wheelchair until evaluated and instructed to do so by a qualified clinician. • Improper seating position can result in contact with power wheelchair...injury or death from the seat and can lead to prolonged sitting or improper positioning. 28 Chapter 4 D82007778 REV N 7/10/12 Discontinue use and contact physician at increased chance of injury due to skin lesions or ulcers. Chapter 4 Seating and Pressure Relief • Unintentional or ...

User Manual
Page 30
... 4D below. Refer to suit your driving and comfort requirements. Turn the screw clockwise to lower the arm and counter clockwise to make the adjustment. Use the supplied 1/4 inch hex wrench to raise the arm. To adjust the arm angle on the seat arms, lift the arm and locate the adjustment...
... 4D below. Refer to suit your driving and comfort requirements. Turn the screw clockwise to lower the arm and counter clockwise to make the adjustment. Use the supplied 1/4 inch hex wrench to raise the arm. To adjust the arm angle on the seat arms, lift the arm and locate the adjustment...

User Manual
Page 32
... and nuts into the new location and tighten securely. To change the back angle position: 1. If the chair must be pushed from the back. Always use caution when pushing the chair from the back, push or pull on the left hinge and right hinge. 2. Make sure the holes in the desired...
... and nuts into the new location and tighten securely. To change the back angle position: 1. If the chair must be pushed from the back. Always use caution when pushing the chair from the back, push or pull on the left hinge and right hinge. 2. Make sure the holes in the desired...
User Manual
Page 38
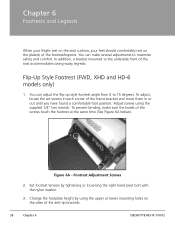
...thighs rest on the seat cushion, your feet should comfortably rest on the sides of the seat accommodates swing-away legrests. Flip-Up Style Footrest (FWD, XHD and HD-6 models only) 1. To prevent binding, make several adjustments to maximize safety and comfort. Footrest Adjustment Screws 2. Change the ... by tightening or loosening the right hand pivot bolt with the nylon washer. 3. In addition, a bracket mounted to 15 degrees. Adjust screws using the upper or lower mounting holes on the plate(s) of the screws touch the footrest at the same time (See Figure 6A below). You ...
...thighs rest on the seat cushion, your feet should comfortably rest on the sides of the seat accommodates swing-away legrests. Flip-Up Style Footrest (FWD, XHD and HD-6 models only) 1. To prevent binding, make several adjustments to maximize safety and comfort. Footrest Adjustment Screws 2. Change the ... by tightening or loosening the right hand pivot bolt with the nylon washer. 3. In addition, a bracket mounted to 15 degrees. Adjust screws using the upper or lower mounting holes on the plate(s) of the screws touch the footrest at the same time (See Figure 6A below). You ...

User Manual
Page 40
Optional tie-down kit is secured to the vehicle and you are using the chair's restraint. 40 Chapter 7 D82007778 REV N 7/10/12 Optional Tie-Down Brackets When transporting the Teknique in a motor vehicle even if the chair is intended for additional information. To reduce chance of serious injury or death due to secure... seat, do not sit in your power wheelchair while riding in a motor vehicle, your wheelchair must be adequately secured within the motor vehicle. Please contact Hoveround® for the wheelchair security, it is available.
Optional tie-down kit is secured to the vehicle and you are using the chair's restraint. 40 Chapter 7 D82007778 REV N 7/10/12 Optional Tie-Down Brackets When transporting the Teknique in a motor vehicle even if the chair is intended for additional information. To reduce chance of serious injury or death due to secure... seat, do not sit in your power wheelchair while riding in a motor vehicle, your wheelchair must be adequately secured within the motor vehicle. Please contact Hoveround® for the wheelchair security, it is available.
User Manual
Page 43
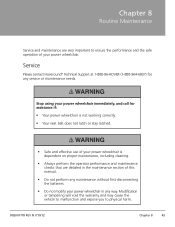
... without first disconnecting the batteries. • Do not modify your power wheelchair. D82007778 REV N 7/10/12 Chapter 8 43 Service Please contact Hoveround® Technical Support at 1-800-96-HOVER (1-800-964-6837) for assistance if: • Your power wheelchair is not working correctly. &#...8226; Your seat belt does not latch or stay latched. • Safe and effective use of your power wheelchair is dependent on proper maintenance, including cleaning. • Always perform the operator performance and maintenance checks that are ...
... without first disconnecting the batteries. • Do not modify your power wheelchair. D82007778 REV N 7/10/12 Chapter 8 43 Service Please contact Hoveround® Technical Support at 1-800-96-HOVER (1-800-964-6837) for assistance if: • Your power wheelchair is not working correctly. &#...8226; Your seat belt does not latch or stay latched. • Safe and effective use of your power wheelchair is dependent on proper maintenance, including cleaning. • Always perform the operator performance and maintenance checks that are ...

User Manual
Page 45
...body can be wiped with a damp cloth or towel, using a mild detergent. D82007778 REV N 7/10/12 Chapter 8 45 Vacuum or brush off loose material with a dry bristle brush and wipe with liquid. Cleaning your Teknique The Teknique is off before attempting to operate both inside and outside ...the home. Never spray the chair with a damp cloth or towel. Doing so may damage it. Brush-off dirt, then wipe with a cotton swab, using a mild detergent. Top Cover ...
...body can be wiped with a damp cloth or towel, using a mild detergent. D82007778 REV N 7/10/12 Chapter 8 45 Vacuum or brush off loose material with a dry bristle brush and wipe with liquid. Cleaning your Teknique The Teknique is off before attempting to operate both inside and outside ...the home. Never spray the chair with a damp cloth or towel. Doing so may damage it. Brush-off dirt, then wipe with a cotton swab, using a mild detergent. Top Cover ...

User Manual
Page 46
Use the 1/4 inch hex wrench supplied with your chair (See Figure 9A below ). Refasten controller cable (if so equipped). 46 Chapter 9 D82007778 REV N 7/10/12 Cap ... arm and loosen the sockethead cap screw closest to the controller. Remove bracket from seat or frame (if so equipped). Chapter 9 Disassembling and Reassembling Your Teknique Controller Removal/Replacement Removal 1.
Use the 1/4 inch hex wrench supplied with your chair (See Figure 9A below ). Refasten controller cable (if so equipped). 46 Chapter 9 D82007778 REV N 7/10/12 Cap ... arm and loosen the sockethead cap screw closest to the controller. Remove bracket from seat or frame (if so equipped). Chapter 9 Disassembling and Reassembling Your Teknique Controller Removal/Replacement Removal 1.


