
User manual
Page 1
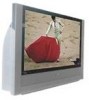
... Control™-analyzes and adjusts incoming signal • Two-tuner, Double-window PIP (Picture-in-Picture) • Dolby® Virtual Surround, 40-watt RMS • 3D Y/C Comb Filter • HD Component and DVI Input • Center Channel Audio Input • Side AV Convenience Jacks • Matching stand and swivel available Refer to the Quick Use and Setup Guide (supplied with your TV) for information on basic connections, remote control button descriptions, on-screen menu...
... Control™-analyzes and adjusts incoming signal • Two-tuner, Double-window PIP (Picture-in-Picture) • Dolby® Virtual Surround, 40-watt RMS • 3D Y/C Comb Filter • HD Component and DVI Input • Center Channel Audio Input • Side AV Convenience Jacks • Matching stand and swivel available Refer to the Quick Use and Setup Guide (supplied with your TV) for information on basic connections, remote control button descriptions, on-screen menu...
User manual
Page 3
... the cable ground shall be serviced by qualified service personnel when: A. IMPORTANT SAFETY INSTRUCTIONS Read before operating equipment 1. Install in accordance with a dry cloth. 7. Refer all warnings. 4. The appliance has been exposed to operate normally or exhibits a marked change in any way, such as power-supply cord or plug is provided to call the CATV system installer's attention to the receiver, be located away...
... the cable ground shall be serviced by qualified service personnel when: A. IMPORTANT SAFETY INSTRUCTIONS Read before operating equipment 1. Install in accordance with a dry cloth. 7. Refer all warnings. 4. The appliance has been exposed to operate normally or exhibits a marked change in any way, such as power-supply cord or plug is provided to call the CATV system installer's attention to the receiver, be located away...
User manual
Page 4
...9 Connecting a VCR 10 Connecting a VCR and Cable Box 11 Connecting an S-Video Device 12 Connecting a Standard DVD Player 13 Connecting a Progressive-scan DVD Player 14 Connecting an HD Satellite Receiver to YPbPr 15 Connecting an HD Satellite Receiver to DVI 16 Connecting Surround Sound Equipment 17 Connecting to the Side Inputs:Video Game System . . . . . .18 Labeling the Audio/Video Input Sources 19 USING THE REMOTE CONTROL Remote Control Buttons 20-21 Programming the Remote Control 22-23 Setup Codes for Accessory Devices 24-25 Using the TV Remote's VCR-specific Buttons 26 Using...
...9 Connecting a VCR 10 Connecting a VCR and Cable Box 11 Connecting an S-Video Device 12 Connecting a Standard DVD Player 13 Connecting a Progressive-scan DVD Player 14 Connecting an HD Satellite Receiver to YPbPr 15 Connecting an HD Satellite Receiver to DVI 16 Connecting Surround Sound Equipment 17 Connecting to the Side Inputs:Video Game System . . . . . .18 Labeling the Audio/Video Input Sources 19 USING THE REMOTE CONTROL Remote Control Buttons 20-21 Programming the Remote Control 22-23 Setup Codes for Accessory Devices 24-25 Using the TV Remote's VCR-specific Buttons 26 Using...

User manual
Page 5
... feature uses an ambient light sensor to adjust the picture settings according to easily switch between only the channels that occur at an even level. In addition, you set up your old television, batteries, and packing materials. Audio/Video (A/V) Jack Panel The A/V jack panel allows direct connections with supplied batteries). Audio Volume Leveler (AVL) Control AVL keeps the TV sound at commercial breaks or during program changes are of the set maintenance, Factory Service Center locations, and...
... feature uses an ambient light sensor to adjust the picture settings according to easily switch between only the channels that occur at an even level. In addition, you set up your old television, batteries, and packing materials. Audio/Video (A/V) Jack Panel The A/V jack panel allows direct connections with supplied batteries). Audio Volume Leveler (AVL) Control AVL keeps the TV sound at commercial breaks or during program changes are of the set maintenance, Factory Service Center locations, and...

User manual
Page 7
... use the TV speakers as DVD players. Separating the video into three signals, these inputs provide excellent Pr Pb Y quality. Connect A/V cables Video (called "CVBS" or "composite") Input Jack Cable used :Audio with RCA-type phono plugs Provide sound for computer connections. Set the EXT/INT switch to EXT to the antenna input on the television. DVI-D Input Connector Cable used : RF coaxial cable (75Ω) Allows you will not need this product is separated from the black and white...
... use the TV speakers as DVD players. Separating the video into three signals, these inputs provide excellent Pr Pb Y quality. Connect A/V cables Video (called "CVBS" or "composite") Input Jack Cable used :Audio with RCA-type phono plugs Provide sound for computer connections. Set the EXT/INT switch to EXT to the antenna input on the television. DVI-D Input Connector Cable used : RF coaxial cable (75Ω) Allows you will not need this product is separated from the black and white...

User manual
Page 8
... sound, connections must be made to the AV3 audio inputs. 10 CENTER CHANNEL AMP INPUT _ INT EXT + Jack Panel Located on the Back Left Side of the TV connections must be made to the AV1 audio inputs. 2 MON OUT Output Jacks Provide video and audio output signals from all TV when those sources are being viewed on the main screen. Intended use , set will automatically show the S-Video, since it is at a time. Inputs available: S-Video...
... sound, connections must be made to the AV3 audio inputs. 10 CENTER CHANNEL AMP INPUT _ INT EXT + Jack Panel Located on the Back Left Side of the TV connections must be made to the AV1 audio inputs. 2 MON OUT Output Jacks Provide video and audio output signals from all TV when those sources are being viewed on the main screen. Intended use , set will automatically show the S-Video, since it is at a time. Inputs available: S-Video...

User manual
Page 10
... Color Coding Used on Jacks and Plugs to the channel you must press the digit (number) buttons to tune directly to simplify connections: Yellow: Video (Composite Video) Red: Right Audio White: Left Audio. 45 6 5 ACITVE SOUND CONTROL PICTURE 1 2 ZOOM 10 buttons on the TV remote control (in the Quick Use and Setup Guide that came with the TV. Otherwise, you must use Autoprogram, you can access through "Install" in the TV's memory, you desire. To store channels in the TV's on-screen menu. The set...
... Color Coding Used on Jacks and Plugs to the channel you must press the digit (number) buttons to tune directly to simplify connections: Yellow: Video (Composite Video) Red: Right Audio White: Left Audio. 45 6 5 ACITVE SOUND CONTROL PICTURE 1 2 ZOOM 10 buttons on the TV remote control (in the Quick Use and Setup Guide that came with the TV. Otherwise, you must use Autoprogram, you can access through "Install" in the TV's memory, you desire. To store channels in the TV's on-screen menu. The set...

User manual
Page 11
... incoming cable TV signal to a two-way signal splitter. HELPFUL HINT Color Coding Used on Jacks and Plugs to simplify connections: Yellow: Video (Composite Video) Red: Right Audio White: Left Audio. See the Autoprogram section in TV mode). The RF jack output jack on a cable box (commonly labeled "OUT TO TV," "OUTPUT," or "OUT") will not pass stereo sound to the TV. 2 Using a coaxial cable, connect to one used in the TV's on-screen menu. buttons on the TV remote control (in the Quick Use and Setup Guide...
... incoming cable TV signal to a two-way signal splitter. HELPFUL HINT Color Coding Used on Jacks and Plugs to simplify connections: Yellow: Video (Composite Video) Red: Right Audio White: Left Audio. See the Autoprogram section in TV mode). The RF jack output jack on a cable box (commonly labeled "OUT TO TV," "OUTPUT," or "OUT") will not pass stereo sound to the TV. 2 Using a coaxial cable, connect to one used in the TV's on-screen menu. buttons on the TV remote control (in the Quick Use and Setup Guide...

User manual
Page 13
... whether your DVD player is now switched to confirm your DVD or digital accessory for more information. • If you experience difficulties receiving sound with a DVD disc, check the sound settings through the DVD disc's menu. Back of TV 2 AV4 AV3 SUB OUT AV2 MON AV1 SERVICE 12C OUT G S-VIDEO R L V AV6 DVI 1 Pr Pb Y R L V R L V G S-VIDEO AV5 R L R L RGB+HV R L STANDARD/ HD INPUTS STANDARD/ HD INPUTS R L Pr Pb Y Pr Pb Y TUNER DIGITAL AUDIO OUT PCM...
... whether your DVD player is now switched to confirm your DVD or digital accessory for more information. • If you experience difficulties receiving sound with a DVD disc, check the sound settings through the DVD disc's menu. Back of TV 2 AV4 AV3 SUB OUT AV2 MON AV1 SERVICE 12C OUT G S-VIDEO R L V AV6 DVI 1 Pr Pb Y R L V R L V G S-VIDEO AV5 R L R L RGB+HV R L STANDARD/ HD INPUTS STANDARD/ HD INPUTS R L Pr Pb Y Pr Pb Y TUNER DIGITAL AUDIO OUT PCM...

User manual
Page 14
... blue and red color component signal connectors, respectively, and Y indicates the luminance signal. left audio. • The names for details on -screen menu. NOTE: Some DVD players have dedicated progressive-scan output jacks that are often color coded to confirm your choice. The set to the user manual for your DVD or digital accessory for more information on placing the player in progressive-scan mode. 4 Press the Source Select button on the remote control to access...
... blue and red color component signal connectors, respectively, and Y indicates the luminance signal. left audio. • The names for details on -screen menu. NOTE: Some DVD players have dedicated progressive-scan output jacks that are often color coded to confirm your choice. The set to the user manual for your DVD or digital accessory for more information on placing the player in progressive-scan mode. 4 Press the Source Select button on the remote control to access...

User manual
Page 16
... number of high-definition receivers when they are often color coded to match the colors on TV jacks: red for right audio, and white for the HD satellite receiver to complete the connections to the HD satellite receiver and to use the HD satellite receiver's on-screen setup menus. 4 After completing HD satellite receiver connections and setup through the onscreen setup menus, press the Source Select button on the TV remote to access the Source list...
... number of high-definition receivers when they are often color coded to match the colors on TV jacks: red for right audio, and white for the HD satellite receiver to complete the connections to the HD satellite receiver and to use the HD satellite receiver's on-screen setup menus. 4 After completing HD satellite receiver connections and setup through the onscreen setup menus, press the Source Select button on the TV remote to access the Source list...

User manual
Page 21
... and SAP. Additionally, use with specific factory settings of a Sleeptimer setting. Menu Press to display the TV's on the adjustments or settings you tune to select a screen or reposition a PIP screen. CH (Channel Selection) Press to browse through the Picture menu. (See page 34 in the AutoPicture™ menu. or three-digit channel, enter all numbers. EXIT Press this button to show any excluded parts of source for the Side input. (See page...
... and SAP. Additionally, use with specific factory settings of a Sleeptimer setting. Menu Press to display the TV's on the adjustments or settings you tune to select a screen or reposition a PIP screen. CH (Channel Selection) Press to browse through the Picture menu. (See page 34 in the AutoPicture™ menu. or three-digit channel, enter all numbers. EXIT Press this button to show any excluded parts of source for the Side input. (See page...

User manual
Page 47
... a Closed Captioning option: TV Settings Demo Install Picture Sound Features Channels TV Settings Demo Install General Clock Source 1 Press the Menu button on the remote control to display the on screen. Closed captions Off On On during mute Closed captions Off On On during mute NOTES: • The captions do not always use correct spelling and grammar. • Not all caption services are usually noted in progress. Refer to your area's TV program listings for the TV channels and times of...
... a Closed Captioning option: TV Settings Demo Install Picture Sound Features Channels TV Settings Demo Install General Clock Source 1 Press the Menu button on the remote control to display the on screen. Closed captions Off On On during mute Closed captions Off On On during mute NOTES: • The captions do not always use correct spelling and grammar. • Not all caption services are usually noted in progress. Refer to your area's TV program listings for the TV channels and times of...

User manual
Page 56
... a television station's transmitter tower, you change the setting. 1 Press the Menu button on the remote control to display the on -screen menu from the station while watching other TV channels. If you need to use the feature, simply toggle it "On" in place until you may receive an interfering signal from the TV screen. TV Settings Demo Install Picture Sound Features Channels 2 4 3 1 5 Channels TV Channel list Channel lock Lock after TV ratings lock Channels TV Movie ratings lock Channel remove Antenna attenuator Off • On OR Channels TV Movie ratings lock Channel...
... a television station's transmitter tower, you change the setting. 1 Press the Menu button on the remote control to display the on -screen menu from the station while watching other TV channels. If you need to use the feature, simply toggle it "On" in place until you may receive an interfering signal from the TV screen. TV Settings Demo Install Picture Sound Features Channels 2 4 3 1 5 Channels TV Channel list Channel lock Lock after TV ratings lock Channels TV Movie ratings lock Channel remove Antenna attenuator Off • On OR Channels TV Movie ratings lock Channel...

User manual
Page 74
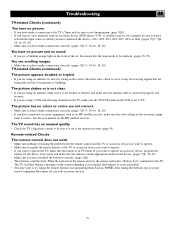
... hardware and software subsystems which operate in normal operation. Unplug the TV for blockage and clean or replace the air filters as all subsystems are not covered under your TV. 74 One consequence of the increasing complexity of televisions is displayed on or off . Troubleshooting Review This List of Symptoms and Checks Before Requesting Service You may have been set. (page 49) An on-screen message tells...
... hardware and software subsystems which operate in normal operation. Unplug the TV for blockage and clean or replace the air filters as all subsystems are not covered under your TV. 74 One consequence of the increasing complexity of televisions is displayed on or off . Troubleshooting Review This List of Symptoms and Checks Before Requesting Service You may have been set. (page 49) An on-screen message tells...
User manual
Page 75
... you point the remote directly at the TV or accessory device you want to operate. • If you want to operate the TV, make sure the color setting on the VCR is set to TV. Troubleshooting TV-related Checks (continued) You have no picture. • If you have made a connection to the TV's Tuner jack be sure to use with accessory devices. 75 See the user manual for the...
... you point the remote directly at the TV or accessory device you want to operate. • If you want to operate the TV, make sure the color setting on the VCR is set to TV. Troubleshooting TV-related Checks (continued) You have no picture. • If you have made a connection to the TV's Tuner jack be sure to use with accessory devices. 75 See the user manual for the...

User manual
Page 76
... Standby: direct-access menus and cursor control • Selection of three menu languages: English, French, and Spanish • On-screen status display on programs and functions (on /off), and Headphone (volume, balance) • Center channel input • Subwoofer out Operation • Easy, menu-driven installation and operation; Product Specifications Picture • Screen Size 44PL9523: 44" measured diagonally 55PL9523: 55" measured diagonally • Visible Screen Size 44PL9523: 44" measured diagonally 55PL9523: 55" measured diagonally • Aspect...
... Standby: direct-access menus and cursor control • Selection of three menu languages: English, French, and Spanish • On-screen status display on programs and functions (on /off), and Headphone (volume, balance) • Center channel input • Subwoofer out Operation • Easy, menu-driven installation and operation; Product Specifications Picture • Screen Size 44PL9523: 44" measured diagonally 55PL9523: 55" measured diagonally • Visible Screen Size 44PL9523: 44" measured diagonally 55PL9523: 55" measured diagonally • Aspect...
User manual
Page 77
...-scan DVD Player, 14 Standard DVD Player, 13 Surround Sound, 17 S-Video, 12 VCR, 10 VCR and Cable Box, 11 Video Game System, 19 D Daylight Savings, Setting, 67 Delta Volume, 45 Digital Processing Options, 30 Dolby** Virtual (See Sound Mode Options) Dual Screen/PIP Format Changing Channels or Input Sources, 59 DVI Input Jack, 8-9, 16 Dynamic Contrast Options, 31 Dynamic Noise Reduction Options, 32 F Factory Service Locations, 78-79 Features, List of, 5 Index Filters, Cleaning or Replacing, 70 H Headphone Volume, Adjusting...
...-scan DVD Player, 14 Standard DVD Player, 13 Surround Sound, 17 S-Video, 12 VCR, 10 VCR and Cable Box, 11 Video Game System, 19 D Daylight Savings, Setting, 67 Delta Volume, 45 Digital Processing Options, 30 Dolby** Virtual (See Sound Mode Options) Dual Screen/PIP Format Changing Channels or Input Sources, 59 DVI Input Jack, 8-9, 16 Dynamic Contrast Options, 31 Dynamic Noise Reduction Options, 32 F Factory Service Locations, 78-79 Features, List of, 5 Index Filters, Cleaning or Replacing, 70 H Headphone Volume, Adjusting...

Leaflet
Page 2
... operation 270W, Standby 44" Cineos Widescreen HDTV Monitor 44PL9523/17 Technical specifications Picture quality • Philips' single-panel LCOS technology • Digital Natural Motion™ • Active Control™ Plus+ • Screen Size: 44" • Visible Screen Size: 44" • Aspect Ratio: 16:9 • Resolution: 1280 x 720 • 720p HD performance and line doubling • Brightness: 450 Nits • Contrast Ratio: >400:1 • Screen protector Ease of use • Ergonomic universal remote control • Easy menu-driven installation and operation...
... operation 270W, Standby 44" Cineos Widescreen HDTV Monitor 44PL9523/17 Technical specifications Picture quality • Philips' single-panel LCOS technology • Digital Natural Motion™ • Active Control™ Plus+ • Screen Size: 44" • Visible Screen Size: 44" • Aspect Ratio: 16:9 • Resolution: 1280 x 720 • 720p HD performance and line doubling • Brightness: 450 Nits • Contrast Ratio: >400:1 • Screen protector Ease of use • Ergonomic universal remote control • Easy menu-driven installation and operation...

Quick start guide
Page 6
REMOTE CONTROL BUTTONS Source Select Press to display a list of a Sleeptimer setting. A green indicator lights up . Press this button on the right side of the remote control. NOTE: The Freeze mode must be set using the remote control to operate the television. Press again to directly access a specific TV channel. Surf (AutoSurf™) If you set will cycle through the on-screen menu. (See page 30 in certain on-screen menu controls. If you choose the nine-channel Surf, pressing...
REMOTE CONTROL BUTTONS Source Select Press to display a list of a Sleeptimer setting. A green indicator lights up . Press this button on the right side of the remote control. NOTE: The Freeze mode must be set using the remote control to operate the television. Press again to directly access a specific TV channel. Surf (AutoSurf™) If you set will cycle through the on-screen menu. (See page 30 in certain on-screen menu controls. If you choose the nine-channel Surf, pressing...


