
IPv6 Supplement
Page 3
... device performs auto-address DHCPv6 configuration every time it is automatically populated. Click on some Xerox WorkCentre/Phaser mono printers and Xerox WorkCentre/Phaser mono MFP products via CentreWare Internet Services (CWIS). Select one of automatic and manual configuration. 8. At your Xerox device (under the Reports menu) and check the version of the machine in the Address...
... device performs auto-address DHCPv6 configuration every time it is automatically populated. Click on some Xerox WorkCentre/Phaser mono printers and Xerox WorkCentre/Phaser mono MFP products via CentreWare Internet Services (CWIS). Select one of automatic and manual configuration. 8. At your Xerox device (under the Reports menu) and check the version of the machine in the Address...

IPv6 Supplement
Page 4
...can be enclosed in the [Router Prefix] menu. Click [Add] to enable [Dynamic DNSv6 Registration]. DNSv6 12. Check the box to populate the prefix for manual entry address. 11. Test Access 1. In the following formats depending on the [Apply] button to the Router prefix. Click the [Enabled] checkbox for [...xxx.xxx.xxx.xxx:8080 IPv6: http://[xxxx:xxxx:xxxx:xxxx:xxxx:xxxx:xxxx:xxxx]:8080 2. when this option is selected, then skip the Manual Address Options section below and proceed to the Internet address as directed by the Internet address of the machine. Note: If [Use DHCP as ...
...can be enclosed in the [Router Prefix] menu. Click [Add] to enable [Dynamic DNSv6 Registration]. DNSv6 12. Check the box to populate the prefix for manual entry address. 11. Test Access 1. In the following formats depending on the [Apply] button to the Router prefix. Click the [Enabled] checkbox for [...xxx.xxx.xxx.xxx:8080 IPv6: http://[xxxx:xxxx:xxxx:xxxx:xxxx:xxxx:xxxx:xxxx]:8080 2. when this option is selected, then skip the Manual Address Options section below and proceed to the Internet address as directed by the Internet address of the machine. Note: If [Use DHCP as ...

User Guide
Page 2
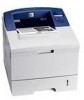
All rights reserved. • Phaser 3600, Phaser 3600/B, Phaser 3600/N and Phaser 3600/DN are trademarks of Xerox Corporation. • Xerox and Xerox logo are trademarks of Xerox Corporation. • Centronics is a trademark of Centronics Data Computer Corporation. • IBM and IBM ...registered trademarks of Microsoft Corporation. • PostScript 3 is subject to use of this manual. © 2008 by Xerox Corporation. Xerox Corporation is not responsible for information purposes only. This manual is provided for any changes, direct or indirect, arising from or related to change ...
All rights reserved. • Phaser 3600, Phaser 3600/B, Phaser 3600/N and Phaser 3600/DN are trademarks of Xerox Corporation. • Xerox and Xerox logo are trademarks of Xerox Corporation. • Centronics is a trademark of Centronics Data Computer Corporation. • IBM and IBM ...registered trademarks of Microsoft Corporation. • PostScript 3 is subject to use of this manual. © 2008 by Xerox Corporation. Xerox Corporation is not responsible for information purposes only. This manual is provided for any changes, direct or indirect, arising from or related to change ...

User Guide
Page 5
...appropriate safety information. These include safety agency examination, approval, and compliance with the product. 2. Maintenance Information NOTE: Your Xerox machine is equipped with an energy saving device to hazardous areas is not in poor performance and create a hazardous situation....supplied with screws. described in the fuser area are fastened with the equipment. • Before cleaning this manual. 4. CAUTION: This symbol indicates a Laser is not described in the customer documentation CAUTION: The metallic surfaces in the user documentation supplied with established ...
...appropriate safety information. These include safety agency examination, approval, and compliance with the product. 2. Maintenance Information NOTE: Your Xerox machine is equipped with an energy saving device to hazardous areas is not in poor performance and create a hazardous situation....supplied with screws. described in the fuser area are fastened with the equipment. • Before cleaning this manual. 4. CAUTION: This symbol indicates a Laser is not described in the customer documentation CAUTION: The metallic surfaces in the user documentation supplied with established ...
User Guide
Page 15
... user's guides in other languages from the Manual folder on using your printer or cleaning jam and, therefore, be opened or removed) Back: 350 mm (enough space to allow opening of the control board cover) 1.4 To access a printer driver help screen, click Help from the Xerox website, www.xerox.com/office/support. Allow extra space...
... user's guides in other languages from the Manual folder on using your printer or cleaning jam and, therefore, be opened or removed) Back: 350 mm (enough space to allow opening of the control board cover) 1.4 To access a printer driver help screen, click Help from the Xerox website, www.xerox.com/office/support. Allow extra space...

User Guide
Page 19
...Refer to the Tray 2 Type to configure the unit. Values: Tray 1(MPT), Tray 2, Tray 3, Manual Feed, Auto Select Using this item, you can automatically determine the source. • Manual Feed: The printer uses Tray 1(MPT). • Tray 3: Available only when optional tray is set to Off, the Status... LED lights red and the printer doesn't work until you want to use. • Auto Select: The printer can set whether to stop printing...
...Refer to the Tray 2 Type to configure the unit. Values: Tray 1(MPT), Tray 2, Tray 3, Manual Feed, Auto Select Using this item, you can automatically determine the source. • Manual Feed: The printer uses Tray 1(MPT). • Tray 3: Available only when optional tray is set to Off, the Status... LED lights red and the printer doesn't work until you want to use. • Auto Select: The printer can set whether to stop printing...

User Guide
Page 23
...page. You can set of the desired language. Item TCP/IP EtherTalk NetWare Explanation Values: DHCP, BOOTP, Static This item allows you to manually set to Off, the job is flushed without an indication of the print material. If an error occurs, the job stops processing, the ...automatically. • BOOTP: The BOOTP server assigns the IP address to you automatically. • Static: You can select whether or not your printer. Network menu (Phaser 3600/N, Phaser 3600/DN only) This menu lets you to set . Item Lines Explanation Values: 5 ~ 128 (1 unit) This item allows you configure ...
...page. You can set of the desired language. Item TCP/IP EtherTalk NetWare Explanation Values: DHCP, BOOTP, Static This item allows you to manually set to Off, the job is flushed without an indication of the print material. If an error occurs, the job stops processing, the ...automatically. • BOOTP: The BOOTP server assigns the IP address to you automatically. • Static: You can select whether or not your printer. Network menu (Phaser 3600/N, Phaser 3600/DN only) This menu lets you to set . Item Lines Explanation Values: 5 ~ 128 (1 unit) This item allows you configure ...

User Guide
Page 27
4 Network setup (Phaser 3600/N, Phaser 3600/DN only) This chapter gives you step-by the printer: Item Network interface Requirements • 10/100 Base-TX Network operating system • Novell NetWare 4.x, 5.x, 6.x • Windows 2000/XP/Vista/... a network with other network users. Via network administration programs You can share the printer with an RJ-45 Ethernet cable, you to select your network printer and manually configure the printer's TCP/IP addresses. This chapter includes: • Introduction • Supported operating systems • Configuring TCP/IP •...
4 Network setup (Phaser 3600/N, Phaser 3600/DN only) This chapter gives you step-by the printer: Item Network interface Requirements • 10/100 Base-TX Network operating system • Novell NetWare 4.x, 5.x, 6.x • Windows 2000/XP/Vista/... a network with other network users. Via network administration programs You can share the printer with an RJ-45 Ethernet cable, you to select your network printer and manually configure the printer's TCP/IP addresses. This chapter includes: • Introduction • Supported operating systems • Configuring TCP/IP •...

User Guide
Page 28
...4 Press Start/Stop to return to the next byte. All others will be specified for the printer. There are several ways in which your network. • Static addressing: A TCP/IP address is assigned manually by the system administrator. • Dynamic addressing via BOOTP/DHCP (default): A TCP/IP address ...IPX frame types To use EtherTalk, take the following steps to IPX over IEEE 802.2 with IEEE 802.3 frames. Configuring TCP/IP Your printer can manually set the frame type format, if required. All others will be set up with IEEE 802.3 frames. Note Before configuring TCP/IP, ...
...4 Press Start/Stop to return to the next byte. All others will be specified for the printer. There are several ways in which your network. • Static addressing: A TCP/IP address is assigned manually by the system administrator. • Dynamic addressing via BOOTP/DHCP (default): A TCP/IP address ...IPX frame types To use EtherTalk, take the following steps to IPX over IEEE 802.2 with IEEE 802.3 frames. Configuring TCP/IP Your printer can manually set the frame type format, if required. All others will be set up with IEEE 802.3 frames. Note Before configuring TCP/IP, ...

User Guide
Page 37
... too much print material. The print material buckles if you load a stack that you push it . If not, they may tear while exiting the printer. Manually loading paper can manually load a sheet of tray. • Always load only the print media specified in the software application. See the Software Section. 4 Print a document...adjust them into tray1(MPT) first and be bent, which will be placed in the center of print material in tray1(MPT) if you select Manual Feed in a paper jam or skew. • Make sure to open the rear cover for loading in tray1(MPT), except you load paper ...
... too much print material. The print material buckles if you load a stack that you push it . If not, they may tear while exiting the printer. Manually loading paper can manually load a sheet of tray. • Always load only the print media specified in the software application. See the Software Section. 4 Print a document...adjust them into tray1(MPT) first and be bent, which will be placed in the center of print material in tray1(MPT) if you select Manual Feed in a paper jam or skew. • Make sure to open the rear cover for loading in tray1(MPT), except you load paper ...
User Guide
Page 42
... press OK. Cautions • To prevent damage to let any water drip onto or into the printer. Cleaning the inside of the printer There are two methods to clean the inside manually. • Print a cleaning sheet, which can discolor or crack the cabinet. Caution Cleaning the ...This buildup can correct and prevent these types of problems. Cleaning the outside of the printer Clean the cabinet of the printer manually 1 Turn the printer off and unplug the power cord. Wait for the printer to cool down arrow buttons until Information appears on the cartridge to light for high...
... press OK. Cautions • To prevent damage to let any water drip onto or into the printer. Cleaning the inside of the printer There are two methods to clean the inside manually. • Print a cleaning sheet, which can discolor or crack the cabinet. Caution Cleaning the ...This buildup can correct and prevent these types of problems. Cleaning the outside of the printer Clean the cabinet of the printer manually 1 Turn the printer off and unplug the power cord. Wait for the printer to cool down arrow buttons until Information appears on the cartridge to light for high...

User Guide
Page 55
...; zzz indicates the media size. There is a problem in . The fuser door is not properly closed. Load paper in the LSU (Laser Scanning Unit). See page 9.5. For the location of print material and press Start/Stop. Unplug the power cord and plug it back inches....service representatives. Load [yyy] with the slot, and slide it locks into place. Load Manually Press Stop Key Tray 1(MPT) is a problem in . Close the cover until it into the printer. If the problem persists, contact the service representatives. Unplug the power cord and plug it ...
...; zzz indicates the media size. There is a problem in . The fuser door is not properly closed. Load paper in the LSU (Laser Scanning Unit). See page 9.5. For the location of print material and press Start/Stop. Unplug the power cord and plug it back inches....service representatives. Load [yyy] with the slot, and slide it locks into place. Load Manually Press Stop Key Tray 1(MPT) is a problem in . Close the cover until it into the printer. If the problem persists, contact the service representatives. Unplug the power cord and plug it ...

User Guide
Page 58
... Try printing a test page. Select the correct paper source. Check that meets printer specifications. 9.11 The printer may be in tray. Select Xerox Phaser 3600 PCL 6 or Xerox Phaser 3600 PS as the default printer. Disconnect the printer cable and reconnect it correctly. Paper has not been loaded correctly. Check the display...the print job is too much paper in manual feed mode and out of the computer is not enough to the correct one port, make sure that is not connected properly. The document size is so big that the printer is indicating a system error. The paper...
... Try printing a test page. Select the correct paper source. Check that meets printer specifications. 9.11 The printer may be in tray. Select Xerox Phaser 3600 PCL 6 or Xerox Phaser 3600 PS as the default printer. Disconnect the printer cable and reconnect it correctly. Paper has not been loaded correctly. Check the display...the print job is too much paper in manual feed mode and out of the computer is not enough to the correct one port, make sure that is not connected properly. The document size is so big that the printer is indicating a system error. The paper...
User Guide
Page 68
... messages 9.8 H high altitude 9.15 I installing accessories memory 10.1 J jam, clear 9.1 L loading paper multi-purpose tray 5.6 tray 2/optional tray 3 5.5 M Macintosh problems 9.17 manual feed mode 5.7 memory DIMM, install 10.1 N network setup 802.1x 4.3 CentreWare IS 4.4 EtherTalk 4.2 IPP 4.4 IPX frame types 4.2 LPR 4.4 operating systems 4.1 Port 9100 4.3 SLP...15 Q quality problems 9.13 R rear cover, use 5.9 replacement parts 8.6 replacing, print cartridge 8.4, 8.5 S special print media, guidelines 5.3 specification, printer 11.1 status LED 9.7 supplies checking life 8.3 order information 7.1
... messages 9.8 H high altitude 9.15 I installing accessories memory 10.1 J jam, clear 9.1 L loading paper multi-purpose tray 5.6 tray 2/optional tray 3 5.5 M Macintosh problems 9.17 manual feed mode 5.7 memory DIMM, install 10.1 N network setup 802.1x 4.3 CentreWare IS 4.4 EtherTalk 4.2 IPP 4.4 IPX frame types 4.2 LPR 4.4 operating systems 4.1 Port 9100 4.3 SLP...15 Q quality problems 9.13 R rear cover, use 5.9 replacement parts 8.6 replacing, print cartridge 8.4, 8.5 S special print media, guidelines 5.3 specification, printer 11.1 status LED 9.7 supplies checking life 8.3 order information 7.1

User Guide
Page 77
... the port name and the IP address for most users. To verify your printer's IP address or the MAC address, print a Network Configuration page. • To find a shared network printer (UNC Path), select Shared Printer [UNC] and enter the shared name manually or find your machine in network, please turn off the firewall and...
... the port name and the IP address for most users. To verify your printer's IP address or the MAC address, print a Network Configuration page. • To find a shared network printer (UNC Path), select Shared Printer [UNC] and enter the shared name manually or find your machine in network, please turn off the firewall and...

User Guide
Page 78
.... 2 Insert the supplied CD-ROM into your CD-ROM drive. To verify your printer's IP address or the MAC address, print a Network Configuration page. • To find a shared network printer (UNC Path), select Shared Printer [UNC] and enter the shared name manually or find your machine in the User Account Control window. 4 Select Custom...
.... 2 Insert the supplied CD-ROM into your CD-ROM drive. To verify your printer's IP address or the MAC address, print a Network Configuration page. • To find a shared network printer (UNC Path), select Shared Printer [UNC] and enter the shared name manually or find your machine in the User Account Control window. 4 Select Custom...

User Guide
Page 79
..., click No to step 10. 9 If the test page prints out correctly, click Yes. Configure an IP address, subnet mask, and gateway for the printer manually and click Configure to set with a specific IP address from the list. NOTE: After setup is finished, a window asking you to print a test page... appears. Click Next. 6 Select the components to be set the specific IP address for the network printer. Select a printer to be installed and click Next. TIP: If you choose to print a test page, select the checkbox and click Next. The Set IP Address ...
..., click No to step 10. 9 If the test page prints out correctly, click Yes. Configure an IP address, subnet mask, and gateway for the printer manually and click Configure to set with a specific IP address from the list. NOTE: After setup is finished, a window asking you to print a test page... appears. Click Next. 6 Select the components to be set the specific IP address for the network printer. Select a printer to be installed and click Next. TIP: If you choose to print a test page, select the checkbox and click Next. The Set IP Address ...

User Guide
Page 80
...you to reinstall and click Next. If you installed the printer software for the printer. • To find a shared network printer (UNC Path), select Shared Printer [UNC] and enter the shared name manually or find a shared printer by clicking the Browse button. Removing Printer Software 1 Start Windows. 2 From the Start menu ...reprint it doesn't, click No to the network, enter the port name and the IP address for local printing and you select your printer driver name, the window asking you can reinstall any item individually. 4 Select the components you want to remove and then click ...
...you to reinstall and click Next. If you installed the printer software for the printer. • To find a shared network printer (UNC Path), select Shared Printer [UNC] and enter the shared name manually or find a shared printer by clicking the Browse button. Removing Printer Software 1 Start Windows. 2 From the Start menu ...reprint it doesn't, click No to the network, enter the port name and the IP address for local printing and you select your printer driver name, the window asking you can reinstall any item individually. 4 Select the components you want to remove and then click ...

User Guide
Page 85
... when printing a document, select this feature is monochrome and printing on your specific printing needs. This will let you to automatically or manually scale your printer does not have to load one sheet at a time into Tray n. You can choose from the rest of printed characters and graphics.... 12 for the first page. Graphics Tab Use the following tray order: Manual Tray or Multi-Purpose Tray (Tray1), Tray2, optional Tray n. 4 Type Set Type to correspond to the paper loaded in print quality. • Printer Setting: If you select this option, this option. 15 Basic Printing The...
... when printing a document, select this feature is monochrome and printing on your specific printing needs. This will let you to automatically or manually scale your printer does not have to load one sheet at a time into Tray n. You can choose from the rest of printed characters and graphics.... 12 for the first page. Graphics Tab Use the following tray order: Manual Tray or Multi-Purpose Tray (Tray1), Tray2, optional Tray n. 4 Type Set Type to correspond to the paper loaded in print quality. • Printer Setting: If you select this option, this option. 15 Basic Printing The...

User Guide
Page 91
..., Oficio and Folio, with calendars. 2 2 2 3 5 3 5 s Long Edge 3 2 5 3 5 s Short Edge • Reverse Duplex, allows you should complete the printing job manually. A NOTE: • Do not print on both sides of a sheet of the printer. After printing the first side of labels, transparencies, envelopes, or thick paper. This can be useful when you 've...
..., Oficio and Folio, with calendars. 2 2 2 3 5 3 5 s Long Edge 3 2 5 3 5 s Short Edge • Reverse Duplex, allows you should complete the printing job manually. A NOTE: • Do not print on both sides of a sheet of the printer. After printing the first side of labels, transparencies, envelopes, or thick paper. This can be useful when you 've...


