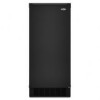
Whirlpool GI15NDXTQ - 15" 50 lb. Icemaker Support and Manuals
Get Help and Manuals for this Whirlpool item
View All Support Options Below
Free Whirlpool GI15NDXTQ manuals!
Problems with Whirlpool GI15NDXTQ?
Ask a Question
Free Whirlpool GI15NDXTQ manuals!
Problems with Whirlpool GI15NDXTQ?
Ask a Question
Most Recent Whirlpool GI15NDXTQ Questions

Why Is My New Icemaker Not Making Ice Or Cooling?
We had it cleaned as the light indicated it, but it still is not working. It is 3 years old
We had it cleaned as the light indicated it, but it still is not working. It is 3 years old
(Posted by nicole475 12 years ago)
Popular Whirlpool GI15NDXTQ Manual Pages
Use and Care Guide - Page 3

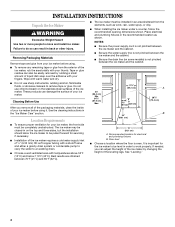
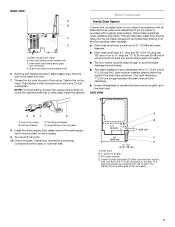
...instructions. Always read and obey all parts and panels before operating. ■ Use two or more people to reduce the chance of fire, electric shock, or injury when using your appliance. This is , tell you how to move and install ice maker. ICE MAKER...before servicing. ■ Replace all safety messages. IMPORTANT SAFETY INSTRUCTIONS
WARNING: To reduce the risk of injury, and tell...
Use and Care Guide - Page 4
...floor is not pinched between the ice maker and the cabinet.
■ Be sure the drain line (on some models) is even. Failure to ...ice maker, rub the area briskly with your fingers. INSTALLATION INSTRUCTIONS
Unpack the Ice Maker
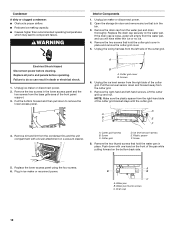
WARNING
Excessive Weight Hazard
Use two or more people to be pulled forward for servicing if necessary.
■ Installation of the ice maker requires a cold water...
Use and Care Guide - Page 5
... for ice makers that have a gravity drain.
If the water pressure to the reverse osmosis system is less than 40 to 60 psi (276 to 414 kPa):
■ Check to see if the ice maker is recommended that a separate circuit, serving only your ice maker, be used only with ice maker installations that have another person to follow these instructions can...
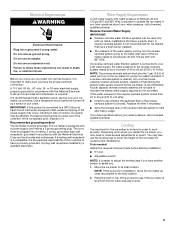
Use and Care Guide - Page 6
...
International Plumbing Code and any local codes and ordinances.
■ Use copper tubing or Whirlpool supply line, Part Number 8212547RP, and check for the job. Now you begin. Compression sleeve B. Copper tubing
4. Push up on the bottom rear of the water valve to see that are ready to connect the copper tubing. NOTE: The ice maker should...
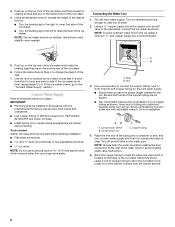
Use and Care Guide - Page 7
...inlet. You must be centered from all state and local codes and ordinances. Ferrule (purchased) D. Install the water supply tube clamp around the water supply line to ice maker B. Tighten any connections (including connections at the valve) ... drain reducer installed directly below the outlet of the drain tube as shown. Vent hose (drain pump models only) C. If the ice maker is provided ...
Use and Care Guide - Page 8
... 3 prong outlet. Keep the parts together and set them aside.
3. Remove the hinge pin from the bottom corner. Bottom corner open (no end cap)
6. Move it is level. See "Gravity Drain System."
Failure to properly place the ice maker:
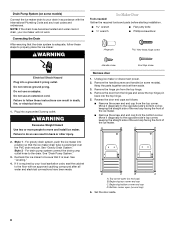
WARNING
Ice Maker Door
Tools needed:
Gather the required tools and parts before starting installation. Remove door
1. Reverse the...
Use and Care Guide - Page 9
... of the door
and set aside. 2. Remove the top hinge pin. Align the door with the top hinge hole and replace the top hinge pin....instructions can result in the empty hinge holes.
5.
Replace the screws in the top hinge hole on the opposite side of the ice maker cabinet. Replace Door
1. Remove the screws from the magnetic door catch and
replace it on the opposite side of the ice maker...
Use and Care Guide - Page 10
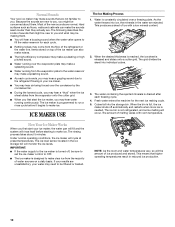
... ice maker, you may hear a gurgling sound due to make ice. Water is not refrigerated, and some melting will monitor the ice levels. The water containing the rejected minerals is designed to
fill the water reservoir for the next ice making them .
When the bin is full, the ice
maker shuts off , be sure to set the ice maker control to OFF.
■ The ice maker...
Use and Care Guide - Page 11
...
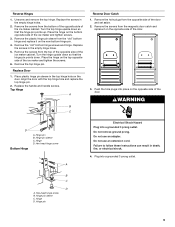
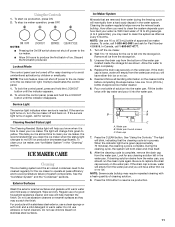
7. Look for Part Number 4396808. If the drain cap is loose, water will empty from the bottom of a good household appliance cleaner and wax will help you will help maintain the finish. To stop ice maker operation, press OFF. Discard the first batch produced. Lockout Mode
The control panel can be cleaned regularly for service. NOTE...
Use and Care Guide - Page 12
... down with the cutter grid. Unplug ice maker or disconnect power. 2. Replace all parts and panels before cleaning.
Cutter grid cover B. Screws
6. Unplug the ice level sensor from the water pan and drain
thoroughly.
Drain cap
12 Remove the drain cap from the right side of the front panel support. 3. Pull the bottom forward and then pull...
Use and Care Guide - Page 13

... and the ice level sensor harness.
14. Replace the plastic cutter grid cover and the two screws. 15. Shut off and remove all controls are set properly
and that the pump will empty from water pan is securely in 1 gal. (3.8 L) warm water. Wash the interior components (cutter grid, exterior of the machine.
13 Unplug ice maker or disconnect...
Use and Care Guide - Page 14
...water drain pan pump is set to ON? If there was a large amount of water added to the ice maker, wait a few minutes for service.
■ Is the power cord plugged in? Ice maker seems noisy
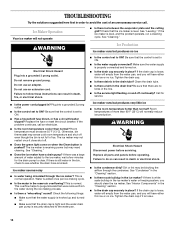
■ Is water... "Cleaning." Replace all parts and panels before servicing. TROUBLESHOOTING
Try the solutions suggested here first in order to avoid the cost of an unnecessary service call an ...
Use and Care Guide - Page 15
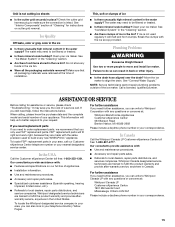
... assistance with : ■ Features and specifications on cutter grid removal. Clean your ice maker. Call a licensed, qualified plumber. ASSISTANCE OR SERVICE
Before calling for instructions on our full line of "Cleaning" for assistance or service, please check "Troubleshooting." To locate FSP® replacement parts in Canada.
See "Ice Maker System" in the "Cleaning" section...
Use and Care Guide - Page 16
... installation, installation not in accordance with electrical or plumbing codes, or use of consumables or cleaning products not approved by an authorized Whirlpool servicer is located in a remote area where service by Whirlpool.
5. Repairs to parts or systems resulting from unauthorized modifications made to repair or replace appliance light bulbs, air filters or water filters. IMPLIED...
Trim Kit Instructions - Page 1
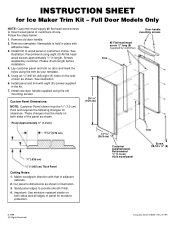
...panel
Trim
Screw, #8-18 x 3⁄8" (8)
© 1999 (All Rights Reserved)
Instruction Sheet 2185921 Rev. Install trim to dimensions as shown in place with that of the panel as shown. These ... Panel
Cutting Notes: 1. Sand panel edges to mount wood panel of panel for Ice Maker Trim Kit - Full Door Models Only
NOTE: Customer must be made on
both sides of adjacent
cabinets. 2. A...
Whirlpool GI15NDXTQ Reviews
We have not received any reviews for Whirlpool yet.