
User Guide
Page 7
... 1 Getting started ...1 Best practices ...1 More HP resources ...1 2 Getting to know your computer ...3 Locating hardware ...3 Locating software ...3 Right side ...4 Left side ...5 Rear ...6 Display ...6 Low blue light mode (select products only 6 Keyboard area ...8 Touchpad ...8 Touchpad settings ...8 Lights ...9 Button ...10 Special keys ...11 Action keys ...12 Bottom ...13 Labels ...14 HP OMEN Command Center ...15 3 Connecting to a network ...16 Connecting to a wireless network ...16 Using the wireless controls ...16 Airplane mode key ...16 Operating system controls 16 Connecting to...
... 1 Getting started ...1 Best practices ...1 More HP resources ...1 2 Getting to know your computer ...3 Locating hardware ...3 Locating software ...3 Right side ...4 Left side ...5 Rear ...6 Display ...6 Low blue light mode (select products only 6 Keyboard area ...8 Touchpad ...8 Touchpad settings ...8 Lights ...9 Button ...10 Special keys ...11 Action keys ...12 Bottom ...13 Labels ...14 HP OMEN Command Center ...15 3 Connecting to a network ...16 Connecting to a wireless network ...16 Using the wireless controls ...16 Airplane mode key ...16 Operating system controls 16 Connecting to...
User Guide
Page 9
... your computer and information ...42 Using passwords ...42 Setting Windows passwords ...42 Setting Setup Utility (BIOS) passwords 43 Using Windows Hello (select products only) ...44 Using internet security software ...44 Using antivirus software ...44 Using firewall software ...44 Installing software updates ...45 Using HP Device as a Service (select products only 45 Securing your wireless network ...45 Backing up your software applications and information 45 Using an optional security cable (select products only 45 9 Using Setup Utility (BIOS) ...46 Starting Setup Utility (BIOS) ...46 ix
... your computer and information ...42 Using passwords ...42 Setting Windows passwords ...42 Setting Setup Utility (BIOS) passwords 43 Using Windows Hello (select products only) ...44 Using internet security software ...44 Using antivirus software ...44 Using firewall software ...44 Installing software updates ...45 Using HP Device as a Service (select products only 45 Securing your wireless network ...45 Backing up your software applications and information 45 Using an optional security cable (select products only 45 9 Using Setup Utility (BIOS) ...46 Starting Setup Utility (BIOS) ...46 ix
User Guide
Page 13
... your hard drive by creating recovery media. Then select Support. See details in Connecting to find additional HP resources. Table 1-1 Additional information Resource Setup Instructions HP support For HP support, go to http://www.hp.com/support, and follow the instructions to a network on page 44. ● Access HP Support Assistant app-For quick online support, open the HP Support Assistant app (select products only). Read this guide: ▲ Type HP Documentation in the taskbar search box. 1 Getting started This...
... your hard drive by creating recovery media. Then select Support. See details in Connecting to find additional HP resources. Table 1-1 Additional information Resource Setup Instructions HP support For HP support, go to http://www.hp.com/support, and follow the instructions to a network on page 44. ● Access HP Support Assistant app-For quick online support, open the HP Support Assistant app (select products only). Read this guide: ▲ Type HP Documentation in the taskbar search box. 1 Getting started This...
User Guide
Page 24
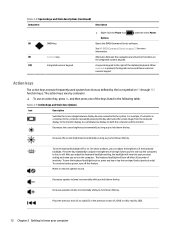
...) Component Description (8) OMEN key (9) num lock key (10) Integrated numeric keypad ▲ Right-click the Power icon , and then select Power Options. Turns the keyboard backlight off . Mutes or restores speaker sound. The keyboard backlight will revert to know your previous setting each time you hold down the key. To conserve battery power, turn off this key alternates the screen image from high (when you first start up the computer...
...) Component Description (8) OMEN key (9) num lock key (10) Integrated numeric keypad ▲ Right-click the Power icon , and then select Power Options. Turns the keyboard backlight off . Mutes or restores speaker sound. The keyboard backlight will revert to know your previous setting each time you hold down the key. To conserve battery power, turn off this key alternates the screen image from high (when you first start up the computer...
User Guide
Page 28
... devices. But even at the factory. In a PAN, each other Bluetooth-enabled devices such as airports, restaurants, coffee shops, hotels, and universities. Using the wireless controls You can travel with a wireless router or a wireless access point. ● HP Mobile Broadband Module-Gives you go. The wireless light indicates the overall power state of the following wireless devices: ● WLAN device-Connects the computer to wireless local area networks (commonly referred to other . Mobile network operators install...
... devices. But even at the factory. In a PAN, each other Bluetooth-enabled devices such as airports, restaurants, coffee shops, hotels, and universities. Using the wireless controls You can travel with a wireless router or a wireless access point. ● HP Mobile Broadband Module-Gives you go. The wireless light indicates the overall power state of the following wireless devices: ● WLAN device-Connects the computer to wireless local area networks (commonly referred to other . Mobile network operators install...
User Guide
Page 33
...://www.hp.com/support, and follow the device manufacturer's instructions. Use the audio control panel to view and control audio settings. ▲ Type control panel in (microphone) combo jack on your USB Type-C features, go to a network. To view or change system sounds, or manage audio devices. Connecting headsets WARNING! Using sound settings Use sound settings to find your sound system. To access this document: ▲ Type HP Documentation in the taskbar search box, select Control Panel, select Hardware and Sound, and then select Sound. To connect wireless headsets...
...://www.hp.com/support, and follow the device manufacturer's instructions. Use the audio control panel to view and control audio settings. ▲ Type control panel in (microphone) combo jack on your USB Type-C features, go to a network. To view or change system sounds, or manage audio devices. Connecting headsets WARNING! Using sound settings Use sound settings to find your sound system. To access this document: ▲ Type HP Documentation in the taskbar search box, select Control Panel, select Hardware and Sound, and then select Sound. To connect wireless headsets...
User Guide
Page 46
... additional information about battery types, specifications, life cycles, and capacity Conserving battery power To conserve battery power and maximize battery life: ● Lower the brightness of the display. ● Turn off wireless devices when you are not using them. ● Disconnect unused external devices that are not plugged into an external power source, such as an external hard drive connected to a USB port. ● Stop, disable, or remove any external media cards that your work, initiate Sleep or shut down and...
... additional information about battery types, specifications, life cycles, and capacity Conserving battery power To conserve battery power and maximize battery life: ● Lower the brightness of the display. ● Turn off wireless devices when you are not using them. ● Disconnect unused external devices that are not plugged into an external power source, such as an external hard drive connected to a USB port. ● Stop, disable, or remove any external media cards that your work, initiate Sleep or shut down and...
User Guide
Page 47
... and to external power. 2. Resolving a low battery level Resolving a low battery level when external power is available Connect one of the following conditions: ● When charging or calibrating a battery ● When installing or updating system software ● When updating the system BIOS ● When writing information to a disc (select products only) Running on external power For information about connecting to external power, see the Setup Instructions poster provided in the HP Support Assistant app...
... and to external power. 2. Resolving a low battery level Resolving a low battery level when external power is available Connect one of the following conditions: ● When charging or calibrating a battery ● When installing or updating system software ● When updating the system BIOS ● When writing information to a disc (select products only) Running on external power For information about connecting to external power, see the Setup Instructions poster provided in the HP Support Assistant app...
User Guide
Page 50
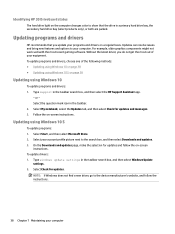
... hard drive bay (select products only), or both are parked. Identifying HP 3D DriveGuard status The hard drive light on the computer changes color to show that you do not get the most recent gaming software. Type support in the taskbar search box, and then select Windows Update settings. 2. Updating using Windows 10 To update programs and drivers: 1. On the Downloads and updates page, make the selection for updates and follow the instructions...
... hard drive bay (select products only), or both are parked. Identifying HP 3D DriveGuard status The hard drive light on the computer changes color to show that you do not get the most recent gaming software. Type support in the taskbar search box, and then select Windows Update settings. 2. Updating using Windows 10 To update programs and drivers: 1. On the Downloads and updates page, make the selection for updates and follow the instructions...
User Guide
Page 55
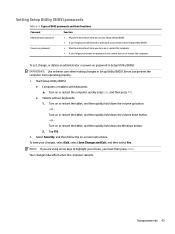
... then quickly hold down the volume down the volume up button. - Turn on or restart the tablet, and then quickly hold down button. - Select Security, and then follow the on password in Setup Utility (BIOS): IMPORTANT: Use extreme care when making changes in Setup Utility (BIOS). To set, change, or delete an administrator or power-on -screen instructions. Errors can prevent the computer from operating properly. 1. To save your choice, you cannot access Setup Utility (BIOS). Power-on password ●...
... then quickly hold down the volume down the volume up button. - Turn on or restart the tablet, and then quickly hold down button. - Select Security, and then follow the on password in Setup Utility (BIOS): IMPORTANT: Use extreme care when making changes in Setup Utility (BIOS). To set, change, or delete an administrator or power-on -screen instructions. Errors can prevent the computer from operating properly. 1. To save your choice, you cannot access Setup Utility (BIOS). Power-on password ●...
User Guide
Page 57
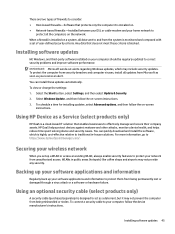
... a software or hardware failure. Select the Start button, select Settings, and then select Update & Security. 2. To schedule a time for installing updates, select Advanced options, and then follow the device manufacturer's instructions. Installing software updates 45 HP DaaS helps protect devices against malware and other attacks, monitors device health, and helps reduce time spent solving device and security issues. There are two types of user-defined security criteria. You can quickly download and install the software...
... a software or hardware failure. Select the Start button, select Settings, and then select Update & Security. 2. To schedule a time for installing updates, select Advanced options, and then follow the device manufacturer's instructions. Installing software updates 45 HP DaaS helps protect devices against malware and other attacks, monitors device health, and helps reduce time spent solving device and security issues. There are two types of user-defined security criteria. You can quickly download and install the software...
User Guide
Page 59
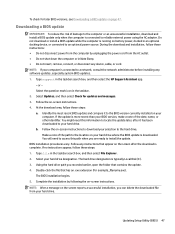
..., remove, connect, or disconnect any device, cable, or cord. Select Updates, and then select Check for later BIOS versions, see Downloading a BIOS update on -screen instructions to your BIOS version, make a note of the date, name, or other identifier. NOTE: If your hard drive where the BIOS update is running on your computer is connected to an optional power source. or - b. Type file in an optional docking device, or connected to reliable external power using the AC adapter...
..., remove, connect, or disconnect any device, cable, or cord. Select Updates, and then select Check for later BIOS versions, see Downloading a BIOS update on -screen instructions to your BIOS version, make a note of the date, name, or other identifier. NOTE: If your hard drive where the BIOS update is running on your computer is connected to an optional power source. or - b. Type file in an optional docking device, or connected to reliable external power using the AC adapter...
User Guide
Page 76
... 21 sound settings 21 speakers 20 audio-out (headphone)/audio-in (microphone) combo jack, identifying 5 B backing up software and information 45 backup, creating 53 backups 53 battery conserving power 34 discharging 34 factory-sealed 35 finding information 34 low battery levels 34 resolving low battery level 35 battery charge 33 battery information, finding 34 battery power 33 best practices 1 BIOS determining version 46 downloading an update 47 starting the Setup Utility 46 updating 46 Bluetooth device 16, 18 Bluetooth label 15 boot order, changing...
... 21 sound settings 21 speakers 20 audio-out (headphone)/audio-in (microphone) combo jack, identifying 5 B backing up software and information 45 backup, creating 53 backups 53 battery conserving power 34 discharging 34 factory-sealed 35 finding information 34 low battery levels 34 resolving low battery level 35 battery charge 33 battery information, finding 34 battery power 33 best practices 1 BIOS determining version 46 downloading an update 47 starting the Setup Utility 46 updating 46 Bluetooth device 16, 18 Bluetooth label 15 boot order, changing...

User Guide
Page 77
... MEID number 18 mute light, identifying 9 mute volume action key 12 N network jack, identifying 5 next track action key 13 num lock key, identifying 12 O OMEN key 15 OMEN key, identifying 12 one-finger slide touch screen gesture 30 operating environment 57 operating system controls 16 P passwords Setup Utility (BIOS) 43 Windows 42 pause action key 13 play action key 12 ports HDMI 5, 23, 24 USB 4 USB port with HP Sleep and Charge 5 USB Type-C 25 USB Type-C SuperSpeed with HP Sleep and Charge 4 USB Type-C Thunderbolt 22 USB Type-C Thunderbolt with HP Sleep and Charge 4 power battery 33 external...
... MEID number 18 mute light, identifying 9 mute volume action key 12 N network jack, identifying 5 next track action key 13 num lock key, identifying 12 O OMEN key 15 OMEN key, identifying 12 one-finger slide touch screen gesture 30 operating environment 57 operating system controls 16 P passwords Setup Utility (BIOS) 43 Windows 42 pause action key 13 play action key 12 ports HDMI 5, 23, 24 USB 4 USB port with HP Sleep and Charge 5 USB Type-C 25 USB Type-C SuperSpeed with HP Sleep and Charge 4 USB Type-C Thunderbolt 22 USB Type-C Thunderbolt with HP Sleep and Charge 4 power battery 33 external...
User Guide
Page 78
...54 media 54 USB flash drive 54 recovery media creating using HP Cloud Recovery Download Tool 53 creating using Windows tools 53 regulatory information regulatory label 15 wireless certification labels 15 Remote HP PC Hardware Diagnostics UEFI settings customizing 51 using 51 resources, accessibility 62 restoring 53 right side components 4 RJ-45 (network) jack, identifying 5 RJ-45 (network) status lights, identifying 5 S screen brightness action keys 12 Section 508 accessibility standards 61 security cable, installing 45 serial number, computer 14 service labels, locating 14 Setup Utility (BIOS...
...54 media 54 USB flash drive 54 recovery media creating using HP Cloud Recovery Download Tool 53 creating using Windows tools 53 regulatory information regulatory label 15 wireless certification labels 15 Remote HP PC Hardware Diagnostics UEFI settings customizing 51 using 51 resources, accessibility 62 restoring 53 right side components 4 RJ-45 (network) jack, identifying 5 RJ-45 (network) status lights, identifying 5 S screen brightness action keys 12 Section 508 accessibility standards 61 security cable, installing 45 serial number, computer 14 service labels, locating 14 Setup Utility (BIOS...
Maintenance and Service Guide
Page 8
...service provider parts 37 Component replacement procedures ...37 Battery ...37 Power connector cable ...38 Speakers ...39 Card reader/audio board ...40 Heat sink ...41 Fans ...44 USB board ...45 System board ...46 RJ-45 door ...48 Infrared (IR) board ...49 Touchpad ...50 Display assembly ...52 Keyboard with top cover ...60 7 Using Setup Utility (BIOS) ...63 Starting Setup Utility (BIOS) ...63 Updating Setup Utility (BIOS) ...63 Determining the BIOS version ...63 Preparing for a BIOS update ...64 Downloading a BIOS update 64 Installing a BIOS update 64 8 Backing up, restoring, and recovering...
...service provider parts 37 Component replacement procedures ...37 Battery ...37 Power connector cable ...38 Speakers ...39 Card reader/audio board ...40 Heat sink ...41 Fans ...44 USB board ...45 System board ...46 RJ-45 door ...48 Infrared (IR) board ...49 Touchpad ...50 Display assembly ...52 Keyboard with top cover ...60 7 Using Setup Utility (BIOS) ...63 Starting Setup Utility (BIOS) ...63 Updating Setup Utility (BIOS) ...63 Determining the BIOS version ...63 Preparing for a BIOS update ...64 Downloading a BIOS update 64 Installing a BIOS update 64 8 Backing up, restoring, and recovering...
Maintenance and Service Guide
Page 62
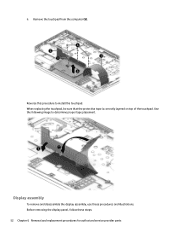
Remove the touchpad from the computer (5). Reverse this procedure to determine proper tape placement. Use the following image to install the touchpad. When replacing the touchpad, be sure that the protective tape is correctly layered on top of the touchpad. Display assembly To remove and disassemble the display assembly, use these steps: 52 Chapter 6 Removal and replacement procedures for authorized service provider parts Before removing the display panel, follow these procedures and illustrations. 6.
Remove the touchpad from the computer (5). Reverse this procedure to determine proper tape placement. Use the following image to install the touchpad. When replacing the touchpad, be sure that the protective tape is correctly layered on top of the touchpad. Display assembly To remove and disassemble the display assembly, use these steps: 52 Chapter 6 Removal and replacement procedures for authorized service provider parts Before removing the display panel, follow these procedures and illustrations. 6.
Maintenance and Service Guide
Page 74
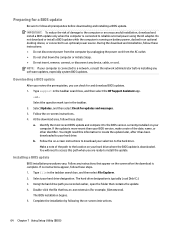
... selection to the hard drive. Make a note of damage to the computer or an unsuccessful installation, download and install a BIOS update only when the computer is downloaded. Follow the on -screen instructions to reliable external power using the AC adapter. Follow the on -screen instructions. 4. The hard drive designation is running on -screen instructions. 64 Chapter 7 Using Setup Utility (BIOS) Double-click the file that has an .exe extension (for updates and messages. 3. Type support in the taskbar...
... selection to the hard drive. Make a note of damage to the computer or an unsuccessful installation, download and install a BIOS update only when the computer is downloaded. Follow the on -screen instructions to reliable external power using the AC adapter. Follow the on -screen instructions. 4. The hard drive designation is running on -screen instructions. 64 Chapter 7 Using Setup Utility (BIOS) Double-click the file that has an .exe extension (for updates and messages. 3. Type support in the taskbar...
Maintenance and Service Guide
Page 95
...creating 67 backups 67 battery illustrated 17 spare part number 17 spare part numbers 17 BIOS determining version 63 downloading an update 64 starting the Setup Utility 63 updating 63 Bluetooth label 13 boot order, changing 68 bottom components 13 bottom cover illustrated 17 removal 31 spare part number 17, 31 buttons left touchpad 9 power 10 right touchpad 9 C cables spare part numbers 21 camera identifying 7 camera light, identifying 7 caps lock light 9 card reader/audio board illustrated 17 removal 40 spare part number 17 spare part numbers 40 card reader/audio board cable spare part number...
...creating 67 backups 67 battery illustrated 17 spare part number 17 spare part numbers 17 BIOS determining version 63 downloading an update 64 starting the Setup Utility 63 updating 63 Bluetooth label 13 boot order, changing 68 bottom components 13 bottom cover illustrated 17 removal 31 spare part number 17, 31 buttons left touchpad 9 power 10 right touchpad 9 C cables spare part numbers 21 camera identifying 7 camera light, identifying 7 caps lock light 9 card reader/audio board illustrated 17 removal 40 spare part number 17 spare part numbers 40 card reader/audio board cable spare part number...
Maintenance and Service Guide
Page 96
... audio 2 microphone 2 ports 2 power requirements 3 video 2 product name and number, computer 13 R rear components 7 recovery 67, 68 discs 68 media 68 USB flash drive 68 recovery media 67 creating using HP Cloud Recovery Download Tool 67 creating using Windows tools 67 regulatory information regulatory label 13 wireless certification labels 13 Remote HP PC Hardware Diagnostics UEFI settings customizing 75 using 74 removal and replacement solid-state drive 32 removal/replacement procedures 31, 37 restoring 67 right side components 5 RJ-45 (network) jack, identifying 5 RJ-45 (network...
... audio 2 microphone 2 ports 2 power requirements 3 video 2 product name and number, computer 13 R rear components 7 recovery 67, 68 discs 68 media 68 USB flash drive 68 recovery media 67 creating using HP Cloud Recovery Download Tool 67 creating using Windows tools 67 regulatory information regulatory label 13 wireless certification labels 13 Remote HP PC Hardware Diagnostics UEFI settings customizing 75 using 74 removal and replacement solid-state drive 32 removal/replacement procedures 31, 37 restoring 67 right side components 5 RJ-45 (network) jack, identifying 5 RJ-45 (network...


