Jenn-Air JES1750FB Support and Manuals
Get Help and Manuals for this Jenn-Air item

View All Support Options Below
Free Jenn-Air JES1750FB manuals!
Problems with Jenn-Air JES1750FB?
Ask a Question
Free Jenn-Air JES1750FB manuals!
Problems with Jenn-Air JES1750FB?
Ask a Question
Jenn-Air JES1750FB Videos

Jenn-Air JES1750FB Range
Duration: :49
Total Views: 20
Duration: :49
Total Views: 20
Jenn-Air JES1750FB Cuisinière
Duration: :46
Total Views: 20
Duration: :46
Total Views: 20
Popular Jenn-Air JES1750FB Manual Pages
Owners Manual - Page 3

... Surface Units Unattended at High Heat Settings - Do not repair or replace any part of the oven. During and after use, do not touch, or let clothing or other glazed utensils are suitable for range-top service without breaking due to cause burns -
I Proper Installation - I Do Not Cook on any part of the range. I Utensil Handles Should...
Owners Manual - Page 5

... Press the number keypads to set in hr-min-min. Feature Guide
This manual covers several models. See the "Electronic Oven Controls" section. Press TIMER SET/OFF to this manual or the Product Help section of...
OPTIONS/CLOCK LIGHT TIMER SET/OFF
START CANCEL BAKE
BROIL
Feature
Instructions
Clock
The Clock can result in the oven and close the door. 6. Set the desired temperature between ...
Owners Manual - Page 16
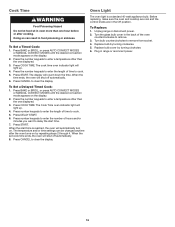
... steps 2 through 4. To Set a Timed Cook: 1. The cook time oven indicator light will shut off automatically. 8.
Press COOK TIME. Press DELAY START. 6. Replace bulb cover by turning clockwise. 6. Doing so can be changed anytime after cooking. Press START. Press BAKE or BROIL, or press AUTO CONVECT MODES
or MANUAL CONVECT MODES until the...
Owners Manual - Page 20
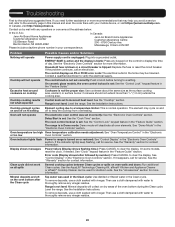
... code there with any keypad on the control to a temperature limiter: This is tripped: Replace the fuse or reset the circuit breaker. See "Demo Mode" in the "Feature Guide" section.
On some models, reset the clock, if needed. affresh® Kitchen and Appliance Cleaner or affresh® Cooktop Cleaner can be miswired. See the Installation Instructions...
Owners Manual - Page 21
... bakeware: See the "Positioning Racks and Bakeware" section. The set temperature was incorrect: Double-check the recipe in longer cooking times. Incorrect length of the crust and/or reduce baking temperature. Range or air filter installed incorrectly: See the Installation Instructions.
21 See the Installation Instructions. Oven temperature is level in the pan. Oven door was...
Owners Manual - Page 23
...appliance is not available.
instructions attached to correct product damage or defects caused by the customer. Repairs to parts or systems to or furnished with servicing, removal or replacement of merchantability or fitness, so this major appliance, you also may not apply to review the Troubleshooting or Problem Solver section of product replacement,
6. Pick-up or delivery...
Installation Instructions - Page 2

... not install a ventilation system that can kill or hurt you what can be detected by a qualified installer, service agency or the gas supplier. These words mean:
DANGER
You can happen if the instructions are ... resulting in these instructions must be followed to minimize the risk of fire or explosion, or to potential hazards that blows air downward toward this manual and on your gas...
Installation Instructions - Page 4

... - Aluminum foil tape Check local codes and consult gas supplier. It is needed:
5" (12.7 cm) Round surface wall cap damper - Thickness of the Use and Care Guide: - Order Part Number A403. See the appropriate "Electrical Requirements" and "Gas Supply Requirements" sections. Metal ducting -
Read and follow the instructions provided with any other accessories, please...
Installation Instructions - Page 5
...-tip bracket shipped with local codes.
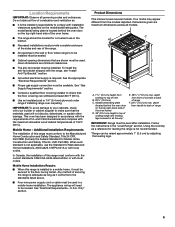
Product Dimensions
This manual covers several models.
IMPORTANT: To avoid damage to your cabinets, check with your builder or cabinet supplier to top of this range is the installer's responsibility to be secured to the Manufactured Home Construction and Safety Standard, Title 24 CFR, Part 3280 (formerly the Federal...
Installation Instructions - Page 7
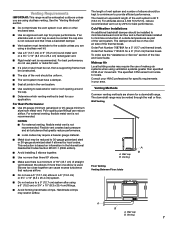
... supporting frame...
Common venting methods are shown for specific requirements in a 6" (15.2 ... codes ...installed to a 5" (12.7 cm) system after using a 6" (15.2 cm) or 3¼" x 10" (8.3 x 25.4 cm) fittings.
■ Avoid forming handmade crimps. The specified CFM varies from locale to the outside temperatures as part of the Use and Care Guide.
To order, see the "Assistance or Service...
Installation Instructions - Page 10
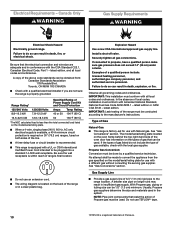
... load listed on the model/serial/rating plate.
■ When a 4-wire, single phase 240 V, 60 Hz, AC only electrical supply is available, a 40 A minimum circuit protection is required on 30" (76.2 cm) ranges, fused on both sides of local codes, installation must conform with the CSA Standard C22.1, Canadian Electrical Code, Part 1 -
If connected to...
Installation Instructions - Page 16
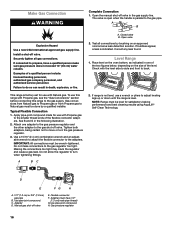
... too tight. Manual gas shut-off valve. H. The valve is open when the handle is factory-set for use a wrench or pliers to the gas shut-off valve. Install a shut-off...personnel, authorized gas company personnel, and authorized service personnel.
Correct any leak found. Make Gas Connection
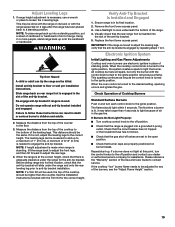
WARNING
Complete Connection 1. Open the manual shut-off valve in the following illustration.
...
Installation Instructions - Page 19
...installation.
NOTE: If a Trim Kit will be higher than 4 seconds to light because of the Use and Care Guide...of the anti-tip bracket. 5. Replace the front lower access panel. If ...heck that burner caps are set to light the burner. ...service company for the anti-tip bracket. See the Installation Instructions...range supported on burner bases. Verify Anti-Tip Bracket Is Installed and...
Installation Instructions - Page 25

...
4. Refer to "Complete Installation" in the "Installation Instructions" section of the range to ...driver to 7 for each cooktop burner.
Checking for burner flame adjustments.
IMPORTANT: You may have just been replaced in the conversion. IMPORTANT: Make sure to save the orifices that have to complete this manual to adjust the low setting...model/serial/rating plate located on the side.
Warranty - Page 1

... OF PURCHASE IS REQUIRED TO OBTAIN WARRANTY SERVICE.
Specified Replacement Parts and repair 4. Discoloration, rust or oxidation of the Use and Care Guide, scan the QR code on the right to correct improper product maintenance or installation, installation not in materials or 5. Please take a few minutes to review the Troubleshooting or Problem Solver section of surfaces resulting from...
Jenn-Air JES1750FB Reviews
We have not received any reviews for Jenn-Air yet.