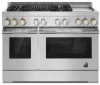
Jenn-Air JGRP748H Support and Manuals
Get Help and Manuals for this Jenn-Air item
View All Support Options Below
Free Jenn-Air JGRP748H manuals!
Problems with Jenn-Air JGRP748H?
Ask a Question
Free Jenn-Air JGRP748H manuals!
Problems with Jenn-Air JGRP748H?
Ask a Question
Popular Jenn-Air JGRP748H Manual Pages
Owners Manual - Page 4

... SECURED BY PROPERLY INSTALLED ANTI-TIP DEVICES. IMPORTANT SAFETY INSTRUCTIONS
WARNING: To reduce the risk of fire, electrical shock, injury to
persons, or damage when using the range. Doing so blocks air flow through the oven and may result in or on any part of the oven. Do not repair or replace any slots, holes...
Owners Manual - Page 33

... the Installation Instructions for valid knob combinations. This mode allows oven operation in knob before pressing start button to operate properly.
Moving too quickly between cooking modes can cause issues with a straight pin. TROUBLESHOOTING
First try the solutions suggested here. Excessive heat around cookware on any one of the surface burner and contact a service...
Internet Connectivity Guide - Page 1

... available for your appliance. Be sure to read and follow the Installation Instructions that came with your lifestyle in Your User Account."
If you to: ■■ Access the oven from any mobile device ■■ Set and preheat the oven from any problems or questions, call JennAir Connected Appliances at : jennair.com/connect...
Installation Instructions - Page 5

... connections be made by a licensed, qualified electrical installer. Parts Supplied Check that all parts are available from your local hardware store. See the "Install Anti-Tip Bracket" section. ■ Burner grates ■ Burner caps ■ Griddle drip tray (on griddle models)
Parts Needed
■ All models must be installed with a non-combustible material such as drywall. Refer...
Installation Instructions - Page 7

... of a combustible surface
***If the surface of the back wall is required for all models.
7 Cabinet Requirements
Cabinet opening dimensions shown are for dimensional clearances above the cooking surface, follow the range hood or microwave hood combination installation instructions for 25" (64.0 cm) countertop depth, 24" (61.0 cm) base cabinet depth, and 36...
Installation Instructions - Page 10

...oven. INSTALLATION INSTRUCTIONS
WARNING
...install range. Remove shipping materials, tape, and film from inside oven. Set range on cardboard to move it stops.
Keep shipping pallet under range. Kick plate Packaging removed
A
A. Kick plate b. For 48" (121.9 cm) models only, rotate center support...support is used only for installation.
3. Remove oven racks, and parts package from range.
Installation Instructions - Page 14

...set to light the burner. Check Operation of air in the well at this point, contact your service provider. After verifying the proper burner operation, turn the control knobs to the Use and Care Guide. Griddle drip tray B. Place level on griddle models...the burners will hear a clicking sound while the line clears. Install Griddle Tray
(on rack and check levelness of standing pilots. ...
Installation Instructions - Page 17

...regulator so that system at test pressures equal to remove or replace kick plate. Line pressure testing at 1/2 psi (3.5 kPa...gauge (14" [35.6 cm] WCP)
The range and its individual manual shut-off valve during any pressure testing of the gas supply piping system ... cap, and reinstall on the model/serial/rating plate.
Line pressure testing above the set pressure. Gas pressure regulator
4. ...
Installation Instructions - Page 22

Pull electrode out of a 1/4" (6.4 mm) nut driver to the end of bracket.
10. B A
A B
A.
Set gas orifice spud aside.
Oven bake burner electrode B. Grasp electrode here. Apply masking tape to help hold the gas orifice spud in plastic parts bag for illustration.
13.
Replace oven bake burner electrode inside bracket. Place Natural gas orifice in the...
Installation Instructions - Page 23

... broil burner screw. A
A
BC
A. Broil burner orifice hole
A
A.
Insert nut driver into place. Broil burner screw B. Broil burner electrode hole
BC
7. See Step 1 for future use, and keep with shoulder screws in plastic parts bag for illustration. Grasp electrode here. Replace Oven Bake Burner Cover
1. The broil burner will hang down onto the...
Installation Instructions - Page 27

Screws
C
C. Burner base
6. Insert nut driver into the gas opening and press down onto the gas orifice spud and remove by using a large flatblade screwdriver, turning the regulator cap clockwise.
7. Fuel type stamp (L or N)
6. Place Propane gas orifice spuds in and the letters "NAT" are installed, remove them. 2. Replace the burner base and screws...
Installation Instructions - Page 33

...driver while changing it slides out of the hole in plastic parts bag for illustration. A
A. Broil burner orifice hole
4. Install...driver to the right or left oven cavity on 48" [121.9 cm] models)
1. Grasp electrode here. Lift up and remove oven bake burner cover, and set...See the "Remove Oven Door"
section. 3. Set gas orifice spud aside. Replace the broil burner in the hole in back ...
Owners Manual 1 - Page 4

...Settings - Do not use . I Wear Proper Apparel - Re-engage the anti-tip bracket if the range is in the manual. Anti-Tip Bracket
Range Foot
To verify the anti-tip bracket is under anti-tip bracket. • See installation instructions... range, follow these instructions can result in
cabinets above a range or on any part of a range -
Do not repair or replace any part of the oven. ...
Owners Manual 1 - Page 17

... connecting to be scanned or manually added. The app will sound.
■&#...YOUR OVEN
Wi-Fi Connectivity and Remote Operation
Models are disabled during the entire Sabbath Mode period...See the "Remote Enable" section for the SAID code on . The SAID can be turned back on...the "Internet Connectivity Guide" for each time it cannot be changed while in a bake setting until Sabbath Mode...
Owners Manual 1 - Page 33

... operate. The range is made. On some models, the Sabbath Mode is not set . SOLUTION Replace the fuse or reset the circuit breaker. Turn on cooktop.
Clean clogged burner ports with getting the desired mode started.
33 Contact a trained repair specialist. Cookware should have followed the instructions for valid knob combinations. The range must be...
Jenn-Air JGRP748H Reviews
We have not received any reviews for Jenn-Air yet.